1. Introduction
The Pinelicorn Pneumatic Dot Peen Marking Machine is designed for precise and clear marking on various materials. Utilizing advanced pneumatic technology, this electric metal marking machine is suitable for metals and hard plastics. Its robust construction ensures stable long-term operation, making it an effective tool for industrial marking applications.

Front-right view of the Pinelicorn Pneumatic Dot Peen Marking Machine, showcasing its compact design and marking area.
2. Safety Instructions
Please read and understand all safety instructions before operating the machine. Failure to follow these instructions may result in injury or damage to the equipment.
- Read the Manual: Always read the entire operating manual before initial use and keep it for future reference.
- Personal Protective Equipment (PPE): Wear appropriate safety glasses and hearing protection during operation.
- Electrical Safety: Ensure the machine is connected to a properly grounded power outlet. Do not operate with wet hands or in damp conditions. Disconnect power before performing any maintenance or adjustments.
- Pneumatic Safety: Ensure the air supply is clean, dry, and within the specified pressure range (0.3-0.6Mpa). Always depressurize the system before disconnecting air lines.
- Work Area: Operate the machine in a well-ventilated area. Keep the work area clean and free of clutter.
- Material Handling: Securely fasten the material to be marked to prevent movement during operation.
- Emergency Stop: Familiarize yourself with the location of the power switch for quick shutdown in an emergency.
3. Package Contents
Verify that all items listed below are present in the package:
- 1x Pneumatic Marking Machine
- 1x Marking Needle
- 1x Air Tube
- 1x Adapter
- 1x Power Cord
- 1x Data Cable
- 1x Magnetic Clamp
- 1x Optical Disc (Software)
- 1x English Manual
- Other Assembly Accessories
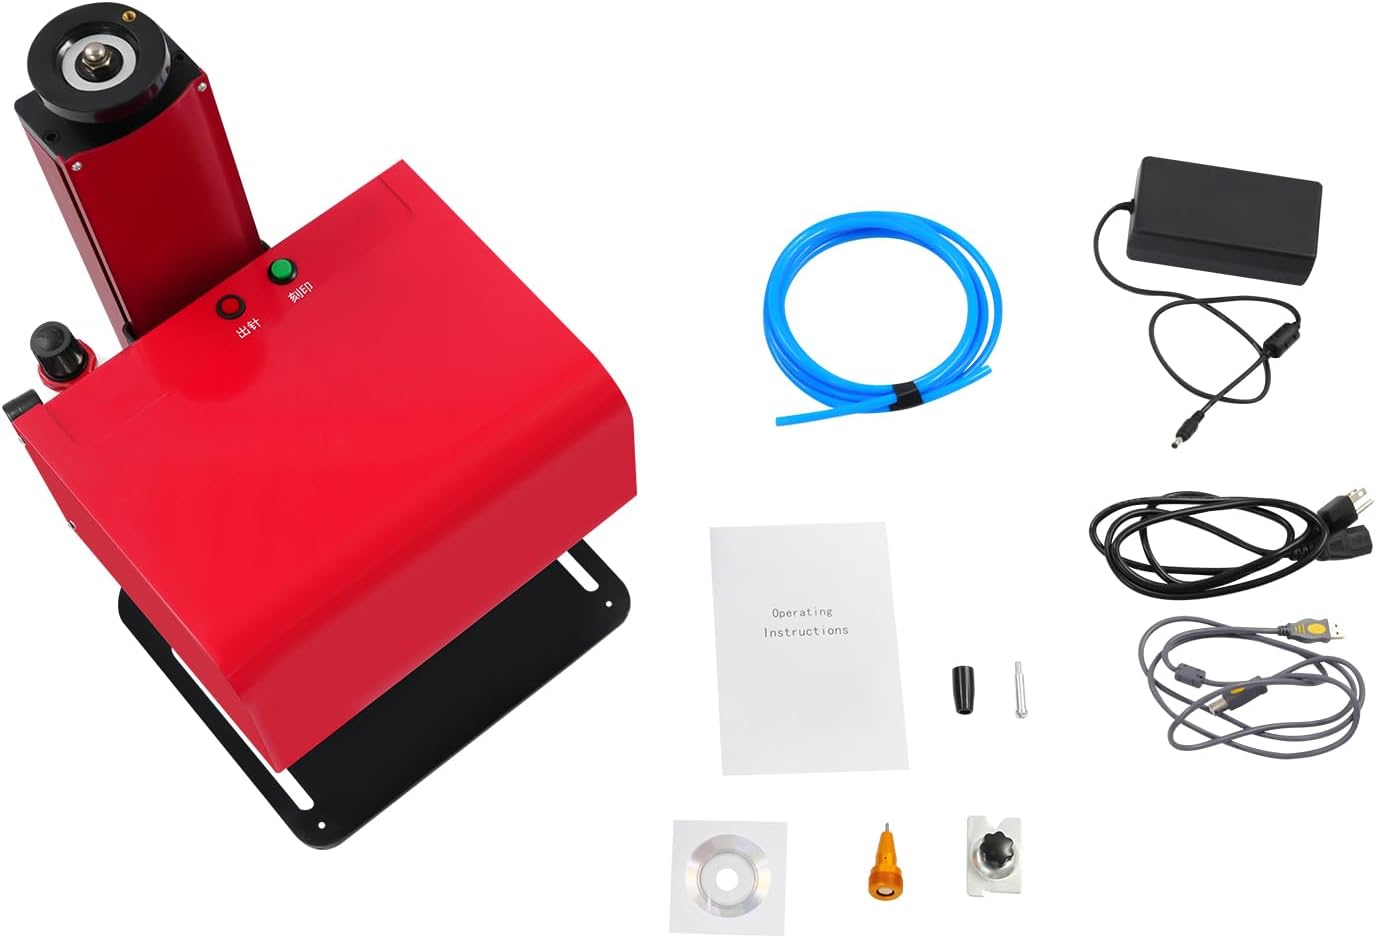
Image displaying the complete package contents, including the marking machine, marking needle, air tube, adapter, power cord, data cable, magnetic clamp, optical disc, and English manual.
4. Specifications
| Feature | Specification |
|---|---|
| Model | T7-8 |
| Brand | Pinelicorn |
| Color | Red + Black |
| Machine Power Source | Corded Electric |
| Marking Power Source | Pneumatic |
| Motor Type | Pure Copper Motor |
| Operation Method | Computer Controlled |
| Voltage | 110-220V |
| Power | 500W |
| Needle Hardness | HRC98 |
| Air Source Pressure | 0.3-0.6Mpa |
| Marking Speed | 1-2 Characters/s |
| Marking Area | 200 x 130mm (7.87 x 5.12in) |
| Marking Depth | 0.1-1mm (0.004-0.04in) (Depends on Material) |
| Product Dimensions | 30 x 33 x 53.6cm (11.81 x 12.99 x 21.1in) |
| Net Weight | 16kg (35.27 lbs) |

Diagram illustrating the overall dimensions of the Pinelicorn Pneumatic Dot Peen Marking Machine: 30cm (11.81in) width, 33cm (12.99in) depth, and 53.6cm (21.1in) height.
5. Setup
Follow these steps to set up your marking machine:
- Unpack: Carefully remove all components from the packaging.
- Assembly: Assemble the machine according to the included assembly instructions. Ensure all fasteners are tightened securely.
- Positioning: Place the machine on a stable, level surface.
- Connect Air Supply: Connect an external air compressor (not included) to the machine's air inlet using the provided air tube. Ensure the air pressure is regulated between 0.3-0.6Mpa.
- Connect Power: Plug the power cord into the machine and then into a grounded 110-220V power outlet.
- Connect to Computer: Use the provided data cable to connect the machine to your computer (not included).
- Software Installation: Install the marking software from the optical disc onto your computer. Follow the on-screen instructions.

Rear view of the machine, showing the power input, USB data port, and air inlet connection.

Side view of the marking machine, highlighting the integrated air pressure gauge and air filter regulator.
6. Operating Instructions
Once the machine is set up and software installed, follow these steps for operation:
- Power On: Turn on the machine and your computer. Launch the marking software.
- Material Placement: Place the material to be marked on the machine's base plate. Use the magnetic clamp if necessary to secure the material.
- Adjust Marking Height: Use the height adjustment knob on top of the machine to set the marking needle to the appropriate height for your material. The marking needle should be close to, but not touching, the material surface. The maximum adjustable height is 7.87 inches.
- Software Configuration: In the marking software, design your mark (text, logo, etc.) and configure marking parameters such as marking depth, speed, and character spacing.
- Test Mark (Optional): It is recommended to perform a test mark on a scrap piece of material to verify settings before marking the final product.
- Initiate Marking: Once satisfied with the settings, click the 'Start' or 'Mark' button in the software to begin the marking process.
- Monitor Operation: Observe the machine during operation to ensure proper function.
- Power Off: After marking is complete, exit the software, turn off the machine, and disconnect the air supply.

Angled view of the marking head and base plate, illustrating the working area for material placement.

Close-up view of the HRC98 marking needle, the primary component for creating precise indentations on materials.
7. Maintenance
Regular maintenance ensures optimal performance and extends the lifespan of your machine:
- Cleaning: Regularly clean the machine's exterior and marking area to remove dust and debris. Use a soft, dry cloth.
- Air System Check: Periodically inspect the air tube and connections for leaks or damage. Ensure the air filter is clean and functioning correctly.
- Marking Needle Inspection: Check the marking needle for wear or damage. Replace if necessary to maintain marking quality.
- Software Updates: Keep the marking software updated to the latest version for improved features and stability.
- Storage: When not in use, store the machine in a clean, dry environment.
8. Troubleshooting
Refer to this section for common issues and their solutions:
- Machine Not Powering On:
- Check power cord connection to both the machine and the outlet.
- Ensure the power outlet is functional.
- No Marking or Weak Marking:
- Verify air supply pressure is within 0.3-0.6Mpa.
- Check marking needle for wear or damage; replace if needed.
- Ensure the marking height is correctly adjusted.
- Review marking depth settings in the software.
- Uneven Marking Depth:
- Ensure the material is flat and securely fastened.
- Check for any obstructions in the marking path.
- Inspect the marking needle for damage.
- Software Connection Issues:
- Ensure the data cable is securely connected to both the machine and the computer.
- Restart the software and/or the computer.
- Check device manager for proper driver installation.
9. Application
This pneumatic engraving machine is suitable for marking a wide range of materials, including:
- Metal parts
- Stainless steel
- Nameplates
- Copper
- Brass
- Gold
- Silver
- Hard plastics
- PVC
10. Warranty and Support
For warranty information or technical support, please contact Pinelicorn customer service through the retailer where the product was purchased or visit the official Pinelicorn website. Please have your model number (T7-8) and purchase details ready when contacting support.