1. Introduction
This manual provides essential instructions for the safe and efficient operation of your ciciglow A4 Photo Portable 900 DPI Document Scanner. Please read this manual thoroughly before using the device and retain it for future reference.
The ciciglow A4 Photo Portable Scanner is a compact and lightweight device designed for on-the-go document and photo scanning. It offers three resolution modes (300dpi, 600dpi, 900dpi) and supports both JPEG and PDF file formats. Its portability and ease of use make it suitable for various applications, including business, home, and outdoor use.

Image 1.1: The ciciglow A4 Photo Portable 900 DPI Document Scanner in green.
2. Package Contents
Before proceeding with setup, please verify that all items listed below are present in your package:
- Handheld Image Scanner
- Storage Bag
- Data Cable (USB 2.0)
- Cleaning Cloth
- User Manual (this document)

Image 2.1: All items included in the ciciglow A4 Photo Portable Scanner package.
3. Setup
3.1. Battery Installation
- Locate the battery compartment on the scanner.
- Open the compartment cover.
- Insert two (2) AA batteries (not included), ensuring correct polarity (+/-).
- Close the battery compartment cover securely.
3.2. Memory Card Installation
A storage card (1GB-32GB, not included) is required to save scanned documents.
- Locate the memory card slot on the side of the scanner.
- Insert a compatible storage card into the slot until it clicks into place.
- To remove, gently push the card inward until it springs out.

Image 3.1: Side view of the scanner indicating the USB port and memory card slot.
4. Operating Instructions
4.1. Device Overview
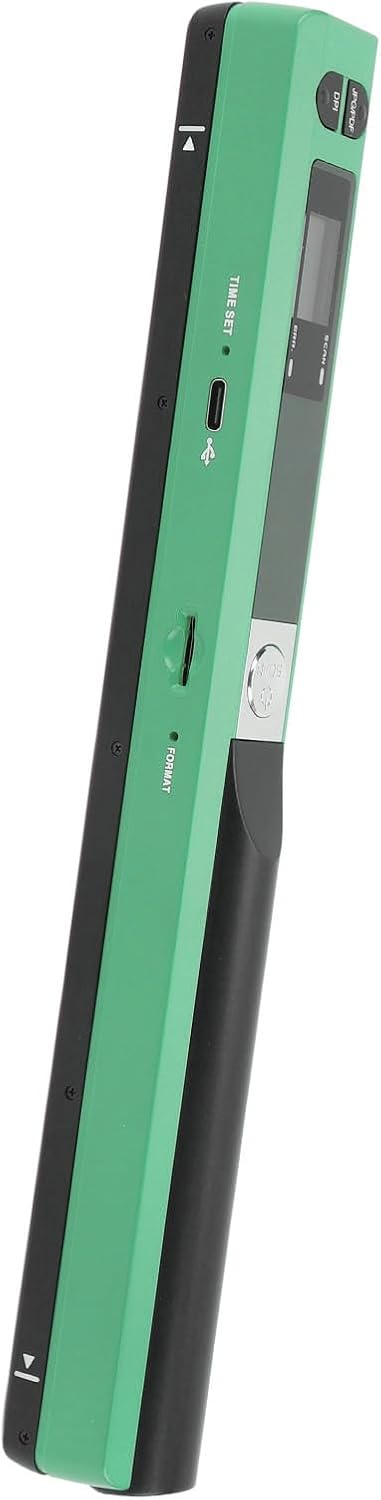
Image 4.1: Top view of the scanner with labeled controls.
- Power/Scan Button: Press to turn on/off, press to start/stop scanning.
- JPG/PDF Button: Press to switch between JPEG and PDF file formats.
- DPI Button: Press to cycle through 300dpi, 600dpi, and 900dpi resolution settings.
- Time Set Button: Used for setting the device's internal clock (refer to advanced settings).
- Display Screen: Shows current settings (DPI, file format, battery status, scan count).
4.2. Basic Scanning Procedure
- Power On: Press and hold the Power/Scan button until the display screen illuminates.
- Select Format: Press the JPG/PDF button to choose your desired output format (JPEG or PDF).
- Select Resolution: Press the DPI button to select the scanning resolution (300dpi, 600dpi, or 900dpi). Higher DPI results in better quality but larger file sizes.
- Position Document: Place the scanner flat on the document you wish to scan, ensuring the document is aligned with the scanner's scanning area.
- Start Scan: Press the Power/Scan button once to begin scanning. Slowly and steadily glide the scanner across the document. Maintain even pressure and speed for optimal results.
- Stop Scan: Press the Power/Scan button again to stop scanning. The scanned image will be automatically saved to the inserted memory card.
- Power Off: Press and hold the Power/Scan button to turn off the device when not in use. The scanner also features a 3-minute auto power-off function to conserve battery.
4.3. Transferring Scanned Files
To transfer scanned photos or documents to your computer:
- Ensure the scanner is powered off.
- Connect the scanner to your PC using the provided USB 2.0 data cable.
- The scanner will be recognized as a removable storage device.
- Open the scanner's folder on your computer to access and copy the scanned files.
- Safely eject the device from your computer before disconnecting the USB cable.
5. Maintenance
5.1. Cleaning the Scanner
Regular cleaning ensures optimal scanning performance and image quality.
- Use the provided cleaning cloth to gently wipe the scanning lens and exterior surfaces of the device.
- Do not use liquid cleaners, abrasive materials, or solvents, as these can damage the scanner.
- Ensure the scanner is powered off before cleaning.
5.2. Storage
When not in use, store the scanner in the provided storage bag to protect it from dust and scratches. Keep the device in a cool, dry place away from direct sunlight and extreme temperatures.
6. Troubleshooting
If you encounter issues with your scanner, please refer to the following common solutions:
- Scanner not turning on:
Ensure that two fresh AA batteries are correctly installed with the proper polarity. - Poor scan quality (streaks, blurry images):
Clean the scanning lens with the provided cleaning cloth. Ensure you are gliding the scanner smoothly and evenly across the document. Check the DPI setting; higher DPI generally yields better quality. - Scanned files not saving:
Verify that a compatible memory card (1GB-32GB) is properly inserted into the scanner. Ensure the card is not full. - Cannot transfer files to PC:
Ensure the scanner is powered off before connecting to the PC. Try a different USB port or cable. Ensure the memory card is properly inserted in the scanner. - Scanner freezes or becomes unresponsive:
Remove and reinsert the batteries to perform a soft reset.
If the problem persists after trying these steps, please contact customer support.
7. Specifications
| Feature | Specification |
|---|---|
| Scan Mode | Black and Color |
| Scan Size | Approx. A4 (213mm / 8.39in) |
| Battery | 2 x AA Battery (Not Included) |
| Storage Format | JPEG, PDF |
| Optional Expandable Memory | Storage Card (1G-32GB) (Not Included) |
| Scan Resolution | 300DPI, 600DPI, 900DPI |
| Supported Systems | For XP, For OS X 10.4 or above |
| Image Sensor | A4 Color Image Sensor |
| Transfer Method | USB 2.0 |
| Operation Mode | Offline Scanning |
| Auto Power Off | 3 Minutes |
| Package Dimensions | 12.2 x 4.33 x 1.97 inches |
| Item Weight | 10.1 ounces |
| Manufacturer | ciciglow |
8. Warranty and Support
For warranty information or technical support, please refer to the documentation provided at the time of purchase or contact your retailer. Keep your purchase receipt as proof of purchase.


