Introduction
This manual provides comprehensive instructions for the installation, operation, and maintenance of the Machinist B760 GT4 DDR4 Motherboard. This motherboard is designed to support Intel 12th and 13th Generation Core i3, i5, i7, and i9 processors using the LGA 1700 socket. It features dual DDR4 memory support for efficient data handling and multitasking.
Key features include:
- LGA 1700 socket compatibility for 12th and 13th generation Intel processors.
- Dual DDR4 memory support for enhanced data transfer rates.
- Advanced cooling solutions for optimal thermal management.
- Multiple expansion slots for graphics cards and other peripherals.
- User-friendly BIOS interface for system configuration.
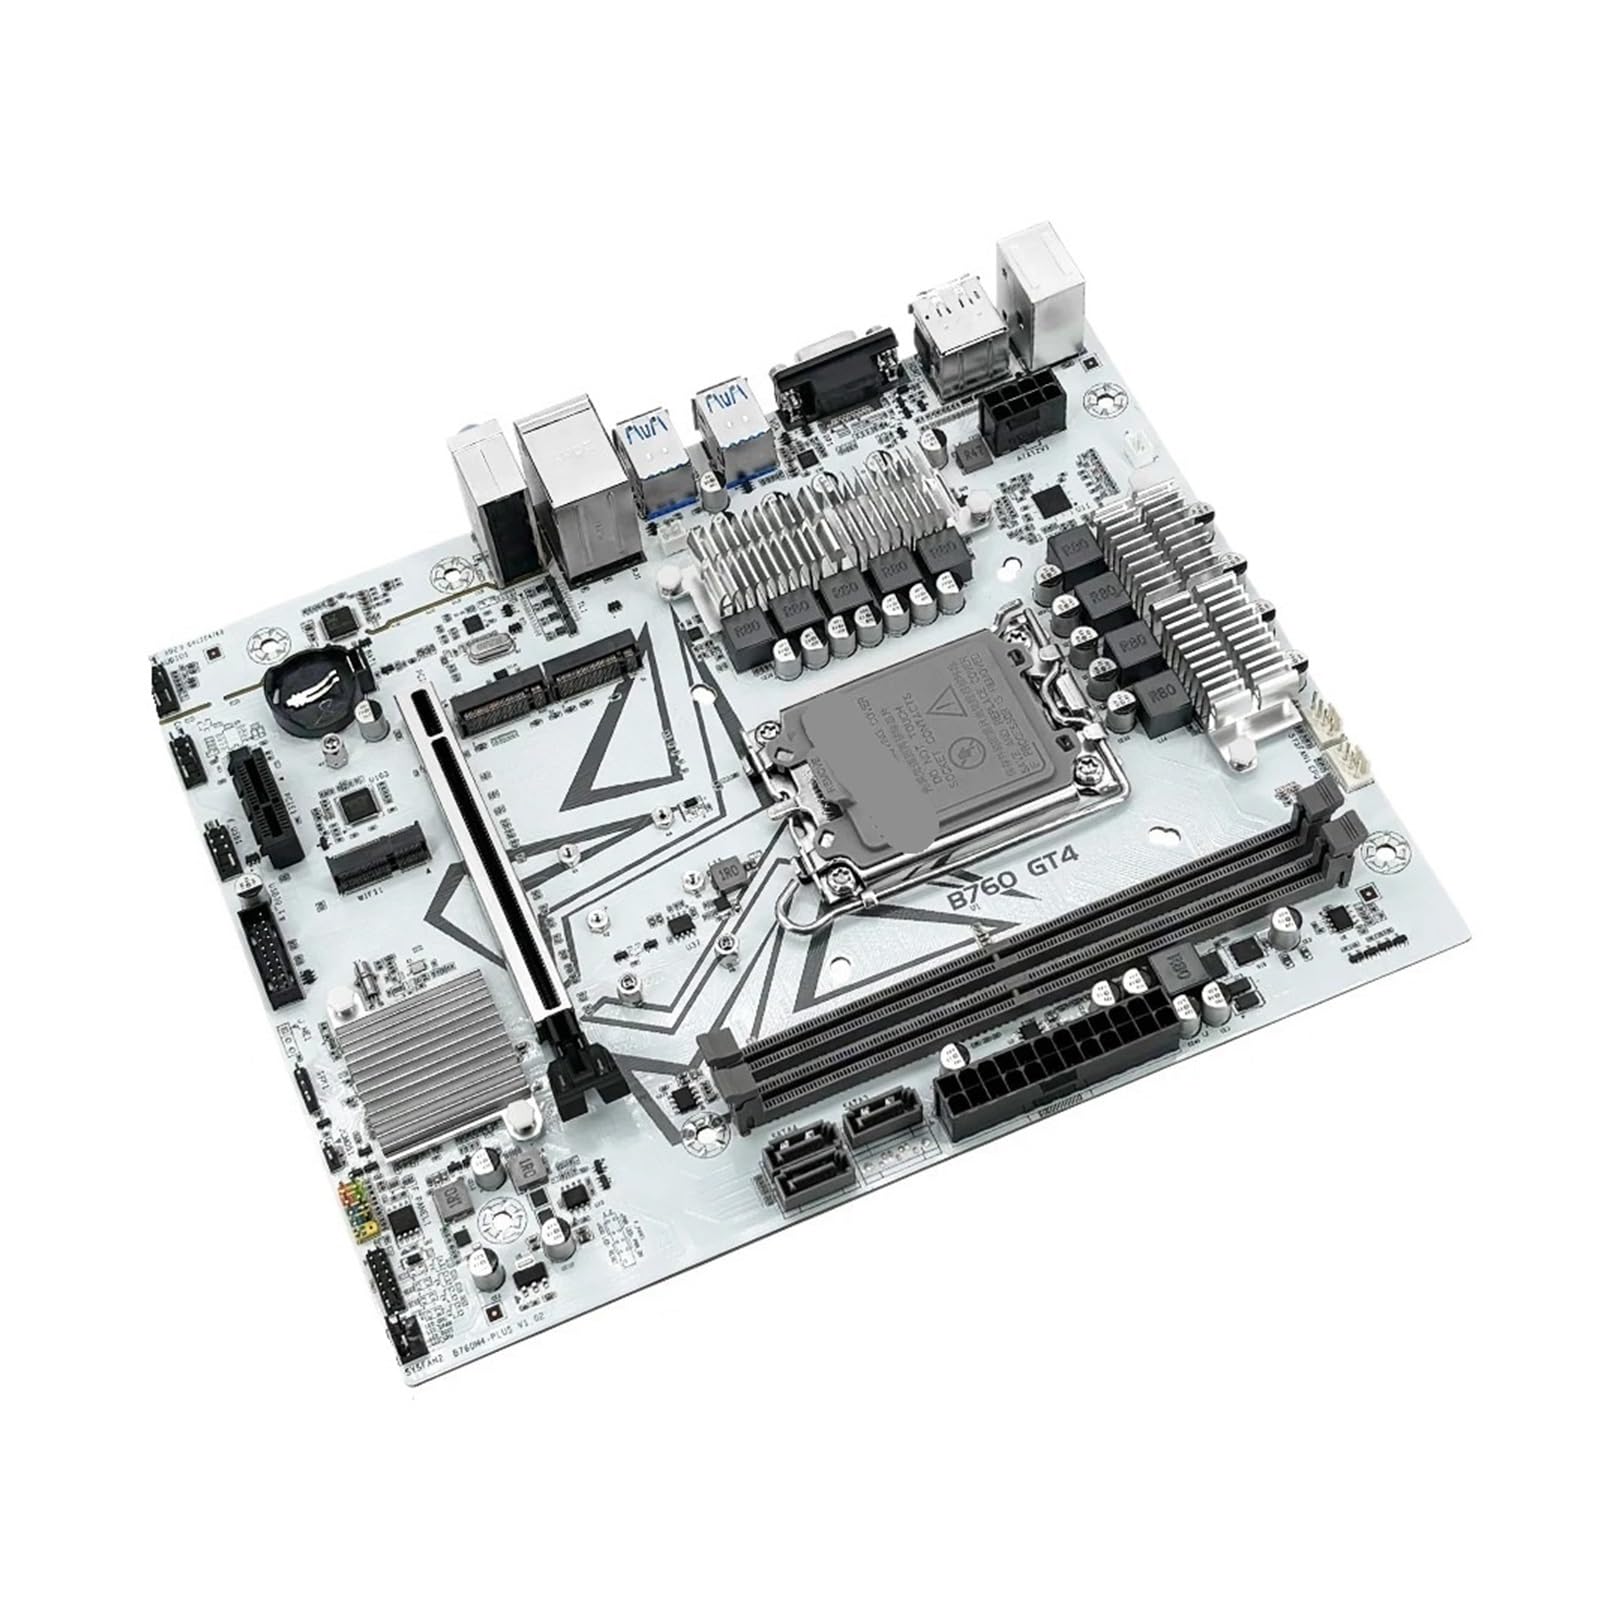
Figure 1: Top-down view of the Machinist B760 GT4 DDR4 Motherboard, showcasing the LGA 1700 CPU socket, DDR4 memory slots, and various expansion slots.
Setup and Installation
Follow these steps for proper installation of your motherboard and components.
1. Prepare the Motherboard
- Unpacking: Carefully remove the motherboard from its packaging and place it on an anti-static surface.
- CPU Installation:
- Locate the LGA 1700 socket. Open the CPU socket lever.
- Align the CPU (Intel 12th/13th Gen) with the socket, ensuring the triangular mark on the CPU matches the mark on the socket.
- Gently place the CPU into the socket. Do not force it.
- Close the socket lever to secure the CPU.
- CPU Cooler Installation: Install your compatible LGA 1700 CPU cooler according to its specific instructions. Ensure thermal paste is applied correctly.
- Memory (RAM) Installation:
- Locate the DDR4 DIMM slots. Open the clips at both ends of the slot.
- Align the notch on the DDR4 memory module with the notch in the DIMM slot.
- Press down firmly on both ends of the memory module until the clips snap into place.
- For dual-channel operation, refer to your motherboard's specific manual for recommended slot configurations.

Figure 2: Close-up view of the motherboard, showing the CPU socket and DDR4 memory slots. Proper alignment is crucial during installation.
2. Install Motherboard into PC Case
- Install I/O Shield: If your case requires it, install the motherboard's I/O shield into the case's rear opening.
- Mount Motherboard: Carefully place the motherboard into the PC case, aligning the screw holes with the standoffs. Secure the motherboard with screws.
- Connect Power Supply:
- Connect the 24-pin ATX power connector from your power supply to the motherboard.
- Connect the 8-pin (or 4+4-pin) CPU power connector to the motherboard.
- Connect Front Panel Cables: Connect the power button, reset button, HDD LED, power LED, and USB/audio headers from your case to the corresponding pins on the motherboard. Refer to the motherboard's silkscreen labels for correct orientation.
- Install Graphics Card (Optional): If using a dedicated graphics card, insert it into the primary PCIe x16 slot and secure it. Connect PCIe power cables from the power supply if required by the graphics card.
- Connect Storage Devices: Connect SATA data cables from your storage drives (HDDs/SSDs) to the SATA ports on the motherboard. Connect SATA power cables from the power supply to the drives.

Figure 3: Overview of the motherboard's various ports, including SATA, USB headers, and PCIe slots, essential for connecting peripherals and storage.
Operating Instructions
After physical installation, proceed with initial boot-up and software configuration.
1. Initial Boot-Up and BIOS Configuration
- Power On: Connect your monitor, keyboard, and mouse. Power on your system.
- Access BIOS/UEFI: During startup, repeatedly press the DEL or F2 key (or as indicated on screen) to enter the BIOS/UEFI setup utility.
- Basic Settings:
- Set the correct system date and time.
- Verify that all installed components (CPU, RAM, storage drives) are detected correctly.
- Configure boot order to prioritize your operating system installation media (USB drive or DVD).
- Save and Exit: Save your changes and exit the BIOS/UEFI. The system will restart.
2. Operating System and Driver Installation
- Install OS: Follow the on-screen instructions to install your preferred operating system (e.g., Windows, Linux).
- Install Drivers: After OS installation, install all necessary drivers for your motherboard. These typically include chipset drivers, audio drivers, LAN drivers, and any other peripheral drivers. Drivers can usually be found on the manufacturer's website or an included driver CD/USB.
- System Updates: Ensure your operating system and drivers are up to date for optimal performance and security.
Maintenance
Regular maintenance helps ensure the longevity and stable operation of your motherboard.
- Dust Removal: Periodically clean dust from inside your PC case, especially from heatsinks and fans, using compressed air. Ensure the system is powered off and unplugged before cleaning.
- BIOS/UEFI Updates: Check the manufacturer's website for BIOS/UEFI updates. Updates can improve compatibility, stability, and performance. Follow the update instructions carefully to avoid damaging the motherboard.
- Driver Updates: Keep all system drivers updated to ensure optimal performance and compatibility with new software and hardware.
- Cable Management: Ensure internal cables are neatly routed to improve airflow and prevent interference.
Troubleshooting
This section addresses common issues you might encounter.
| Problem | Possible Cause | Solution |
|---|---|---|
| System does not power on. | Loose power cables, faulty power supply, incorrect front panel connections. | Check all power connections (24-pin ATX, 8-pin CPU). Verify front panel power switch connection. Test power supply if possible. |
| No display output. | Monitor not connected, faulty graphics card, incorrect RAM installation, CPU not seated correctly. | Ensure monitor is connected and on. Reseat graphics card and RAM modules. Verify CPU installation. Try integrated graphics if available. |
| System powers on but does not boot (no POST). | RAM issues, CPU issues, faulty motherboard, incompatible components. | Reseat RAM. Try booting with one RAM stick at a time. Check CPU cooler installation. Listen for beep codes (if speaker installed) and consult motherboard manual for codes. |
| Operating system not detected. | Incorrect boot order, loose SATA cables, faulty storage drive. | Check BIOS/UEFI boot order. Ensure SATA data and power cables are securely connected to the drive and motherboard. |
If issues persist, consult the manufacturer's support resources or a qualified technician.
Specifications
| Feature | Detail |
|---|---|
| Brand | Generic (Machinist) |
| Model Name | STBBTBVTY-MOTHERBOARDS |
| CPU Socket | LGA 1700 |
| Supported CPUs | Intel Core i3/i5/i7/i9 12th & 13th Gen |
| Memory Type | DDR4 (Dual Memory Support) |
| Item Weight | 13.7 ounces |
| Package Dimensions | 0.39 x 0.39 x 0.39 inches (Note: These dimensions appear to be placeholder/incorrect for a motherboard) |
| Batteries Required | No (CMOS battery is typically pre-installed) |
Warranty Information
For specific warranty terms and conditions, please refer to the official website of the manufacturer or the retailer from whom the product was purchased. Warranty coverage typically includes defects in materials and workmanship under normal use.
Keep your proof of purchase for any warranty claims.
Support
If you require technical assistance or have questions not covered in this manual, please visit the manufacturer's official support website or contact their customer service department.
When contacting support, please have your motherboard model number (STBBTBVTY-MOTHERBOARDS) and purchase information readily available.