1. Important Safety Information
- Read all instructions carefully before assembly and use.
- Keep all small parts and packaging materials away from children.
- Assemble on a soft, clean surface to prevent scratches.
- Ensure all connections are secure before use.
- Do not overload drawers or the tabletop. Maximum weight recommendation for tabletop is 130 lbs.
- The charging station is designed for standard household use. Do not exceed specified electrical ratings.
- Keep liquids away from the charging station to prevent electrical hazards.
- Regularly check for loose connections or damage.
2. Package Contents
Verify that all components are present before beginning assembly. If any parts are missing or damaged, please contact customer support.
2.1. Components List
Refer to the assembly video for a visual guide to the parts.
Video Description: This video provides a step-by-step guide for the installation of the 3-drawer nightstand, including an overview of all components and assembly steps.
2.2. Hardware and Accessories
The package includes various hardware components necessary for assembly. Please refer to the detailed parts list in the assembly video for specific counts and types.
- Screws (various sizes)
- Wooden dowels
- Drawer slides
- Power strip with USB ports and AC outlets
3. Assembly Instructions
Estimated assembly time: 45 minutes.
Use the packaging carton as a working surface to prevent product damage during assembly.
Step 1: Prepare Side Panels
Attach the wooden dowels and screws to panels #2 and #3, and the curved support panels #20 and #21 as shown.

Image Description: A visual representation of Step 1, showing panels #2, #3, #20, and #21 laid out with wooden dowels and screws being inserted.
Step 2: Install Drawer Slides on Side Panels
Align the drawer slides (J1) with the pre-drilled holes on panels #2 and #3 and secure them with screws (F). Ensure the slides are correctly oriented.

Image Description: Close-up view of a drawer slide being screwed into panel #2, highlighting the screw hole positions.
Step 3: Connect Side Panels to Base
Attach the curved support panels (#20, #21) and horizontal support panels (#7) to panel #2 using screws (B).

Image Description: A person assembling the side structure, connecting panel #2 with other support pieces using screws.
Step 4: Attach Top Panel
Secure panel #19 (top panel) to the assembled side structure. Ensure the hole on panel #19 faces the side of panel #7. Use screws (B).

Image Description: A person carefully placing the top panel onto the frame, aligning the pre-drilled holes.
Step 5: Install Curved Side Panels (Top)
Attach the curved side panels (#4 and #5) to the top panel (#1) using screws (A) and wooden dowels (C).

Image Description: The top panel with curved side panels being attached, showing the screw and dowel connections.
Step 6: Install Curved Side Panels (Bottom)
Repeat Step 5 for the bottom panel (#6) and its corresponding curved side panels (#4 and #5).

Image Description: The bottom panel with its curved side panels attached, mirroring the top assembly.
Step 7: Connect Top and Bottom Sections
Connect the top section (panel #1) to the main body (panels #2 and #3) using screws (B).

Image Description: A person carefully lowering the top section onto the main frame and securing it with screws.
Step 8: Secure Bottom Panel
Attach the bottom panel (#6) to the main body using screws (E). Ensure all connections are tight.

Image Description: The bottom panel being screwed into place, completing the outer frame of the nightstand.
Step 9: Assemble Drawer Frame
Assemble the drawer frame using panels #16 and #17, securing them with screws (A) and wooden dowels (C).

Image Description: A person assembling the rectangular frame that forms the base of a drawer, using screws and dowels.
Step 10: Attach Drawer Frame to Main Unit
Secure the assembled drawer frame to the main nightstand unit using screws (E).

Image Description: The drawer frame being screwed into the nightstand's interior, preparing for drawer installation.
Step 11-15: Install Drawers
Assemble each of the three drawers using panels #8, #9, #10, #11, #12, and #13. Attach the drawer slides (J2) to the sides of the drawers using screws (F).
For detailed instructions on installing the drawer slides, refer to the video below.
Video Description: This video demonstrates the correct method for installing drawer rails, showing how to separate the mobile plastic parts and attach them to the drawer.
Step 16: Install Charging Station
Insert the charging station (I) into the pre-cut opening on the top panel. Secure it with screws (L).

Image Description: The charging station being placed into the designated slot on the nightstand's top surface and secured with screws.
Step 17: Attach Back Panel Supports
Install all the #G parts (back panel supports) at the marked positions on the back of the nightstand using screws (H).

Image Description: A close-up of a back panel support being screwed into the corner of the nightstand's rear.
Final Assembly Check
Once all drawers are installed, gently push and pull them to ensure smooth operation. Verify all screws are tightened and the nightstand is stable.

Image Description: A pair of fully assembled Standifurno Black Night Stands with charging stations, ready for use.
4. Operating Instructions
4.1. Using the Charging Station
- Plug the night stand's power cord into a standard 120V AC wall outlet.
- The charging station features two AC outlets (120V/12A) and two USB ports (5V/2A).
- Connect your electronic devices (phones, tablets, laptops) to the appropriate ports for charging.
- The 1.5m long power cord allows for flexible placement.
- Utilize the cable management hole on the back panel to keep wires organized.

Image Description: A close-up view of the integrated charging station on the nightstand's top surface, showing a smartphone and tablet connected for charging.
4.2. Drawer Usage
The three spacious drawers are designed for organized storage of clothes, books, jewelry, or daily essentials. The handle-free design allows for a sleek, minimalist look.
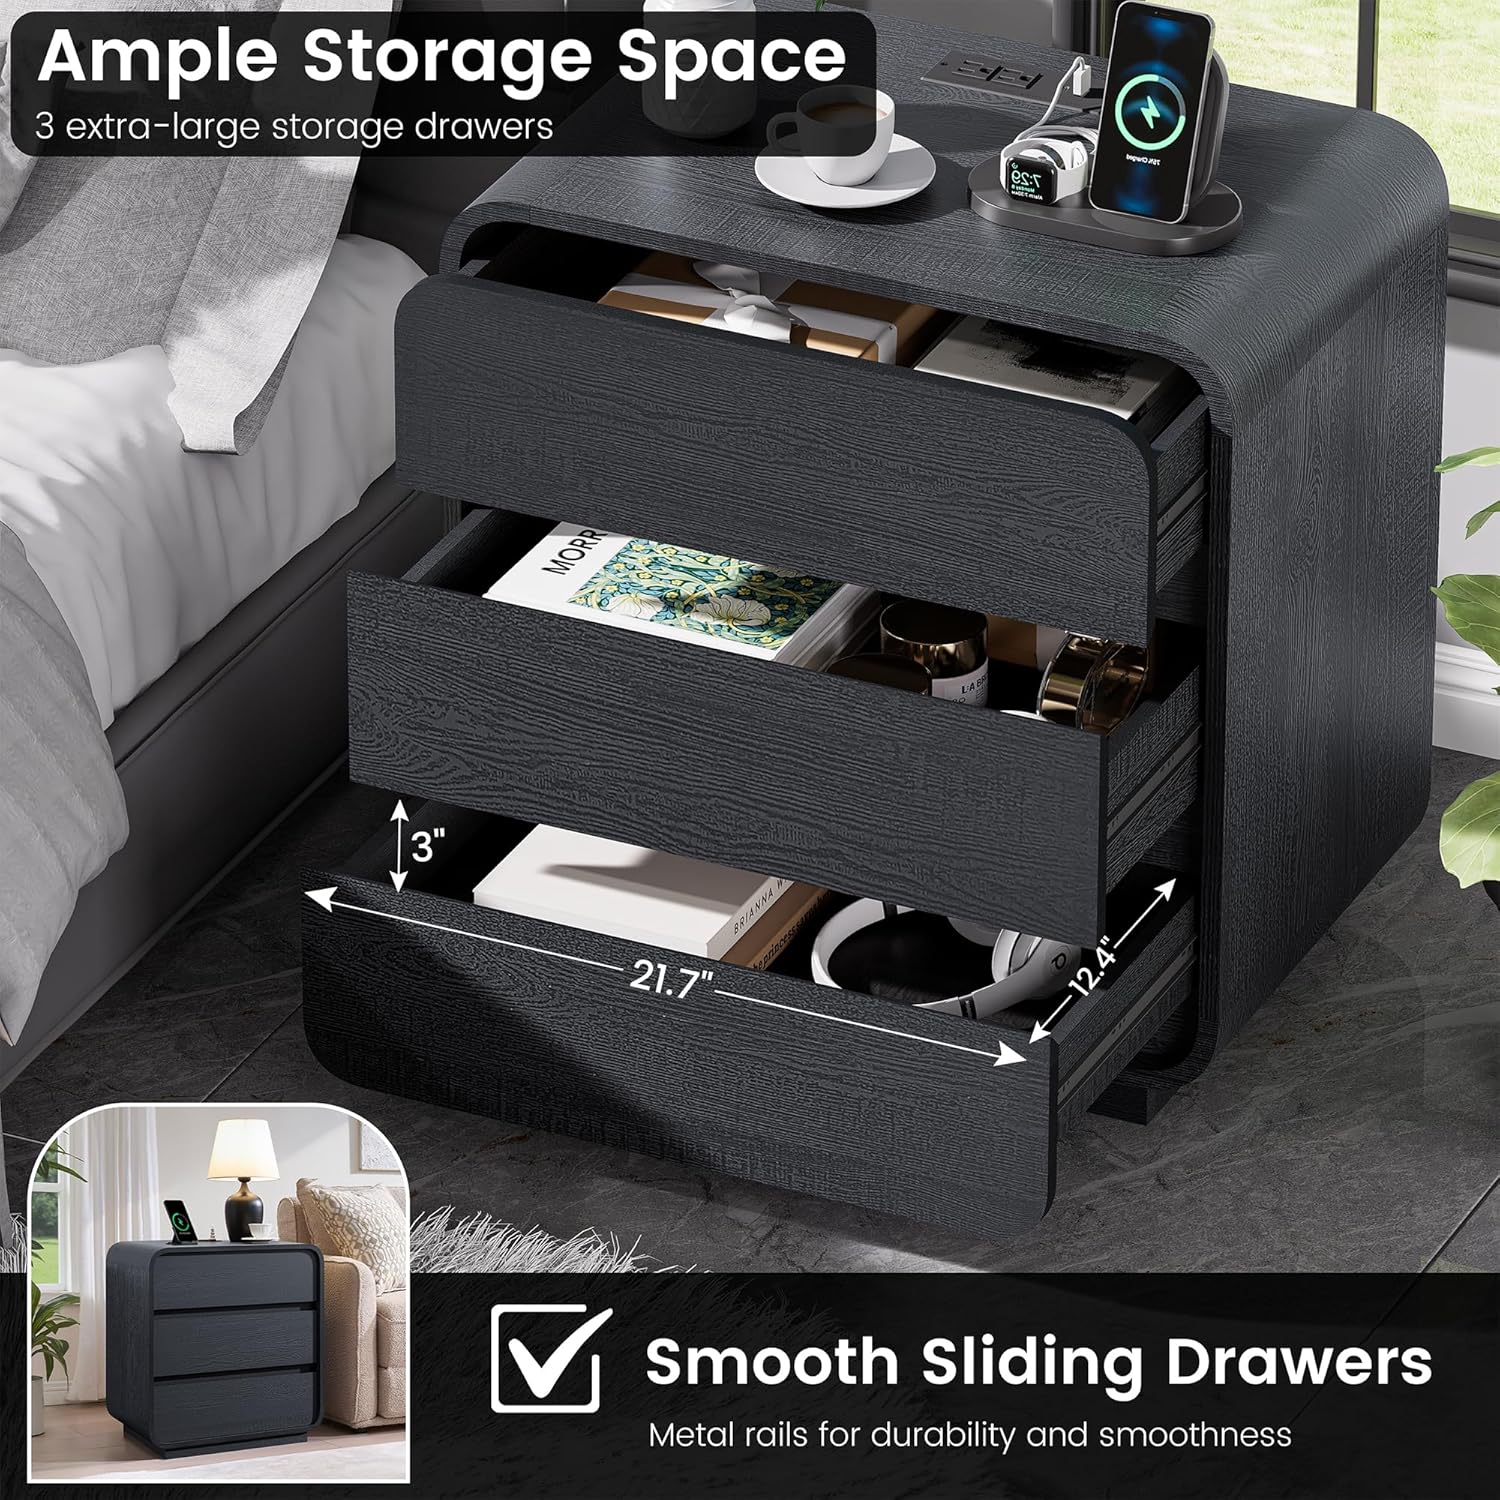
Image Description: The nightstand with its three drawers partially open, revealing the interior storage space and items like books and headphones.
5. Maintenance
- Cleaning: Wipe the surface with a soft, damp cloth. Avoid harsh chemicals or abrasive cleaners.
- Spills: Promptly wipe up any spills to prevent damage to the wood finish.
- Drawer Slides: Periodically check drawer slides for smooth operation. If needed, a small amount of silicone lubricant can be applied.
- Electrical Components: Ensure the charging station remains dry and free from dust.
- Stability: Regularly check all screws and connections to ensure they remain tight.
Video Description: This video demonstrates the easy-to-clean surface of the nightstand, showing a liquid spill being wiped away without leaving a mark. It also highlights the spacious desktop and curved corners.
6. Troubleshooting
6.1. Drawers are Sticking or Not Sliding Smoothly
- Check Alignment: Ensure the drawer slides are correctly aligned and installed on both the drawer and the main unit.
- Lubrication: Apply a small amount of silicone-based lubricant to the drawer slides.
- Obstructions: Check for any objects obstructing the drawer's path.
- Overload: Ensure drawers are not overloaded, which can cause them to stick.
6.2. Charging Station Not Working
- Power Connection: Verify that the night stand's power cord is securely plugged into a functional wall outlet.
- Device Connection: Ensure your devices are properly connected to the USB ports or AC outlets.
- Circuit Breaker: Check your home's circuit breaker to ensure the outlet has power.
- Overload: Avoid plugging in too many high-power devices simultaneously, which could trip an internal safety mechanism.
6.3. Night Stand is Unstable
- Tighten Screws: Re-check and tighten all assembly screws.
- Level Surface: Ensure the night stand is placed on a flat, level surface.
- Weight Distribution: Distribute items evenly across the tabletop and within drawers.
7. Specifications
| Feature | Specification |
|---|---|
| Brand | Standifurno |
| Model | B0FS5LT6TF |
| Dimensions (D x W x H) | 15.7"D x 23.2"W x 25"H |
| Material | Engineered Wood |
| Number of Drawers | 3 |
| Max Weight Recommendation | 130 Pounds |
| Charging Station | 2 AC Outlets (120V/12A), 2 USB Ports (5V/2A) |
| Power Cord Length | 1.5m (approx. 4.9 feet) |

Image Description: An infographic showing the detailed dimensions of the nightstand, including height, width, depth, drawer dimensions, and weight capacity.
8. Warranty and Support
For warranty information or customer support, please contact Standifurno directly. Refer to your purchase documentation for specific warranty terms and contact details.
You can also visit the official Standifurno store for more products and support: Standifurno Store.