Introduction
This manual provides comprehensive instructions for the TESmart USB C 8K KVM Switch, Model CKS201-M23-USBK-V1. This device allows two USB-C enabled computers to share a single monitor, keyboard, mouse, and other USB 3.0 peripherals, along with a 1G Ethernet connection. It supports high-resolution video output up to 8K@60Hz or 4K@144Hz, and provides 60W power delivery to connected laptops. The integrated EDID emulators ensure stable display compatibility and prevent screen flickering or resolution issues during switching.
What's in the Box
Verify that all items are present in your package:
- 1 x TESmart USB C 8K KVM Switch (CKS201-M23-USBK-V1)
- 2 x USB-C Cables
- 1 x IR Remote Control (AAA batteries not included)
- 1 x DC 20V Power Adapter
- 1 x User Manual

Figure 1: Package Contents. The image displays the KVM switch unit, two USB-C cables, an infrared remote control, a DC 20V power adapter, and the user manual.
Setup Instructions
1. Device Overview and Port Identification
Familiarize yourself with the ports on your KVM switch before connecting any devices.

Figure 2: KVM Switch Rear Ports. From left to right: DC 20V power input, 3.5mm audio output, HDMI output for monitor, 2x USB 2.0 ports for keyboard/mouse, 1G Ethernet port, 2x USB 3.0 ports, and 2x USB-C input ports (Input 2 and Input 1) for connecting computers.
The front panel features an IR receiver, two select buttons (Select 1 and Select 2), and a power switch.
2. Connection Diagram
Follow these steps to connect your computers and peripherals to the KVM switch:
- Power: Connect the DC 20V power adapter to the KVM switch and then to a power outlet.
- Monitor: Connect your monitor to the HDMI Output port on the KVM switch.
- Computers (Input): Use the provided USB-C cables to connect each of your two computers to the "Input 1" and "Input 2" USB-C ports on the KVM switch. Ensure your laptop's USB-C port supports both video output and data transfer for full functionality.
- Keyboard & Mouse: Connect your keyboard and mouse to the dedicated USB 2.0 ports (with keyboard and mouse icons) on the KVM switch.
- USB Peripherals: Connect any additional USB 3.0 devices (e.g., USB drives, printers, webcams) to the USB 3.0 ports (labeled SS) on the KVM switch.
- Ethernet: Connect an Ethernet cable from your router or network switch to the LAN port on the KVM switch.
- Audio: If desired, connect speakers or headphones to the 3.5mm audio output port.

Figure 3: Basic Connection Diagram. This diagram illustrates connecting two laptops via USB-C to the KVM switch, which then outputs to a single HDMI monitor. It also shows the connection points for USB-C inputs, HDMI output, and other peripherals.
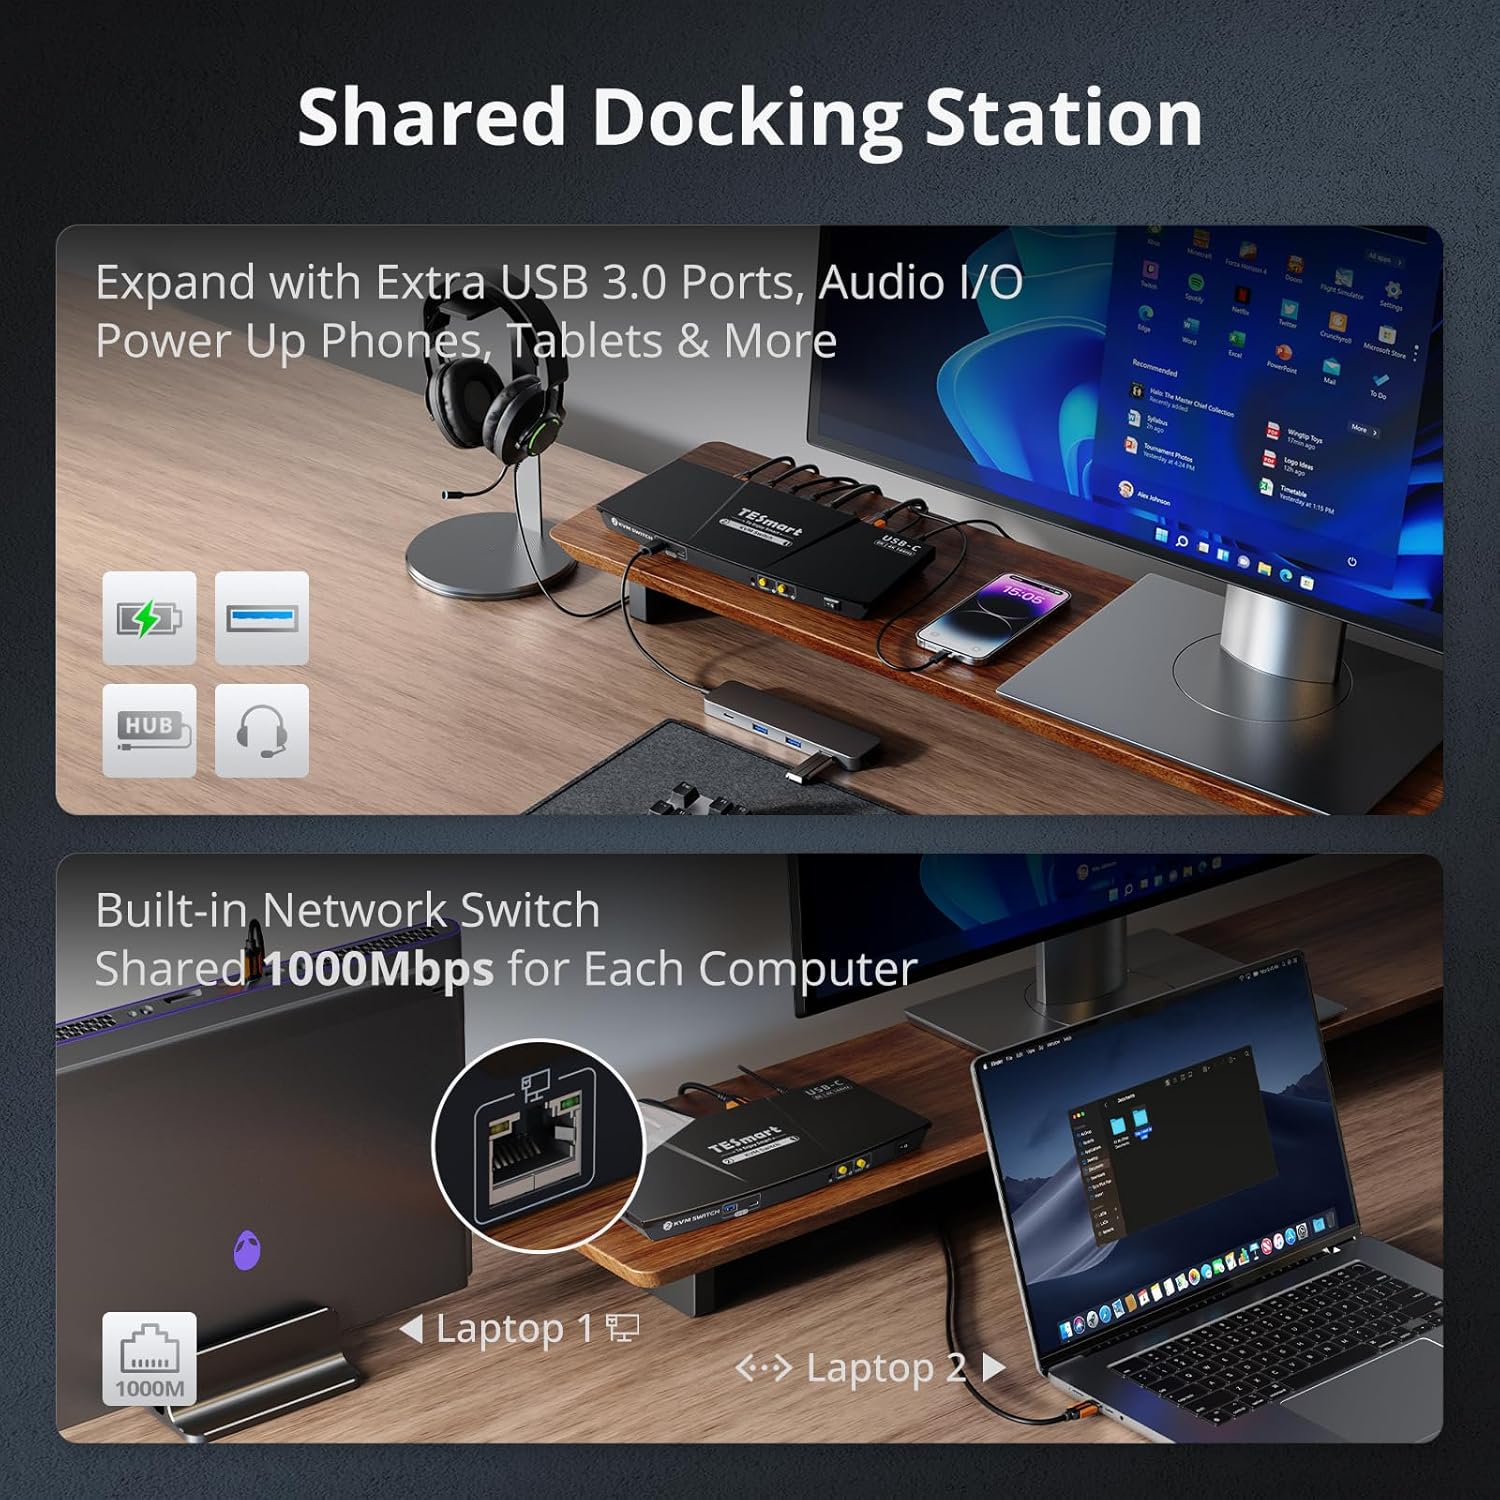
Figure 4: Shared Docking Station Functionality. This image highlights the KVM's ability to act as a docking station, providing USB 3.0 ports for data transfer and charging (7.5W), and audio input/output for shared peripherals like headsets, speakers, and microphones.

Figure 5: Comprehensive Connection Guide. This diagram provides a detailed visual guide for connecting all supported devices to the KVM switch, including power, monitor, two laptops, keyboard, mouse, router, printer, and external storage.
3. USB-C Port Compatibility
Ensure your laptop's USB-C port supports the necessary functions for video output and data transfer. Not all USB-C ports are identical.

Figure 6: USB-C Port Compatibility. This chart helps identify compatible USB-C ports (Thunderbolt 3/4/5, Data Transfer & Video Output, Full-Featured USB-C) and incompatible ones (Only Data Transfer, Only Charging, Only Data & Transfer Charging) for optimal KVM performance.
Operating Instructions
1. Switching Between Computers
The KVM switch offers four methods for switching between connected computers:
- Front Panel Buttons: Press the "Select 1" or "Select 2" button on the front of the KVM switch to switch to the corresponding computer.
- Keyboard Hotkeys: Use customizable keyboard hotkeys for quick switching. Refer to the detailed user manual for specific hotkey combinations.
- Mouse Wheel: Double-click the middle mouse wheel to switch between computers.
- IR Remote Control: Use the included IR remote control to switch inputs.

Figure 7: Switching Methods. This image illustrates the four convenient ways to switch between connected computers: using custom keyboard hotkeys, the front panel buttons, the IR remote control, or by double-clicking the mouse wheel.
2. EDID Emulation
The KVM switch features built-in EDID emulators in each input port. This ensures that your computers always receive correct display information, preventing issues like desktop icon rearrangement, screen flickering, or black screens when switching inputs.

Figure 8: EDID Emulation Benefit. This visual demonstrates how the KVM's EDID emulation prevents desktop icon rearrangement and screen flickering, maintaining display stability when switching between computers.
3. Independent USB & Audio Focus Lock
The KVM supports an Independent USB & Audio Focus Lock feature. When enabled, this allows USB and audio connections to remain with the currently active computer even if the display is switched. This is useful for maintaining continuous audio or USB device connectivity during presentations or meetings.
To disable/enable follow mode: Press Scroll Lock, Scroll Lock, then -.
When Follow Mode is disabled, you can use the following hotkeys to switch audio and USB 3.0 channels between PCs: Scroll Lock, Scroll Lock, then 0.
4. Video Features
The KVM switch supports advanced video features for an enhanced viewing experience:
- Resolutions: Up to 8K (7680x4320)@60Hz 4:4:4 and 4K (3840x2160)@144Hz. Backward compatible with lower resolutions.
- Dynamic HDR: Supports HDMI Dynamic HDR metadata, HDR10+, and Dolby Vision for improved contrast and color accuracy.
- Gaming Features: Supports Variable Refresh Rate (VRR), Fast Vactive (FVA), and Auto Low Latency Mode (ALLM) to reduce screen tearing, stuttering, and input lag.
Maintenance
To ensure the longevity and optimal performance of your TESmart KVM switch, follow these maintenance guidelines:
- Cleaning: Use a soft, dry cloth to clean the exterior of the device. Avoid using liquid cleaners or aerosols, which may damage the unit.
- Ventilation: Ensure the KVM switch is placed in a well-ventilated area to prevent overheating. Do not block any ventilation openings.
- Storage: When not in use for extended periods, store the device in a cool, dry place away from direct sunlight and extreme temperatures.
- Cable Management: Keep cables organized and free from kinks or excessive bending to prevent damage to the cables and ports.
Troubleshooting
If you encounter issues with your KVM switch, refer to the following common problems and solutions:
- No Display/Flickering Screen:
- Ensure all HDMI and USB-C cables are securely connected.
- Verify that your monitor is set to the correct input source.
- Check if your laptop's USB-C port supports video output. Refer to your laptop's specifications.
- Restart the KVM switch by cycling its power.
- Try using different HDMI or USB-C cables, as faulty cables can cause display issues.
- Keyboard/Mouse Not Responding:
- Ensure the keyboard and mouse are connected to the dedicated USB 2.0 ports on the KVM switch.
- Try connecting the keyboard and mouse directly to the computer to confirm they are functional.
- Some specialized keyboards/mice with extra features may require "Pass-Through Mode" for full functionality. Refer to the detailed user manual for hotkey settings.
- Restart the KVM switch.
- Hotkey Switching Not Working:
- Ensure your keyboard is connected to the dedicated keyboard USB 2.0 port.
- Verify the hotkey sequence. The default hotkey for switching is typically Scroll Lock, Scroll Lock, then 1 or 2.
- Some operating systems or applications might interfere with hotkey recognition. Try switching using the front panel buttons or IR remote.
- No Network Connection:
- Ensure the Ethernet cable is securely connected to the KVM's LAN port and your network device.
- Check network settings on your computer.
- Verify that the KVM switch is powered on.
Specifications
| Feature | Specification |
|---|---|
| Model | CKS201-M23-USBK-V1 |
| Brand | TESmart |
| Video Input | 2 x USB-C (Full-Featured) |
| Video Output | 1 x HDMI |
| Max Resolution | 8K@60Hz (4320p), 4K@144Hz (2160p) |
| USB Ports | 2 x USB 2.0 (Keyboard/Mouse), 2 x USB 3.0 (Peripherals) |
| Ethernet Port | 1 x 1G (1000Mbps) LAN |
| Power Delivery | 60W (via USB-C) |
| Audio | 3.5mm Audio Output |
| Switching Methods | Front Panel Buttons, Keyboard Hotkeys, Mouse Wheel, IR Remote |
| EDID Emulation | Built-in EDID Emulators |
| Dimensions (L x W x H) | 7.68 x 3.07 x 1.1 inches |
| Material | Metal |
| Operating Voltage | 20 Volts |
| Max Operating Temperature | 50 Degrees Celsius |

Figure 9: Key Features and Specifications. This infographic summarizes the main technical features of the KVM switch, including supported resolutions, chip technology, and various video and connectivity standards.
Warranty and Support
TESmart products are designed for reliability and performance. For warranty information and technical support, please refer to the official TESmart website or contact their customer service directly.
For further assistance, you may visit the TESmart Store on Amazon or contact support via the information provided in your product packaging.
Product Videos
Watch these official product videos for visual guides and demonstrations of the TESmart USB C 8K KVM Switch.
Video 1: 60W Power Supply and Gigabit Network. This video demonstrates the KVM switch's capability to provide 60W power delivery to connected laptops and its integrated Gigabit Ethernet port for stable network connectivity.
Video 2: TESmart 8K USB C KVM Switch 2 Laptops 1 Monitor CKS201 M23. An overview video showcasing the TESmart 8K USB C KVM Switch, highlighting its features and how it connects two laptops to a single monitor.
Video 3: TESmart 8K USB-C 2 Port KVM. A concise video demonstrating the functionality and benefits of the TESmart 8K USB-C 2 Port KVM switch.