Upperizon G-14T 14-inch Touch Panel Portable Monitor User Manual
Model: G-14T
Introduction
Thank you for purchasing the Upperizon G-14T 14-inch Touch Panel Portable Monitor. This manual provides essential information for setting up, operating, and maintaining your new device. Please read it thoroughly before use to ensure optimal performance and longevity.
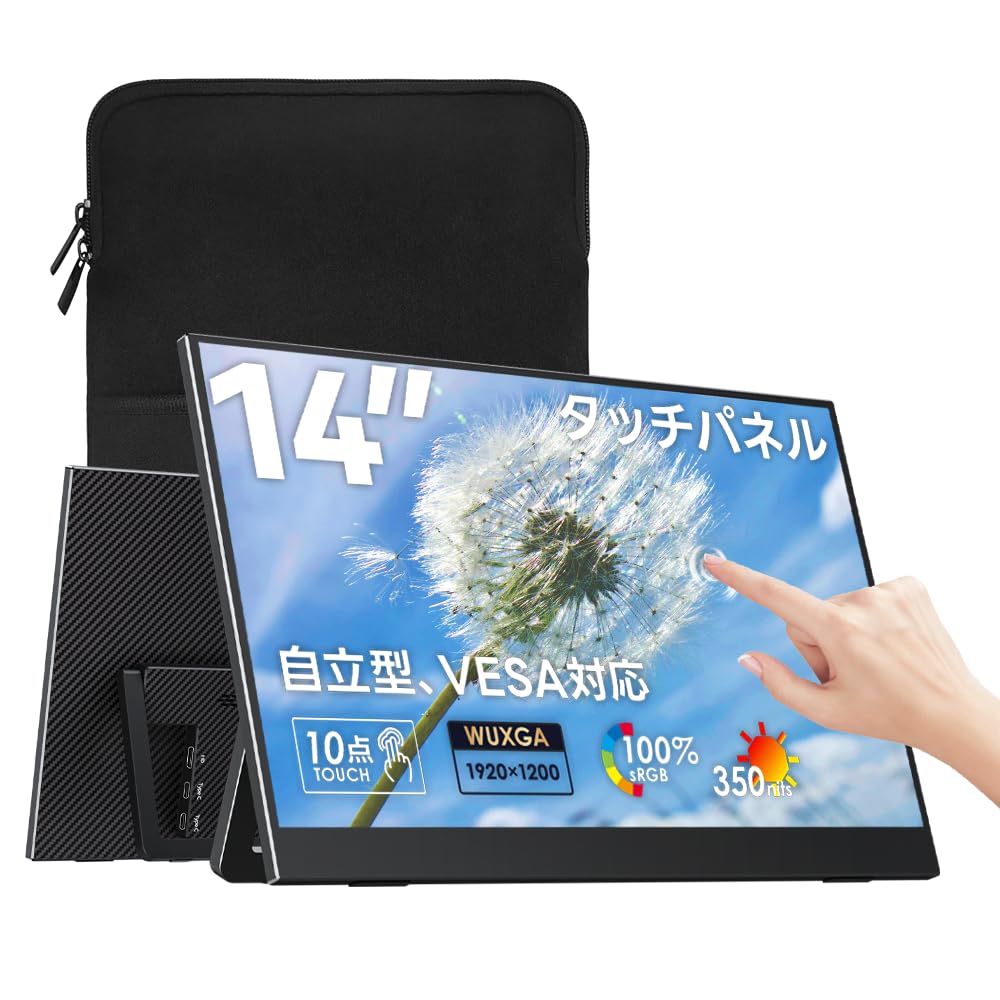
Image: The Upperizon G-14T 14-inch Touch Panel Portable Monitor, showcasing its sleek design.
The Upperizon G-14T is a versatile 14-inch portable monitor featuring a WUXGA (1920x1200) resolution, 16:10 aspect ratio, non-glare IPS panel with 100% sRGB color gamut, and 350 nits brightness. It supports 10-point multi-touch (Windows only) and offers flexible connectivity via USB Type-C and Mini HDMI. Its lightweight (approx. 610g) and slim design, along with an integrated stand and VESA compatibility, make it ideal for various uses, including telework, gaming, and presentations.
Package Contents
Please check the box for the following items:
Upperizon G-14T Portable Monitor
HDMI to Mini HDMI Cable (for video signal)
USB Type-C to Type-C Cable (for power, video, and touch signal)
USB Type-C to Type-A Cable (for power and touch signal)
Storage Case
User Manual (this document)
Image: The monitor unit, user manual, HDMI to mini HDMI cable, USB Type-C to Type-C cable, USB Type-C to Type-A cable, and storage case.
Setup
1. Connecting via USB Type-C (Single Cable Solution)
For devices with a full-featured USB Type-C port (supporting DisplayPort Alternate Mode and power delivery), a single USB Type-C to Type-C cable can provide video, power, and touch functionality.
Connect one end of the USB Type-C to Type-C cable to the monitor's Type-C port.
Connect the other end to your device's full-featured USB Type-C port.
Important Note: Ensure your device's Type-C port supports DP Alt Mode. If the device cannot provide sufficient power, the monitor's power supply may be unstable. In such cases, connect an external power adapter (not included) to the monitor's second Type-C port.
Image: A laptop connected to the portable monitor via a single USB Type-C cable, illustrating power, signal, and touch data transmission.
2. Connecting via HDMI (for Video) and USB (for Touch/Power)
For devices without a full-featured Type-C port, or when an external power source is preferred, use HDMI for video and USB for touch and additional power.
Connect the HDMI to Mini HDMI cable from your device's HDMI port to the monitor's Mini HDMI port.
To enable touch functionality, connect the USB Type-C to Type-A cable from the monitor's Type-C port to your device's USB-A port.
Important Note: An external power supply (not included) is always required when using an HDMI connection. Connect a power adapter to one of the monitor's Type-C ports.
Image: A laptop connected to the portable monitor using an HDMI cable for video and a USB cable for power and touch, suitable for devices without full-featured Type-C ports.
3. Stand Adjustment and VESA Mounting
The monitor features an integrated stand for flexible angle adjustment and VESA compatibility for alternative mounting options.
Integrated Stand: The integrated stand allows smooth angle adjustment from 0° to 175°, providing excellent stability for various viewing positions.
VESA Mounting: The monitor is VESA compatible (75mm pitch, 2 holes, M4x6mm screws) for mounting on compatible arms or stands, offering flexible placement options.
Image: The monitor's integrated stand allows for flexible angle adjustments. It also shows the VESA mounting points for alternative setup configurations.
Operating Instructions
1. Power On/Off and OSD Menu
Power Button: Located on the side of the monitor. Press to power on/off.
Menu Button/Toggle Switch: Use the toggle switch to navigate the On-Screen Display (OSD) menu. Press the switch to enter the menu, and move it up/down/left/right to select and adjust settings.
Image: A detailed view of the monitor's side, highlighting the built-in speakers, VESA holes, power button, menu button/toggle, earphone jack, and anti-slip rubber cushions.
2. Touch Panel Operation
The monitor supports 10-point multi-touch for intuitive interaction (Windows PCs only; macOS supports 1-point touch).
Tap/Long Press: Similar to a mouse click or right-click.
Slide: Move the screen content. Similar to mouse scrolling.
Stretch/Pinch: Zoom in or out on images, maps, etc.
Rotation: Rotate the screen and adjust the angle (some items may not be rotatable).
Image: Visual guide to touch panel operations including tap, zoom in/out, and swipe gestures for smooth interaction.
3. Display Modes
The monitor supports various display modes to enhance productivity and entertainment.
Extended Mode: Extends your primary display, providing more screen real estate for multitasking.
Duplicate Mode: Mirrors your primary display, useful for presentations or sharing content.
Vertical Display: Rotates the display to a vertical orientation, ideal for coding, document viewing, or social media feeds.
Image: Examples of the monitor operating in extended mode, duplicate mode, and vertical display mode, demonstrating its versatility.
4. Special Features
Non-Glare IPS Panel: Reduces reflections, making the screen easy to view even in bright environments and gentle on the eyes.
100% sRGB Color Gamut: Provides rich and accurate colors for a superior visual experience.
Low Blue Light: Designed to be easy on the eyes, providing comfort during long viewing sessions.
FreeSync: Reduces stuttering and tearing for smoother visuals, especially during gaming.
Image: A visual comparison demonstrating the benefit of a non-glare IPS panel in reducing reflections for clearer viewing.
Image: A side-by-side comparison illustrating the richer and more vibrant colors achieved with 100% sRGB color gamut compared to 72% sRGB.
Image: A visual demonstration of the Low Blue Light feature, showing the difference in screen warmth when the feature is enabled versus disabled, for eye comfort.
Image: A side-by-side comparison illustrating the smoother motion and reduced screen tearing when FreeSync is enabled versus disabled during gameplay.
Maintenance
Cleaning the Screen: Use a soft, lint-free cloth slightly dampened with water or a screen-cleaning solution. Do not spray liquid directly onto the screen.
Cleaning the Body: Wipe the monitor's body with a soft, dry cloth. Avoid using harsh chemicals or abrasive materials.
Storage: When not in use, store the monitor in its provided storage case to protect it from dust and scratches.
Handling: Avoid dropping the monitor or subjecting it to strong impacts. Do not place heavy objects on top of it.
Troubleshooting
No Display/Signal:
Ensure all cables are securely connected.
Verify your device's output port (Type-C or HDMI) is active and configured correctly.
If using Type-C, confirm your device's Type-C port supports DP Alt Mode.
Ensure the monitor is receiving sufficient power. If using a single Type-C cable, try connecting an external power adapter to the monitor.
Touch Function Not Working:
For HDMI connections, ensure the USB Type-C to Type-A cable is connected from the monitor to your PC's USB-A port.
For Type-C connections, ensure the Type-C cable supports touch signal transmission and your device's Type-C port is fully featured.
Note that 10-point touch is only supported on Windows PCs; macOS supports only 1-point touch.
On macOS, touch direction does not automatically align with screen rotation.
Unstable Power Supply:
If the monitor's power is unstable when connected via a single Type-C cable, your device may not be providing enough power. Connect an external power adapter (not included) to the monitor's second Type-C port.
An external power supply is always required for HDMI connections.
Screen Flickering/Image Distortion:
Check cable connections.
Try a different cable.
Adjust the display settings on your connected device (resolution, refresh rate).
2x USB Type-C (full-featured), 1x Mini HDMI, 1x 3.5mm Audio Jack
Built-in Speakers
Yes
VESA Compatibility
75mm (M4x6mm screws)
Weight (with stand)
Approx. 610g
Dimensions (D x W x H)
1.7 x 32 x 20.3 cm
Color
Black
Product Use
Entertainment, Gaming, Business
Compatible Devices
Game Consoles, Desktops, Laptops (PC/Mac/Switch)
Warranty Information
The Upperizon G-14T Portable Monitor comes with a 2-year manufacturer's warranty. This warranty covers malfunctions that occur during normal use within the warranty period. It does not cover damage caused by improper use, accidents, or unauthorized modifications. Verification may be required for warranty claims.
In case of a covered malfunction, Upperizon offers free replacement of accessories or the main unit.
Image: Information regarding the 2-year manufacturer's warranty and support options.
Customer Support
If you encounter any issues or have questions regarding your Upperizon G-14T Portable Monitor, please do not hesitate to contact our customer support team.
Contact Method: Please contact us via Amazon message at any time.
Additional Support: Email and phone support may also be available.
Our dedicated support team is ready to assist you.
Ask a question about this manual
Ask about setup, troubleshooting, compatibility, parts, safety, or missing instructions. Manuals+ will review the question and use this page’s manual context to help answer it.