1. Product Overview
This BEISHI Long Arm Full-Motion TV Wall Mount is designed to securely hold televisions ranging from 32 to 75 inches and weighing up to 132 pounds. It offers versatile viewing options with a 180° swivel, +5/-20° tilt, and a unique 90° screen rotation feature, allowing for both horizontal and vertical screen orientation. The mount extends from 2.6 inches to 40.9 inches from the wall, providing flexibility for various room layouts and viewing preferences. It is compatible with VESA patterns from 200x100mm to 600x400mm and can be installed on wood studs (8"-16"), concrete, or brick walls.
2. Important Safety Instructions
- Read all instructions carefully before installation. If you have any questions, consult a qualified installer.
- Ensure the wall structure can safely support the combined weight of the mount and your television.
- Do not install on drywall alone. Always mount into wood studs, concrete, or brick.
- Verify your TV's weight and VESA pattern are within the specified limits of this mount (32-75 inches, up to 132 lbs, VESA 200x100mm to 600x400mm).
- Use only the hardware provided or specified by the manufacturer.
- Do not overtighten screws, as this may cause damage.
- Keep children and pets away during installation.
- Periodically check all connections to ensure they remain secure.
3. Package Contents
Please verify that all components are present and undamaged before beginning installation.
- Wall Plate Assembly
- TV Brackets (2 pcs)
- Hardware Kit (various screws, washers, spacers, anchors)
- HDMI Cable
- Bubble Level
- Cable Ties
- Instruction Manual

Figure 3.1: Overview of mount components and VESA compatibility. This mount supports VESA patterns from 200x100mm to 600x400mm and fits 8", 12", and 16" wood studs.
4. Product Specifications
| Feature | Specification |
|---|---|
| Mounting Type | Wall Mount |
| Movement Type | Rotate, Swivel, Tilt, Extend |
| Brand | BEISHI |
| Material | Iron |
| Color | Black |
| Compatible Devices | Television |
| Minimum Supported Screen Size | 32 Inches |
| Maximum Supported Screen Size | 75 Inches |
| Maximum Load Capacity | 132 lbs (60 kg) |
| VESA Compatibility | 200x100mm to 600x400mm |
| Tilt Angle | +5° / -20° |
| Swivel Angle | 180° |
| Screen Rotation | 90° |
| Extension from Wall | 2.6 inches to 40.9 inches |
| Wall Stud Compatibility | 8"-16" Wood Studs, Concrete, Brick |
| Manufacturer | BEISHI |
| Warranty | One Month |
5. Installation Guide
Step 1: Pre-Installation Checks
- Check TV Size and Weight: Ensure your TV is between 32-75 inches and weighs no more than 132 lbs.
- Verify VESA Pattern: Confirm your TV's VESA mounting holes match the mount's compatibility (200x100mm to 600x400mm).
- Identify Wall Type: Determine if you have wood studs, concrete, or brick walls. Do not install on drywall alone.
- Gather Tools: You will need a drill, stud finder, level, screwdriver, and pencil.
Figure 5.1: Confirming VESA compatibility and wall stud spacing before installation.
Step 2: Attaching TV Brackets to TV
- Carefully place your TV face down on a soft, clean surface to prevent screen damage.
- Identify the correct screws, washers, and spacers from the hardware kit that fit your TV's VESA mounting holes.
- Attach the two TV brackets to the back of your TV using the selected hardware. Ensure the brackets are level and securely fastened, but do not overtighten.
Video 5.2: This video demonstrates the process of attaching the mounting brackets to the back of a television, showing the use of screws and a screwdriver for secure fastening.
Step 3: Mounting Wall Plate to Wall
- Use a stud finder to locate the center of your wood studs. Mark the desired height for the top of your TV.
- Position the wall plate against the wall at the marked location and use a level to ensure it is perfectly horizontal. Mark the drilling points.
- Drill pilot holes at the marked points. For wood studs, use the appropriate drill bit size. For concrete or brick, use a masonry drill bit and insert wall anchors.
- Secure the wall plate to the wall using the lag bolts and washers provided. Tighten firmly.

Figure 5.3: The wall plate securely mounted, designed to hold up to 132 lbs.
Step 4: Hanging TV onto Wall Plate
- With assistance, carefully lift the TV with the attached brackets and hook them onto the wall plate.
- Ensure the TV brackets are properly seated and engaged with the wall plate.
- Secure the TV to the wall plate using the safety screws or locking mechanisms, if applicable, to prevent accidental dislodgement.
Video 5.4: This video illustrates the full range of motion of the TV wall mount, including its 180-degree swivel capability, after the TV has been successfully mounted.
6. Operating Your TV Wall Mount
Swivel Adjustment
The mount allows for a 180° left-to-right swivel. Gently push or pull the TV to achieve your desired viewing angle. This feature is ideal for adjusting the screen between different areas of a room, such as a dining area and a living room.
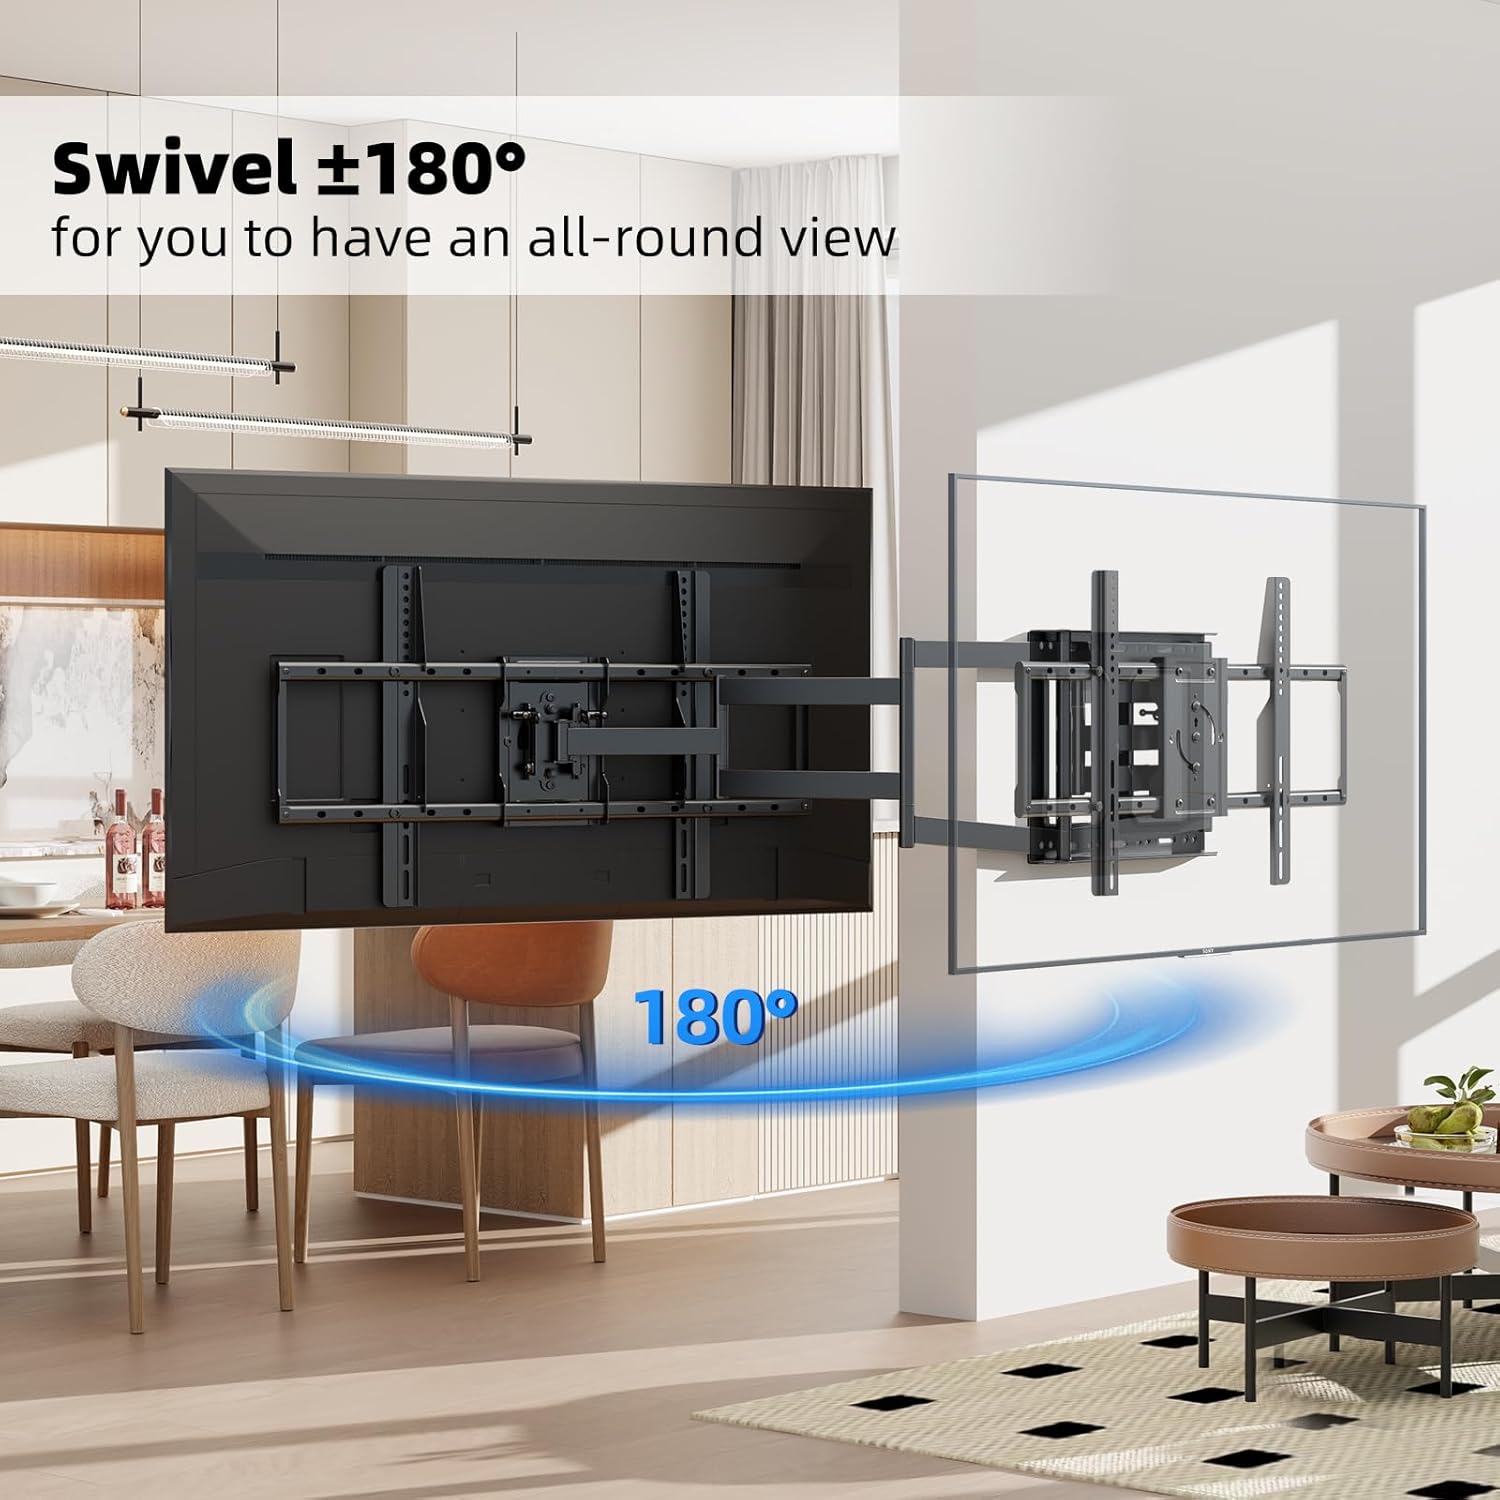
Figure 6.1: The mount offers a 180° swivel for optimal viewing from various positions.
Tilt Adjustment
Adjust the vertical tilt of your TV by +5° upwards and -20° downwards. This helps reduce glare from lights or windows and allows you to find a comfortable viewing position, minimizing neck and eye strain.

Figure 6.2: Adjust the tilt from +5° to -20° to reduce glare and improve viewing comfort.
Screen Rotation
The TV screen can be rotated 90° to switch between horizontal (landscape) and vertical (portrait) orientations. This feature is useful for specific applications like live broadcasting, online meetings, or displaying vertical content.
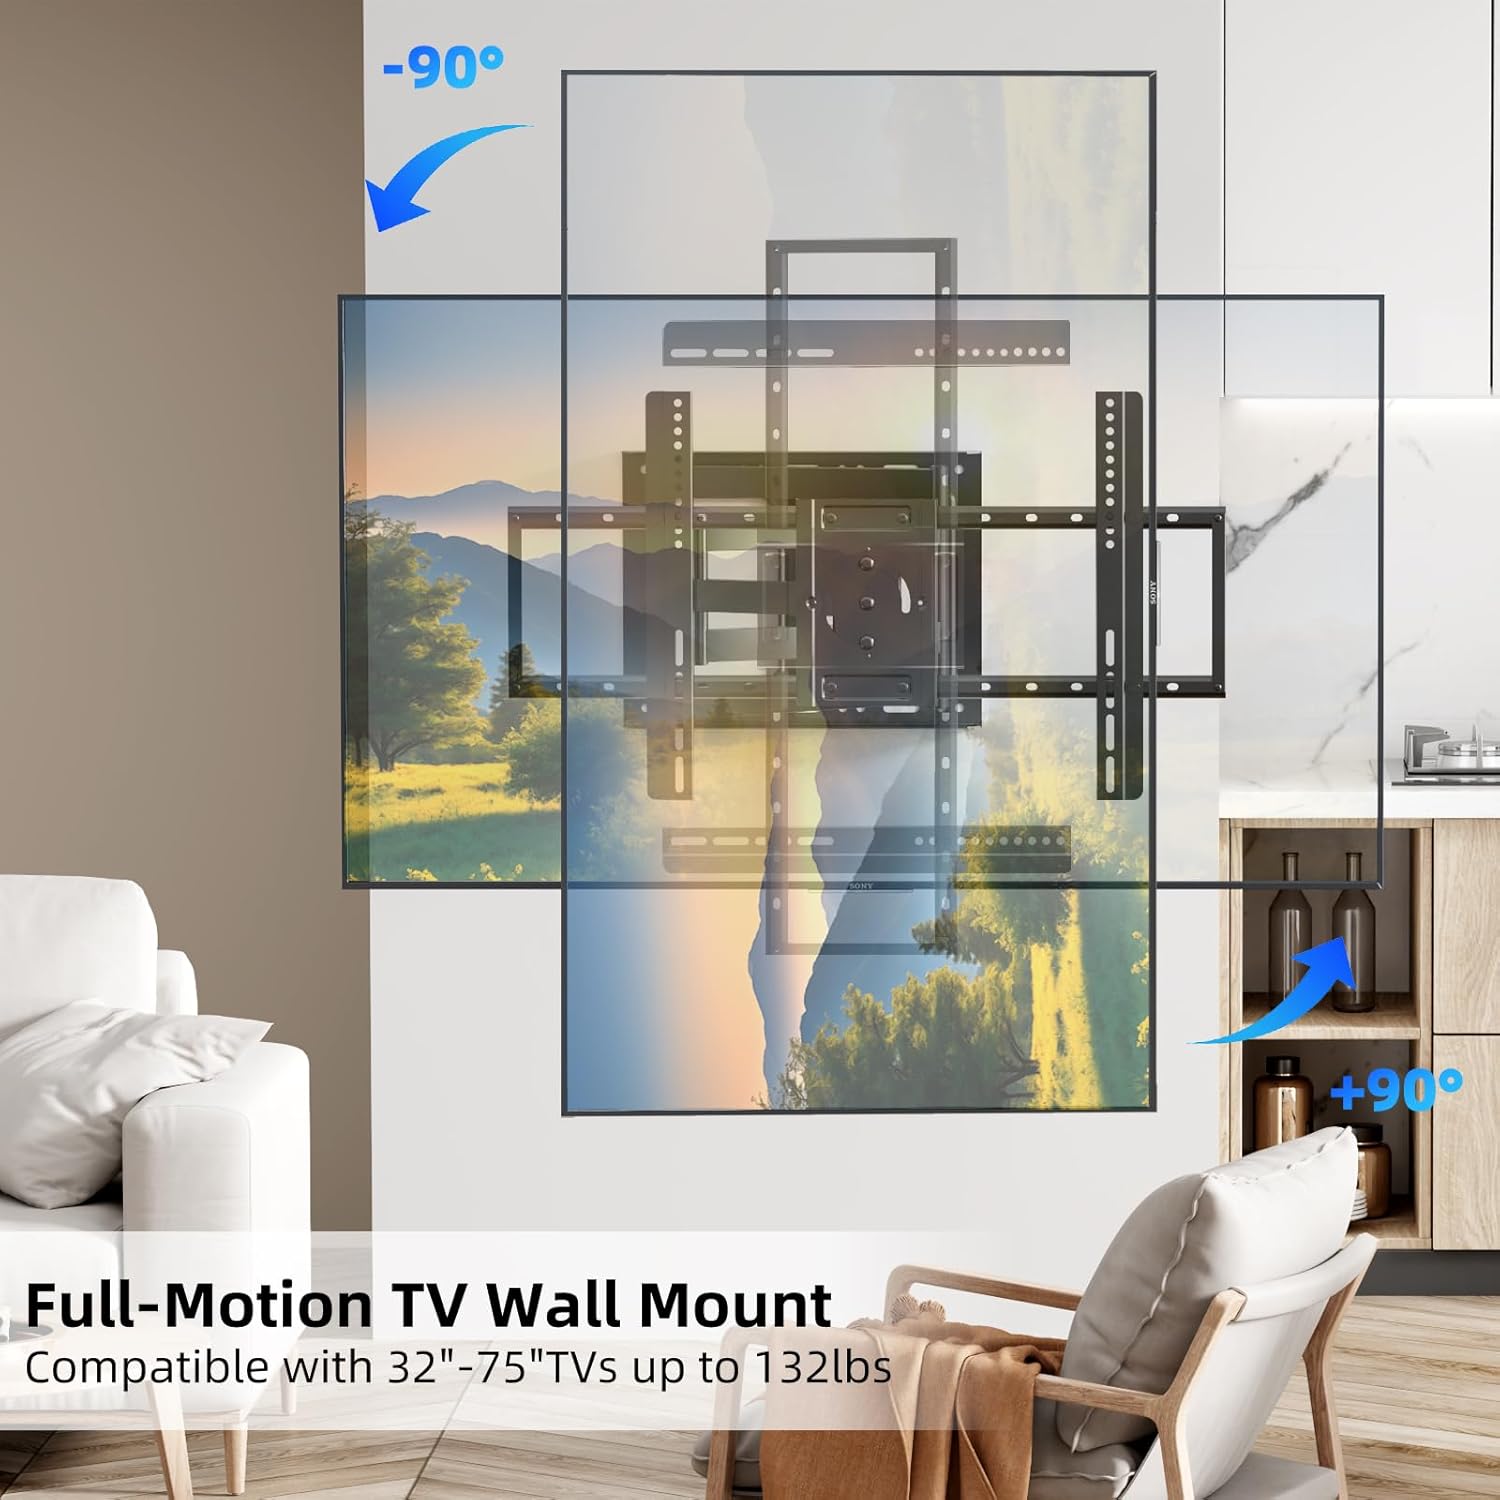
Figure 6.3: The TV screen can rotate 90° for flexible viewing orientations.
Extension and Retraction
The long extension arm allows the TV to extend up to 40.9 inches from the wall and retracts to a mere 2.6 inches. This provides maximum flexibility for viewing and saves space when the TV is not in use.

Figure 6.4: The mount extends and retracts for optimal positioning and space-saving.
7. Maintenance
- Cleaning: Wipe the mount with a soft, dry cloth to remove dust. Avoid using abrasive cleaners or solvents.
- Periodic Inspection: Regularly check all screws and connections to ensure they are tight and secure. Loose connections can lead to instability.
- Lubrication: The moving parts are designed for smooth operation and generally do not require lubrication. If movement becomes stiff, consult customer support.
8. Troubleshooting
| Problem | Possible Cause | Solution |
|---|---|---|
| TV appears crooked after installation. | Wall plate not level; TV brackets not aligned. | Re-check wall plate level during installation. Ensure TV brackets are evenly attached to the TV. Some mounts offer post-installation leveling adjustments. |
| Mount feels unstable or wobbly. | Loose wall plate screws; incorrect wall type; TV exceeds weight limit. | Ensure all wall plate screws are securely tightened into studs/anchors. Verify wall type is suitable. Confirm TV weight is within 132 lbs limit. |
| Difficulty swiveling or tilting the TV. | Friction points are too tight; cables are snagged. | Check for any cable obstructions. Ensure all adjustment knobs or bolts are loosened sufficiently for movement, then re-tighten to desired tension. |
| TV cannot rotate 90 degrees. | Obstruction; specific locking screws not removed. | Ensure there is enough clearance around the TV. Refer to the specific instructions for the 90-degree rotation mechanism, as some models may require removing specific screws in the pivot box. |
9. Warranty and Customer Support
This BEISHI TV Wall Mount comes with a one-month warranty from the date of purchase, covering manufacturing defects. Please retain your proof of purchase for warranty claims.
For technical assistance, missing parts, or warranty inquiries, please contact BEISHI customer support. Contact information can typically be found on the product packaging or the official BEISHI website.


