1. Product Overview
This manual provides instructions for the SOYO X99 Motherboard Set Kit, designed for high-performance desktop computers. The kit includes an X99 motherboard with an LGA2011-3 socket, a Xeon E5 2650 V4 CPU, and 16GB of DDR4 RAM. It supports NVME M.2 storage for fast data transfer and is suitable for demanding applications such as gaming and video editing.
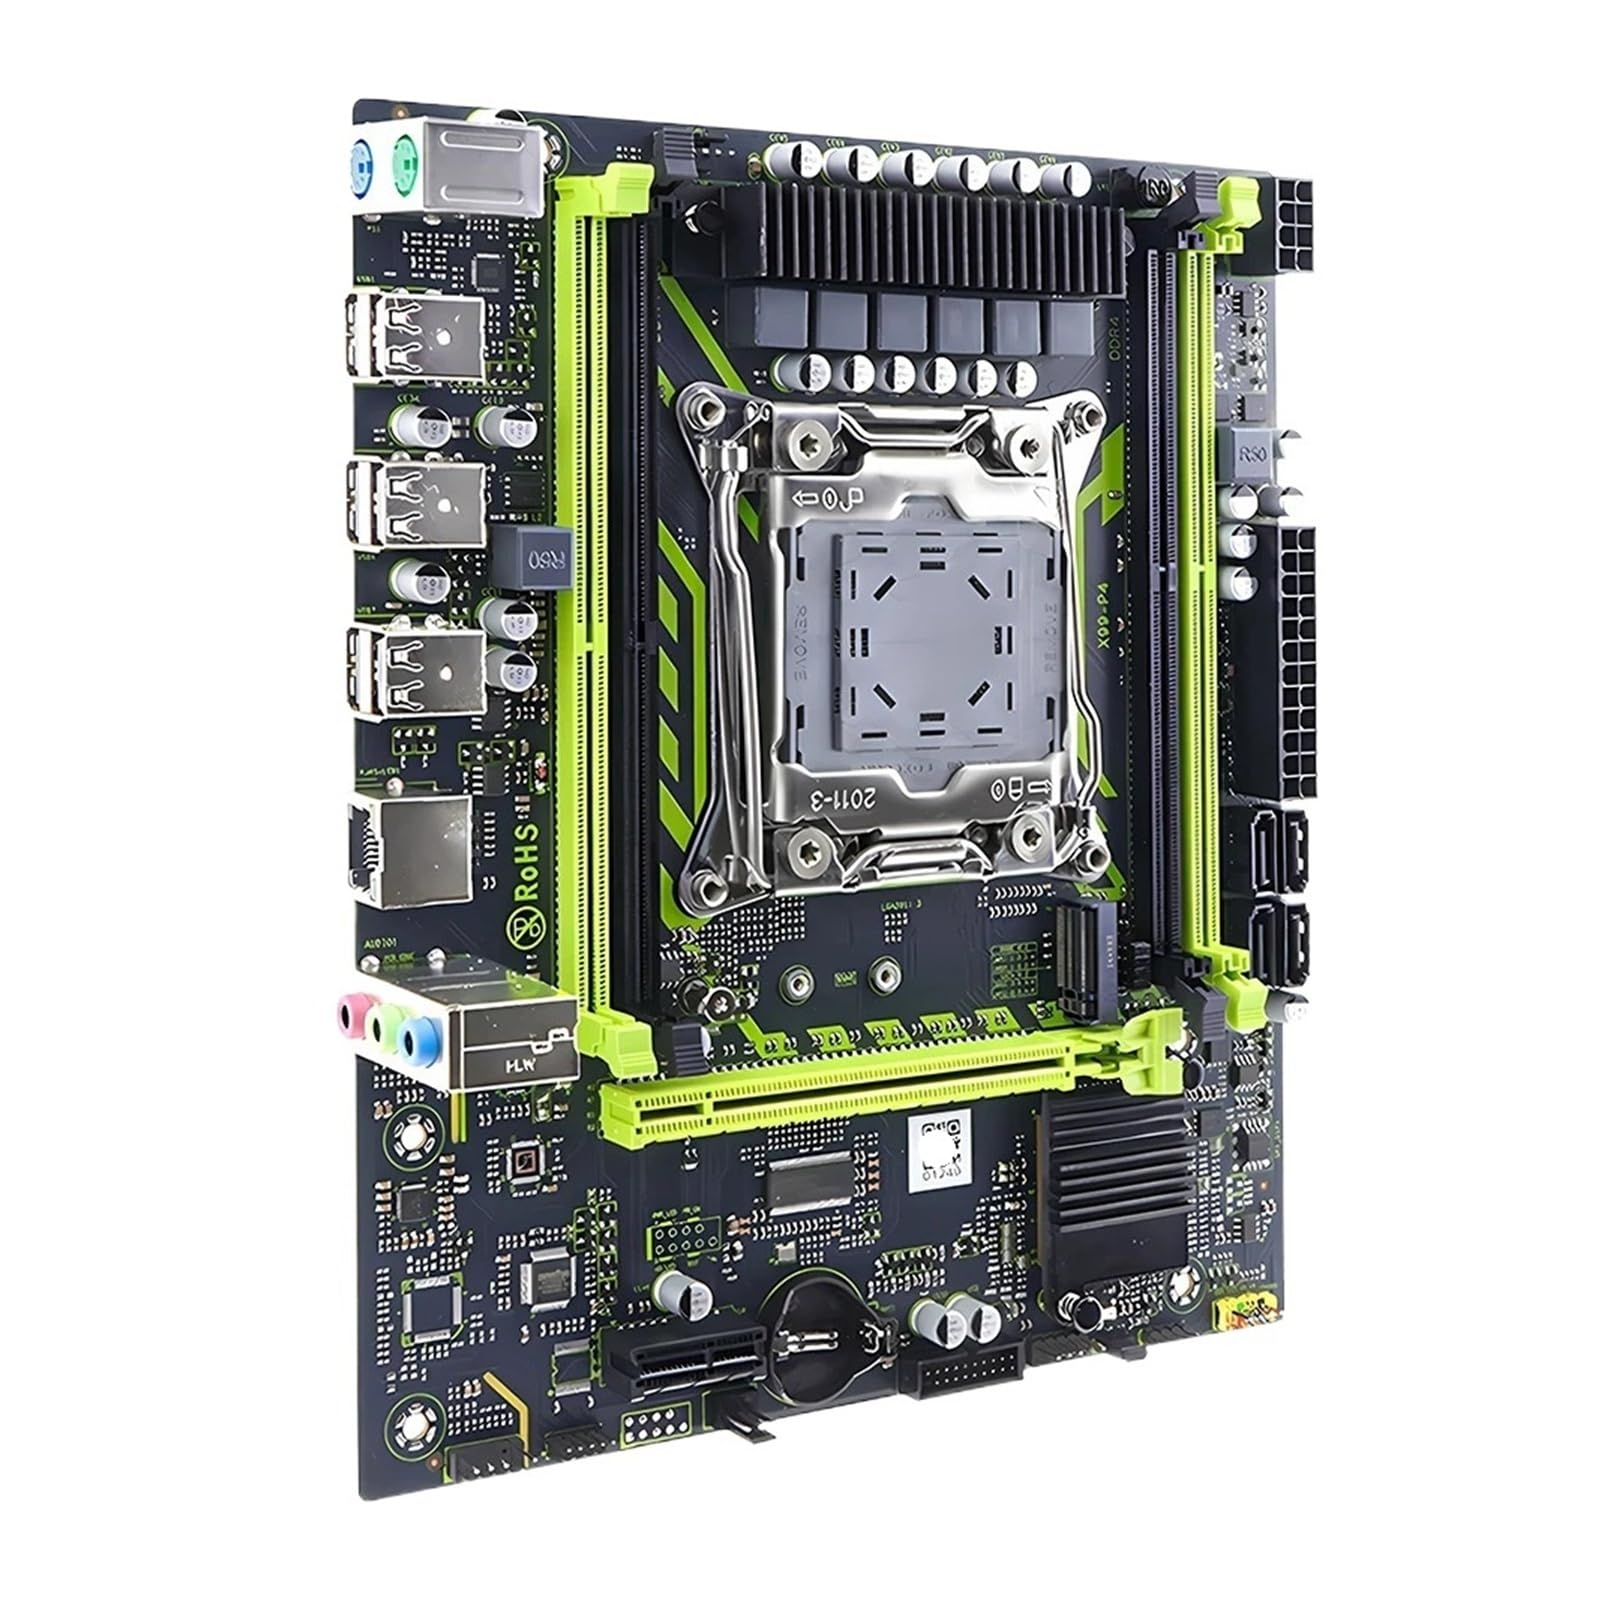
Figure 1.1: Overview of the SOYO X99 Motherboard Set Kit. This image displays the motherboard with the CPU socket, RAM slots, and various ports visible.
2. Package Contents
Verify that all items are present in the package before proceeding with installation. If any components are missing or damaged, contact your vendor.
- SOYO X99 Motherboard
- Intel Xeon E5 2650 V4 CPU (pre-installed or separate)
- 16GB DDR4 RAM (modules, quantity may vary)
- SATA Data Cables
- I/O Shield
- User Manual (this document)
- Driver CD/USB (if included)
3. Setup Instructions
Follow these steps carefully to ensure proper installation of your motherboard kit.
3.1. Preparation
- Ensure your workspace is clean, well-lit, and free of static electricity. Use an anti-static wrist strap or frequently touch a grounded metal object.
- Gather necessary tools: Phillips head screwdriver, thermal paste (if CPU is not pre-installed with cooler), zip ties for cable management.
- Unpack all components carefully.
3.2. CPU Installation (if not pre-installed)
- Locate the LGA2011-3 CPU socket on the motherboard.
- Open the CPU socket retention mechanism by pushing down and out on the lever(s).
- Carefully align the CPU with the socket. Match the gold triangle on the CPU with the triangle on the socket. Do not force the CPU into the socket.
- Gently lower the CPU into place.
- Close the retention mechanism by pushing the lever(s) back into their locked position.
- Apply a small amount of thermal paste to the center of the CPU (if not pre-applied on the cooler).
- Install the CPU cooler according to its specific instructions.

Figure 3.1: Close-up view of the SOYO X99 Motherboard, highlighting the LGA2011-3 CPU socket and surrounding components. This view is crucial for CPU installation.
3.3. RAM Installation
- Locate the DDR4 DIMM slots on the motherboard.
- Open the retention clips at both ends of the DIMM slot.
- Align the notch on the DDR4 RAM module with the key in the DIMM slot.
- Insert the RAM module firmly into the slot until the retention clips snap into place. Ensure both clips are fully closed.
- Repeat for all RAM modules.

Figure 3.2: Angled view of the SOYO X99 Motherboard, showing the DDR4 RAM slots and their proximity to the CPU socket. This perspective aids in proper RAM module insertion.
3.4. Motherboard Installation into Case
- Install the I/O shield into the rear opening of your computer case.
- Align the motherboard with the standoffs inside the case.
- Secure the motherboard with screws, ensuring it is firmly seated but not overtightened.
3.5. Connecting Peripherals
- Power Supply: Connect the 24-pin ATX power connector and the 8-pin (or 4+4 pin) CPU power connector from your power supply to the motherboard.
- Storage: Connect SATA data cables from your storage drives (HDD/SSD) to the SATA ports on the motherboard. If using an NVME M.2 drive, install it into the M.2 slot and secure it with the provided screw.
- Front Panel Connectors: Connect the power button, reset button, HDD LED, power LED, and USB/audio headers from your case to the corresponding pins on the motherboard. Refer to the motherboard's silkscreen labels for correct orientation.
- Graphics Card: Install your graphics card into the primary PCIe x16 slot and connect any necessary PCIe power cables from the power supply.
- Other Peripherals: Connect any additional expansion cards (e.g., Wi-Fi card) to available PCIe slots.
4. Operating Instructions
4.1. First Boot
- After connecting all components and power, press the power button on your computer case.
- The system should power on, and you should see a display on your monitor.
- If no display appears, refer to the Troubleshooting section.
4.2. BIOS/UEFI Setup
- During startup, repeatedly press the DEL key (or F2, F10, F12 depending on BIOS version) to enter the BIOS/UEFI setup utility.
- In the BIOS, you can configure boot order, system time, fan speeds, and other hardware settings.
- Save changes and exit the BIOS to continue booting.
4.3. Operating System Installation
- Insert your operating system installation media (USB drive or DVD) into the computer.
- Boot from the installation media (you may need to adjust the boot order in BIOS).
- Follow the on-screen prompts to install your preferred operating system.
- After OS installation, install the necessary drivers for the motherboard chipset, graphics card, audio, and network. These can usually be found on the manufacturer's website or the included driver media.
5. Maintenance
Regular maintenance helps ensure the longevity and optimal performance of your system.
- Dust Removal: Periodically clean dust from inside your computer case, especially from fans and heatsinks, using compressed air. Ensure the system is powered off and unplugged before cleaning.
- BIOS Updates: Check the manufacturer's website for BIOS/UEFI updates. Updates can improve stability, add new features, or fix bugs. Follow the manufacturer's instructions carefully when updating the BIOS.
- Driver Updates: Keep your drivers updated for optimal performance and compatibility.
- Cable Management: Ensure cables are neatly routed to improve airflow and prevent interference.
6. Troubleshooting
This section addresses common issues you might encounter.
6.1. No Power / No Boot
- Check Power Connections: Ensure the 24-pin ATX and 8-pin CPU power cables are securely connected to the motherboard and power supply.
- Power Supply: Verify the power supply switch is in the "ON" position and the power cable is firmly plugged into both the PSU and the wall outlet.
- Front Panel Connectors: Double-check the power button connector on the motherboard. Try shorting the power pins with a screwdriver to rule out a faulty case button.
- Minimal Boot: Disconnect all non-essential components (storage drives, extra RAM sticks, expansion cards) and try booting with only the CPU, one RAM stick, and the graphics card (if no integrated graphics).
6.2. No Display / POST Errors
- Monitor Connection: Ensure your monitor is connected to the graphics card (or integrated graphics port, if applicable) and is powered on.
- RAM Seating: Re-seat the RAM modules firmly in their slots. Try booting with only one RAM stick.
- Graphics Card: Ensure the graphics card is fully seated in its PCIe slot and any required PCIe power cables are connected.
- BIOS Beep Codes: Listen for beep codes from the motherboard's speaker. Refer to the motherboard's specific documentation (if available) for beep code meanings, as they indicate specific hardware issues.
6.3. Operating System Issues
- Driver Installation: Ensure all necessary drivers (chipset, graphics, network) are installed and up to date.
- Storage Detection: Verify that your storage drives are detected in the BIOS/UEFI.
- OS Reinstallation: If issues persist, a clean reinstallation of the operating system may be necessary.
7. Specifications
Key specifications for the SOYO X99 Motherboard Set Kit:
| Feature | Detail |
|---|---|
| Motherboard Model | SOYO X99 |
| CPU Socket | LGA2011-3 |
| Included CPU | Intel Xeon E5 2650 V4 |
| Included RAM | 16GB DDR4 |
| Storage Support | NVME M.2, SATA |
| Item Model Number | SVCBYUYUU |
| Item Weight | 12.4 ounces (approx. 351 grams) |
| Manufacturer | Generic |
8. Warranty and Support
For warranty information and technical support, please refer to the documentation provided with your purchase or contact the seller directly. Warranty terms may vary based on region and retailer.
Keep your proof of purchase for any warranty claims.