
1. Introduction
Thank you for choosing the kpasafe SH-JA 0.8 Cuft Biometric Fingerprint Safe Box. This manual provides essential information for the safe and efficient operation of your new security product. Please read it thoroughly before installation and use, and retain it for future reference.
Safety Information
- Always keep emergency keys in a secure location away from the safe. Do not store them inside the safe.
- Ensure the safe is securely mounted to prevent unauthorized removal.
- Do not expose the safe to extreme temperatures or humidity.
- Replace batteries promptly when the low battery indicator appears to avoid being locked out.
- Avoid using abrasive cleaners or solvents on the safe's surface.
2. Package Contents
Verify that all items listed below are included in your package:
- Fingerprint Safe Box (1)
- Emergency Key (2)
- Expansion Bolts (4)
- Clamping Screws (4)
- Data Line (1)
- Removable Shelf (1)
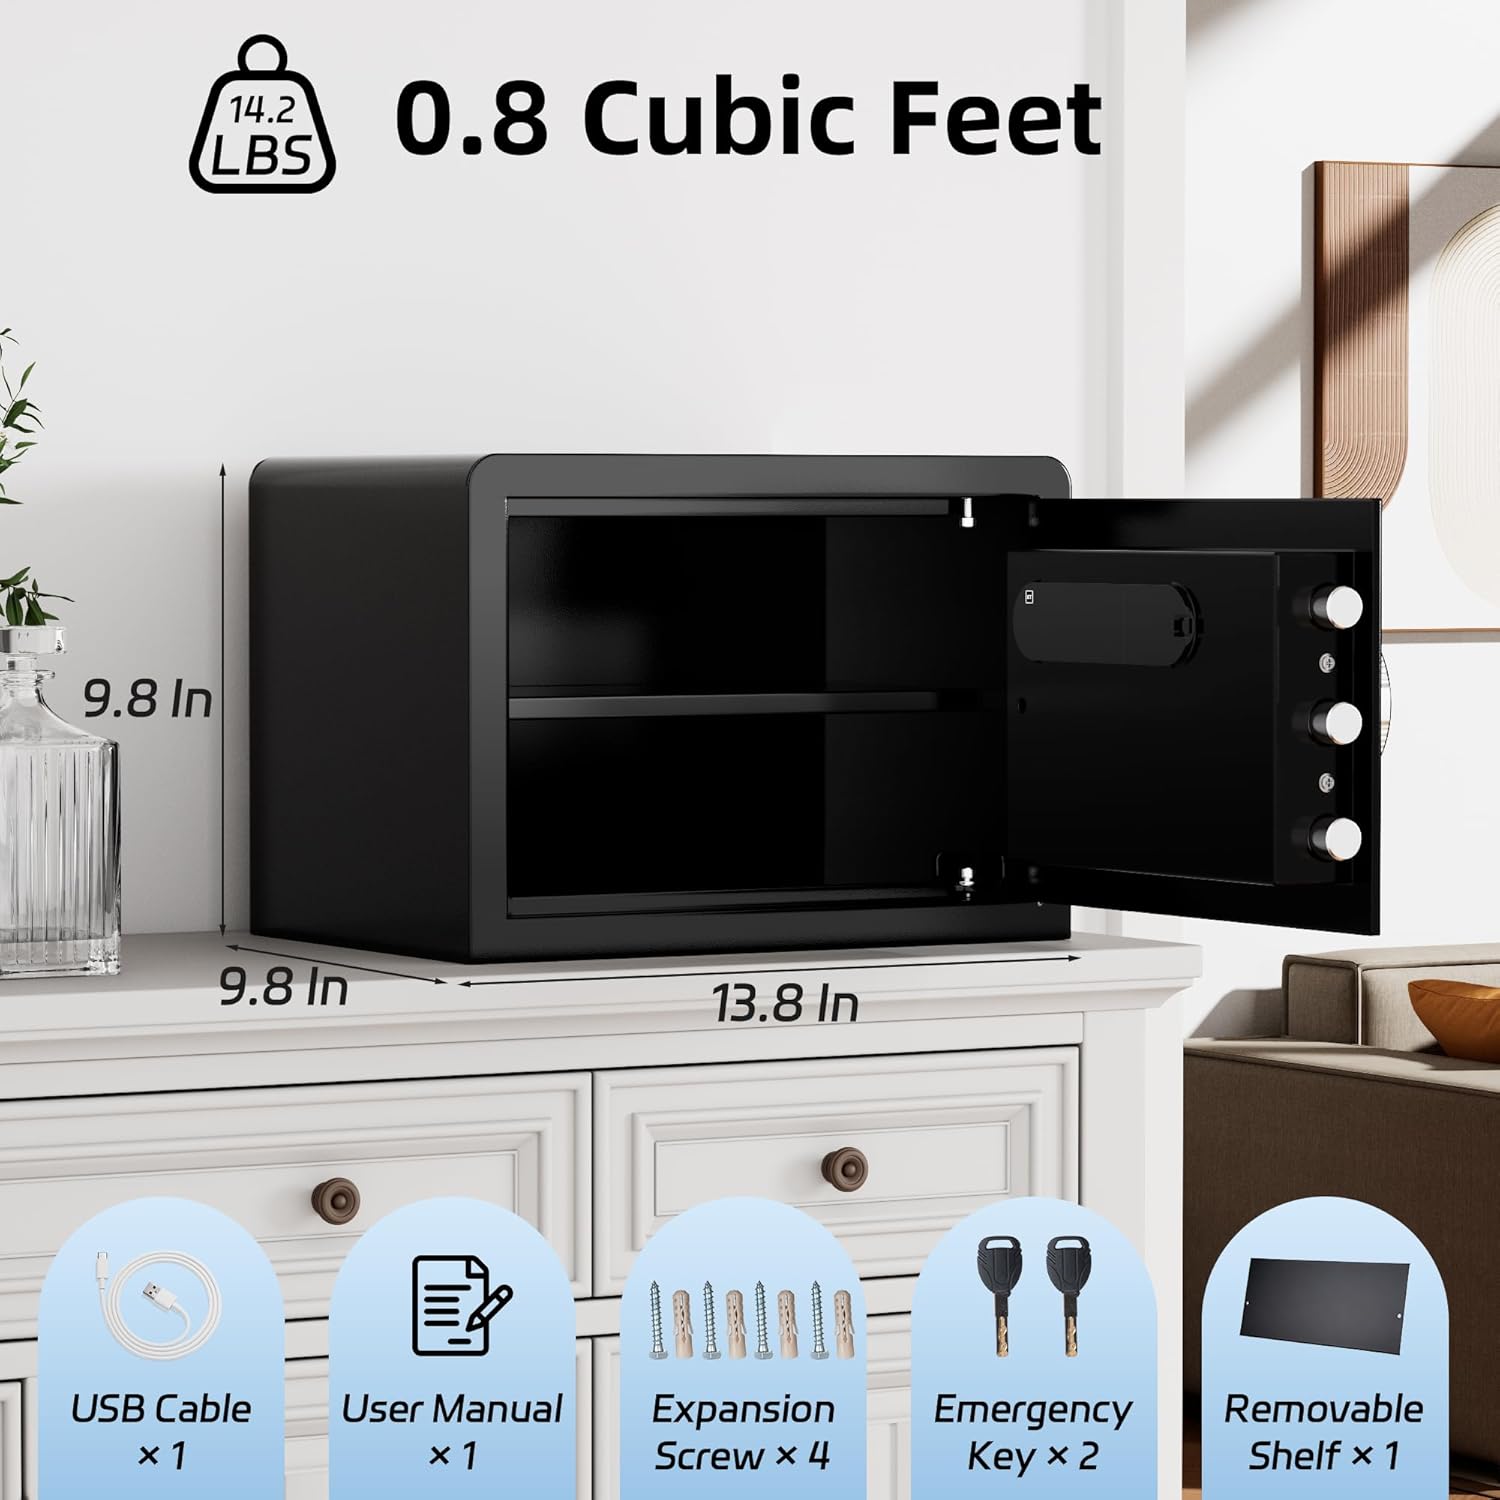
Figure 2.1: Included Components
3. Product Overview
The kpasafe SH-JA Biometric Fingerprint Safe Box offers multiple access methods and robust construction for securing your valuables.
Key Features:
- High-Resolution Fingerprint Scanner: Quick access in 0.3 seconds, stores up to 25 fingerprints.
- Versatile Access Options: Fingerprint, 3-8 digit password, backup keys, and Type-C power port for emergency access.
- User-Friendly Design: Backlit keypad for low-light conditions and an integrated LED light for clear interior visibility.
- Secret and Secure Operation: Silent mode for discreet access and an alarm mode that activates after multiple incorrect attempts.
- Durable Construction: Built with robust alloy steel, featuring a thick door and wall for enhanced security.

Figure 3.1: Quick-Access Lock Interface

Figure 3.2: Internal and External Components
4. Setup
4.1 Battery Installation
The safe requires 4 AA batteries (not included) for operation. The battery compartment is located on the inside of the safe door.
- Open the safe door using the emergency key.
- Locate the battery compartment cover on the inside of the door.
- Remove the cover and insert 4 new AA batteries, ensuring correct polarity.
- Replace the battery compartment cover.
Note: If batteries run low, the keypad will indicate a low power warning. In case of complete power loss, use the emergency key or connect a Type-C cable to the external power port to temporarily power the keypad.
4.2 Mounting the Safe
For enhanced security, it is recommended to mount the safe to a floor or wall using the provided expansion bolts and clamping screws.
- Choose a suitable location for mounting.
- Mark the drilling points through the pre-drilled holes at the back or bottom of the safe.
- Drill pilot holes in the marked locations.
- Align the safe with the drilled holes and secure it using the expansion bolts and clamping screws.
5. Operating Instructions
5.1 Unlocking with Emergency Key
The emergency key provides mechanical access to the safe, useful for initial setup or in case of battery failure or forgotten codes.
- Locate the keyhole cover on the safe door.
- Remove the keyhole cover.
- Insert the emergency key and turn it clockwise.
- Turn the handle to open the safe door.
Video 5.1: Demonstrates unlocking the safe using the emergency key, setting a password, and setting a fingerprint.
5.2 Setting a New Password
You can set a personal password (3 to 8 digits) for electronic access.
- With the safe door open, press the SET button twice. The safe will emit a short beep, and the keypad will light up.
- Enter your desired new password (3 to 8 digits).
- Press the "#" button to confirm. The safe will emit a long beep, indicating successful password setting.
5.3 Unlocking with Password
- Enter your programmed password on the keypad.
- Press the "#" button.
- Turn the handle to open the safe door.
5.4 Setting a Fingerprint
The safe can store up to 25 different fingerprints.
- With the safe door open, press the SET button once. The safe will emit a short beep, and the fingerprint scanner will illuminate blue.
- Place your finger on the fingerprint recognition area. The safe will beep.
- Repeat placing your finger on the scanner 5 times, lifting your finger slightly between each scan.
- After the 5th successful scan, the safe will emit a long beep, confirming the fingerprint has been successfully entered.
5.5 Unlocking with Fingerprint
- Place your registered finger on the fingerprint recognition area.
- If the fingerprint is recognized, the safe will unlock.
- Turn the handle to open the safe door.
5.6 Silent Mode
To operate the safe without audible beeps:
- To activate silent mode: Press "*" then "6" then "#".
- To deactivate silent mode: Press "*" then "6" then "#" again.
5.7 Alarm Mode
The safe features an alarm mode to deter unauthorized access.
- The alarm will activate after multiple incorrect password or fingerprint attempts.
- To silence the alarm, use a correct password, fingerprint, or the emergency key.

Figure 5.1: Comprehensive Protection Features
6. Maintenance
6.1 Battery Replacement
Replace all 4 AA batteries when the low battery indicator appears on the keypad. Always use new, high-quality alkaline batteries. Do not mix old and new batteries or different battery types.
6.2 Cleaning
Wipe the safe's exterior with a soft, damp cloth. Avoid using harsh chemicals, abrasive cleaners, or solvents, as these can damage the finish or electronic components.
6.3 Emergency Key Storage
Periodically check the location of your emergency keys to ensure they are accessible but securely stored away from the safe.
7. Troubleshooting
| Problem | Possible Cause | Solution |
|---|---|---|
| Safe does not open with password/fingerprint. | Low batteries, incorrect code/fingerprint, electronic malfunction. | Replace batteries. Re-enter code carefully. Re-scan fingerprint. Use emergency key. |
| Keypad is unresponsive. | Dead batteries, electronic issue. | Replace batteries. Use Type-C cable for emergency power. Use emergency key. |
| Fingerprint not recognized consistently. | Improper finger placement, dirty sensor, dry/wet finger, fingerprint not properly registered. | Ensure finger is clean and dry. Place finger flat on sensor. Re-register fingerprint. Try different fingers. |
| Alarm sounds unexpectedly. | Multiple incorrect entries, tampering. | Enter correct password/fingerprint or use emergency key to disarm. |
8. Specifications
| Feature | Detail |
|---|---|
| Brand | kpasafe |
| Model Number | SH-JA |
| Capacity | 0.8 Cubic Feet |
| Product Dimensions (D x W x H) | 9.8" x 13.8" x 9.8" |
| Material | Alloy Steel |
| Lock Type | Biometric, Electronic Combination Lock, Key |
| Color | Black |
| Item Weight | 7.39 Kilograms |
| Special Features | Anti-Theft, Biometric Fingerprint, Silent Mode, Backlit Keypad, LED Light |

Figure 8.1: Product Dimensions and Capacity
9. Warranty and Support
kpasafe products are manufactured to high-quality standards. For information regarding warranty coverage, technical support, or service inquiries, please refer to the contact details provided with your purchase documentation or visit the official kpasafe website.