1. Introduction
This manual provides essential information for the safe and efficient installation, operation, and maintenance of your VEVOR LPS25-6BP/130 High-Efficiency Circulation Pump. Please read these instructions thoroughly before installation and use, and retain this manual for future reference.
The VEVOR LPS25-6BP/130 is designed for circulating hot water in residential heating systems, including underfloor heating, radiators, and solar water heaters. Its high-efficiency ECM permanent magnet motor ensures quiet and energy-saving operation.
2. Safety Instructions
- Always disconnect power before performing any installation, maintenance, or repair work.
- Installation must be performed by a qualified professional in accordance with local electrical and plumbing codes.
- Ensure the power supply matches the pump's specifications (AC 220-240V 50Hz).
- Do not operate the pump dry. Ensure the system is filled with water before starting.
- Protect the pump from freezing temperatures.
- Keep children and unauthorized personnel away from the pump during operation.
- The pump is designed for clean water circulation only. Do not use with corrosive, flammable, or explosive liquids.
3. Product Overview
3.1 Components and Features
The VEVOR LPS25-6BP/130 circulation pump features a robust cast iron body, an efficient ECM permanent magnet motor, and an integrated check valve.
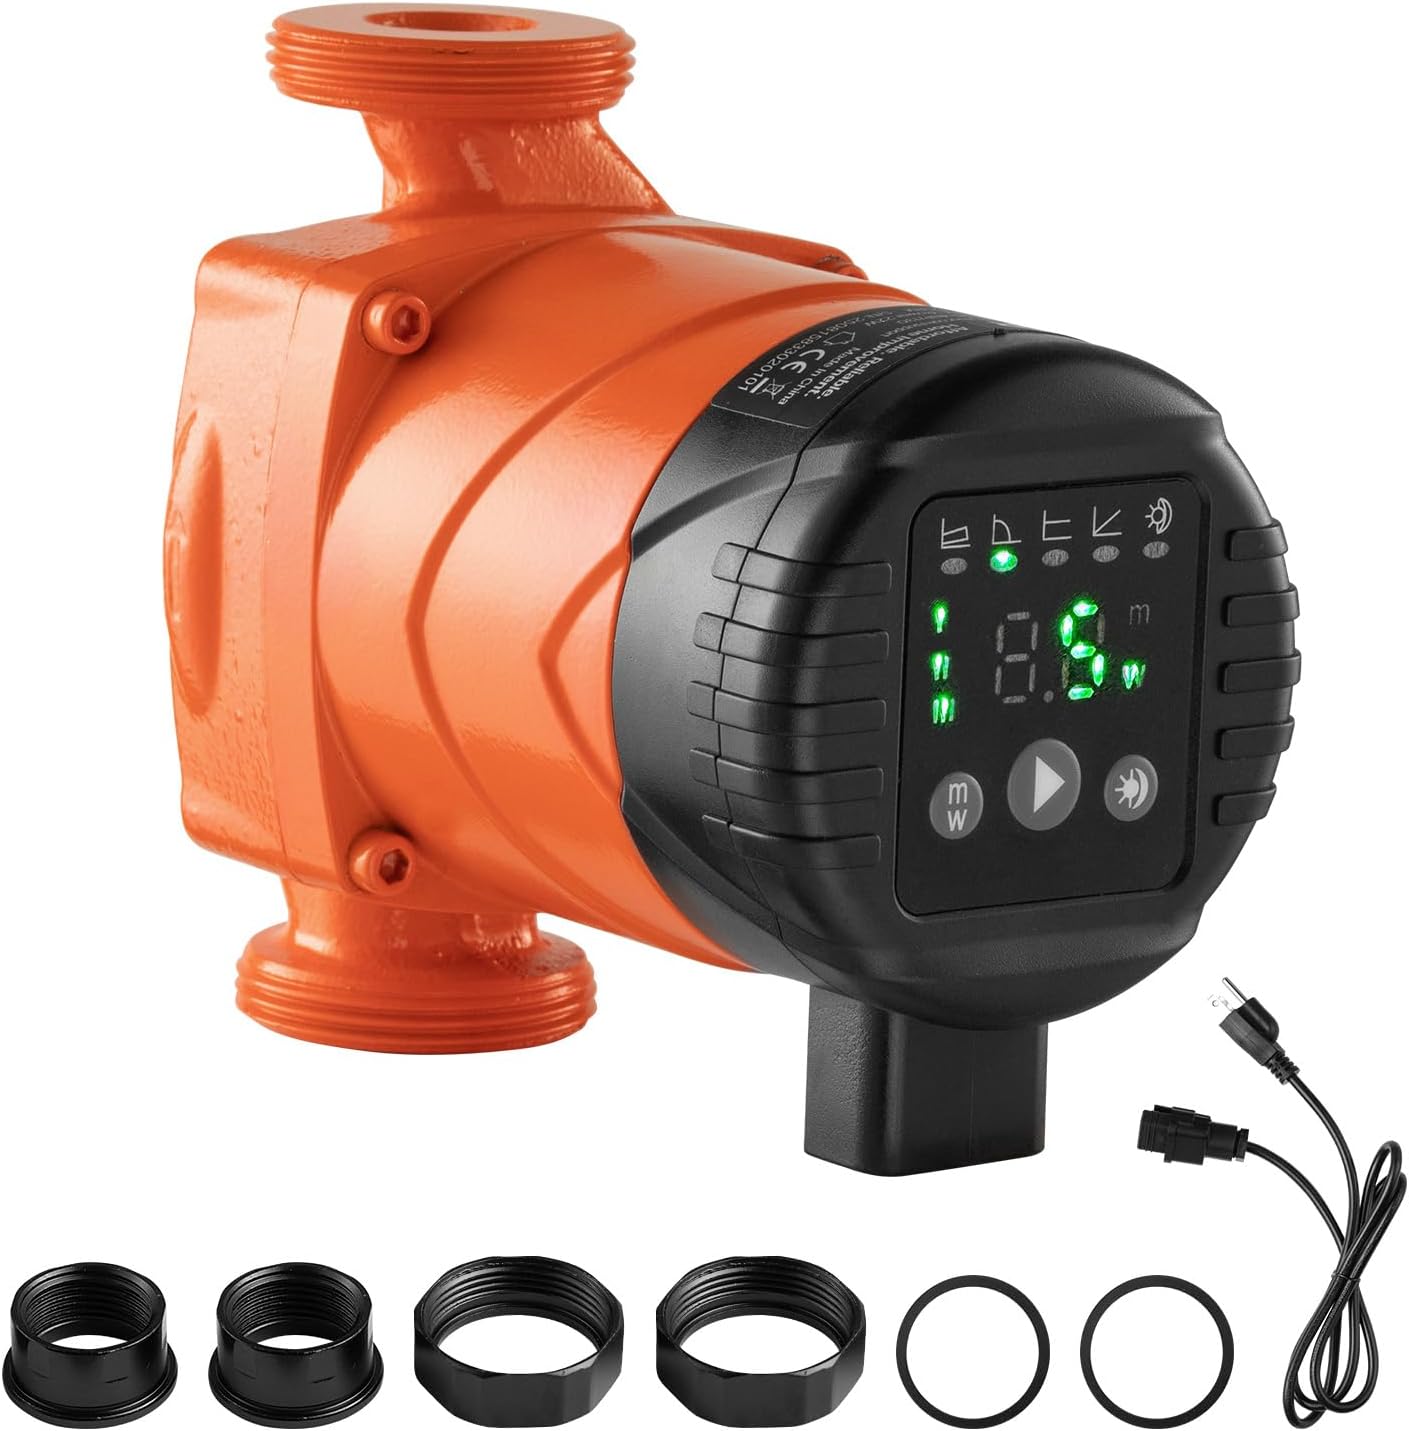
Figure 1: VEVOR LPS25-6BP/130 High-Efficiency Circulation Pump with included accessories. The image displays the orange pump unit, a power cord, and various threaded connections and sealing rings.
- High-Quality Materials: Constructed from heavy-duty cast iron, providing high hardness, pressure resistance, and corrosion resistance for long-term durability.
- Energy-Efficient Motor: Equipped with an ECM permanent magnet motor for quiet operation (below 45 dBA) and low power consumption (max 45W, EEI ≤ 0.23).
- Integrated Check Valve: Prevents backflow in the heating system.
- Digital Display: Provides real-time information and allows for mode selection.

Figure 2: Illustration of the pump's smart energy-saving features, including multiple modes, real-time digital display, and an EEI ≤ 0.23 rating. The image shows the pump's control panel with illuminated indicators.
3.2 Included Accessories
The package includes all necessary components for installation:
- 1 x High-Efficiency Circulation Pump
- 1 x Power Cable
- 1 x User Manual (this document)
- 2 x Sealing Rings
- 2 x Threaded Cast Iron Connections (5.12 in / 130 mm)

Figure 3: Detailed view of the pump and its complete accessories, including the power cord, sealing rings, and threaded connections, ready for installation.
4. Setup and Installation
Proper installation is crucial for the pump's performance and longevity. Follow these steps carefully:
- Preparation: Ensure the heating system is drained and depressurized. Turn off the main power supply.
- Mounting Position: The pump must be installed horizontally on the return line of the heating system. Ensure the motor shaft is horizontal. Do not position the pump with the head facing up or down.
- Connections: Use the provided threaded connections and sealing rings. Apply appropriate sealant to ensure leak-free connections.
- Flow Direction: Observe the arrow on the pump body, which indicates the direction of water flow. Install the pump so that the water flows in the correct direction.
- Electrical Connection: Connect the pump to a grounded power outlet (AC 220-240V 50Hz) using the provided power cable. Ensure all electrical connections are secure and insulated.
- System Fill: After installation, slowly refill the heating system, bleeding air from the system and the pump until all air is expelled.

Figure 4: Visual guide for proper pump installation. The diagram illustrates the correct horizontal mounting position and highlights incorrect vertical orientations. It also shows the steps for connecting the pump to the piping.
5. Operating Instructions
The VEVOR LPS25-6BP/130 pump features a user-friendly control panel for selecting operating modes.
- Power On: Once installed and the system is filled, connect the pump to the power supply. The digital display will illuminate.
- Mode Selection: Use the 'M/W' button to cycle through various operating modes. These modes may include constant pressure, proportional pressure, and fixed speed settings.
- AUTO Adjustment Mode: The pump features an automatic adjustment mode that optimizes performance based on system requirements, ensuring energy efficiency.
- Night Mode: An automatic night mode function may be available to further reduce energy consumption during periods of lower demand.
- Monitoring: The digital display shows real-time operating parameters such as power consumption (W) and head lift (m).
6. Maintenance
Regular maintenance ensures optimal performance and extends the pump's lifespan.
- Annual Inspection: Check for any leaks, unusual noises, or vibrations.
- Cleaning: Keep the pump exterior clean and free from dust and debris.
- System Flushing: Periodically flush the heating system to remove sediment that could affect pump performance.
- Winterization: If the system is shut down for an extended period in freezing conditions, ensure the pump and pipes are completely drained to prevent damage.
7. Troubleshooting
Refer to the following table for common issues and their potential solutions.
| Problem | Possible Cause | Solution |
|---|---|---|
| Pump does not start or runs intermittently. | No power, air in system, motor blockage, faulty wiring. | Check power supply. Bleed air from the system. Inspect for blockages. Consult a qualified electrician. |
| Reduced flow rate or pressure. | Air in system, partial blockage, incorrect operating mode, worn impeller. | Bleed air. Check for debris in pipes or pump. Select appropriate operating mode. Contact service for inspection. |
| Excessive noise or vibration. | Air in system, improper installation, foreign object in pump, worn bearings. | Bleed air. Verify horizontal installation. Check for obstructions. Contact service. |
| Leakage from connections. | Loose connections, damaged sealing rings, improper sealant. | Tighten connections. Replace sealing rings. Reapply sealant correctly. |
If problems persist after attempting these solutions, please contact VEVOR customer support.
8. Specifications
Detailed technical specifications for the VEVOR LPS25-6BP/130 Circulation Pump.
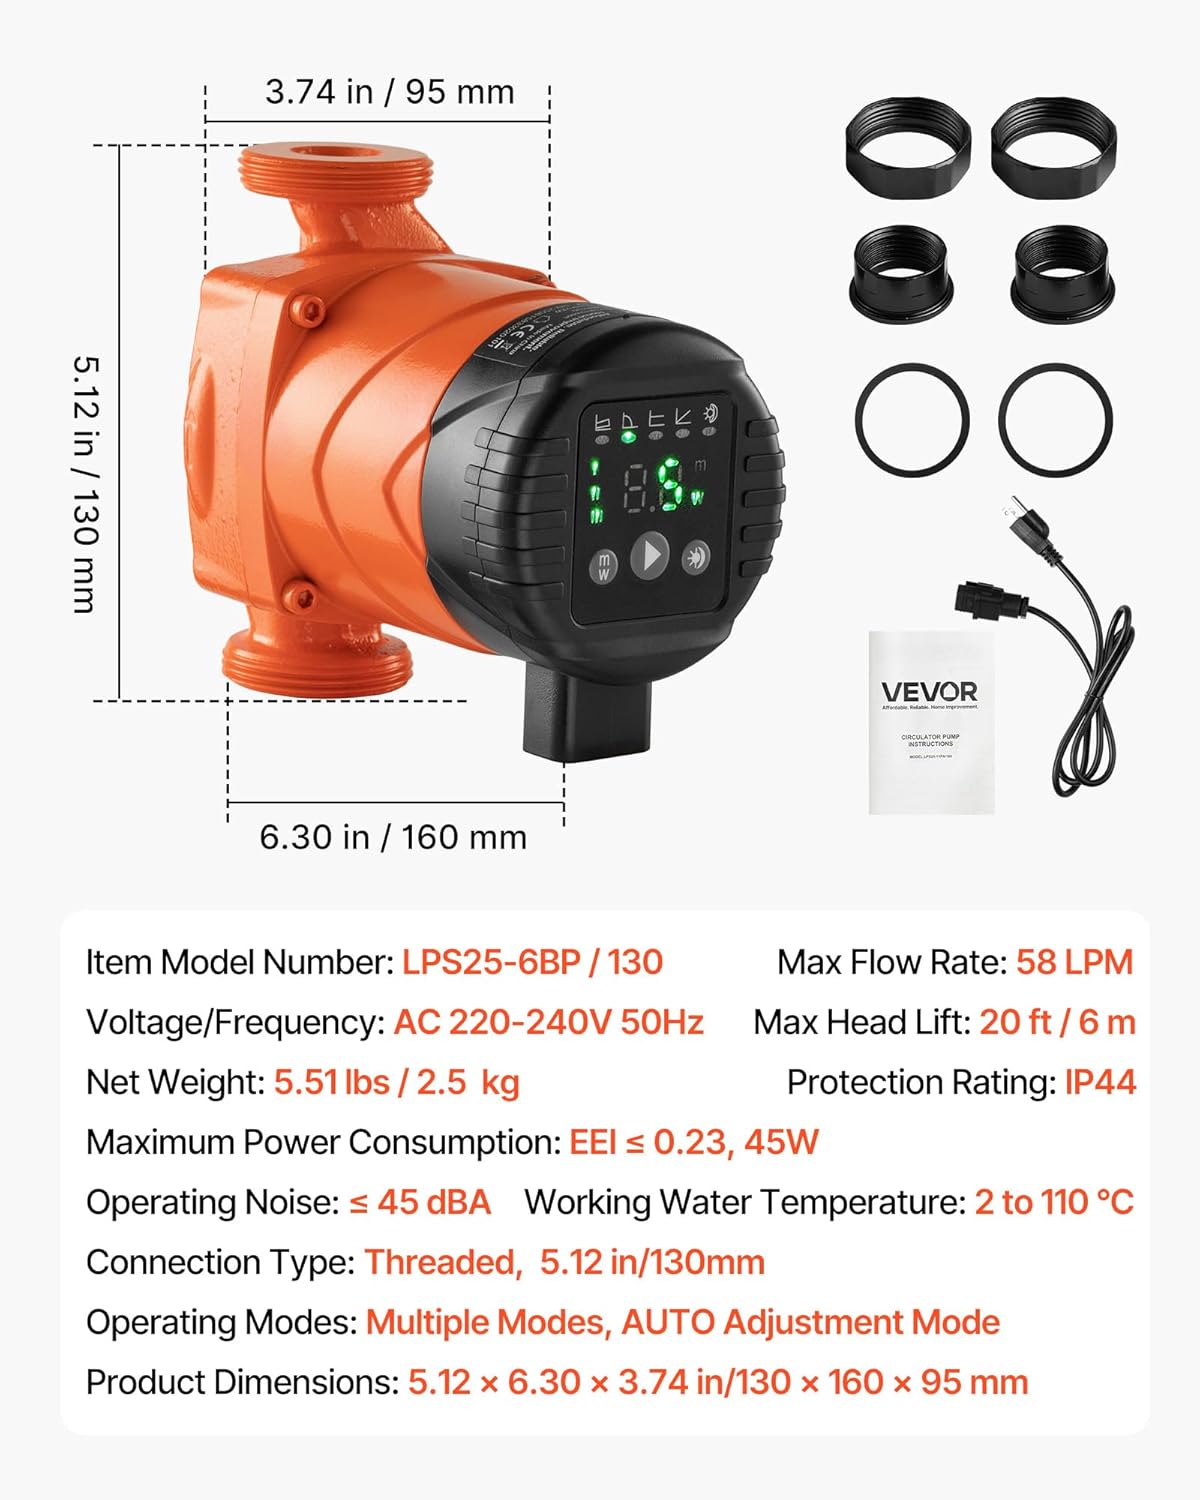
Figure 5: Overview of the pump's dimensions and key technical specifications, including flow rate, head lift, power consumption, and operating temperature range.
| Parameter | Value |
|---|---|
| Model Number | LPS25-6BP/130 |
| Voltage/Frequency | AC 220-240V 50Hz |
| Max Flow Rate | 58 L/min |
| Max Head Lift | 6 m (20 ft) |
| Max Power Consumption | 45 W (EEI ≤ 0.23) |
| Operating Noise | ≤ 45 dBA |
| Working Water Temperature | 2 °C to 110 °C |
| Protection Rating | IP44 |
| Connection Type | Threaded, 5.12 in / 130 mm |
| Product Dimensions (L x W x H) | 160 x 95 x 130 mm (6.30 x 3.74 x 5.12 in) |
| Net Weight | 2.5 kg (5.51 lbs) |
9. Warranty and Support
For warranty information, please refer to the terms and conditions provided at the time of purchase or visit the official VEVOR website. If you encounter any issues or require technical assistance, please contact VEVOR customer support through their official channels. When contacting support, please have your product model number (LPS25-6BP/130) and purchase details readily available.
You can find more information and support resources on the VEVOR Brand Store.