1. Introduction
Thank you for choosing the NEEWER Basics TP14B Travel Tripod Monopod. This versatile and compact tripod is designed for photographers and videographers seeking a portable and stable support solution for cameras and smartphones. It features a 360° ball head, adjustable height, and the ability to convert into a monopod, making it ideal for various shooting scenarios.

Figure 1: NEEWER Basics TP14B Travel Tripod Monopod (folded)
Video 1: Overview of NEEWER Basics 72" / 182 cm Travel Tripod Monopod features and quick setup.
2. What's in the Box
- 1 x NEEWER Basics TP14B Travel Tripod Monopod
- 1 x Phone Holder
- 1 x L-Shaped Hex Key
- 1 x Carrying Bag

Figure 2: Package Contents
3. Product Overview
Familiarize yourself with the main components of your NEEWER Basics TP14B tripod.

Figure 3: Tripod Components
4. Setup
4.1 Unfolding the Tripod
- Remove the tripod from its carrying bag.
- Gently spread the tripod legs outwards until they lock into one of the preset angle positions.
- Ensure all leg locks are securely fastened.
4.2 Adjusting Height
The tripod offers adjustable height from 19 inches (48 cm) to 72 inches (182 cm).
- To extend the legs, open the flip locks on each leg section. Extend the legs to the desired height and close the flip locks securely.
- To extend the center column, loosen the center column locking knob, pull the center column upwards, and then tighten the knob to secure it.
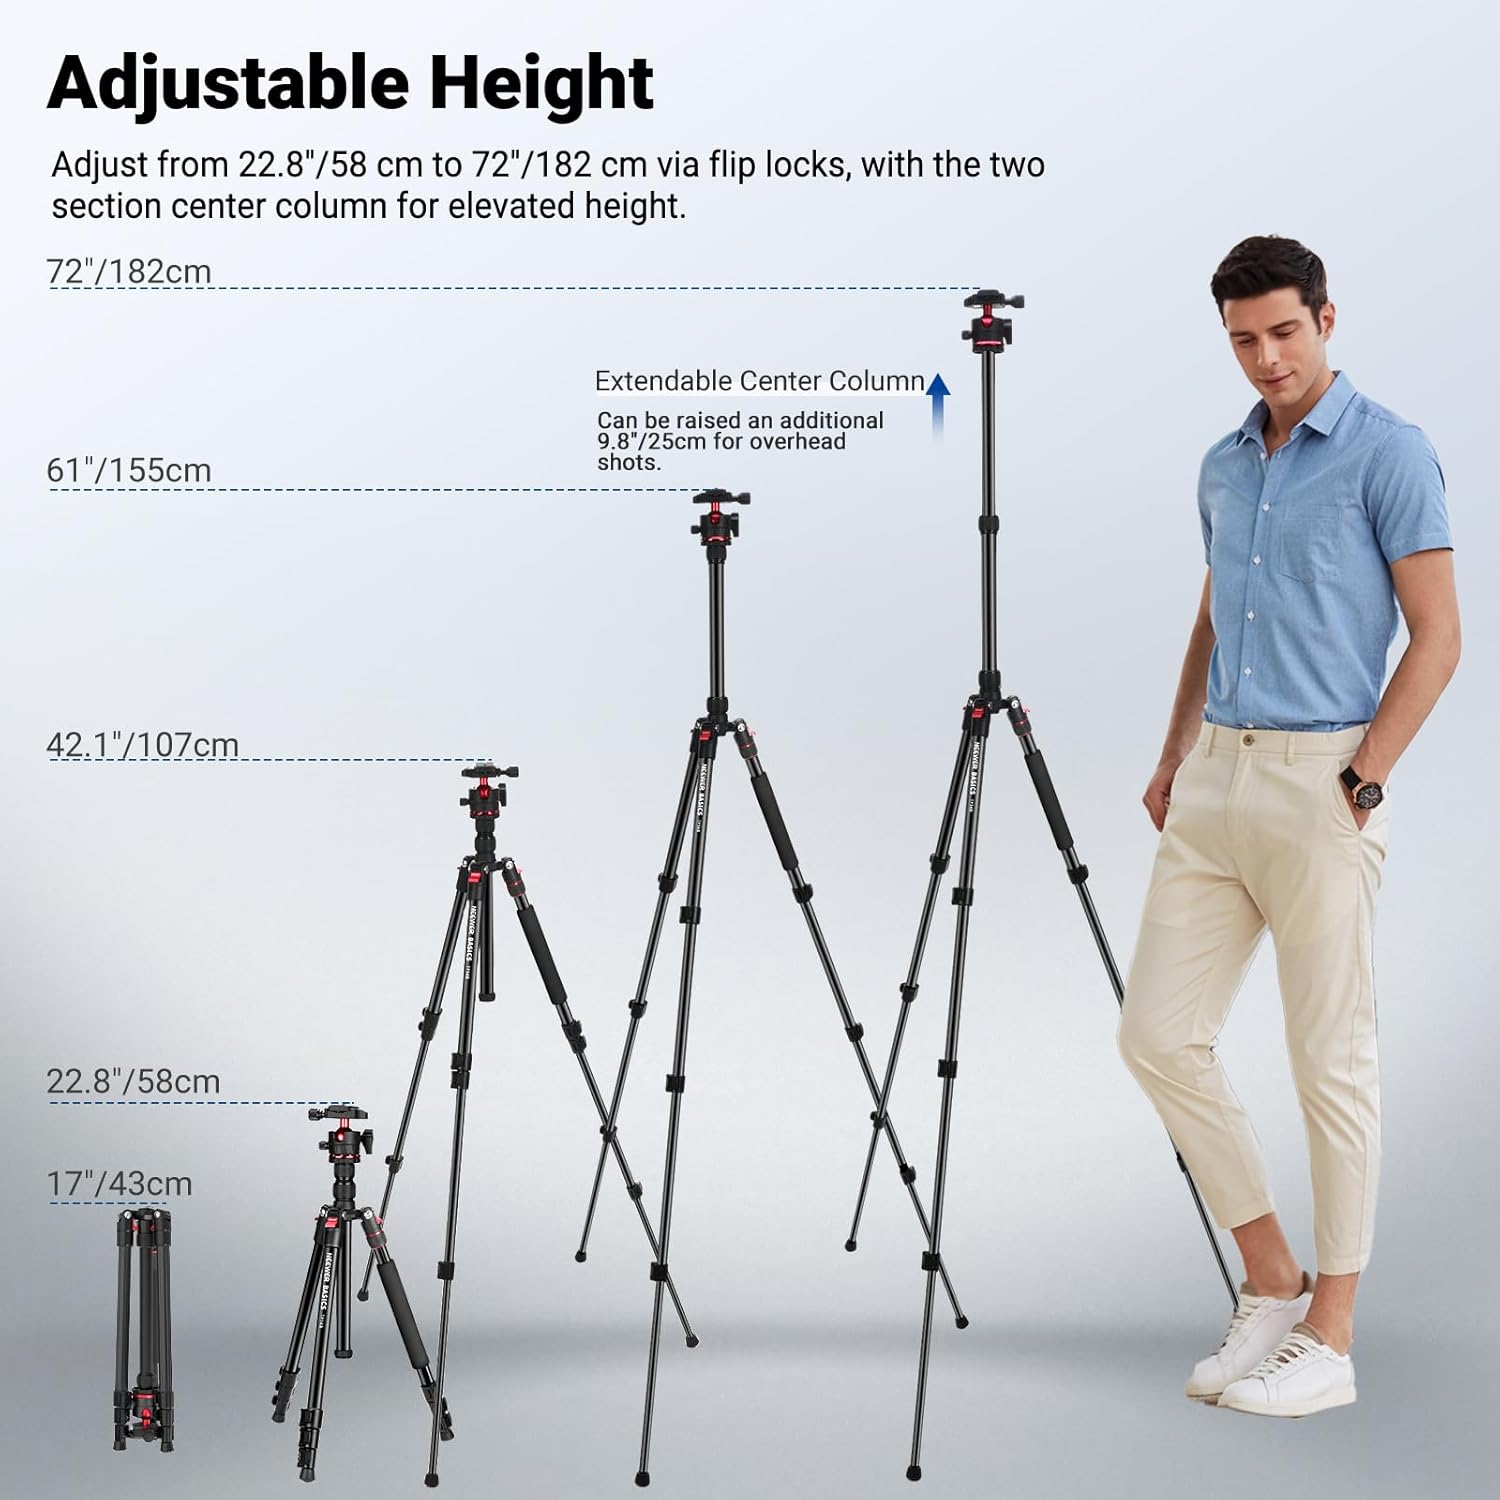
Figure 4: Adjustable Height Options
4.3 Attaching Your Device
- For Cameras: Attach your camera to the 1/4" screw on the Arca-type quick release plate. Slide the plate into the ball head and secure it with the quick release plate locking knob.
- For Smartphones: Attach the included phone holder to the 1/4" screw on the quick release plate. Insert your smartphone into the phone holder, ensuring it is securely gripped.
4.4 Monopod Conversion
One of the tripod legs can be detached and used as a monopod.
- Locate the leg with the foam grip. Unscrew the leg from the tripod body by twisting the red ring at the top of the leg.
- Unscrew the center column with the ball head from the main tripod body.
- Attach the ball head and center column assembly to the detached leg to form a monopod.
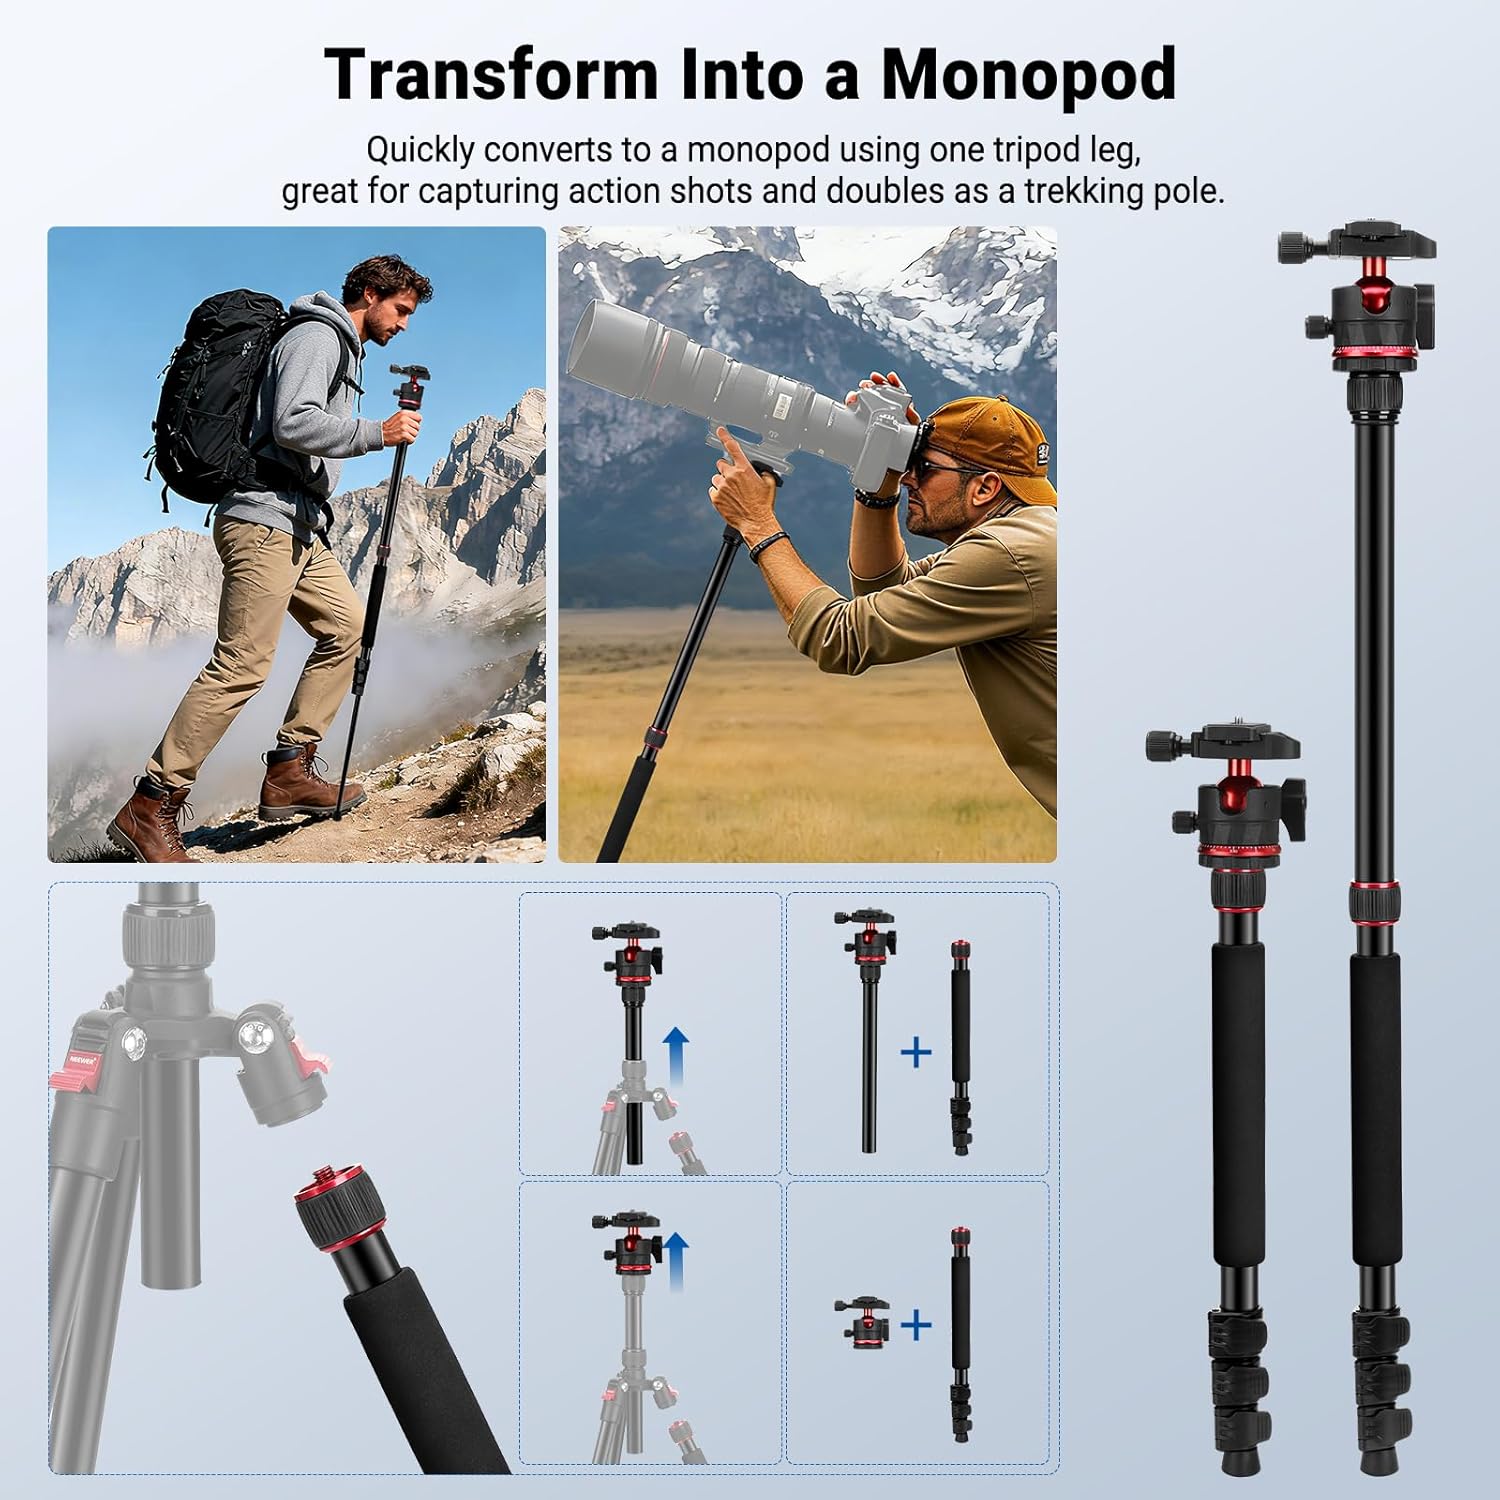
Figure 5: Monopod Conversion
5. Operating Instructions
5.1 360° Ball Head Operation
The Arca-type ball head allows for flexible positioning of your camera.
- Adjusting Angle: Loosen the ball head locking knob to tilt and swivel your camera. Tighten the knob to secure the desired angle.
- Panoramic Rotation: Loosen the base locking knob to rotate the camera 360° horizontally for panoramic shots. The integrated leveling scale helps with precise adjustments.
- Vertical Shooting: Utilize the 90° tilt notch on the ball head for quick transitions to vertical shooting.

Figure 6: 360° Ball Head Features
5.2 Leg Angle Adjustment
Each leg features an angle adjustment button, allowing you to set the legs at different angles (e.g., 24°, 57°, 86°) for stability on uneven terrain or for specific shooting perspectives.
5.3 Low Angle and Macro Shots
The center column can be inverted for extremely low-angle shots or macro photography. To do this, fully extend and remove the center column, then reinsert it upside down into the tripod body.

Figure 7: Swappable Center Columns for Versatile Shooting
6. Maintenance
- Clean the tripod regularly with a soft, dry cloth.
- Avoid exposing the tripod to extreme temperatures or harsh chemicals.
- Ensure all locking mechanisms are free of dirt and debris for smooth operation.
- Store the tripod in its carrying bag when not in use to protect it from dust and scratches.
7. Troubleshooting
| Problem | Solution |
|---|---|
| Tripod is unstable. | Ensure all leg sections are fully extended and their flip locks are securely closed. Adjust leg angles for better balance on uneven surfaces. |
| Ball head movement is stiff or loose. | Check the ball head locking knob and base locking knob. Loosen to adjust, tighten to secure. Clean any debris if movement is stiff. |
| Monopod conversion difficulty. | Ensure the correct leg (with foam grip) is being detached and the center column is properly unscrewed before reassembly. |
8. Specifications
| Feature | Detail |
|---|---|
| Model | TP14B |
| Item Type | Travel Tripod |
| Compatibility | Camera, Smartphone |
| Application | Photo & Video |
| Main Features | Flexible Center Column |
| Mounting Points | 1/4", Arca type |
| Main Material | Aluminum |
| Load Capacity | 13.2 lbs / 6 kg |
| Maximum Height | 72 Inches / 182 cm |
| Minimum Height | 19 Inches / 48 cm |
| Folded Size | 17 inches / 43 cm |
| Item Weight | 51 Ounces / 1.45 kg |
| Tripod Head Type | Ball Heads |
9. Warranty & Support
This product comes with a 1-Year Manufacturer Warranty.
For technical support, warranty claims, or further inquiries, please visit the official NEEWER website or contact their customer service directly. You can also refer to the NEEWER Store on Amazon for additional resources.


