1. Product Overview
The RAINPOT Saker Full View Car Dashcam System is a 4-channel dash camera designed to provide comprehensive vehicle surveillance. It features a 4K front camera and 1080P rear/side cameras, offering a 360-degree view around your vehicle. Key features include advanced night vision, Wide Dynamic Range (WDR) processing, G-Sensor for impact detection, 24-hour parking surveillance, loop recording, and built-in GPS for tracking location and speed data.
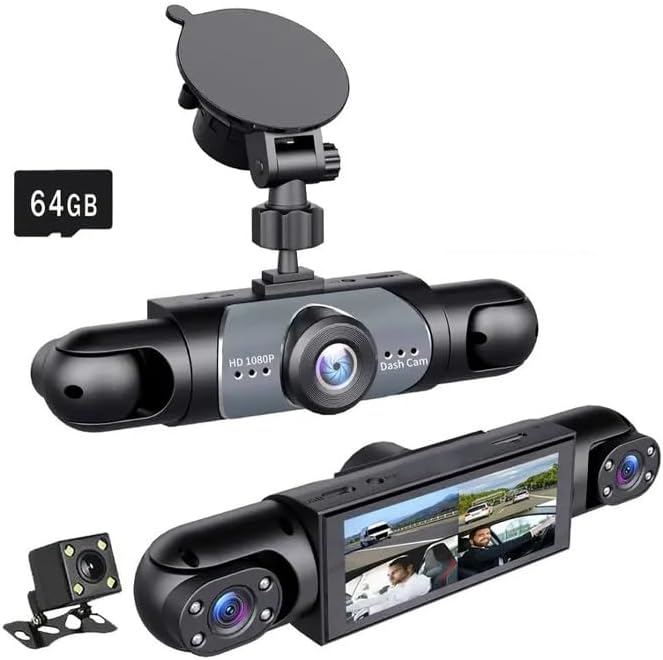
Image 1.1: The main RAINPOT Saker Full View Car Dashcam System unit.
2. Package Contents
Please verify that all items are present in the package:
- Saker Full View Car Dashcam Main Unit
- Rear Camera
- 64GB High-Speed SD Card (pre-installed)
- Car Power Adapter
- User Manual (this document)
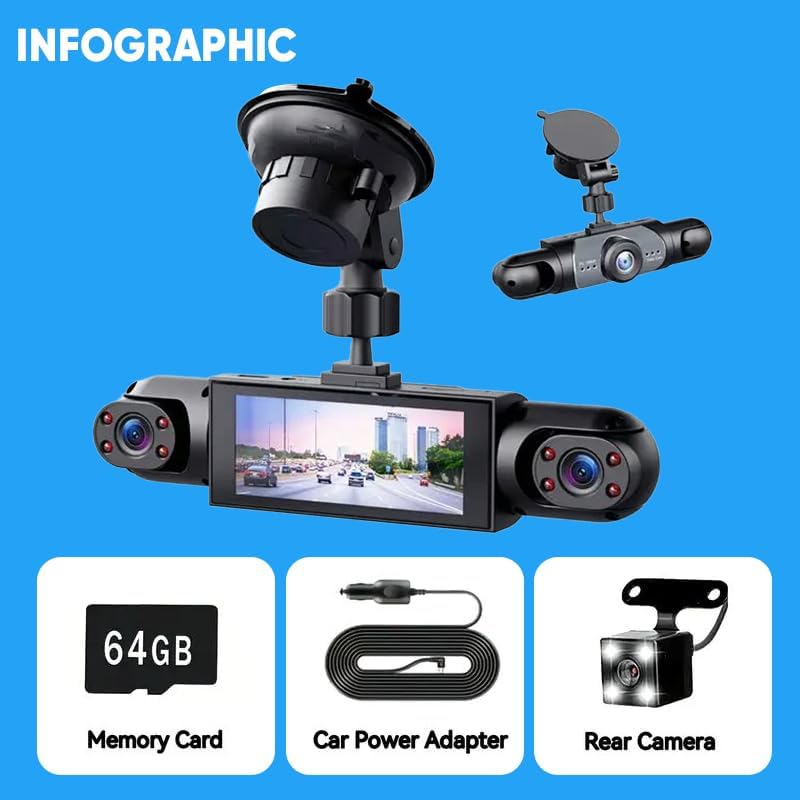
Image 2.1: Included components: Dashcam main unit, 64GB Memory Card, Car Power Adapter, and Rear Camera.
3. Setup Instructions
3.1 Mounting the Dashcam
- Clean the desired mounting area on your dashboard or windshield to ensure a secure adhesion.
- Attach the suction cup mount to the main dashcam unit.
- Press the suction cup firmly against the cleaned surface and engage the locking mechanism to secure the dashcam. Adjust the angle for optimal front view.
3.2 Connecting Cameras
The system includes a front camera (integrated), a rear camera, and two side cameras (integrated into the main unit).
- Rear Camera: Connect the rear camera cable to the designated port on the main dashcam unit. Route the cable discreetly to the rear of your vehicle and mount the camera in a position that provides a clear view of the rear.
- Side Cameras: The left and right cameras are integrated into the main dashcam unit, providing side views.
3.3 Power Connection
- Insert the car power adapter into your vehicle's 12V power outlet (cigarette lighter socket).
- Connect the other end of the power adapter cable to the main dashcam unit.
- The dashcam will typically power on automatically when the vehicle's ignition is turned on.
3.4 Inserting the SD Card
A 64GB high-speed SD card is pre-installed. If you need to replace or re-insert it:
- Ensure the dashcam is powered off.
- Locate the SD card slot on the dashcam unit.
- Insert the SD card with the contacts facing the correct direction until it clicks into place.
- Upon first use or after replacing the card, it is recommended to format the SD card via the dashcam's settings menu to ensure optimal performance and compatibility.
4. Operating Instructions
4.1 Power On/Off
- Automatic: The dashcam powers on and begins recording automatically when connected to power and the vehicle's ignition is on. It powers off automatically when the ignition is turned off.
- Manual: Press and hold the power button (if available) to manually turn the unit on or off.
4.2 Recording Modes
- Continuous Loop Recording: The dashcam records continuously in short segments (e.g., 1, 3, or 5 minutes). When the SD card is full, the oldest files are automatically overwritten by new recordings. This ensures uninterrupted recording.

Image 4.1: Loop Recording function ensures continuous recording by overwriting old files.
- G-Sensor (Emergency Recording): The built-in G-Sensor detects sudden impacts or collisions. When triggered, the current recording segment is automatically locked and saved to a protected folder, preventing it from being overwritten by loop recording.
- Parking Surveillance: When the vehicle is parked and the ignition is off, the dashcam can enter parking surveillance mode. Using its high-sensitivity G-sensor, it will automatically activate and record if motion or impact is detected, providing 24/7 protection.

Image 4.2: The 24-hour parking surveillance feature automatically records motion or impact when the vehicle is parked.
4.3 Night Vision and HDR
The dashcam is equipped with advanced night vision technology and Wide Dynamic Range (WDR) processing to ensure clear recordings in low-light conditions and bright environments.

Image 4.3: HDR function improves image clarity in varying light conditions.
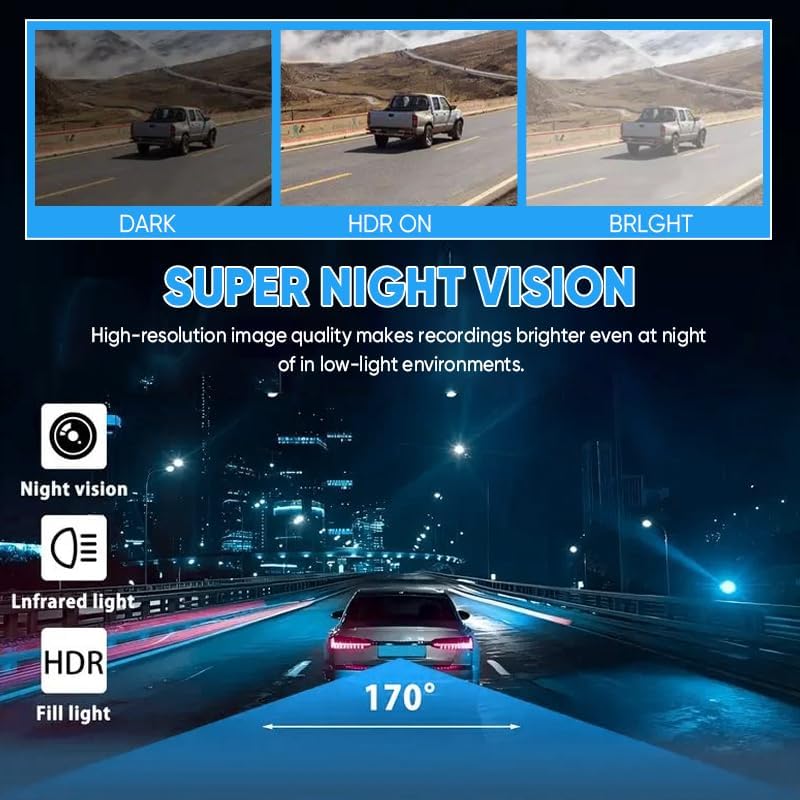
Image 4.4: Super Night Vision enhances recording brightness in low-light environments.
4.4 GPS Tracking
The built-in GPS module tracks your vehicle's journey, including accurate location and speed data. This information is embedded in the video files and can be viewed using compatible playback software on a computer.
4.5 Viewing Footage
- On-Device Playback: Use the dashcam's display and control buttons to navigate through recorded files and play them back directly on the unit.
- Computer Playback: Remove the SD card and insert it into a computer's card reader. Use a compatible media player or the recommended dashcam software (if provided by the manufacturer) to view videos, including GPS data.

Image 4.5: The system allows simultaneous viewing of footage from all four cameras.
4.6 Reversing Camera Function
When the vehicle is shifted into reverse gear, the dashcam automatically switches to a full-screen display of the rear camera view, often with parking guidelines, to assist with safe reversing.
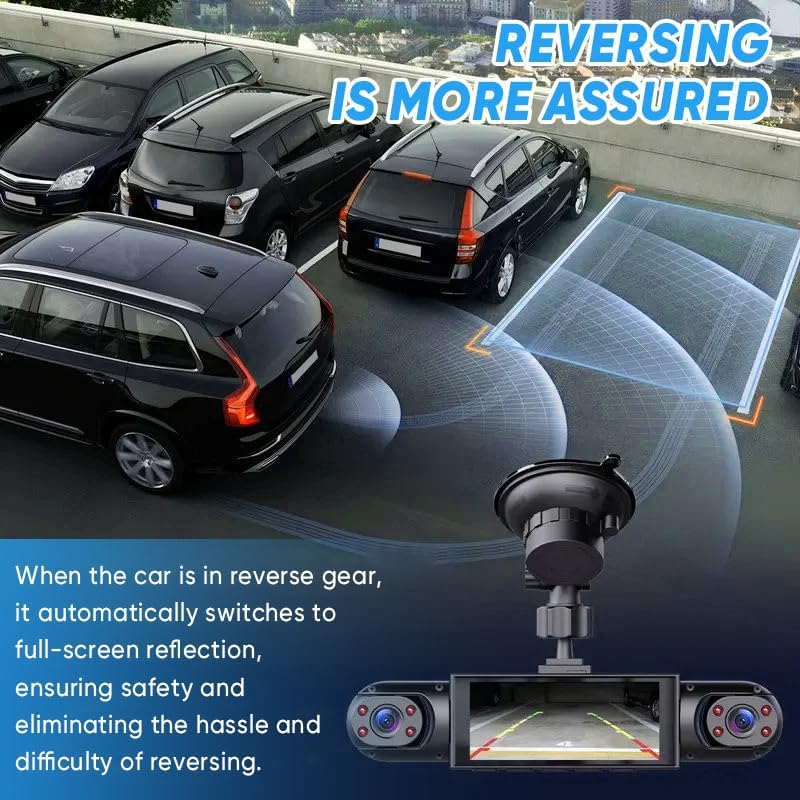
Image 4.6: The dashcam provides an assured reversing experience with automatic full-screen rear view.
5. Maintenance
5.1 SD Card Management
- Formatting: It is recommended to format the SD card regularly (e.g., once a month) through the dashcam's settings menu. This helps maintain card health and prevents data corruption.
- Replacement: SD cards have a limited lifespan. If you experience frequent recording errors or corrupted files, consider replacing the SD card with a new high-speed, reputable brand card.
5.2 Cleaning the Lenses
Periodically clean the camera lenses (front, rear, and side) with a soft, lint-free cloth. Avoid abrasive materials or harsh chemicals that could scratch the lens surface.
6. Troubleshooting
If you encounter issues with your dashcam, please refer to the following common problems and solutions:
| Problem | Possible Cause | Solution |
|---|---|---|
| Dashcam randomly turns off or does not power on. | Loose power connection, faulty power adapter, insufficient power supply. | Ensure the car power adapter is securely plugged into both the dashcam and the vehicle's 12V outlet. Test the power adapter in another vehicle or with another compatible device if possible. Check vehicle's 12V outlet for power. |
| "SD Card Error" or "Please Format SD Card" message. | SD card not inserted correctly, corrupted, or incompatible. | Ensure the SD card is inserted correctly. Format the SD card via the dashcam's settings menu. If the issue persists, try a different high-speed (Class 10 or U3) SD card from a reputable brand. |
| Poor video quality or blurry images. | Dirty lens, protective film still on lens, incorrect resolution settings. | Clean the camera lenses with a soft cloth. Remove any protective film from the lenses. Check the video resolution settings in the dashcam menu and ensure they are set to the highest available (e.g., 4K for front, 1080P for others). |
| GPS not tracking location/speed. | Poor GPS signal, dashcam not positioned correctly. | Ensure the dashcam has a clear view of the sky (not obstructed by metallic tints or other devices). Allow a few minutes for the GPS to acquire a signal after powering on. |
| Loop recording not working / SD card fills up. | Too many locked files, SD card error, or card capacity issue. | Manually delete unnecessary locked files. Format the SD card. Ensure the SD card is genuine and has sufficient capacity (64GB included, supports up to 64GB as per image). |
7. Specifications
| Feature | Detail |
|---|---|
| Brand | RAINPOT |
| Model | Saker Full View Car Dashcam System |
| Vehicle Service Type | Car |
| Connectivity Technology | HDMI |
| Special Feature | 360 Degree View |
| Video Capture Resolution | Front: 4K, Rear/Side: 1080p |
| Mounting Type | Dashboard Mount |
| Color | Black |
| Field Of View | 170 Degrees (Front) |
| Product Dimensions (D x W x H) | 8" x 4.72" x 7.13" |
| Compatible Devices | Car, Truck, Motorcycle |
| Frame Rate | 30 FPS |
| Display Type | LED |
| Batteries Included | No (operates via vehicle power) |
8. Warranty Information
This product comes with a 1-year limited warranty from the date of purchase. This warranty covers manufacturing defects and workmanship under normal use. It does not cover damage caused by misuse, accidents, unauthorized modifications, or improper installation. Please retain your proof of purchase for warranty claims.
9. Customer Support
For further assistance, technical support, or warranty inquiries, please contact the seller or visit the official RAINPOT website. Please have your product model and purchase details ready when contacting support.