Introduction
This manual provides detailed instructions for the installation, operation, and maintenance of your Jufodrca 9.7-inch HD Touch Screen Car Radio. Please read this manual thoroughly before using the product to ensure proper functionality and safety. This unit is designed for Cadillac ATS, XTS, SRX, and CTS models from 2013 to 2018.
Safety Information
- Always ensure the vehicle is parked safely before operating the car radio's advanced features.
- Do not attempt to install or repair the unit if you are not qualified. Seek professional assistance.
- Keep the volume at a safe level to remain aware of traffic and emergency vehicles.
- Avoid prolonged exposure to direct sunlight or extreme temperatures.
- Clean the screen with a soft, dry cloth. Do not use abrasive cleaners.
Package Contents
Verify that all items are present in the package:
- 1x Jufodrca Car Radio
- 1x CANBUS Decoder
- 1x Power Cable
- 1x RCA Cable
- 1x Crowbar (for installation)
- 2x USB Cables
- 1x Backup Camera
- 1x GPS Antenna
- 1x Microphone (MIC)
- 1x Antenna Adapter
Product Overview
The Jufodrca Car Radio is an advanced infotainment system designed to upgrade your Cadillac's interior. It features a 9.7-inch HD touchscreen and runs on Android 13, offering a wide range of functionalities.
- Operating System: Android 13
- Processor: 8-Core
- Memory: 4GB RAM
- Storage: 64GB ROM
- Display: 9.7-inch IPS HD Touchscreen (1024x768 resolution)
- Connectivity: Wireless CarPlay, Android Auto, Bluetooth 5.0, 5G WiFi, USB
- Audio: DSP (Digital Sound Processor), FM/AM/RDS Radio, EQ, HiFi
- Navigation: Built-in GPS (supports online and offline maps)
- Camera Support: 1080P AHD Backup Camera included
- Control: Steering Wheel Control (SWC) compatible

Image: The 9.7-inch IPS HD Touch Screen offers 1024x768 resolution for clear visuals and wide viewing angles.

Image: Overview of the 8-Core processor with 4GB RAM and 64GB ROM for smooth performance.
Setup & Installation
1. Compatibility Check
This car radio is compatible with Cadillac ATS, SRX, XTS, and CTS models manufactured between 2013 and 2018. Before installation, compare your vehicle's original central control panel with the adaptation diagrams provided to ensure compatibility. If they are inconsistent, the unit may not install correctly.

Image: Visual guide for Cadillac ATS/XTS/SRX/CTS (2013-2018) compatibility, showing 'Fit' and 'No Fit' examples.

Image: Comparison of the car's central control before and after installing the Jufodrca car radio.
2. Physical Installation
The car radio features a plug-and-play design. A detailed wiring diagram is included in the package to guide you through the connection process. For specific vehicle disassembly and assembly steps, refer to your vehicle's service manual or consult a professional installer.
- Remove the original radio unit from your dashboard.
- Connect the included CANBUS decoder and power cable according to the wiring diagram.
- Connect all necessary cables, including USB, RCA, GPS antenna, and microphone.
- Install the backup camera (if applicable) and route its cable to the main unit.
- Secure the new car radio unit into the dashboard opening.
- Test all functions before fully reassembling the dashboard.
3. CANBUS Settings
After installation, it is crucial to correctly configure the CANBUS settings to ensure proper communication with your vehicle's systems, including steering wheel controls and factory features. Select the correct CANBUS type based on the size of your original screen in the radio's settings menu.
Operating Instructions
1. Power On/Off and Interface Navigation
The unit powers on automatically with the vehicle ignition. Navigate the interface using the responsive 9.7-inch touchscreen. The main screen displays frequently used applications and vehicle information.
Video: Demonstrates the user interface, app navigation, and various features of the Jufodrca car radio.
2. Bluetooth 5.0 Connectivity
Connect your smartphone via Bluetooth 5.0 for hands-free calling and audio streaming. Access the Bluetooth menu from the main interface, enable Bluetooth on your phone, and pair with the device named "SYU Android".
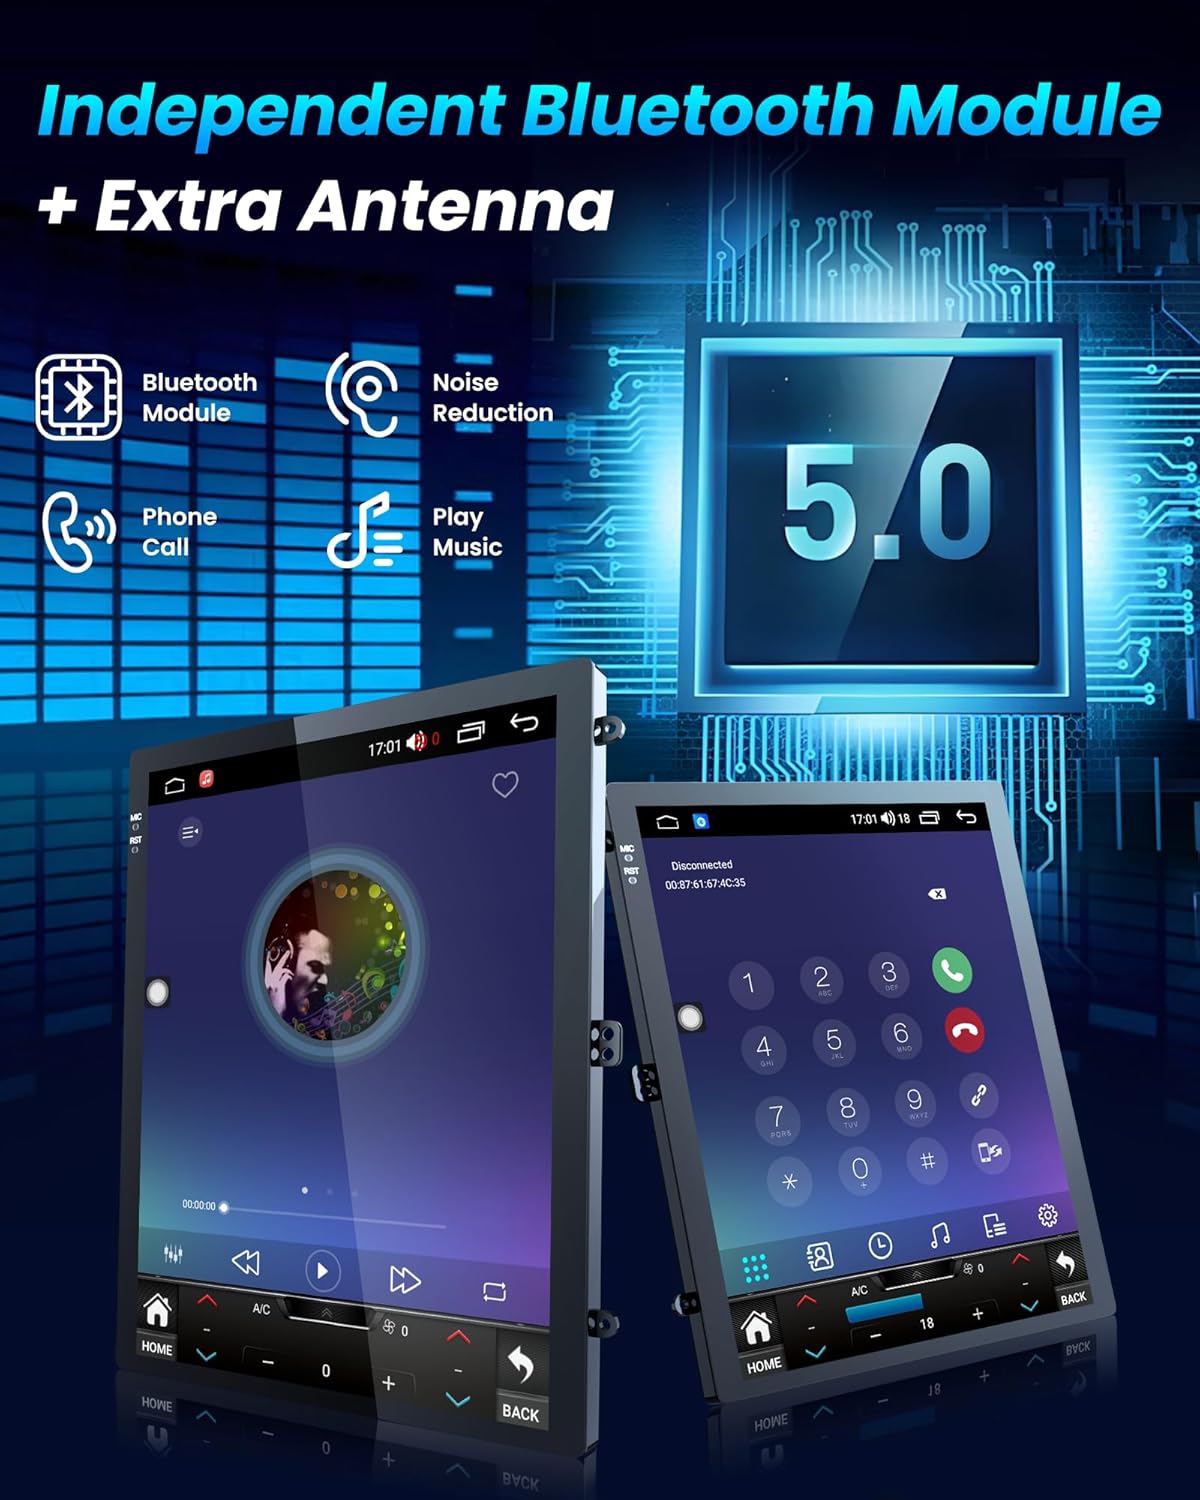
Image: Illustrates the independent Bluetooth module and extra antenna for stable Bluetooth 5.0 connectivity.
3. Wireless CarPlay & Android Auto
Enjoy seamless smartphone integration with both wireless and wired CarPlay and Android Auto. Connect your compatible smartphone to access navigation, music, messages, and calls directly on the touchscreen. Use voice commands via Siri or Google Assistant for safe, hands-free operation.

Image: Displaying the Wireless CarPlay and Android Auto interface with voice control features.
4. GPS Navigation
The unit includes a built-in GPS navigation system. It supports both online and offline maps. Connect to Wi-Fi to use real-time navigation apps like Google Maps or Waze. Ensure the GPS antenna is properly installed for optimal signal reception.
5. FM/AM/RDS Radio
Tune into your favorite radio stations using the built-in FM/AM/RDS tuner. The RDS (Radio Data System) feature provides additional information such as station name and song titles where available.
6. DSP EQ Sound Settings
Customize your audio experience with the Digital Sound Processor (DSP) and 36-band equalizer. Access the EQ settings to adjust sound profiles (e.g., Rock, Pop, Classic), balance, fader, and sound filter options for optimal sound quality.

Image: Illustrates the DSP sound settings and FM/AM/RDS radio interface.
7. 5G WiFi Connection
Connect to a Wi-Fi hotspot (e.g., from your smartphone) to access online features, download apps, and receive OTA updates. The 5G WiFi capability ensures faster internet speeds and a more stable connection.

Image: Highlights the 5G WiFi and Over-The-Air (OTA) update capabilities for improved performance.
8. Split Screen Functionality
The split-screen feature allows you to run two applications simultaneously on the display, such as navigation and music playback, enhancing multitasking capabilities.
9. Steering Wheel Control (SWC)
The unit supports your vehicle's existing steering wheel controls. After proper CANBUS configuration, you can adjust volume, switch tracks, and manage calls without taking your hands off the wheel, promoting safer driving.
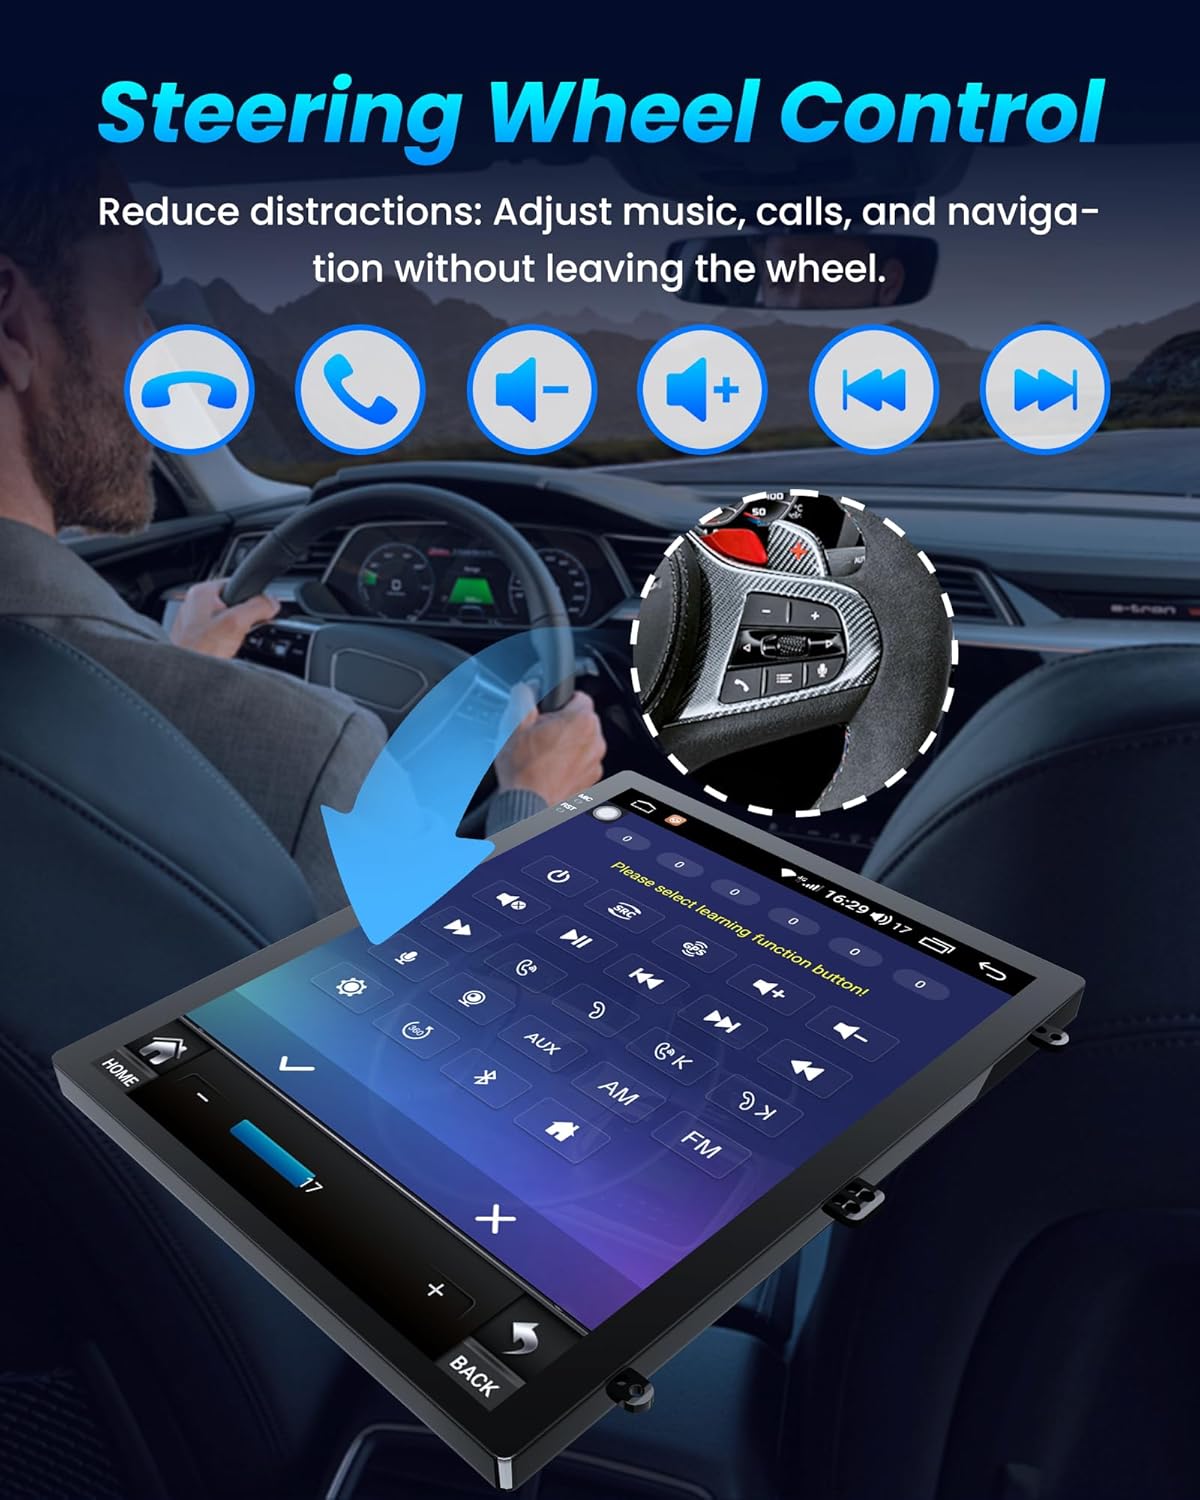
Image: Demonstrates how steering wheel controls can be used to manage the car radio functions.
10. 1080P AHD Backup Camera
The included 1080P AHD backup camera automatically activates when you shift into reverse, providing a clear and wide rear view on the 9.7-inch screen. This assists in safer parking and maneuvering.

Image: Illustrates the 1080P backup camera view and automatic obstacle warning feature.
Maintenance
1. Screen Cleaning
To clean the touchscreen, power off the unit and gently wipe the screen with a soft, lint-free cloth. For stubborn smudges, slightly dampen the cloth with water. Avoid using harsh chemicals, alcohol, or abrasive materials, as these can damage the screen coating.
2. Software Updates (OTA)
The unit supports Over-The-Air (OTA) software updates. Connect the device to a stable Wi-Fi network and check for updates in the system settings. Regular updates ensure optimal performance, security, and access to new features.
Troubleshooting
This section addresses common issues you might encounter. For more complex problems, please contact customer support.
1. Why is there no sound from the radio after installation?
- Ensure the AUX audio cable is properly connected. If your armrest compartment has a USB-A or Type-C port, contact our after-sales service team to obtain the appropriate adapter.
- Using the SEL button (original car function selection button) on the steering wheel: first select Radio Media, then use the scroll up/down buttons to locate AUX input/USB, enable AUX input/USB.
2. Why the steering wheel control buttons do not work after installation?
- Open the cover above the steering wheel to make sure the steering wheel adapter cable is connected correctly.
- Ensure the CANBUS setting is set correctly in the radio's system settings.
3. How to Listen to the FM/AM?
After installing the new head unit, the original factory CD unit remains in place. If you wish to listen to FM/AM radio, please open the "Car UI" application to access the factory system and listen to the broadcast.
4. After installing the radio, where can I control the factory features?
To access and control your vehicle's original factory functions, please follow these steps:
- Ensure all connections are made correctly according to the wiring diagram.
- Select the correct CANBUS type based on the size of your original screen.
- Connect the radio to a stable Wi-Fi network or mobile hotspot. Then, open the App Store and update the following apps: Canbus-Service, Canbus-List, Canbus, and Canbus-Ctrl. Be sure to pull down the page to refresh it before updating. Once the updates are complete, please reboot the radio.
- Scan the QR code to access the video tutorial: CANBUS Setup Video.
- After installation and update, locate and open the "Car UI" app on the system interface. From there, you will be able to control and adjust factory-related functions.
5. Why are some A/C buttons not working on the radio?
The air conditioning button is a factory feature. For vehicles equipped with the 8-inch factory display, please follow QR, then open the "Car UI" app on the head unit. You can operate the A/C functions that are not responding directly within this application.
6. How do I install and secure the new radio?
When installing the new radio, first remove the brackets from both sides of the back of the factory radio. Then attach these brackets to the back of our radio's dash kit to securely mount the unit.
Specifications
| Feature | Detail |
|---|---|
| Item Weight | 4.94 pounds |
| Package Dimensions | 12.3 x 11 x 6 inches |
| Display Size | 9.7 Inches |
| Display Resolution | 1024x768 |
| Operating System | Android 13 |
| Processor | 8-Core |
| RAM | 4GB |
| ROM | 64GB |
| Connectivity Technology | Bluetooth 5.0, USB, 5G Wi-Fi |
| Special Features | Wireless CarPlay, Android Auto, DSP, RDS, EQ, HiFi, FM, GPS, SWC, Mirror Link, 1080P Rear View Camera |
| Map Type | Worldwide |
| Audio Output Mode | Stereo |
| Mounting Type | Dashboard Mount |
Warranty and Support
Jufodrca products are designed for reliability and performance. For warranty information, please refer to the documentation included with your purchase or visit the official Jufodrca website. Should you encounter any questions or technical issues, our professional customer support team is available to provide prompt and reliable assistance. Please have your model number and purchase details ready when contacting support.
Contact Support: Refer to the contact information provided in your product packaging or on the Jufodrca brand store page.