1. Introduction
This manual provides essential information for the safe and effective operation of your Creality Otter Lite Basic 3D Scanner and Scan Bridge. Please read this manual thoroughly before using the device to ensure proper setup, usage, and maintenance. The Creality Otter Lite Basic is designed for high-precision 3D scanning, suitable for various applications including 3D printing, reverse engineering, and DIY projects.
2. Safety Information
- Eye Safety: Do not look directly into the scanner's light source during operation. The device incorporates eye-safe algorithms, but direct exposure should be avoided.
- Power Supply: Use only the provided power adapter. Ensure the voltage matches the device specifications.
- Environment: Operate the scanner in a stable, dry environment. Avoid extreme temperatures, high humidity, and dusty conditions.
- Handling: Handle the scanner and Scan Bridge with care. Avoid dropping or subjecting them to strong impacts.
- Children: Keep the device out of reach of children.
3. Package Contents
Verify that all items are present in the package:
- Creality Otter Lite Basic 3D Scanner
- Creality Scan Bridge (Battery Handle)
- USB Data Cable
- Power Adapter
- Calibration Board
- Portable Carrying Case
- Quick Start Guide
4. Product Overview
Familiarize yourself with the components of the Creality Scan Bridge:

Figure 4.1: Creality Scan Bridge Components
This image displays the various parts of the Creality Scan Bridge, including the magnetic suction cup for attaching the scanner, USB3.0 and Type-C data interfaces, a DC power supply port, a Scan/mode switch button, and indicator lights for Wi-Fi and battery status, along with the power switch.
- Magnetic Suction Cup: For securely attaching the 3D scanner.
- USB3.0 Interface: For data connection to the scanner.
- DC Power Supply Port: For charging the Scan Bridge.
- Scan/Mode Switch Button: To initiate scanning or change scanning modes.
- Wi-Fi Indicator Light: Indicates Wi-Fi connection status.
- Battery Indicator Light: Shows the current battery level.
- Power Switch: To turn the Scan Bridge on or off.
- Type-C Data Interface: For connecting to a computer or mobile device.
5. Setup
5.1 Hardware Connection
- Attach the Creality Otter Lite Basic 3D Scanner to the magnetic suction cup on the Creality Scan Bridge. Ensure it is securely fastened.
- Connect the scanner to the Scan Bridge using the provided USB data cable.
- If using the Scan Bridge for power, ensure it is charged. Connect the power adapter to the DC power supply port if charging is needed.
5.2 Software Installation
Download and install the Creality Scan software from the official Creality website. The software is compatible with Windows and macOS operating systems. For mobile control, download the Creality Scan app on your smartphone.
5.3 Calibration
Before the first use and periodically thereafter, perform a calibration using the provided calibration board. Follow the on-screen instructions within the Creality Scan software for accurate calibration. This ensures optimal scanning precision.
6. Operating Instructions
6.1 Basic Scanning Process
- Power on the Creality Scan Bridge using the power switch.
- Launch the Creality Scan software on your computer or the Creality Scan app on your smartphone.
- Select the desired scanning mode within the software/app.
- Position the scanner appropriately relative to the object.
- Press the Scan/mode switch button on the Scan Bridge to begin scanning.
- Move the scanner smoothly around the object, maintaining a consistent distance and angle. The software will display a real-time preview of the scan.
- Once the scan is complete, press the Scan/mode switch button again to stop.
- Process the scanned data within the software, which may include stitching multiple scans, optimizing the mesh, and applying color textures.
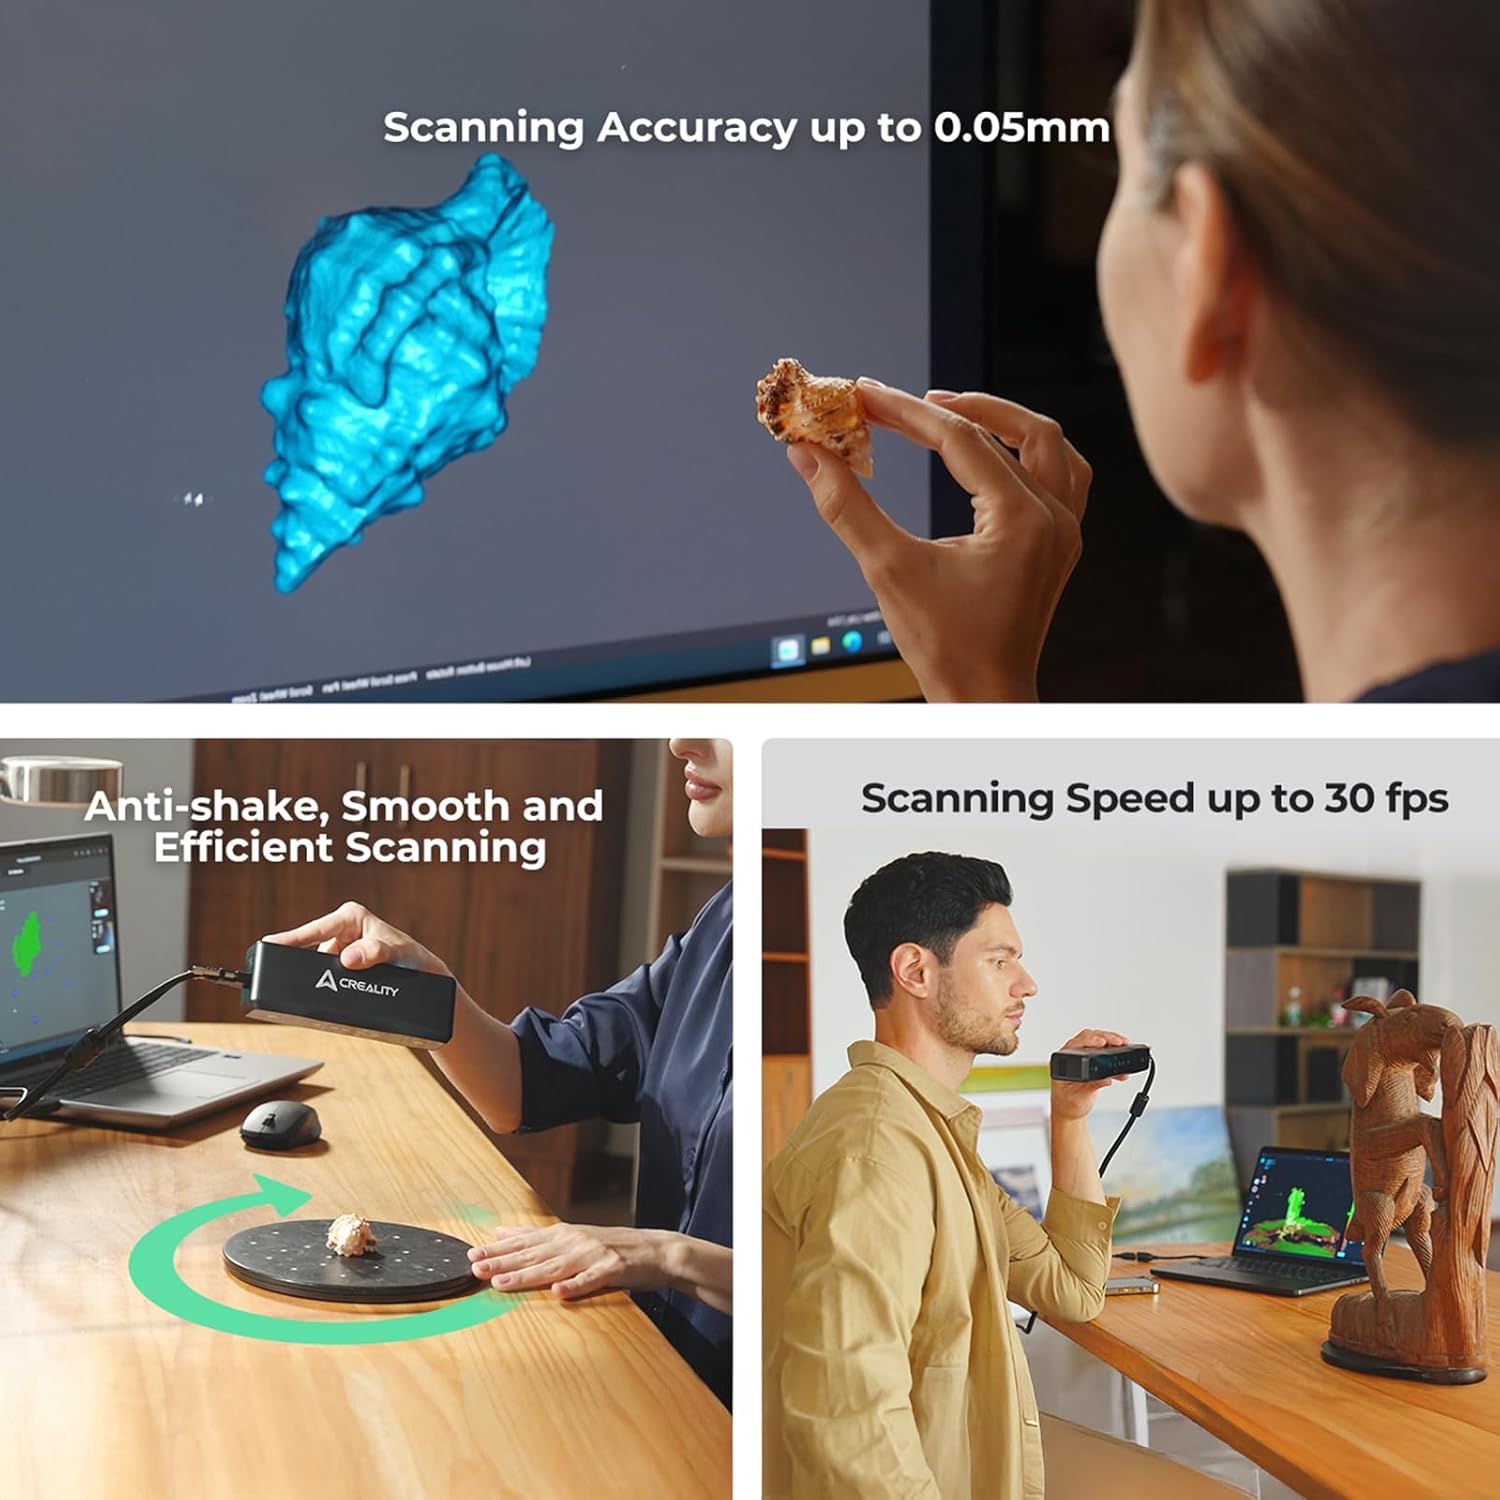
Figure 6.1: Scanning Capabilities
This image illustrates the high scanning accuracy of up to 0.05mm, the smooth and efficient scanning process with anti-shake features, and a scanning speed of up to 30 frames per second, showcasing the scanner's performance.
6.2 Wireless Scanning and Mobile Control
The Creality Otter Lite Basic supports wireless scanning via built-in Wi-Fi and the Lite Bridge battery handle. This allows for flexible scanning without cable restrictions.

Figure 6.2: Easy Wireless Scanning
This image demonstrates the ease of wireless scanning, where a smartphone can be used as a real-time display and control interface for the scanner, simplifying scanning tasks.
Use your smartphone as a real-time display and control interface via the Creality Scan app. The Scan Bridge features WiFi 6 AX6000 for fast data transmission.

Figure 6.3: WiFi 6 AX6000 for Fast Data Transmission
This image highlights the Scan Bridge's integration of WiFi 6 AX6000 technology, ensuring rapid and efficient data transfer during wireless scanning operations.
6.3 Scanning Different Object Types
- Small to Large Objects: The scanner is capable of capturing objects ranging from 20mm³ (e.g., small screws) to 2000mm³ (e.g., automotive parts). The innovative four-lens stereo vision system supports both short-focal and long-focal scanning.
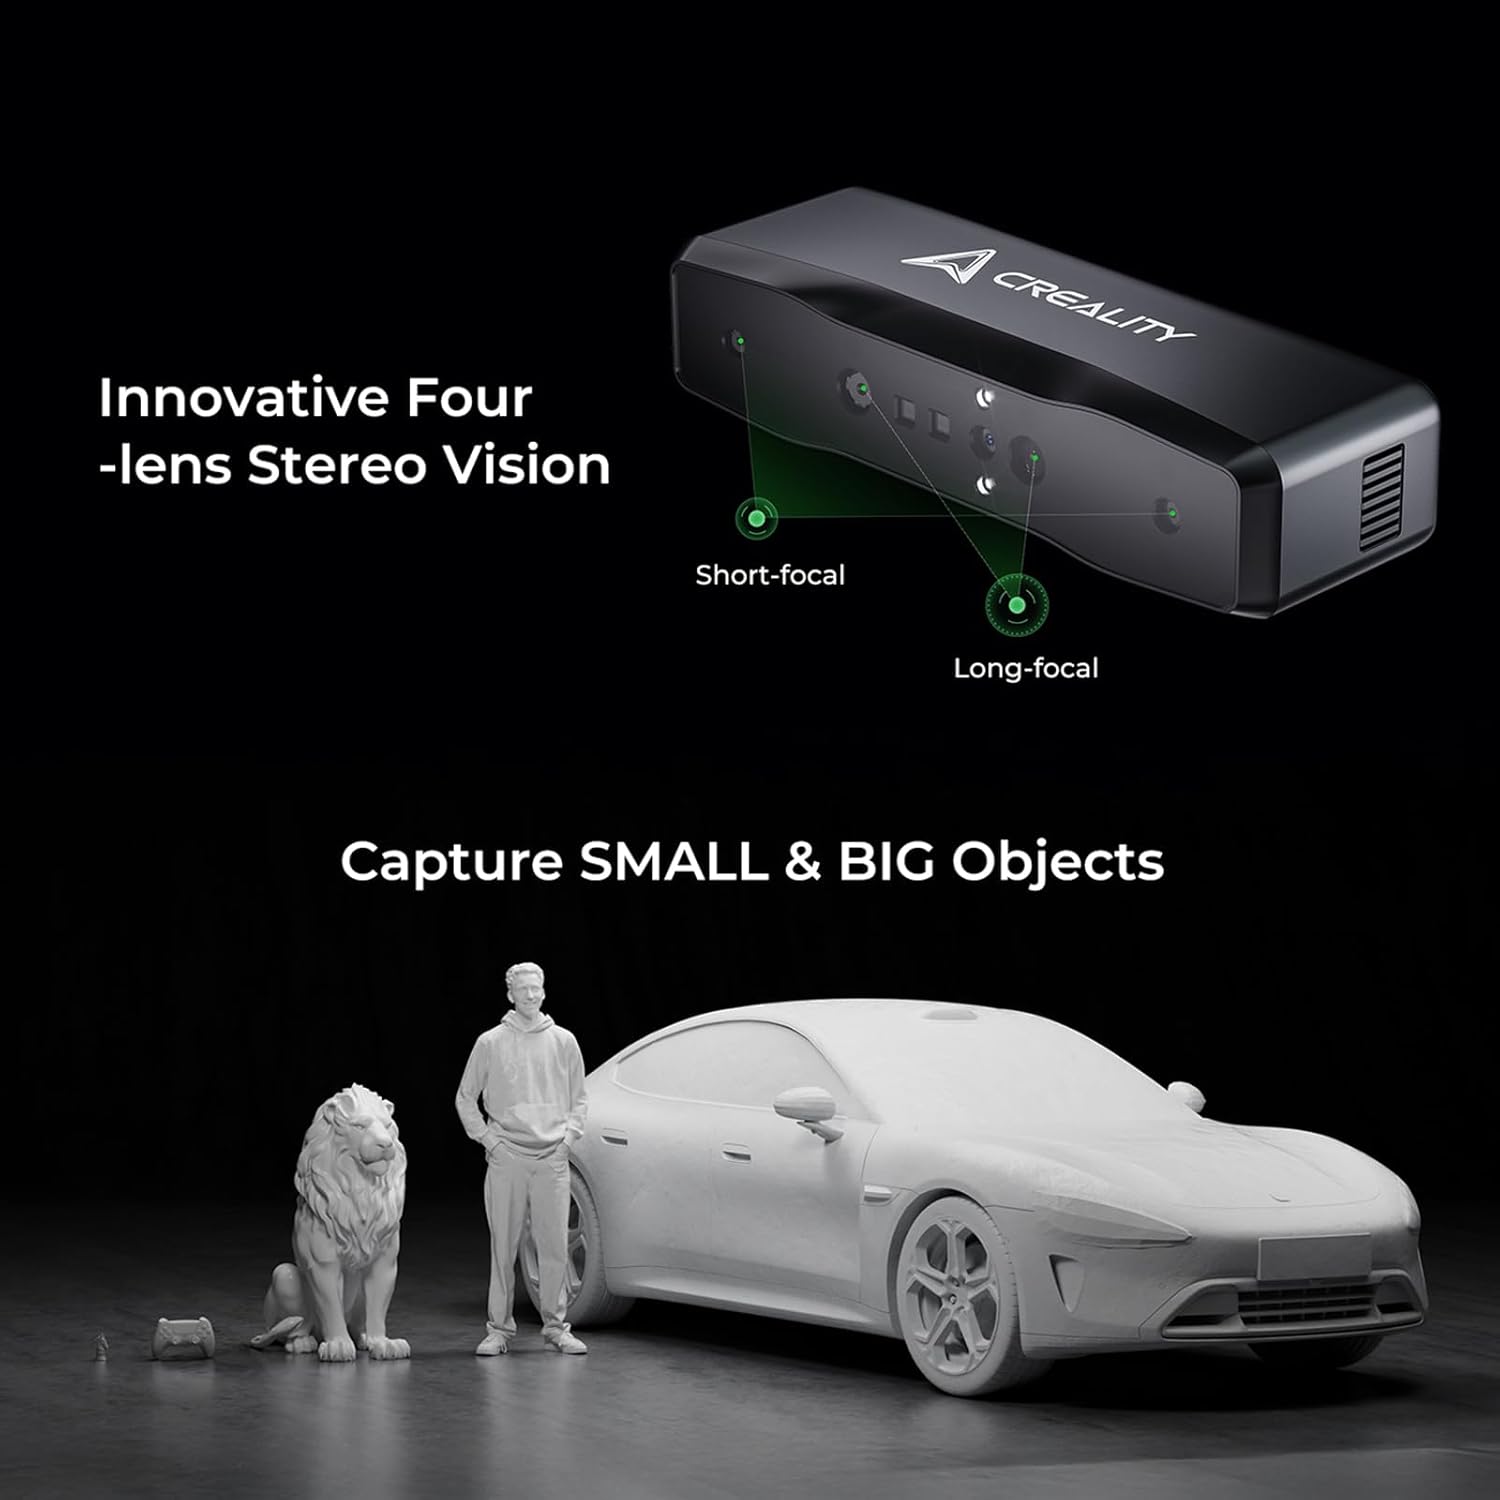
Figure 6.4: Versatile Object Capture
This image illustrates the scanner's innovative four-lens stereo vision, enabling it to capture both small and large objects with precision, from miniature figurines to full-sized car models.
- Black/Metal Objects: The scanner can scan black or metallic objects without requiring anti-glare spray, simplifying the scanning process for challenging surfaces.
- Outdoor Scanning: Equipped with DOE structured light and dual LED fill lights, the scanner performs well in various lighting conditions, including bright outdoor environments (up to 30,000 lux).

Figure 6.5: Advanced Scanning Capabilities
This image demonstrates the scanner's ability to perform outdoor scanning, capture black and metallic objects without pre-treatment, and utilize a unique face and body algorithm with eye safety features for human scanning.
6.4 Full-Color Texture Support
The scanner supports full-color texture capture, providing true-to-life reproduction of scanned objects. It features a million-pixel full-color RGB camera and built-in lights for clear capture.
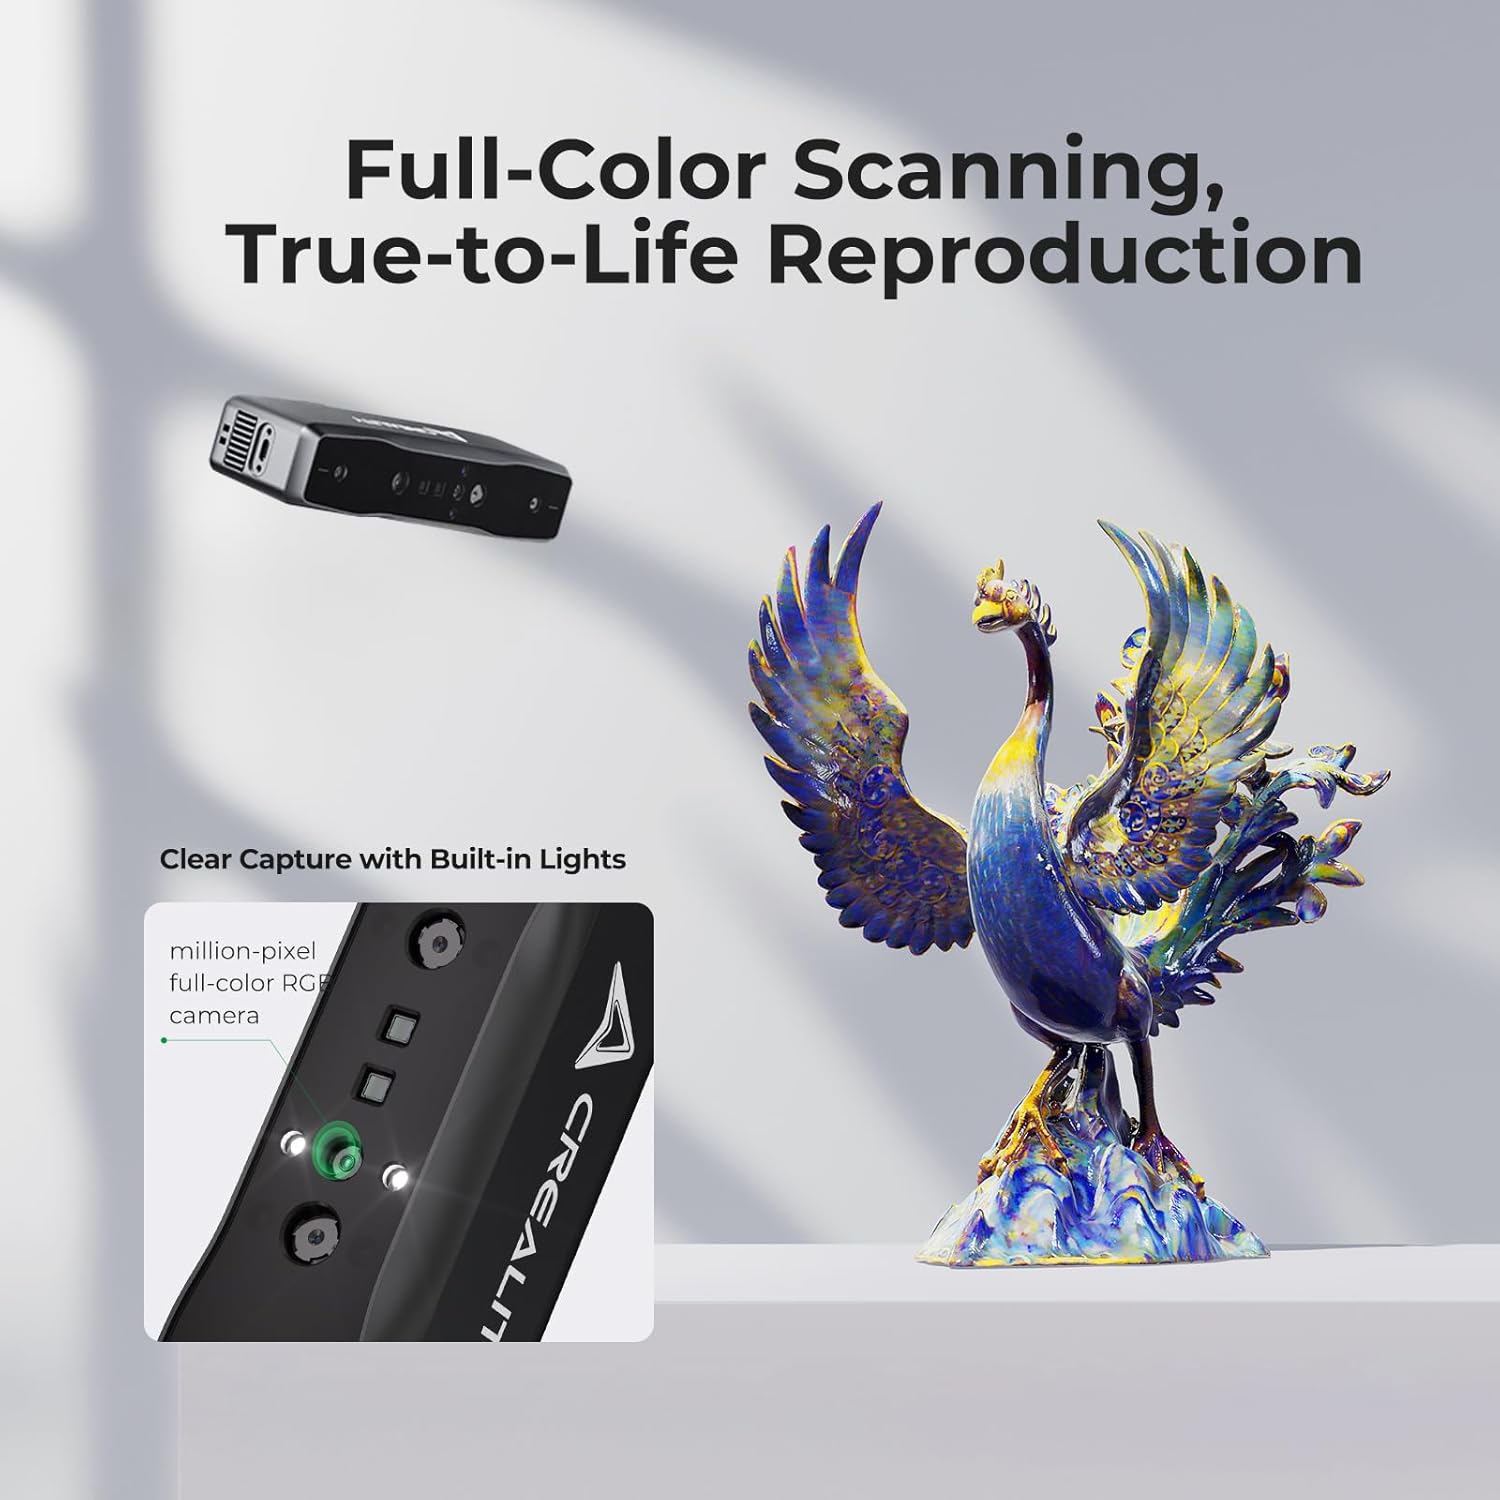
Figure 6.6: Full-Color Scanning and Reproduction
This image highlights the scanner's capability for full-color scanning, producing true-to-life reproductions of objects, aided by its million-pixel RGB camera and integrated lighting for clear capture.
6.5 Data Export
Scanned models can be seamlessly exported in common 3D formats such as OBJ, STL, and PLY, making them compatible with various 3D modeling and printing software.
7. Maintenance
- Cleaning: Use a soft, dry cloth to clean the scanner's lenses and body. Do not use abrasive cleaners or solvents.
- Storage: Store the scanner and Scan Bridge in the provided portable case when not in use to protect them from dust and physical damage.
- Battery Care: For optimal battery life, avoid fully discharging the Scan Bridge battery frequently. Charge it regularly.
8. Troubleshooting
- Scanner Not Detected: Ensure all cables are securely connected. Restart the software and the scanner. Check device drivers on your computer.
- Poor Scan Quality: Recalibrate the scanner. Ensure adequate lighting and stable scanning movement. Check the object's surface for highly reflective or transparent areas that may require matte spray.
- Wi-Fi Connection Issues: Ensure the Scan Bridge is powered on and within range of your mobile device. Check Wi-Fi settings on both devices.
- Software Crashes: Ensure your computer meets the recommended system requirements. Update the Creality Scan software to the latest version.
9. Specifications
| Feature | Specification |
|---|---|
| Scanning Accuracy | Up to 0.05mm |
| Scanning Speed | Up to 30 fps |
| Scanning Range | 20mm³ to 2000mm³ |
| Light Source | Infrared Structured Light (DOE) |
| Fill Lights | Dual LED |
| Outdoor Lighting Tolerance | Up to 30,000 lux |
| Color Texture | Supported (Million-pixel RGB camera) |
| Connectivity | Built-in Wi-Fi, USB3.0, Type-C |
| Wireless Technology | WiFi 6 AX6000 |
| Output Formats | OBJ, STL, PLY |
| Operating System Compatibility | Windows, macOS |
| Special Features | Anti-shake, Dedicated depth-computing chip, Single-frame 3D imaging, Eye safety algorithm |
10. Warranty Information
The Creality Otter Lite Basic 3D Scanner and Scan Bridge come with a standard manufacturer's warranty. Please refer to the warranty card included in your package or visit the official Creality website for detailed terms and conditions regarding warranty coverage and service.
11. Customer Support
For technical assistance, troubleshooting, or any inquiries regarding your Creality Otter Lite Basic 3D Scanner, please contact Creality customer support through their official website or the contact information provided in your product documentation. Online resources, FAQs, and community forums may also be available for additional support.