
1. Introduction
This manual provides detailed instructions for the installation and proper handling of the SRJTEK OLED screen replacement kit for the Google Pixel 6 Pro. This kit is compatible with Google Pixel 6 Pro SIM-free and SoftBank models. It is designed to replace damaged, unresponsive, or malfunctioning screens, restoring your device's display functionality.

Image: Front and back view of the SRJTEK OLED screen replacement assembly for Google Pixel 6 Pro.
2. Product Features
2.1. OLED Technology
This replacement screen utilizes OLED (Organic Light-Emitting Diode) technology. OLED displays offer several advantages:
- Brighter, Clearer Display: OLED uses self-illuminating pixels, providing deep blacks and vibrant colors. Each pixel can turn off individually, resulting in high contrast and energy efficiency compared to traditional LCDs.
- Superior Viewing Angles: OLED panels offer excellent viewing angles, ensuring clear and vivid display from various positions.
- Optimized for Media: With high color accuracy and precise brightness control, OLED is ideal for streaming videos, photo editing, and daily use. It serves as a high-quality, affordable alternative to original AMOLED screens.
2.2. Fingerprint Functionality
This replacement screen supports fingerprint functionality, but it requires the transfer of the original fingerprint flex cable from your old screen. The fingerprint authentication function may not work initially without this transfer.

Image: Close-up view of the display and 3D Touch/digitizer flex cables.
3. Package Contents
The SRJTEK OLED screen replacement kit includes the following items:
- 1x OLED Screen with Black Frame for Google Pixel 6 Pro
- 1x Triangle Pry Tool
- 1x Screwdriver Set
- 1x Flathead Pry Tool
- 1x Double-sided Tape
- 1x Dust Sticker

Image: Contents of the SRJTEK screen replacement kit, including the screen assembly and various tools.
4. Important Safety Information & Precautions
- No Instruction Manual Included: This product does not come with a printed instruction manual. It is highly recommended to search for and watch relevant installation tutorials on YouTube before attempting the replacement.
- Diagnose Before Purchase: Before buying, accurately diagnose whether the malfunction is due to an LCD or touch panel issue.
- Professional Installation Recommended: Installation requires specific skills and tools. If you are an individual user or inexperienced, proceed with extreme caution. Professional repair services are strongly advised to prevent damage.
- Static Electricity Precautions: Be aware of static electricity (ESD) issues. Always use an ESD wrist strap and ensure you are properly grounded to prevent static discharge damage to electronic components.
- Test Upon Receipt: It is crucial to test the product immediately upon receipt before proceeding with full installation. This helps prevent issues that are difficult to address after installation.
- Fragile Component: The LCD is fragile. Handle it with extreme care. Careless handling may result in glass fragments, which can cause injury. Always take appropriate safety measures, such as wearing protective eyewear.
- Installation Damage: We are not responsible for damages caused by improper installation. Products damaged during installation are not eligible for returns or exchanges.
- Tool Compatibility: The provided tools are general-purpose and suitable for most smartphones, but they may not be compatible with all specific models.
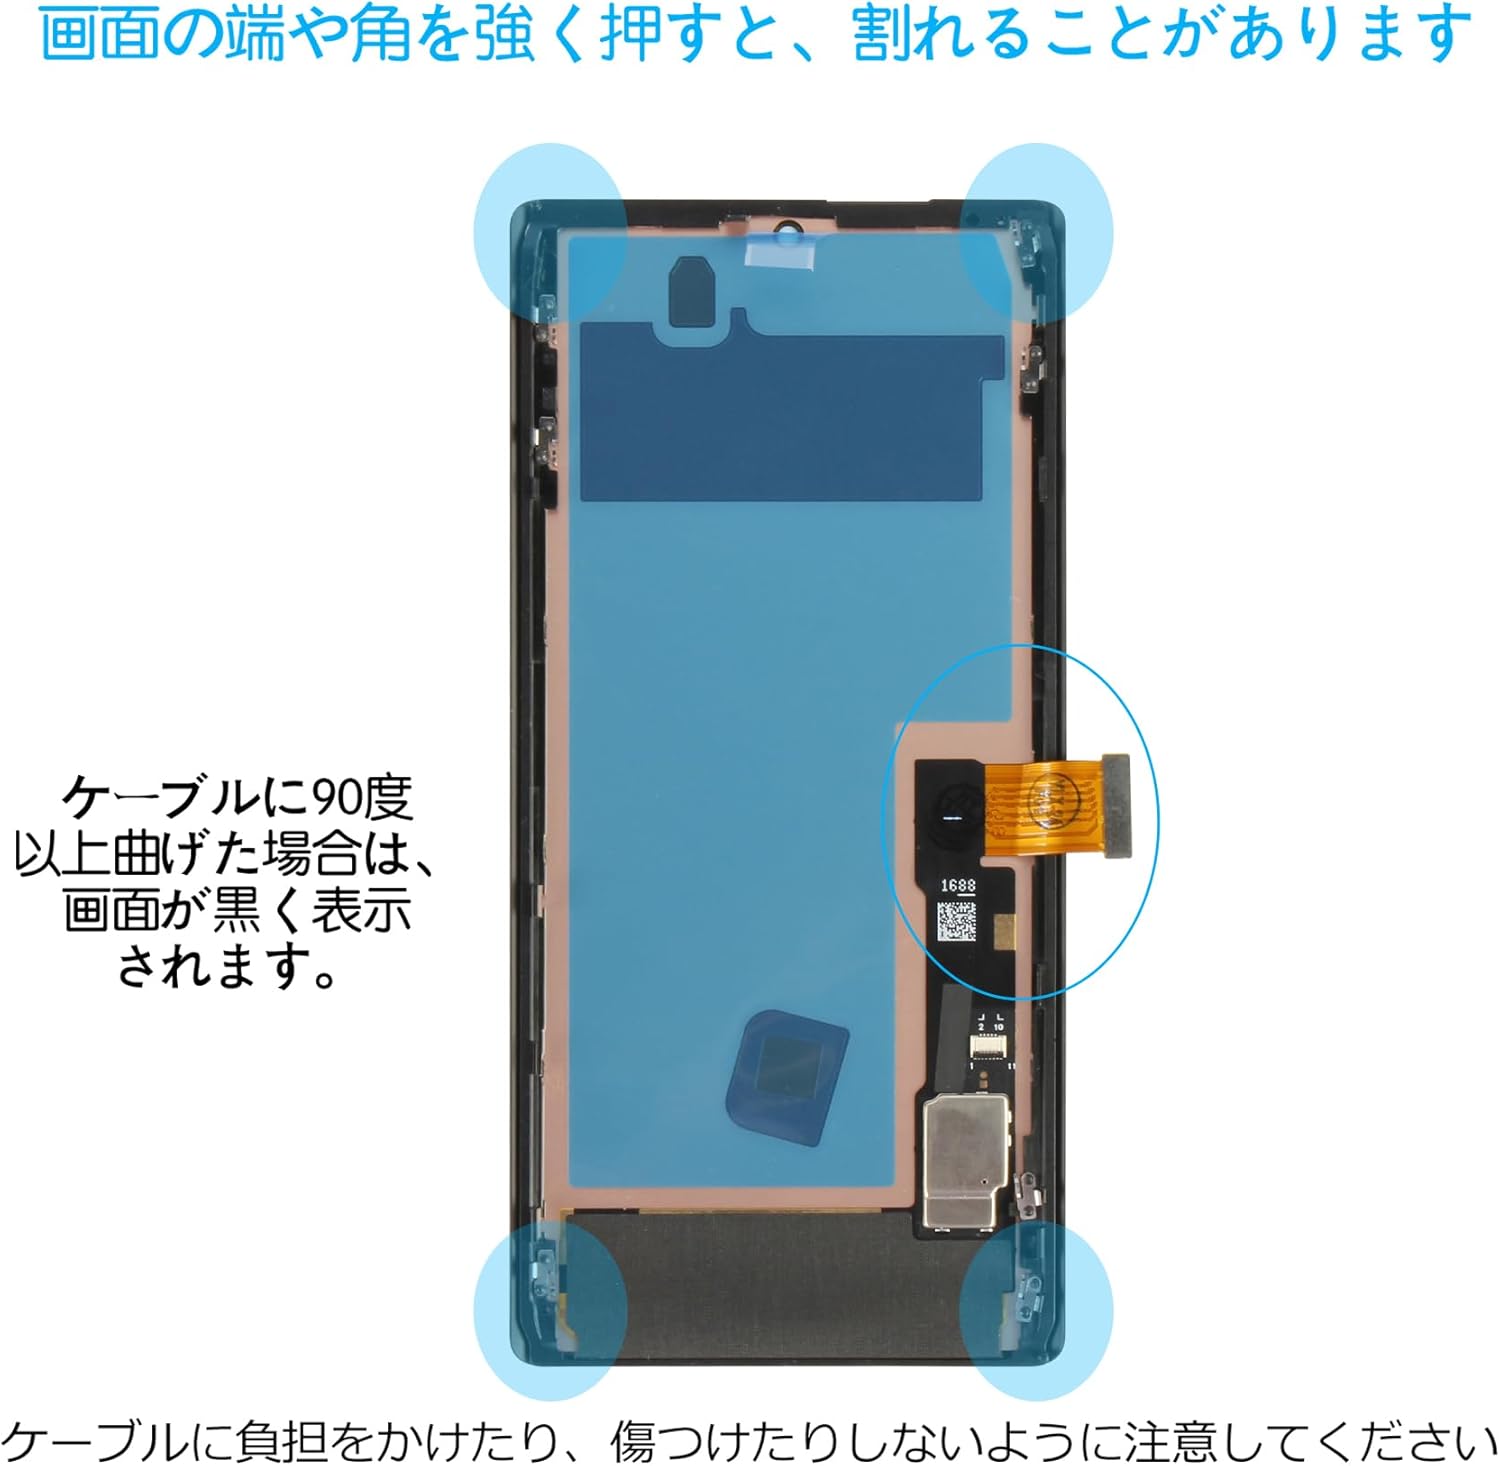
Image: Warning indicating fragile areas (corners) and the risk of screen damage if the cable is bent more than 90 degrees.
5. Setup and Installation Guide
Follow these general steps for installation. Always refer to specific YouTube tutorials for your device model for detailed visual guidance.
- Pre-Installation Test: Before full installation, connect the new screen to your device's motherboard without fully adhering it. Power on the phone and test the display, touch functionality, and any other relevant features. If any abnormalities are observed, contact support immediately with a video or photos. Do not proceed with full installation if issues are present.
- ESD Precautions: Wear an ESD wrist strap throughout the installation process to prevent damage from static electricity.
- Disconnect Power: After removing the old screen, the first critical step is to disconnect the flexible cable clamp between the battery and the device's motherboard. This cuts the power supply to the screen's flex cable.
- Connect New Screen: Carefully connect the flex cable of the new screen to the motherboard.
- Reconnect Battery: After connecting the new screen's flex cable, the final step is to attach the battery's flexible cable clamp. It is crucial not to reverse the order of disconnecting and reconnecting the battery and screen cables.
- Initial Power On: Connect the charging cable and power on the phone to perform a final check that the screen is working correctly.
- Fingerprint Cable Transfer: For fingerprint functionality, you must transfer the fingerprint flex cable from your original screen. Ensure the original cable is functional before transfer. If the original cable is damaged, you may need to replace it and recalibrate the fingerprint function. Refer to YouTube tutorials for this specific procedure.
6. Post-Installation Checks
After completing the installation, perform the following checks to ensure proper operation:
- Display Check: Verify that the screen displays images clearly, without flickering, dead pixels, or color abnormalities.
- Touch Functionality: Test the touch response across the entire screen to ensure it is accurate and responsive.
- Fingerprint Sensor: If the original fingerprint cable was successfully transferred, test the fingerprint sensor to confirm it recognizes your fingerprints.
7. Care for Your New Screen
To prolong the life and maintain the performance of your new OLED screen, follow these care guidelines:
- Gentle Handling: Avoid applying excessive pressure to the screen, especially on the edges and corners, as this can cause damage.
- Protection: Consider using a screen protector and a protective case to shield your device from accidental drops and scratches.
- Cleaning: Clean the screen with a soft, lint-free cloth. Avoid harsh chemicals or abrasive materials.
8. Troubleshooting
8.1. Fingerprint Sensor Not Working
If the fingerprint authentication function does not work after installation:
- Verify Cable Transfer: Ensure that the original fingerprint flex cable was correctly transferred from your old screen and properly connected to the new assembly.
- Check Original Cable Functionality: Confirm that the original fingerprint flex cable was working on your old device. If it was faulty, transferring it will not resolve the issue.
- Recalibration: In some cases, recalibration of the fingerprint function may be necessary after replacing the flex cable. Refer to online resources or professional guidance for this process.
8.2. Display Issues (No Display, Flickering, Dead Pixels)
If you experience display problems:
- Pre-Installation Test: Confirm that you performed the pre-installation test. If issues were present during the test, do not proceed with full installation.
- Check Connections: Ensure all flex cables are securely and correctly connected to the motherboard. Disconnect and reconnect them carefully.
- Battery Disconnection: Verify that the battery was disconnected before connecting the new screen and reconnected after. Incorrect power management during installation can cause issues.
- Contact Support: If problems persist, provide a video or photos of the issue and contact our customer service team for assistance.
9. Specifications
| Brand | SRJTEK |
| Compatible Model | Google Pixel 6 Pro (SIM-free, SoftBank) |
| Screen Size | 6.7 inches |
| Panel Type | OLED |
| Product Dimensions | 10 x 5 x 2 cm; 150 g |

Image: Visual representation of screen specifications including size, resolution, pixel density, and panel type.
10. Warranty and Support
- Exchange Policy: We offer an exchange policy for product damage not caused by user error. All products undergo strict quality checks before shipment.
- Reporting Issues: If you receive a damaged, broken, or missing item, please take photos and contact us within 30 days of receipt.
- Improper Installation: We are not responsible for damage or malfunction due to improper installation. Product use and installation are at your own risk.
- Further Support: For any questions regarding product use or installation, please email our service team for assistance.
11. Frequently Asked Questions (FAQ)
- Q: Does this replacement screen support fingerprint function?
- A: Yes, however, the fingerprint cable needs to be transferred from the original screen. If the original cable is functional, you can restore fingerprint authentication by transferring and reconnecting it. Detailed steps are provided in Section 5. Setup and Installation Guide.
- Q: Is this screen original?
- A: No, this is an aftermarket OLED screen. It offers similar performance at a more affordable price compared to the original AMOLED screen.
- Q: How does the display quality compare to the original screen?
- A: While not original AMOLED, this OLED replacement offers excellent brightness, contrast, and color accuracy, making it a high-quality alternative to more expensive OEM screens.
- Q: Can I install this screen myself?
- A: Yes, however, professional installation is recommended, especially concerning the fingerprint cable transfer. Improper handling may damage the screen or other components. Please refer to Section 4. Important Safety Information & Precautions and Section 5. Setup and Installation Guide.