Introduction
This manual provides detailed instructions for the installation, operation, and maintenance of your WOOCARTY Y2 7" 4-Cam Wired Backup Camera System. This system is designed to enhance safety and visibility for a wide range of vehicles, including commercial fleets, construction equipment, and agricultural machinery.
Key Features:
- AHD 1080P Cameras: Durable, all-metal construction with IP69K waterproofing and 20G impact resistance, suitable for extreme temperatures (-4°F to 158°F).
- 7" HD Monitor: Quad screen display with remote control, voltage spike protection, and one-touch mirror/flip controls.
- IR Night Vision: Enhanced IR LEDs for reliable visibility in low light conditions.
- Intelligent Loop Recording: Continuous recording with a 32GB SD card included, supporting up to 128GB, and instant playback.
- Advanced Parking Features: Activatable parking guidance lines for accurate maneuvering.
What's in the Box
Verify that all components are present before beginning installation:

Image: All components included in the WOOCARTY Y2 7" 4-Cam Wired Backup Camera System package.
- 7" Monitor x1
- Rear View Camera x2
- Side View Camera x2
- 49ft Extension 4pin Cable x2
- 39ft Extension 4pin Cable x2
- Suction Cup Mount x1
- U-shaped Bracket x1
- Remote Control x1
- Installation Tools (screws, Allen wrench, screwdriver)
- 32GB SD Card x1
Setup and Installation
1. Wiring Diagram
Proper wiring is crucial for system functionality. Refer to the diagram below for connection details.

Image: Detailed wiring diagram for the system.
Wiring Options:
- Continuous Monitoring: Connect the Yellow wire to DC 12-24V positive, Red wire to ACC (Accessory), and Black wire to ground. Leave the trigger wire disconnected. This setup provides constant power to the system.
- Automatic Reverse Activation: After making the connections for continuous monitoring, attach the trigger wire to your vehicle's reverse light circuit. This will automatically activate the rear view camera display when shifting into reverse gear.
2. Mounting the Monitor
The 7-inch monitor can be mounted using either the included suction cup mount or the U-shaped bracket.
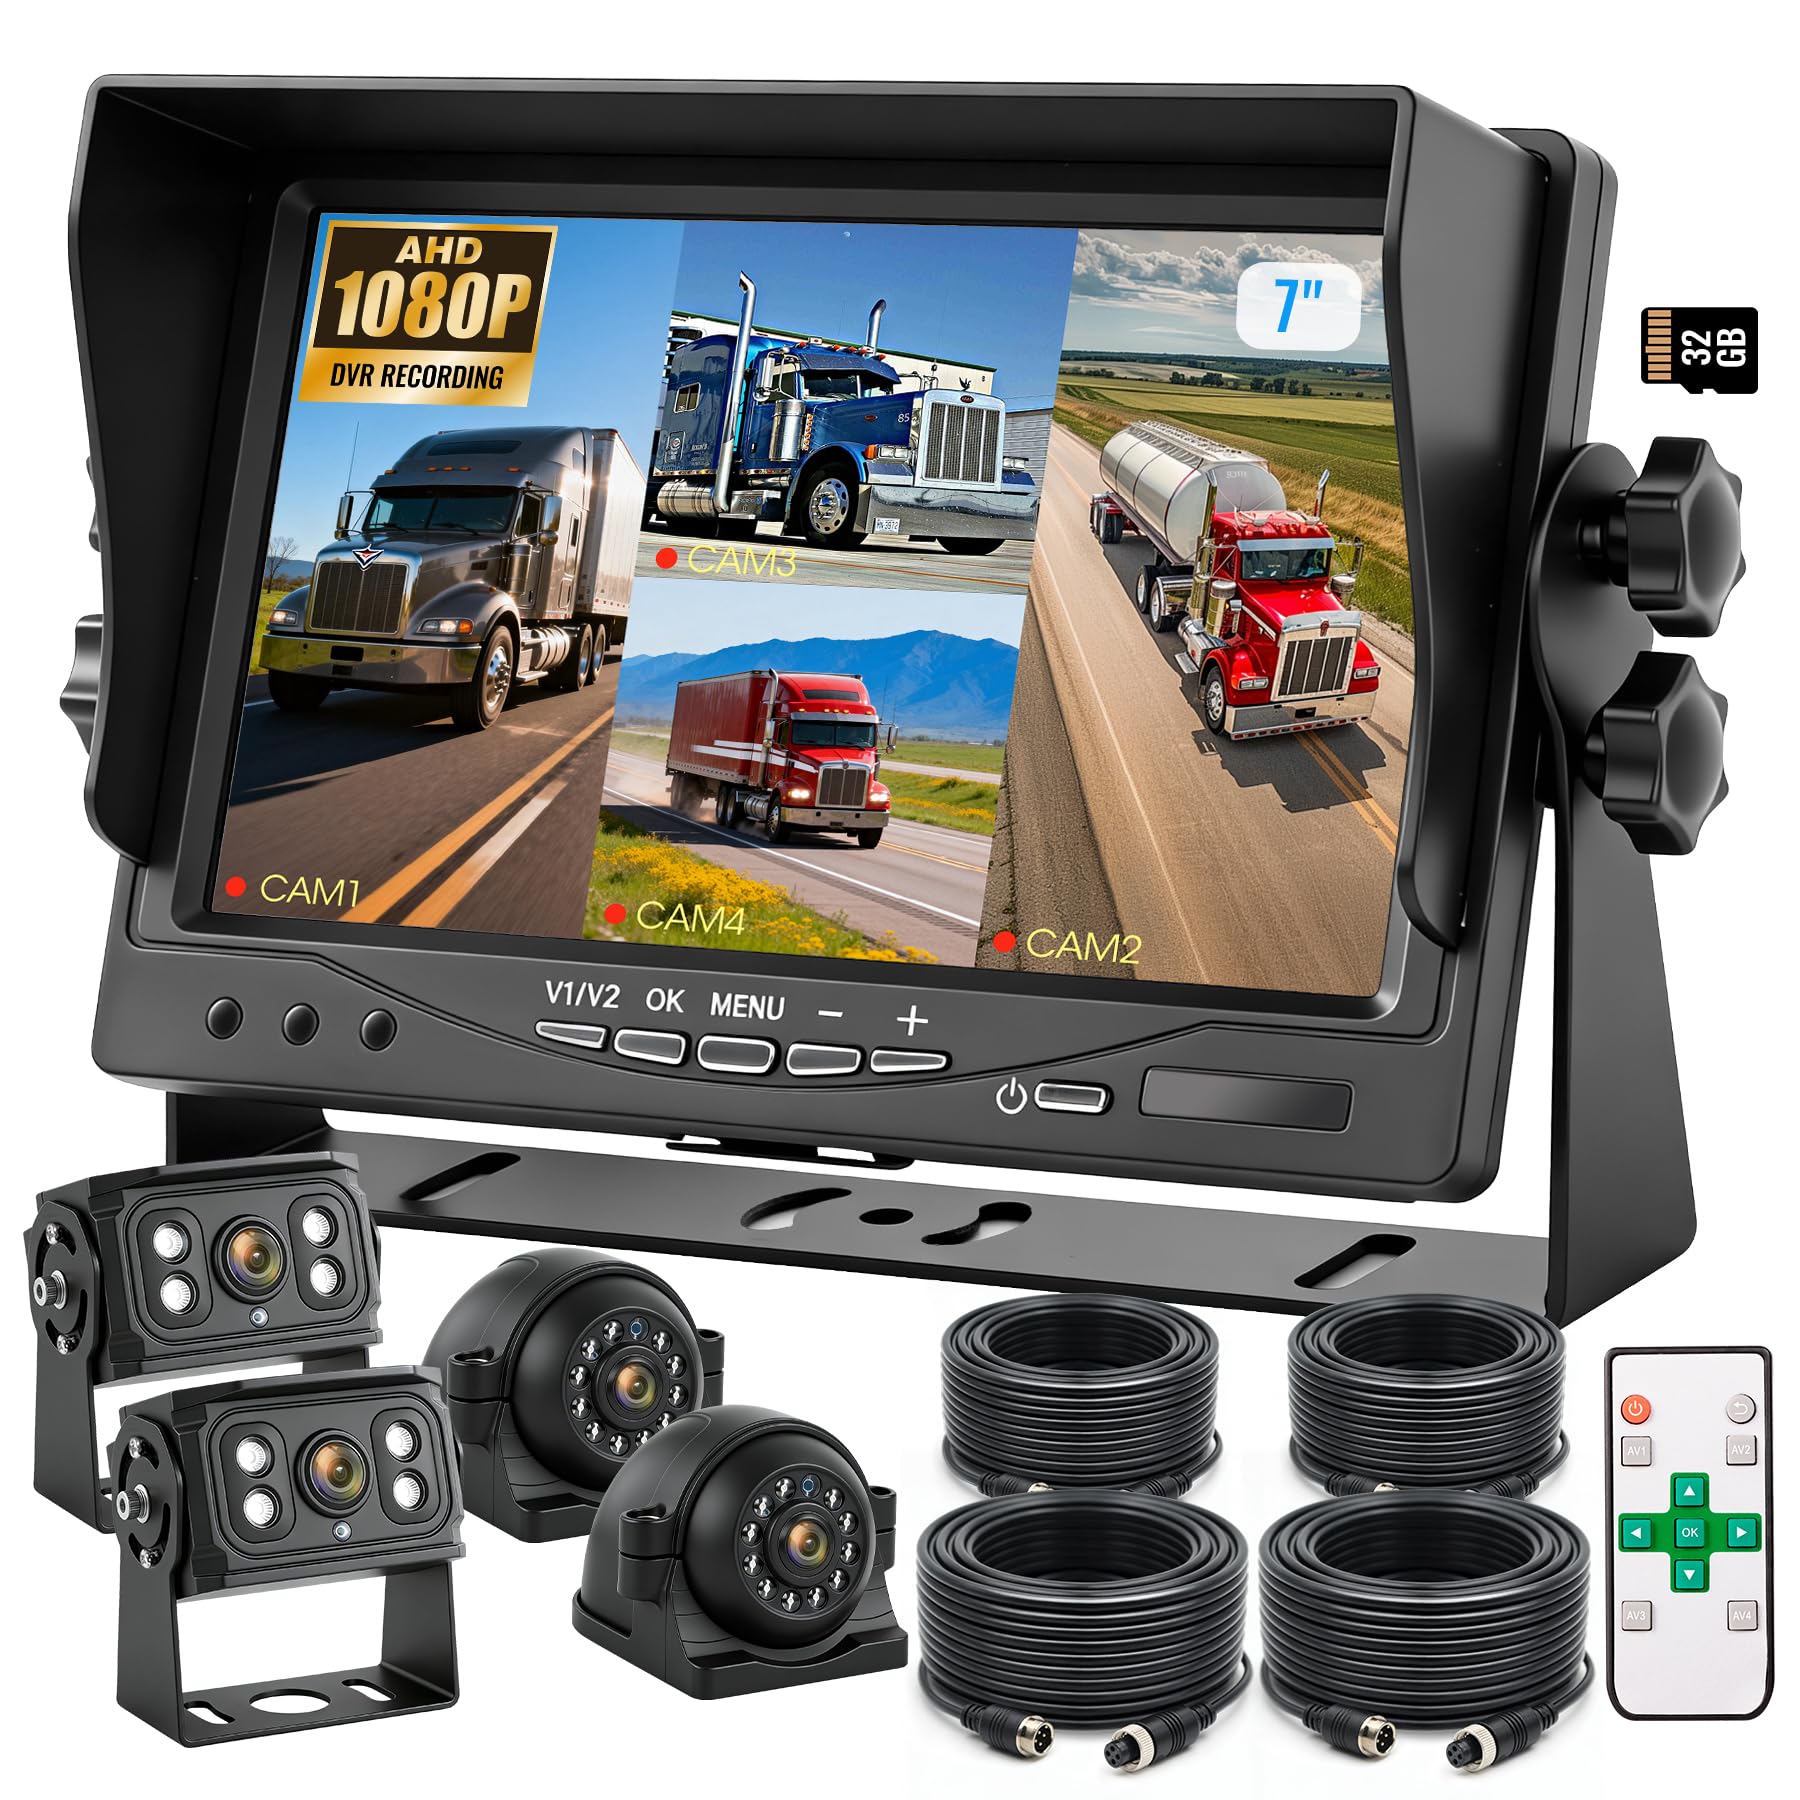
Image: The 7-inch HD monitor.
Suction Cup Mount:
- Attach the suction cup mount to a clean, smooth surface on your dashboard or windshield.
- Secure the monitor to the mount and adjust the viewing angle as needed.
U-shaped Bracket:
- Use the U-shaped bracket for a more permanent installation. Secure it to a flat surface using the provided screws.
- Attach the monitor to the bracket and adjust.
3. Mounting the Cameras
The cameras are designed for tough conditions with IP69K waterproofing and 20G impact resistance. Position them to cover desired blind spots.

Image: IP69K waterproof and durable cameras.
- Install rear cameras at the back of the vehicle for reversing.
- Install side cameras on the left and right sides to cover blind spots.
- Ensure cameras are securely fastened using the provided hardware.
- Connect camera cables to the monitor using the extension cables.
Operating Instructions
1. Monitor Controls
The monitor features several buttons for direct control and comes with a remote for convenient adjustments.

Image: Monitor control buttons.
- Power Button: Turns the monitor on/off.
- V1/V2: Switches between video inputs (if applicable for fewer than 4 cameras).
- OK: Confirms selections in the menu.
- MENU: Accesses the system settings menu.
- +/-: Navigates menu options or adjusts settings.
Remote Control:

Image: Remote control for the system.
The remote control allows for convenient adjustment of settings and switching views without touching the monitor. Remove the insulating tab before first use.
2. Display Modes
The monitor supports various display modes to suit your needs, including full-screen, dual-screen, and quad-screen views.

Image: Examples of split-screen display modes.
- Use the remote or monitor buttons to cycle through display modes (single camera, dual camera, quad camera).
- The quad display mode allows simultaneous viewing of all four cameras, reducing blind spots.
3. Recording and Playback
The system features intelligent loop recording, ensuring continuous video documentation of your journeys.

Image: Loop recording and playback interface.
- A 32GB SD card is included for immediate use. The system supports up to 128GB.
- Recordings are saved automatically in a loop, overwriting the oldest files when the card is full.
- Access recorded footage directly on the monitor for instant playback via the menu options.
4. Night Vision
The cameras are equipped with enhanced IR LEDs to provide clear visibility in low-light and dark conditions.
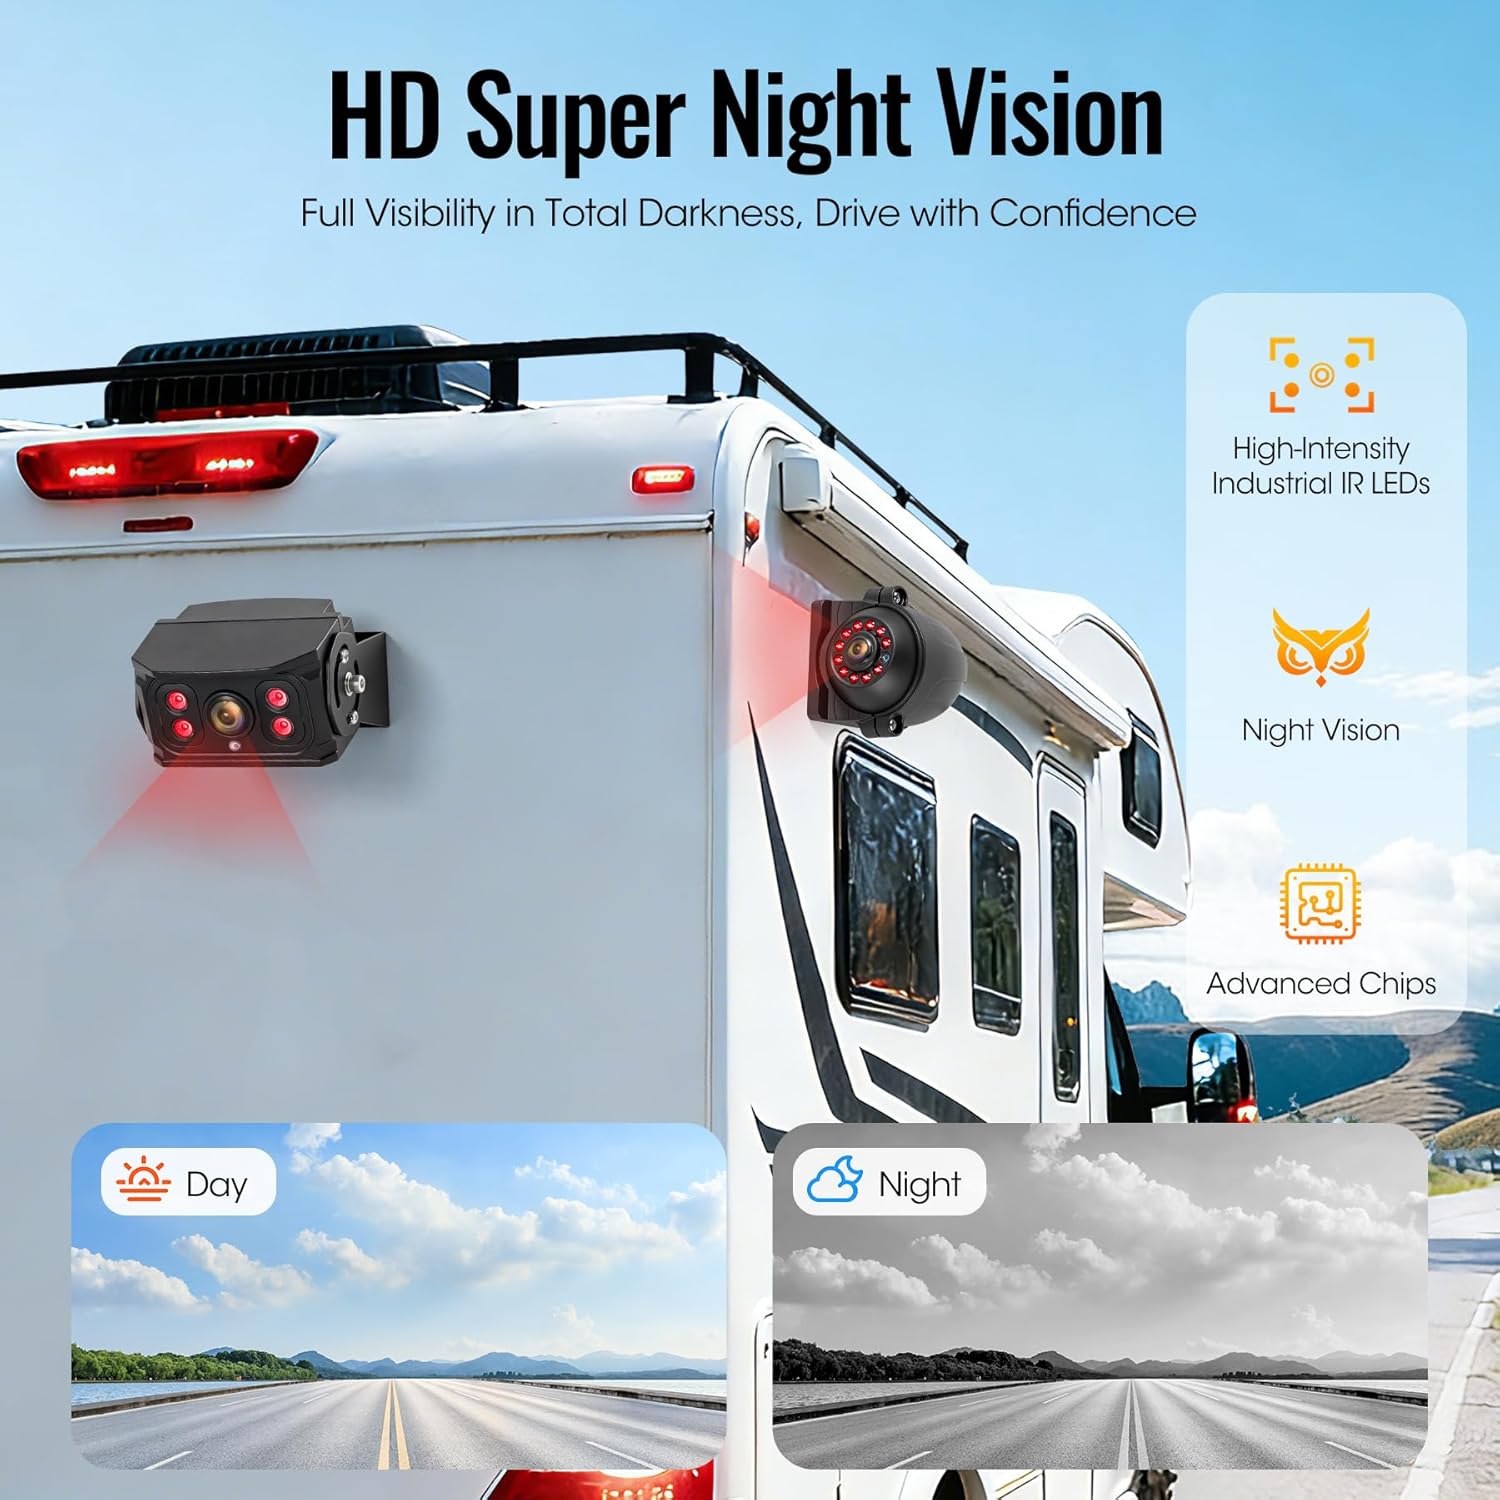
Image: Night vision capability demonstration.
5. Parking Guidance Lines
Activate parking guidance lines through the monitor's menu to assist with accurate parking and maneuvering.
- Navigate to the menu settings using the 'MENU' button.
- Locate the 'Parking Line' or 'Guideline' option and enable it.
- Adjust the position or width of the lines if the option is available.
6. Image Orientation (Mirror/Flip)
Adjust the image orientation (mirror/flip) directly from the monitor or remote control to match camera placement and desired view.
- This feature is useful for front-facing cameras or specific mounting orientations.
- Consult the menu for 'Mirror' or 'Flip' options.
Product Video Demonstration
Video: A demonstration of the WOOCARTY Wired Backup Camera System in use.
Maintenance
- Cleaning: Use a soft, damp cloth to clean the monitor screen and camera lenses. Avoid abrasive cleaners.
- Cable Connections: Periodically check all cable connections to ensure they are secure and free from corrosion.
- Camera Lenses: Keep camera lenses clear of dirt, snow, or ice for optimal image quality.
Troubleshooting
| Problem | Possible Cause | Solution |
|---|---|---|
| No image on monitor | Power connection issue; Loose camera cable; Incorrect video input selected. | Check power supply to monitor; Ensure all camera cables are securely connected; Cycle through video inputs (V1/V2 button). |
| Poor image quality | Dirty camera lens; Low light conditions (without IR); Cable interference. | Clean camera lenses; Ensure IR night vision is active in dark environments; Check cable routing for interference. |
| Recording not working | SD card full or not inserted; SD card error; Recording function disabled. | Insert or replace SD card; Format SD card via monitor menu; Enable recording in settings. |
| Remote control not responding | Insulating tab not removed; Dead battery; Obstruction. | Remove insulating tab; Replace battery; Ensure clear line of sight to monitor's IR receiver. |
Specifications
| Feature | Detail |
|---|---|
| Monitor Size | 7 Inches |
| Camera Resolution | AHD 1080P |
| Waterproof Rating | IP69K |
| Vibration Resistance | 20G |
| Operating Temperature | -4°F to 158°F (-20°C to 70°C) |
| Angle of View | 149° (Wide Angle Lens) |
| Recording | Loop Recording, Supports up to 128GB SD card (32GB included) |
| Power Input | DC 12-24V |
| Product Dimensions (Monitor) | 7.09"L x 4.72"W x 0.78"H |
| Item Weight | 8.29 pounds (total system) |
Warranty and Support
Your WOOCARTY Y2 7" 4-Cam Wired Backup Camera System is covered by an 18-month warranty and replacement assurance.
If you encounter any issues, or if any parts are damaged or missing upon arrival, please contact our customer support team immediately. A dedicated customer care expert will assist you to ensure a satisfactory resolution within one business day.
For support, please visit the WOOCARTY Store on Amazon or refer to the contact information provided in your product packaging.