1. Introduction
Thank you for choosing the JOJIDE A18 Bodycam. This portable 1080P HD video recorder is designed for discreet and reliable video capture, featuring night vision and motion detection capabilities. Please read this manual carefully to ensure proper use and optimal performance of your device.
2. Package Contents
Please check the package for the following items:
- Mini Camera (Host)
- USB Data Cable
- User Manual
- TF Card (Optional, depending on purchase)

Figure 2.1: Package Contents. This image displays the main camera unit, a USB data cable, the instruction manual, and the product's retail packaging.
3. Product Overview
Familiarize yourself with the components of your JOJIDE A18 Bodycam.

Figure 3.1: JOJIDE A18 Bodycam. This image shows two views of the compact black bodycam, highlighting its lens, control buttons on the side, and a clip for attachment.
The camera features a compact design with a clip for easy attachment, a high-definition lens, and intuitive controls for various recording modes.
4. Specifications
| Feature | Detail |
|---|---|
| Product Dimensions | 29.5 mm × 31 mm × 95 mm |
| Video Format | AVI (M-JPEG) |
| Video Resolution | 1920*1080P |
| Video Frame Rate | 30 fps |
| Image Scale | 16:9 |
| Photo Resolution | 4032*3024 |
| Image Format | JPG |
| Battery Type | Built-in Polymer Lithium Battery |
| Battery Capacity | 800 mAh |
| Working Hours | Up to 360 minutes (6 hours) of continuous recording |
| Charging Voltage | DC-5V |
| Storage Support | Max 32GB TF Card |
| Transmission Speed | USB2.0 High Speed |
| Interface Type | Micro-USB |
| Media Player | System-provided or mainstream video playback software |
5. Setup
5.1. Charging the Device
Before first use, fully charge the bodycam. Connect the device to a 5V USB power adapter or a computer's USB port using the provided USB data cable. The charging indicator light will typically show the charging status (refer to device indicators for specific behavior).
5.2. Inserting a TF Card
The camera supports up to a 32GB TF (MicroSD) card. Ensure the camera is powered off before inserting or removing the card.
- Locate the TF card slot on the side of the camera.
- Gently insert the TF card into the slot with the gold contacts facing down until it clicks into place.
- To remove, gently push the card in again until it springs out.

Figure 5.2: TF Card Insertion. This image illustrates the correct orientation and method for inserting a TF (MicroSD) card into the camera's dedicated slot.
Note: The camera requires a TF card for video recording. Without a card, recording functions will not operate.
5.3. Powering On/Off
- Power On: Press and hold the Power button for a few seconds until the indicator light illuminates.
- Power Off: Press and hold the Power button for a few seconds until the indicator light turns off.
6. Operating Instructions
6.1. Video Recording (1080P)
Once powered on and with a TF card inserted, the camera is ready to record. Press the Record button once to start video recording. Press it again to stop recording. The indicator light will change to confirm recording status.
6.2. Night Vision
The JOJIDE A18 Bodycam features a night vision mode for recording in low-light conditions. This function typically activates automatically or can be toggled manually via a dedicated button (refer to your device's specific button layout). The night vision provides clear recording up to 5 meters without additional light.
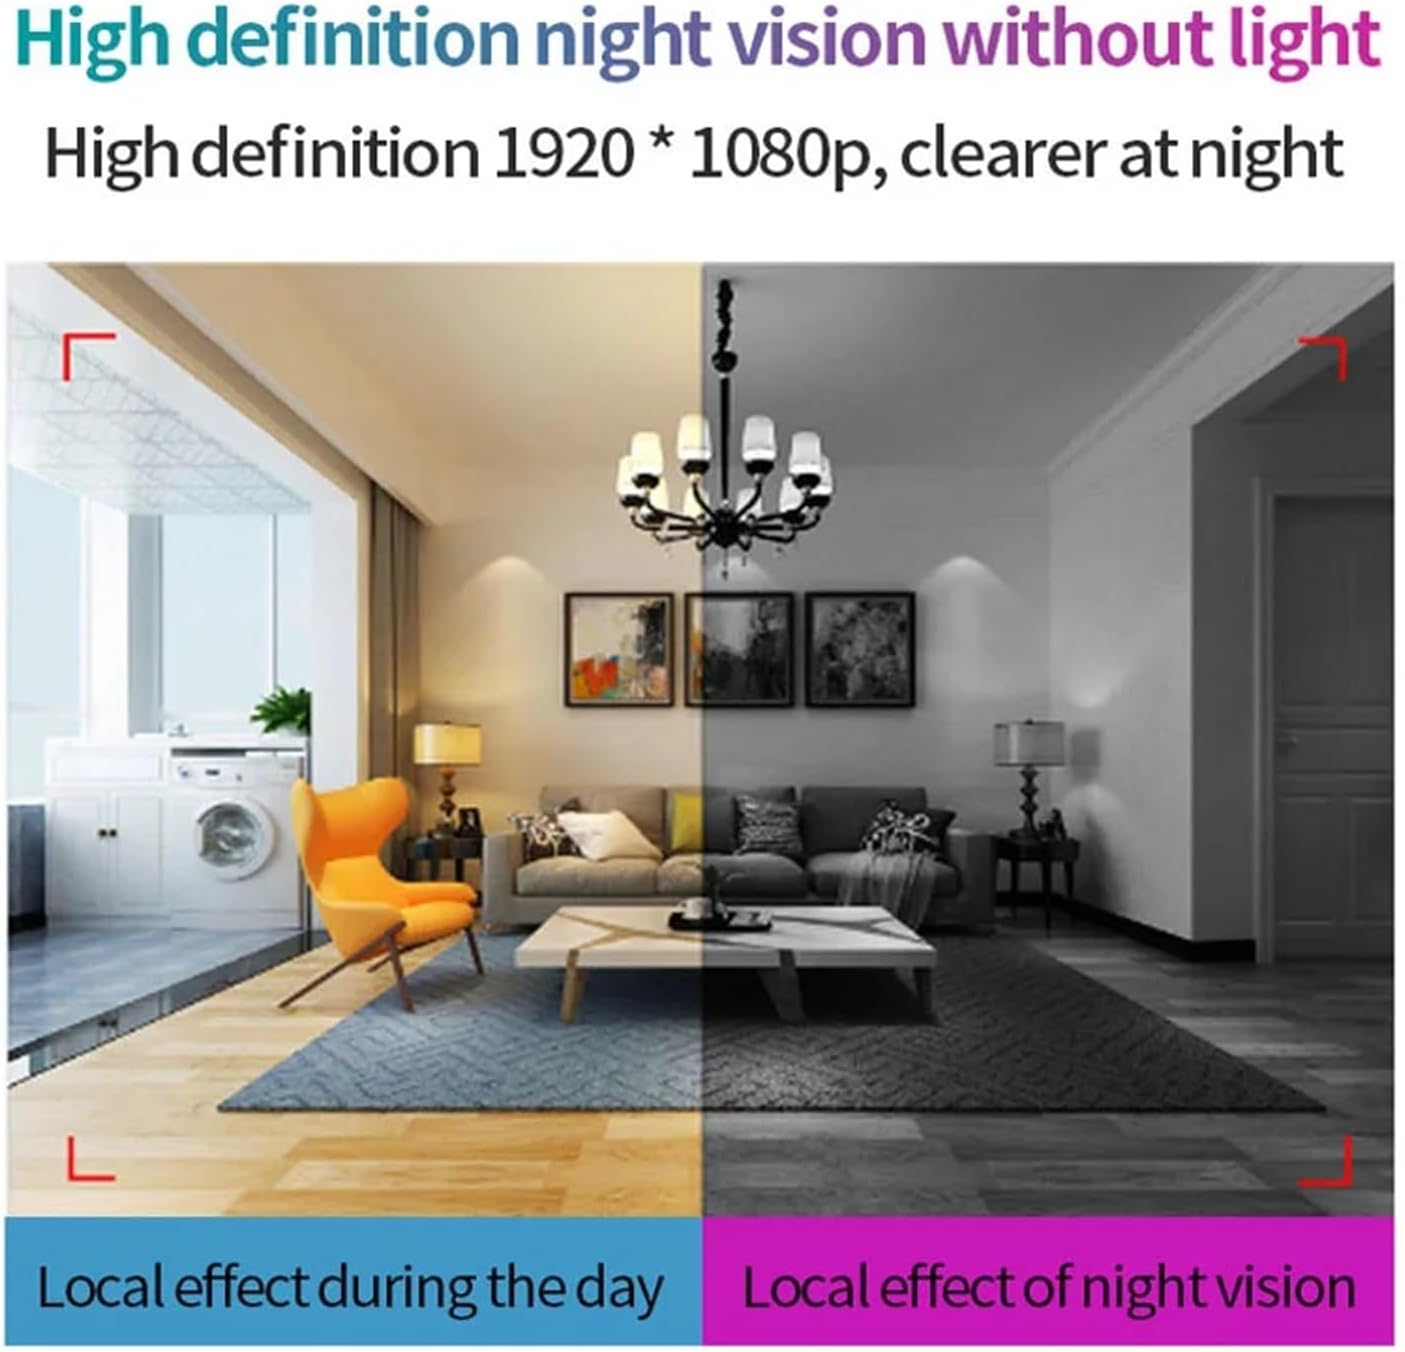
Figure 6.2: High Definition Night Vision. This image demonstrates the camera's ability to record clearly in both daytime and low-light conditions, showing a split view of a room with normal lighting and then with night vision activated.
6.3. Motion Detection Recording
The camera can be set to record automatically when motion is detected. This feature helps conserve storage space and battery life by only recording when activity occurs.
- To activate motion detection, refer to the specific button sequence or mode switch on your device.
- When an object moves within the camera's field of view, it will automatically begin recording.

Figure 6.3: Motion Detection Camera. This image illustrates the camera's motion detection capability, showing it recording a moving subject.
6.4. Webcam Functionality
The JOJIDE A18 Bodycam can be used as a webcam when connected to a computer. This allows for online chats or video calls.
- Ensure the camera is powered off.
- Connect the camera to your computer using the USB data cable.
- The computer should recognize the device as a webcam. You may need to select it as the default camera in your video conferencing software.
Note: When used as a webcam, the camera cannot record to the memory card.

Figure 6.4: USB Connection as Webcam. This image demonstrates the camera's ability to connect via USB to a computer and function as a webcam for online communication.
6.5. Connecting to Computer and Viewing Files
To access recorded videos and photos:
- Power off the camera.
- Connect the camera to your computer using the USB data cable.
- The camera will appear as a removable disk drive on your computer.
- Open the drive to access the recorded files (AVI for video, JPG for photos).
- Use a standard media player to view the files.
7. Maintenance
- Keep the device dry. Avoid exposure to water or moisture.
- Do not attempt to disassemble or modify the camera, as this will void any potential warranty and may damage the device.
- Clean the lens gently with a soft, lint-free cloth. Avoid abrasive materials.
- Store the camera in a cool, dry place away from direct sunlight and extreme temperatures.
- Regularly back up important recordings to your computer.
8. Troubleshooting
- Camera not turning on:
Ensure the battery is charged. Connect to a power source and try again after a few minutes.
- Cannot record video:
Check if a TF card is properly inserted. Ensure the TF card has sufficient free space. The card may need to be formatted (refer to device instructions for formatting, usually done via computer).
- Computer not recognizing the camera:
Try a different USB port or USB cable. Ensure the camera is powered off before connecting for file transfer. If using as a webcam, ensure it's selected in your computer's settings.
- Poor video quality:
Ensure the lens is clean. Check lighting conditions. For night vision, ensure the feature is active if needed.
9. Warranty and Support
According to the product specifications, no manufacturer's warranty information is provided for this device. For any issues or support inquiries, please contact the seller directly through your purchase platform.