1. Important Safety Information
Read and understand all instructions and warnings before using this hydraulic jack. Failure to follow these instructions may result in property damage, personal injury, or death. Keep this manual for future reference.
- Maximum Load Capacity: Never exceed the maximum load capacity of 2.5 tons (2500 kg).
- Stable Surface: Always use the jack on a hard, level, and stable surface. Avoid uneven ground or soft surfaces.
- Use Jack Stands: Never work under a vehicle supported only by a hydraulic jack. Always use appropriate jack stands to support the vehicle after lifting.
- Vehicle Stability: Ensure the vehicle is in park (P), the parking brake is engaged, and the wheels not being lifted are chocked to prevent movement.
- Proper Positioning: Position the jack only on the vehicle manufacturer's recommended lifting points. Use the provided rubber pads to prevent damage to the vehicle's chassis.
- Clear Area: Keep hands, feet, and other body parts clear of the jack and vehicle during lifting and lowering operations.
- Fluid Leaks: If hydraulic fluid leaks, discontinue use immediately and consult a qualified technician.
- Children and Bystanders: Keep children and unauthorized persons away from the work area.
2. Package Contents
Verify that all items listed below are present in your package:
- 1x TRESKO 2.5 Ton Hydraulic Jack
- 1x Lifting Bar (handle)
- 1x Transport Case
- 2x Rubber Pads (for different vehicle types)
- 1x Knee Pad
- 1x Pair of Work Gloves
- 1x Tire Tread Depth Gauge

Figure 1: Complete set of TRESKO 2.5 Ton Hydraulic Jack components.

Figure 2: Included safety gloves and knee pad for comfortable and safe operation.
3. Specifications
| Feature | Specification |
|---|---|
| Model | TKWH |
| Load Capacity | 2.5 Tons (2500 kg) |
| Minimum Lifting Height | 85 mm (8.5 cm) |
| Maximum Lifting Height | 385 mm (38.5 cm) |
| Material | High-carbon Steel |
| Item Weight | 14.2 kg |
| Package Dimensions | 61 x 26 x 17.5 cm |
| Vehicle Service Type | Car, SUV, Van, Sedan, Sports Car, Electric Car, Low-profile Vehicles |

Figure 3: Detailed dimensions of the TRESKO hydraulic jack and its components.
4. Setup
4.1 Handle Assembly
- Insert the two parts of the lifting bar (handle) together.
- Insert the assembled handle into the handle socket on the jack. Ensure it is securely seated.
4.2 Bleeding the Hydraulic System (Initial Use)
Before first use, or if the jack has been stored for a long time, it is recommended to bleed any air from the hydraulic system:
- Turn the release valve (located at the base of the handle socket) counter-clockwise one full turn to open it.
- Pump the handle 10-15 full strokes to expel any air.
- Turn the release valve clockwise until it is firmly closed.
- The jack is now ready for use.
5. Operating Instructions
5.1 Preparation
- Park the vehicle on a hard, level surface.
- Engage the parking brake and place the transmission in 'Park' (automatic) or a low gear (manual).
- Place wheel chocks on the wheels that will remain on the ground to prevent accidental movement.
- Ensure the area around the vehicle is clear of obstructions and bystanders.
5.2 Lifting a Vehicle
- Position the jack directly under the vehicle's designated lifting point. Refer to your vehicle's owner's manual for specific lifting points.
- Place one of the provided rubber pads on the jack's saddle to protect the vehicle's chassis. Use the appropriate pad for your vehicle type (e.g., grooved pad for older vehicles or flat pad for modern vehicles without specific lifting points).
- Ensure the release valve is fully closed by turning the handle clockwise.
- Pump the handle up and down to raise the jack. Continue pumping until the vehicle is lifted to the desired height.
- Once the vehicle is lifted, immediately place appropriately rated jack stands under the vehicle's frame or axle, adjacent to the jack.
- Slowly lower the vehicle onto the jack stands by gently turning the release valve counter-clockwise. Ensure the vehicle is securely resting on the jack stands before performing any work.
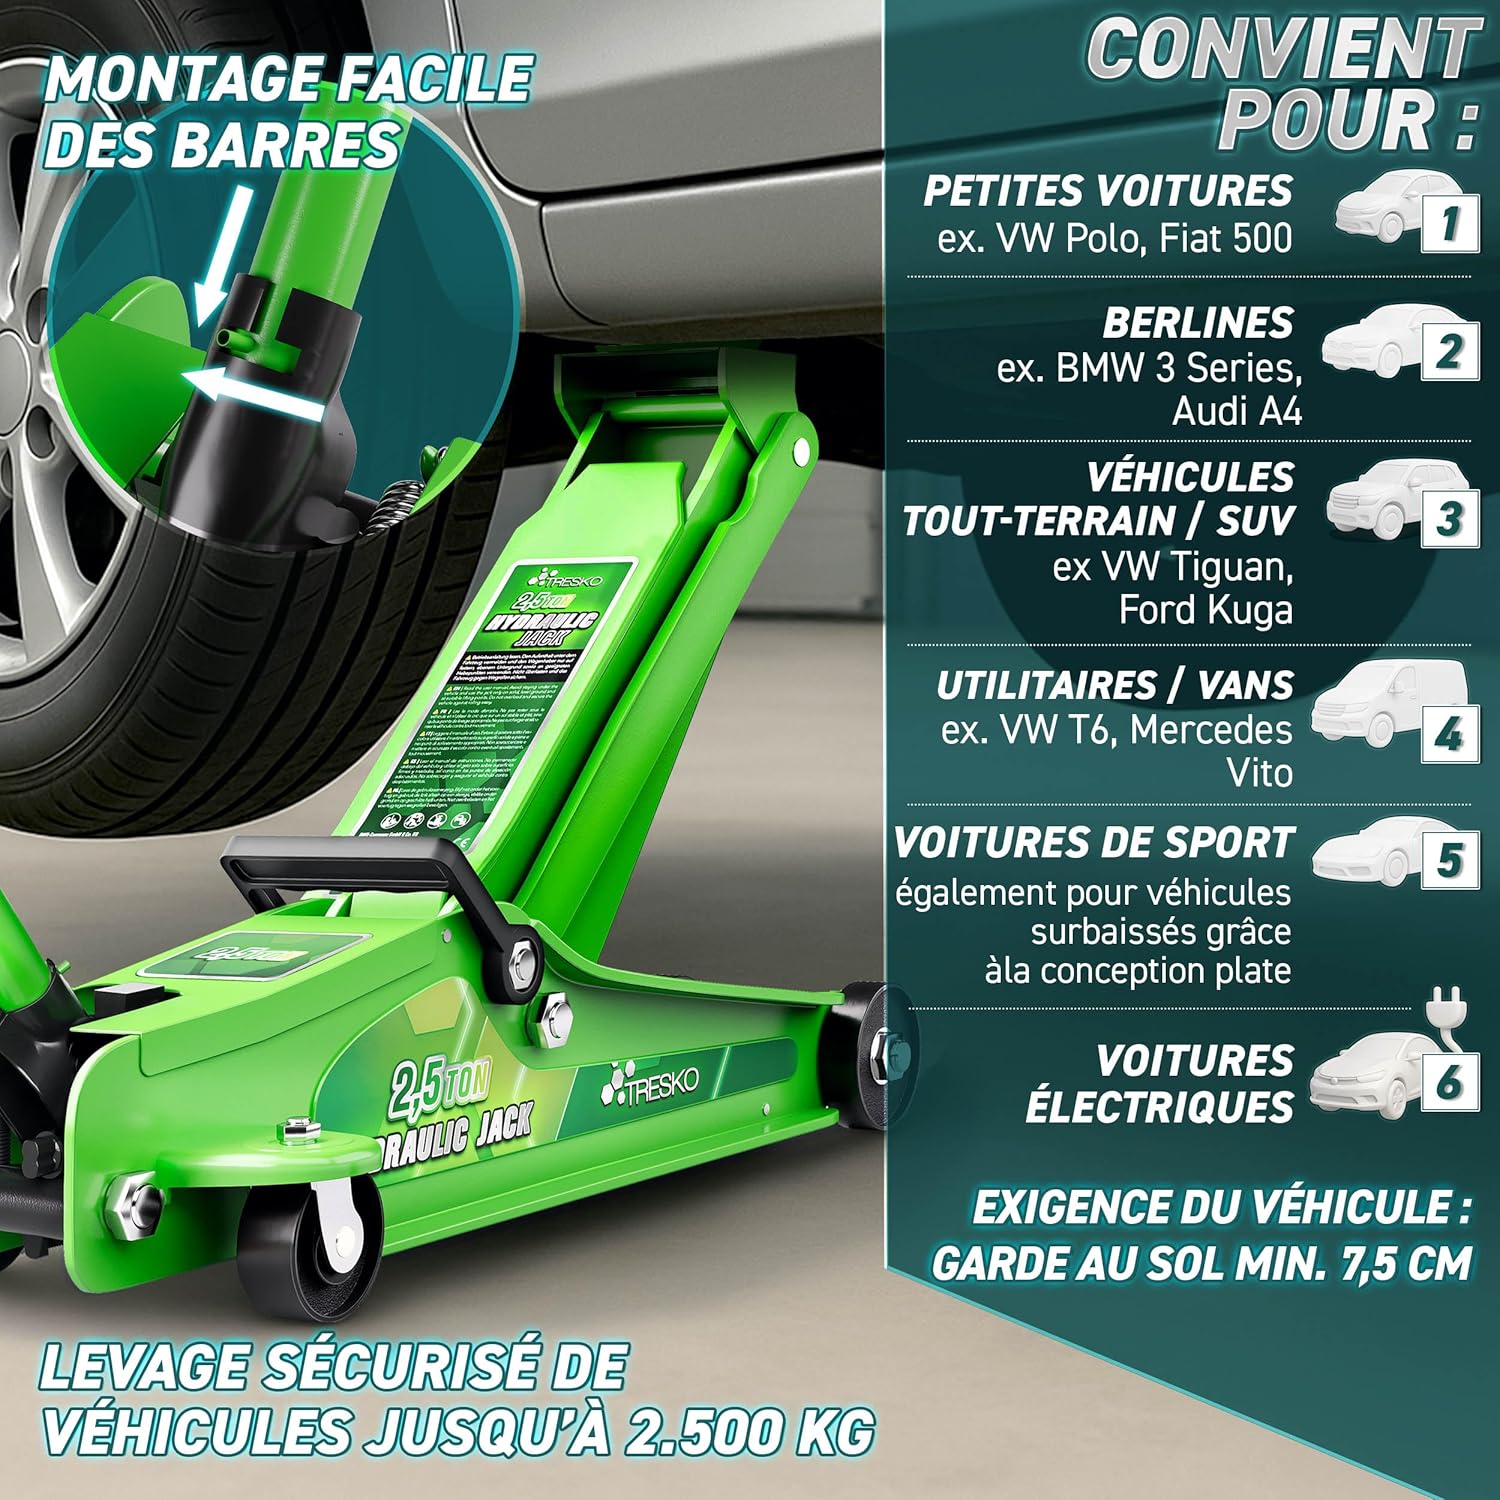
Figure 4: Proper positioning of the hydraulic jack under a vehicle's lifting point.
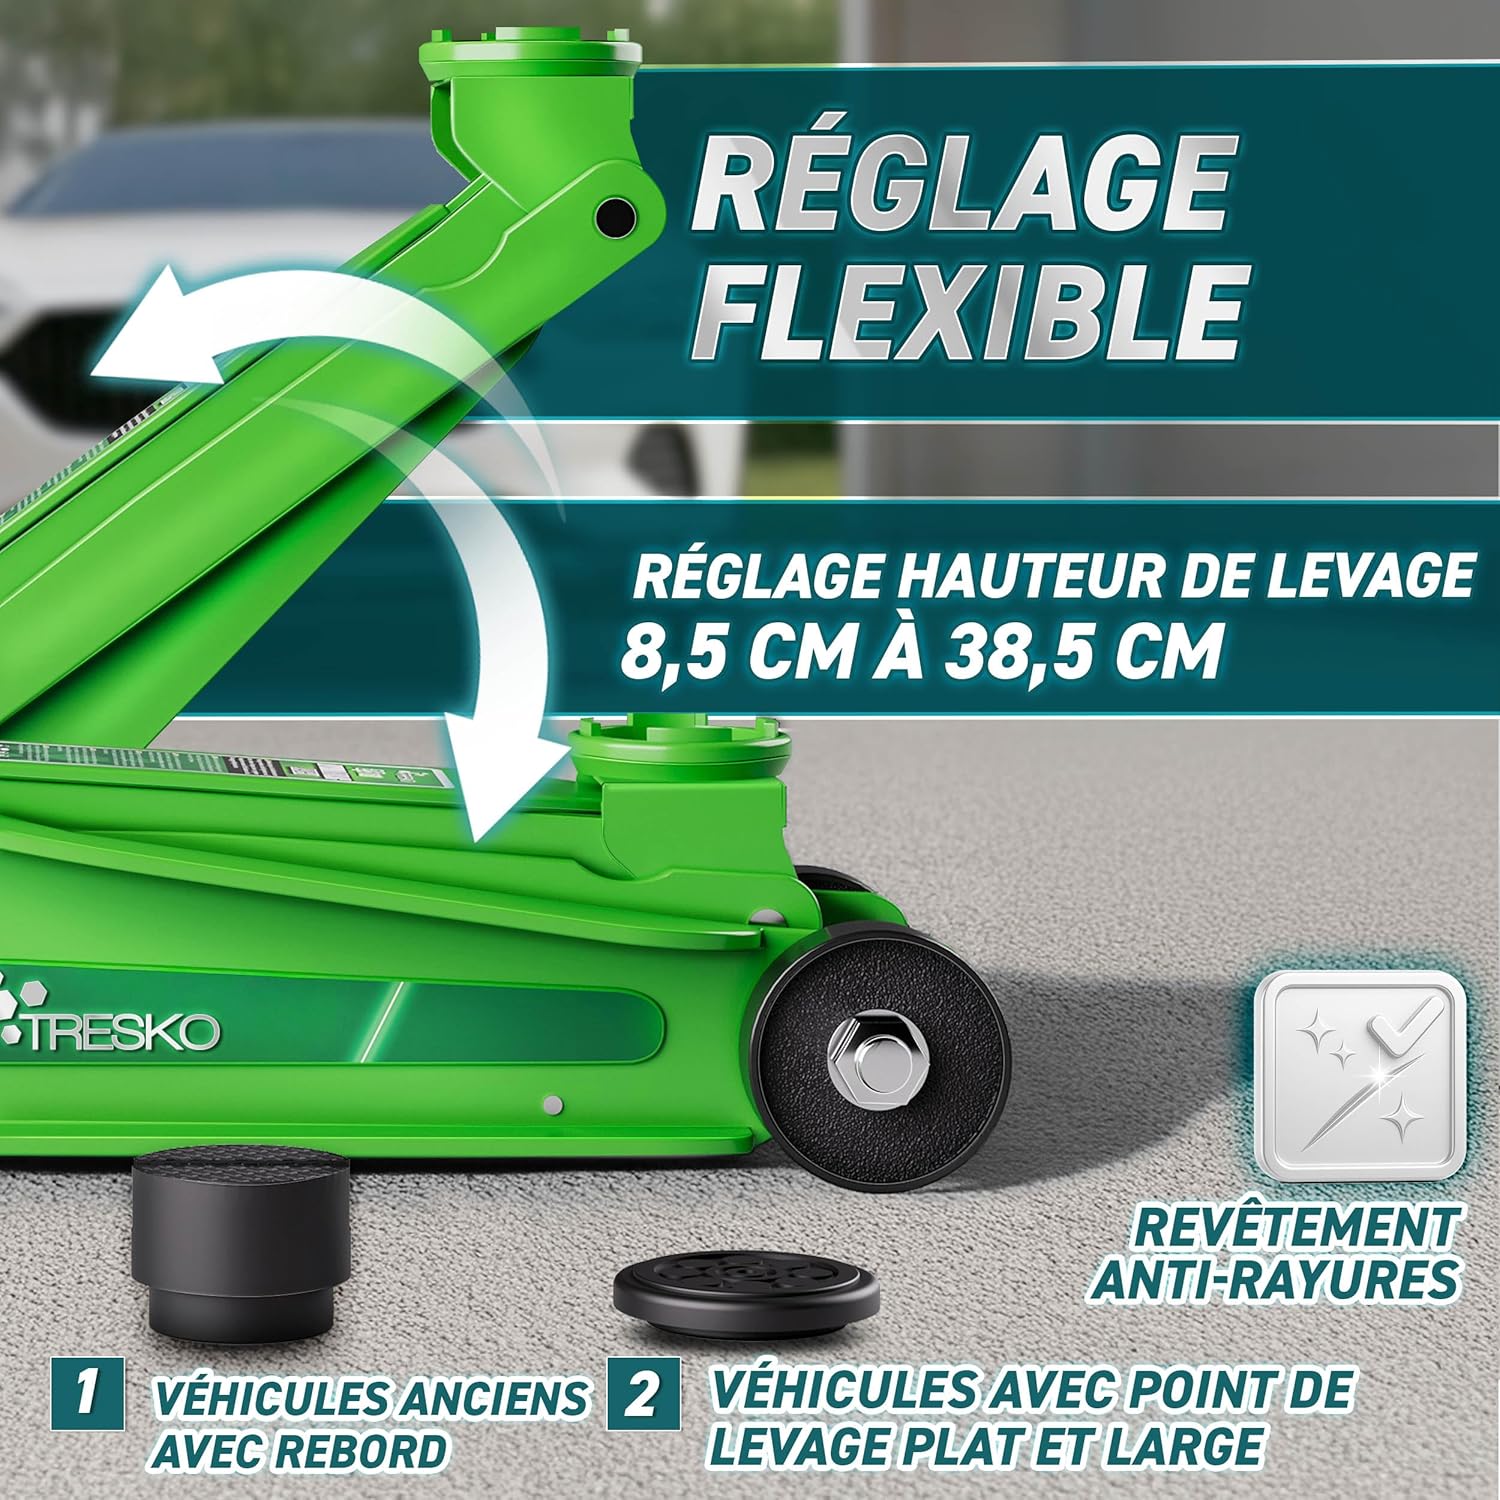
Figure 5: Flexible lifting height and use of protective rubber pads.
5.3 Lowering a Vehicle
- Ensure all tools and personnel are clear from under the vehicle.
- Raise the vehicle slightly with the hydraulic jack to remove the jack stands.
- Carefully remove the jack stands.
- Slowly turn the release valve counter-clockwise to lower the vehicle in a controlled manner. Do not open the valve too quickly.
- Once the vehicle is fully lowered, remove the hydraulic jack.
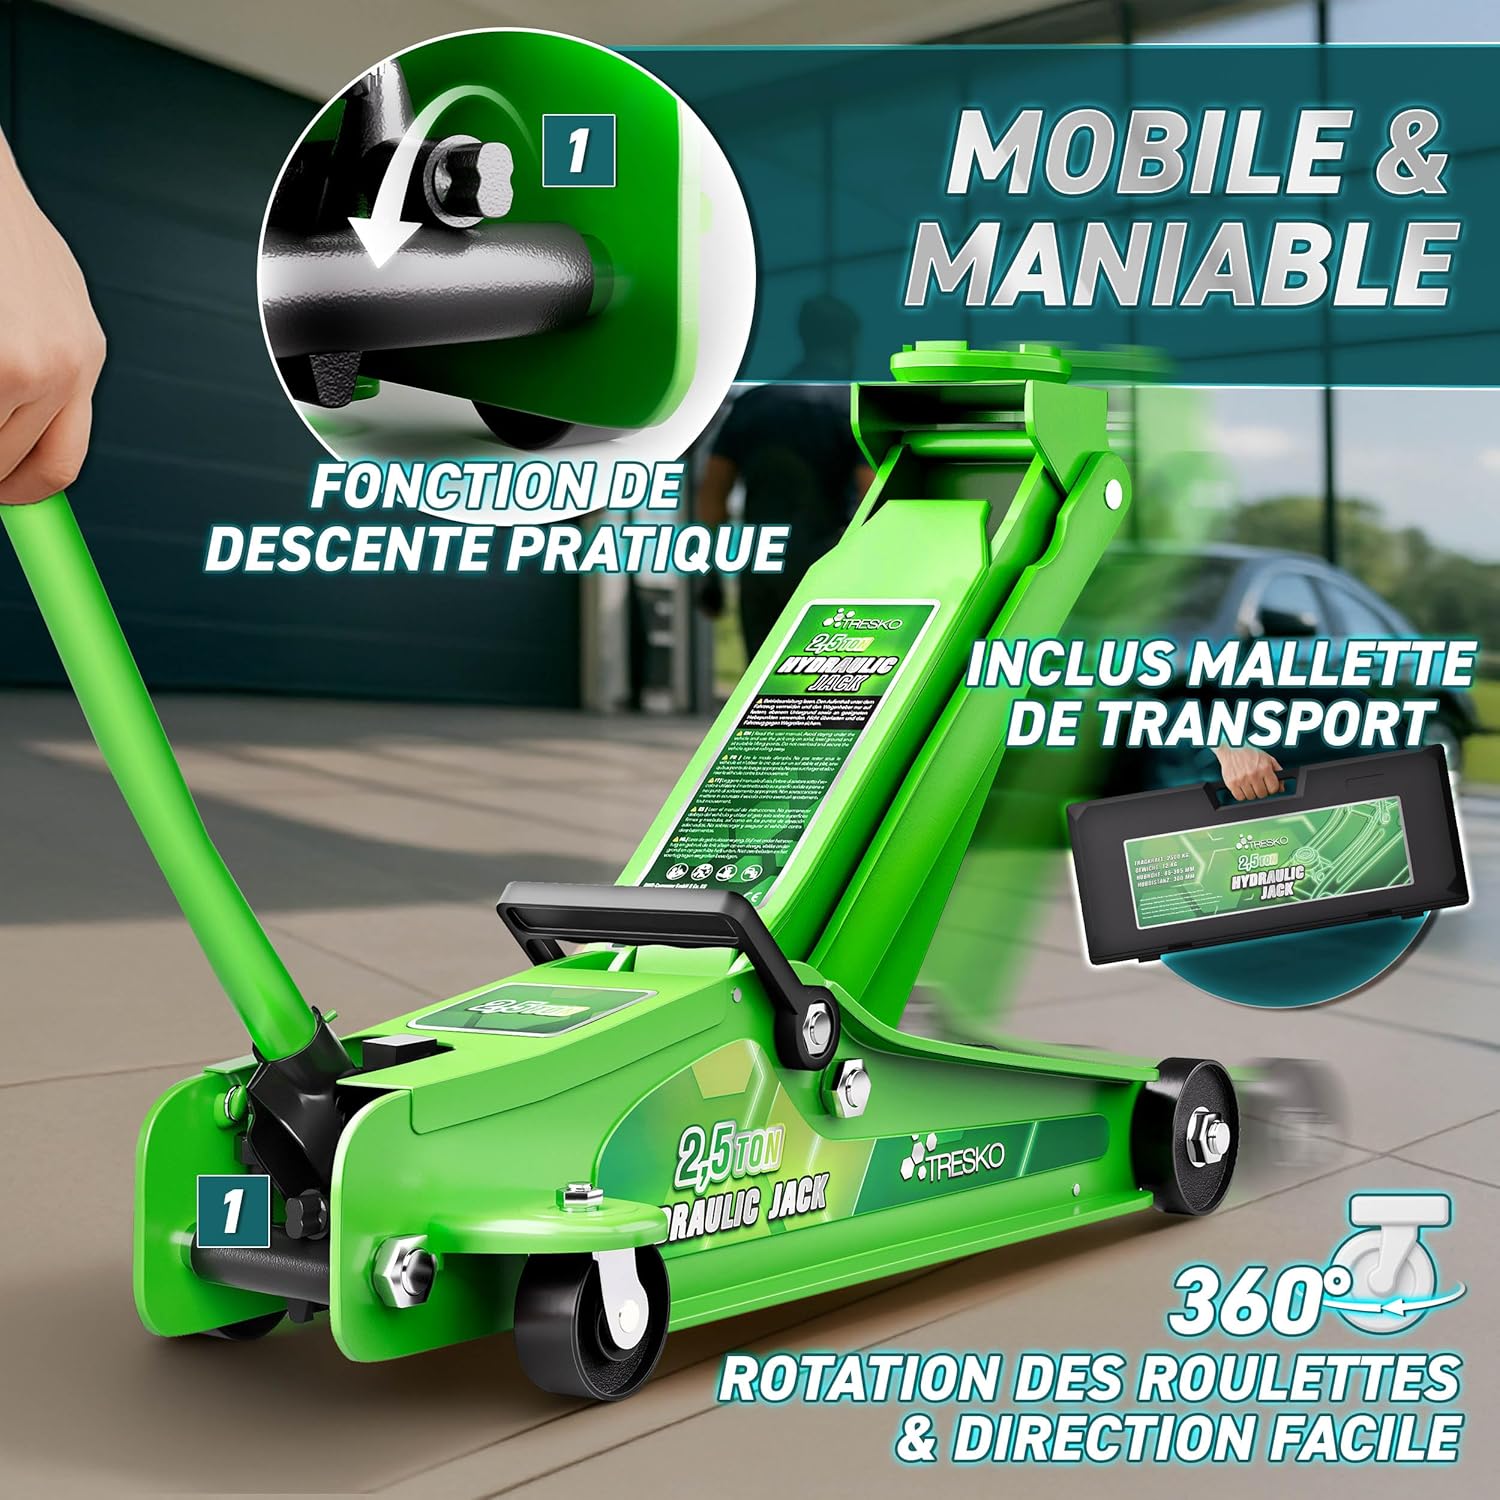
Figure 6: Controlled lowering function and maneuverability of the jack.
6. Maintenance
6.1 Cleaning
- Regularly clean the jack with a damp cloth to remove dirt, grease, and debris.
- Do not use harsh chemicals or solvents that could damage the paint or seals.
- The jack features an anti-scratch and anti-corrosion coating for durability.

Figure 7: The jack's durable anti-corrosion coating.
6.2 Hydraulic Fluid
- Check the hydraulic fluid level periodically. To do this, ensure the jack is fully lowered and on a level surface.
- Remove the oil filler plug. The fluid level should be just below the filler hole.
- If necessary, top up with a high-quality hydraulic jack oil. Do not overfill.
- Never use brake fluid, alcohol, glycerin, detergent, or dirty oil, as this can damage the seals and internal components.
6.3 Storage
- Store the jack in its transport case in a dry, clean, and safe environment.
- Always store the jack in the fully lowered position to relieve pressure on the hydraulic system.
7. Troubleshooting
| Problem | Possible Cause | Solution |
|---|---|---|
| Jack will not lift load | Release valve open; Air in system; Low hydraulic fluid; Overload | Close release valve; Bleed system (Section 4.2); Top up fluid (Section 6.2); Reduce load (do not exceed 2.5 tons) |
| Jack lifts slowly or erratically | Air in system; Low hydraulic fluid; Dirty fluid | Bleed system (Section 4.2); Top up fluid (Section 6.2); Replace fluid (consult technician) |
| Jack leaks hydraulic fluid | Damaged seals; Loose fittings | Discontinue use immediately. Contact customer support or a qualified technician for repair. |
| Jack will not lower | Release valve stuck; Obstruction | Gently try to open valve; Check for obstructions around the mechanism. If problem persists, contact support. |
8. Warranty and Support
TRESKO products are manufactured to high-quality standards and are guaranteed against manufacturing defects. For specific warranty terms and conditions, please refer to the warranty card included with your product or contact your retailer.
For technical assistance, spare parts, or warranty claims, please contact the seller or manufacturer directly. Ensure you have your product model number (TKWH) and proof of purchase available.
Manufacturer: DWD-Company GmbH & Co. KG


