1. Product Overview
The Pumptiva P011-NEW Portable Tire Inflator is a versatile and compact air compressor designed for quick and efficient inflation of various items. It features a powerful motor capable of reaching up to 150 PSI, ensuring fast inflation for car tires, motorcycles, bicycles, and sports balls. Equipped with a digital pressure gauge and automatic shut-off, it prevents over-inflation and ensures accurate pressure. Its multi-functional design includes an LED light for emergency situations and a portable, cordless operation for convenience.

Image 1.1: Pumptiva P011-NEW Portable Tire Inflator with included accessories and examples of items it can inflate.
2. What's in the Box
Upon unboxing your Pumptiva P011-NEW Portable Tire Inflator, please ensure all the following items are present:
- Tire Inflator (P011-NEW unit)
- Storage Bag
- Ball Needle
- Nozzle for Swimming Ring
- Nozzle for Air Mattress
- Presta Valve
- Fuse
- Type-C Charging Cable
- User Manual

Image 2.1: All components included with the Pumptiva P011-NEW Portable Tire Inflator.
3. Setup
3.1 Charging the Device
Before first use, fully charge the tire inflator. Connect the provided Type-C charging cable to the device's charging port and plug the other end into a compatible USB power source. The battery indicator on the display will show charging status.
3.2 Attaching the Air Hose and Nozzle
- Screw the air hose securely into the designated port on the top of the tire inflator.
- Select the appropriate nozzle for the item you wish to inflate (e.g., ball needle, Presta valve, etc.).
- Attach the selected nozzle to the free end of the air hose.
4. Operating Instructions
4.1 Powering On/Off
- To power on: Press and hold the power button (usually marked with a power symbol) for 3 seconds.
- To power off: Press and hold the power button for 3 seconds. The device will also automatically power off after a period of inactivity.
4.2 Selecting Pressure Units
Press the 'M' button to cycle through available pressure units: PSI, BAR, KPA, and kg/cm².
4.3 Setting Target Pressure
- Once powered on, the display will show the current pressure.
- Use the '+' and '-' buttons to adjust the desired target pressure. The numerical value will flash while adjusting.
- Wait a few seconds after setting; the number will stop flashing, indicating the target pressure is set.
4.4 Starting and Stopping Inflation
- Connect the air hose securely to the valve stem of the item to be inflated.
- Press the power button (short press) to start the inflation process.
- The inflator will automatically stop when the preset target pressure is reached.
- To manually stop inflation, press the power button again.

Image 4.1: The digital display shows accurate real-time tire pressure during operation.

Image 4.2: Automatic shut-off feature ensures precise inflation for different items.
5. Preset Inflation Modes
The device comes with 4 preset inflation modes for common items, plus a custom mode:
- Car Mode: Typically preset for 26-50 PSI.
- Motorcycle Mode: Typically preset for 26-45 PSI.
- Bicycle Mode: Typically preset for 30-145 PSI.
- Ball Mode: Typically preset for 4-16 PSI.
- Custom Mode: Allows you to set any desired pressure within the device's range.
To switch between modes, press the 'M' button. The icon on the display will change to indicate the selected mode.

Image 5.1: The 4 preset inflation modes for various applications.
6. LED Light Functions
The Pumptiva P011-NEW includes an integrated LED light with three modes for enhanced utility and safety:
- General Lighting: Provides steady illumination for working in low-light conditions.
- SOS Mode: Emits a Morse code SOS signal for emergency situations.
- Flashing Mode: Provides a rapid flashing light for increased visibility and caution.
To activate the LED light and cycle through its modes, press the light button (usually marked with a sun or light bulb icon).
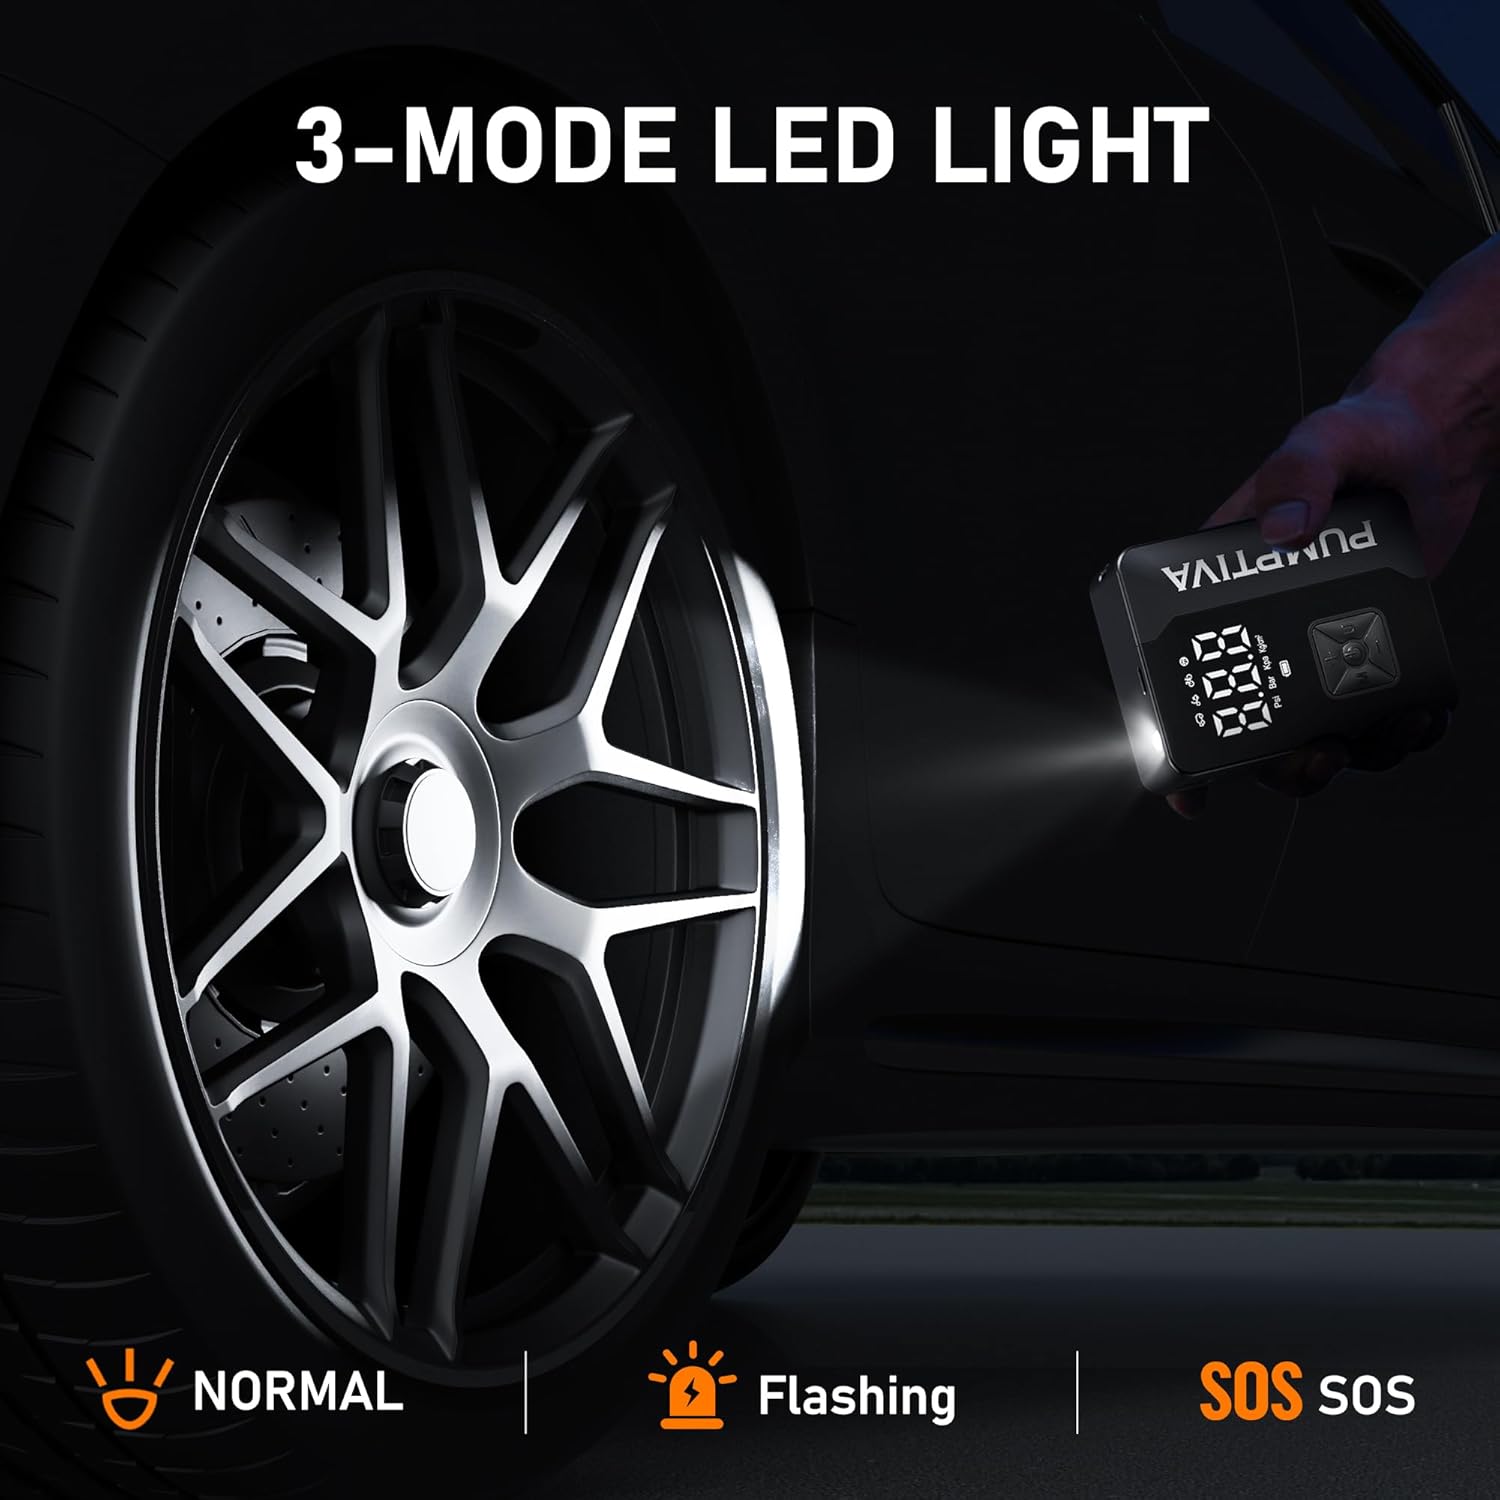
Image 6.1: The 3-mode LED light provides illumination and emergency signaling.
7. Charging
The device is powered by two 12V batteries (included) and can be recharged using the provided Type-C charging cable. The digital display includes a battery indicator to show the current charge level, allowing you to know when recharging is necessary. For extended use, the device can also be powered via a 12V cigarette lighter power cord (not explicitly listed as included, but mentioned in a video, so I'll omit it from this section to avoid contradiction with 'What's in the Box').
8. Maintenance
- Keep the device clean and free from dust and debris.
- Store the inflator in its provided storage bag in a cool, dry place when not in use.
- Ensure the battery is charged regularly, especially before long trips, to maintain optimal performance.
- Inspect the air hose and nozzles for any signs of wear or damage before each use.
9. Troubleshooting
If you encounter issues with your Pumptiva P011-NEW, consider the following:
- Device not turning on: Ensure the battery is sufficiently charged. Recharge if necessary.
- Inflator not starting: Check that the air hose is securely connected to both the device and the valve stem. Verify that a target pressure has been set.
- Inaccurate pressure reading: Ensure the air hose connection to the valve stem is tight and there are no leaks.
- For further assistance, please refer to the detailed troubleshooting section in the included User Manual or contact customer support.
10. Specifications
| Feature | Specification |
|---|---|
| Brand | Pumptiva |
| Model | P011-NEW |
| Material | Acrylonitrile Butadiene Styrene |
| Product Dimensions | 3.15"L x 2"W x 6.42"H |
| Item Weight | 1.19 pounds |
| Power Source | Battery Powered |
| Voltage | 11.99 Volts |
| Hose Length | 13.78 Inches |
| Max Pressure | 150 PSI |
| Batteries | 2 12V batteries (included) |
11. Warranty and Support
- Warranty: The Pumptiva P011-NEW Portable Tire Inflator comes with a 2-Year Warranty Service.
- Return/Exchange Policy: A 90-day return or exchange policy is available.
- After-Sales Service: Lifetime after-sales service is provided.
- Customer Support: Answers to inquiries are available 24 hours a day. Please refer to the User Manual for contact information.