1. Introduction
This manual provides essential instructions for the safe and effective installation, operation, and maintenance of your Generic Dome-shaped Retractable Awning. Designed to enhance the exterior of your home, this awning offers reliable protection from sun and rain for windows and doors.
The awning features a durable, waterproof polyester fabric and a sturdy galvanized frame, ensuring longevity and performance in various weather conditions. Its foldable design facilitates easier transport and assembly.
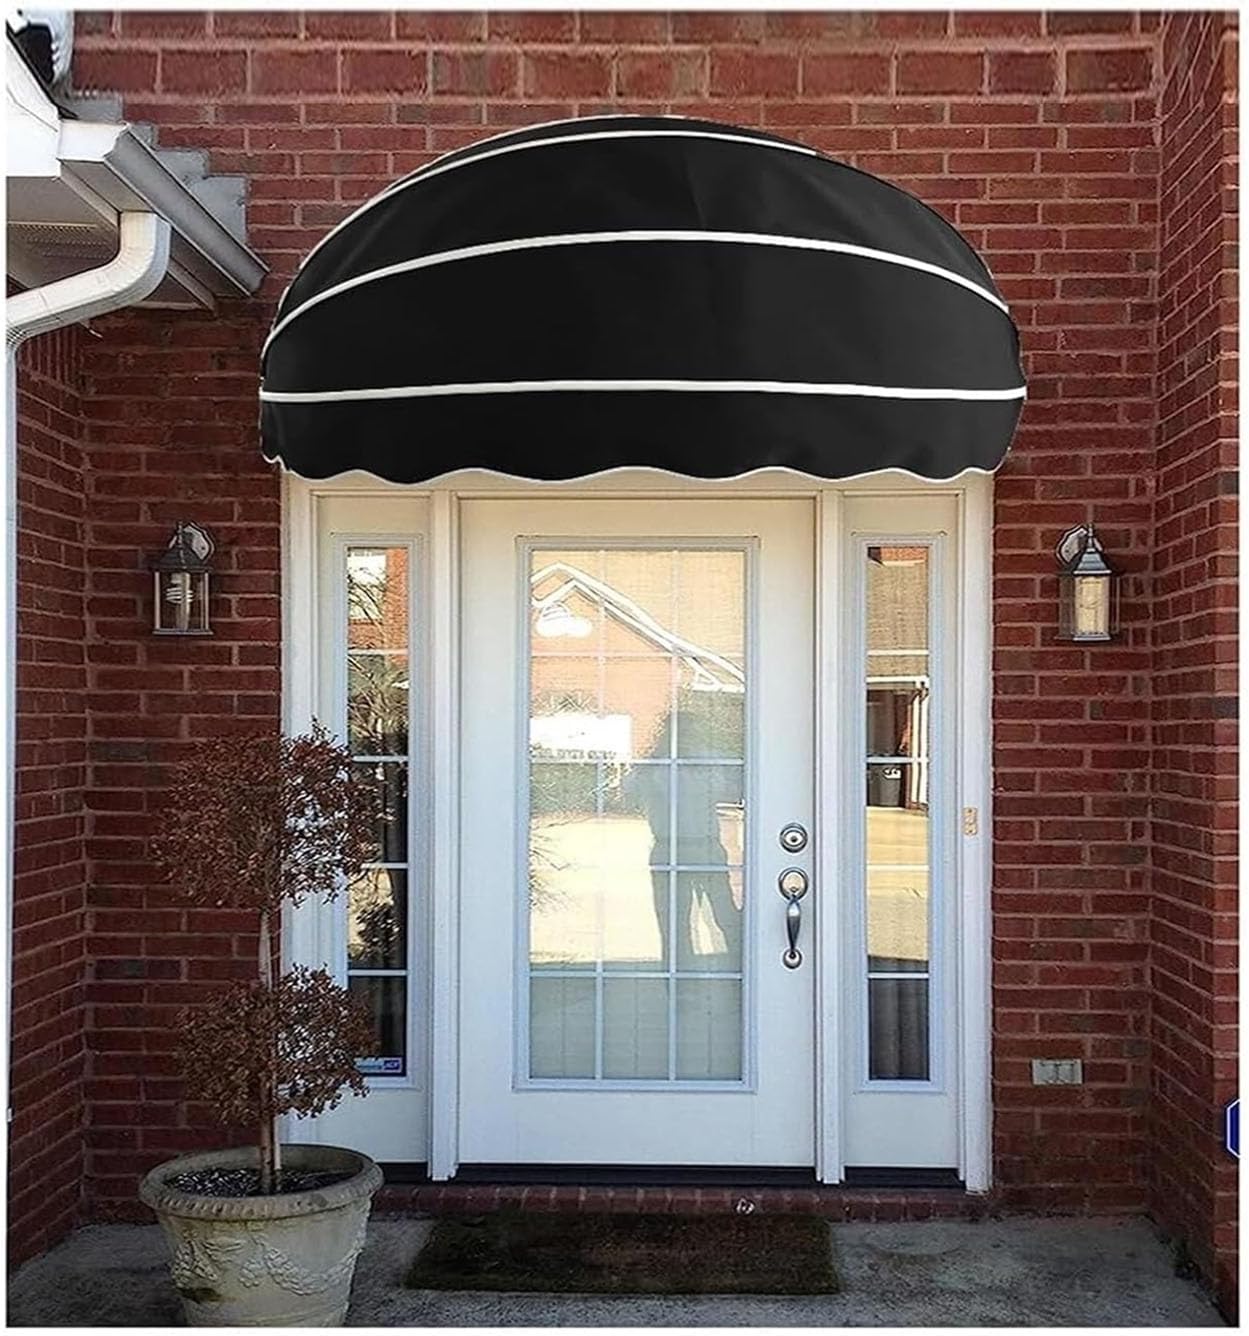
Image 1.1: Generic Dome-shaped Retractable Awning providing shade over an entrance.
2. Safety Information
- Always ensure the awning is securely mounted to a stable surface.
- Regularly inspect all fittings, screws, and connections. Tighten any loose components immediately to prevent accidents.
- While the awning is weatherproof, consider retracting or securing it during extreme weather conditions such as very strong winds or heavy snowfall to prevent damage.
- Installation should ideally be performed by two people for safety and efficiency.
3. Package Contents
Please verify that all components are present before beginning installation:
- 1 x Dome-shaped Retractable Awning (Polyester fabric cover and galvanized frame)
- All necessary mounting accessories (screws, anchors, brackets)
4. Specifications
| Feature | Description |
|---|---|
| Product Name | Dome-shaped Retractable Awning |
| Model | 60cm Diameter Dome Awning |
| Material | Polyester fabric, Galvanized steel frame |
| Waterproof | Yes |
| UV Resistance | Blocks up to 98% of harmful UV rays |
| Weather Resistance | Waterproof, UV-resistant, Frost-resistant, Wind-resistant |
| Dimensions (Diameter) | 60cm (23.62 inches). Other sizes available. |
| Manufacturer | Generic |
| ASIN | B0FQJB38ZG |
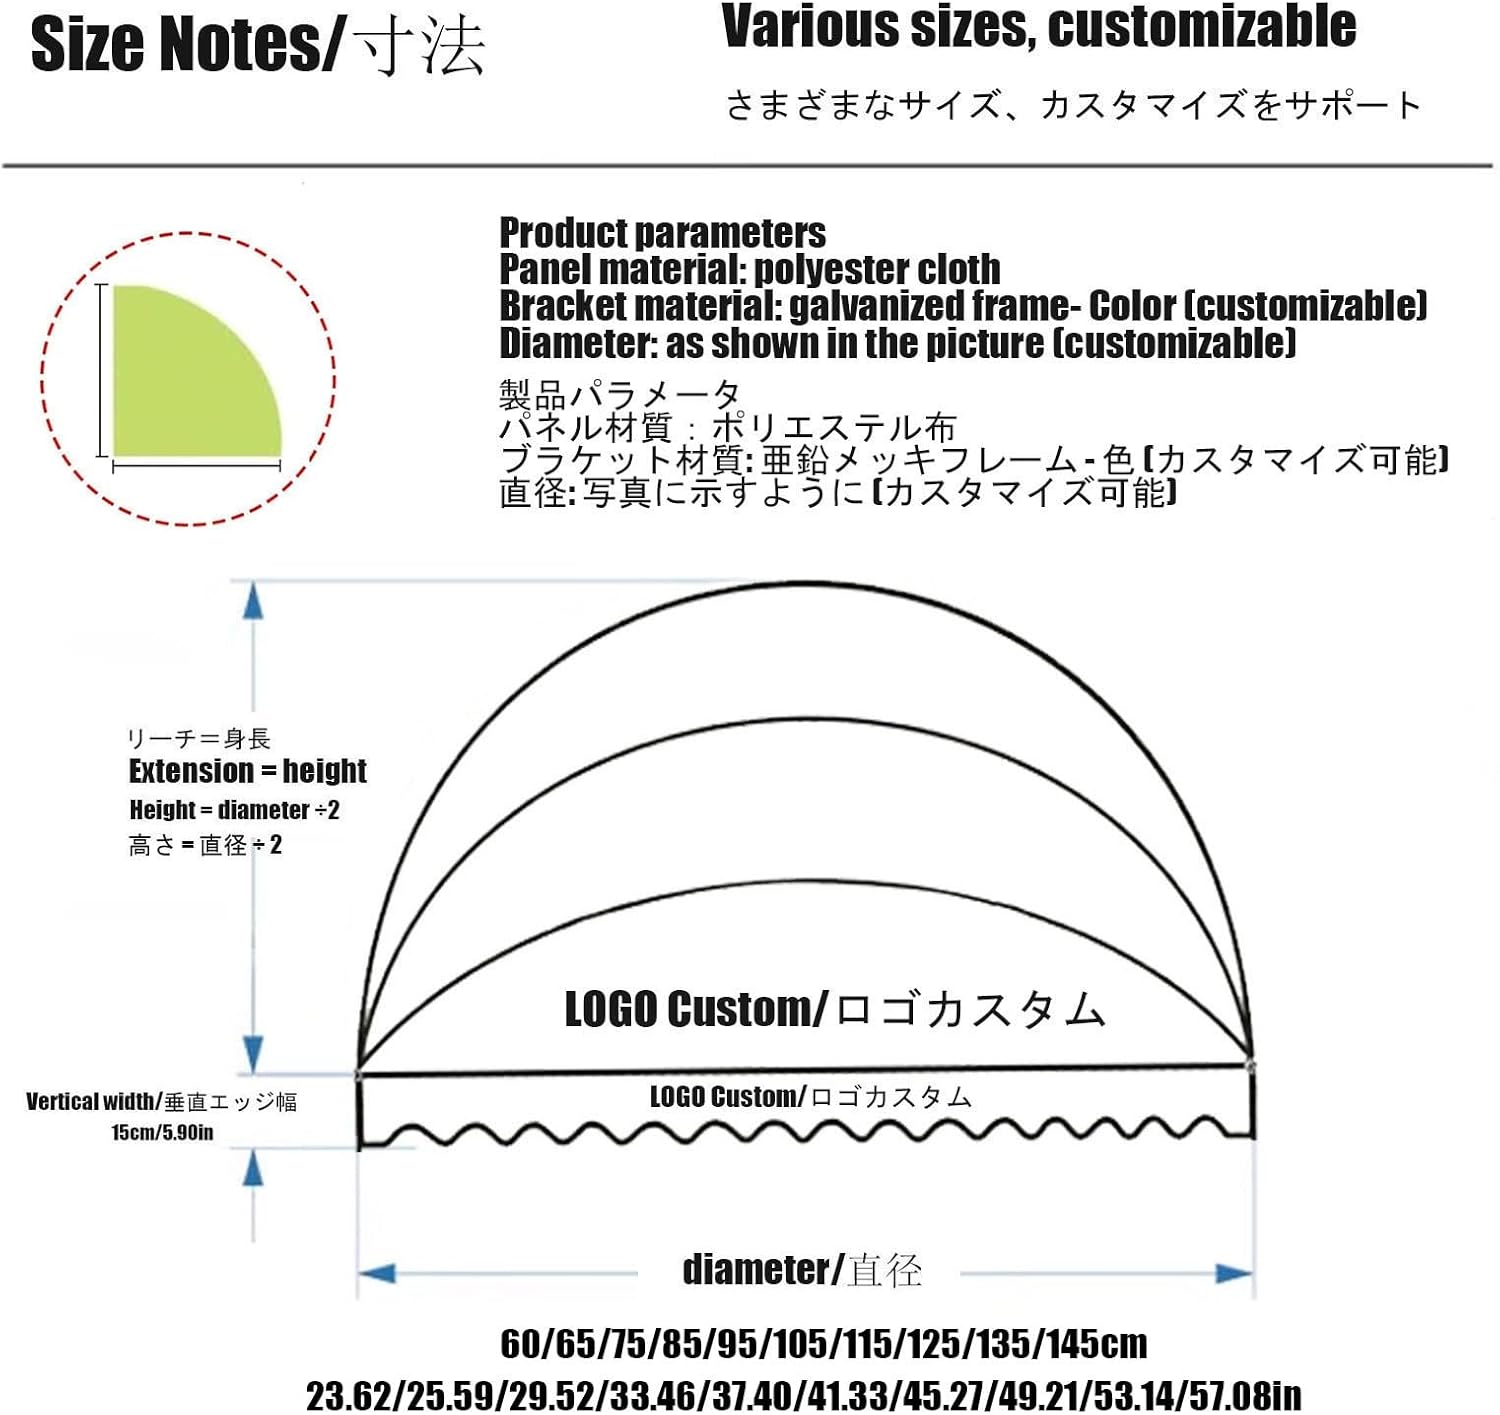
Image 4.1: Awning dimensions and customizable options.

Image 4.2: Key features: UV resistant, waterproof, and windproof.
5. Setup and Installation
The awning is designed for straightforward installation. We recommend two individuals for the installation process to ensure safety and ease.
Required Tools (Not Included):
- Drill
- Drill bits appropriate for your wall material
- Measuring tape
- Pencil or marker
- Wrench or spanner
- Level (optional, for precise alignment)
Installation Steps:
- Step 1: Mark Mounting Points
Hold the awning frame or brackets against the desired installation location on your wall. Use a pencil or marker to accurately mark the positions for drilling. Ensure the marks are level and spaced correctly for the awning's width. - Step 2: Drill Holes
Using an appropriate drill bit for your wall material (e.g., brick, concrete, wood), drill holes at the marked locations. Ensure the depth is sufficient for the provided anchors. - Step 3: Insert Anchors
Insert the wall anchors into the drilled holes. Tap them gently with a hammer if necessary until they are flush with the wall surface. - Step 4: Attach Brackets
Align the mounting brackets with the inserted anchors. Secure the brackets to the wall using the provided screws and a wrench. Ensure they are tightened firmly. - Step 5: Mount Awning Frame
Carefully lift the assembled awning frame and attach it to the installed wall brackets. Secure the frame to the brackets using the remaining hardware. Double-check all connections for tightness. - Step 6: Install Fabric Cover
If the fabric cover is separate, carefully attach it to the awning frame according to the design. Ensure it is taut and evenly distributed.

Image 5.1: Visual guide for awning installation steps.

Image 5.2: Detailed view of awning components and material quality.
6. Operating Instructions
Your Dome-shaped Retractable Awning is designed to provide fixed, continuous protection once installed. While the term 'retractable' may appear in some descriptions, this model is primarily a fixed installation that offers permanent shade and rain cover. The 'foldable' aspect refers to its design for compact shipping and assembly, not daily manual retraction.
Once properly installed, the awning functions as a mini-shelter, keeping your entrance areas dry and protected from direct sunlight. It effectively blocks up to 98% of harmful UV rays and prevents rain and light snow from reaching your windows or doors.

Image 6.1: Awning providing sun protection and rainproofing.
7. Maintenance
- Cleaning: The polyester fabric can be cleaned with mild soap and water. Use a soft brush or cloth to gently scrub away dirt and debris. Rinse thoroughly with clean water and allow to air dry completely before folding or storing (if applicable). Avoid harsh chemicals or abrasive cleaners.
- Frame Inspection: Periodically check the galvanized frame for any signs of rust or damage. While galvanized steel is resistant to corrosion, extreme conditions or prolonged exposure can affect it.
- Hardware Check: Regularly inspect all mounting hardware, screws, and connections. Over time, vibrations or weather changes can cause them to loosen. Tighten any loose fasteners to maintain stability and safety.
- Winter Care: Although the awning is frost-resistant, in areas with heavy snowfall, it is advisable to gently remove accumulated snow to prevent excessive weight on the frame.
8. Troubleshooting
- Awning feels unstable after installation: Ensure all mounting screws and anchors are correctly installed and fully tightened. Verify that the wall surface is suitable for supporting the awning's weight.
- Water pooling on the fabric: While the dome shape is designed to shed water, ensure the fabric is taut and evenly stretched across the frame. If pooling occurs, check for any sagging areas or obstructions.
- Fabric appears dirty or stained: Refer to the cleaning instructions in the Maintenance section. Most dirt can be removed with mild soap and water.
9. Warranty Information
Specific warranty details for this product are not provided in the available information. For warranty claims or detailed information regarding product guarantees, please contact the seller or manufacturer directly. Keep your proof of purchase for any potential warranty inquiries.
10. Support
If you encounter any issues not covered in this manual or require further assistance, please contact the seller through your purchase platform. Provide your product model and ASIN (B0FQJB38ZG) for quicker support.