
1. Introduction
This manual provides essential information for the safe and efficient operation, assembly, and maintenance of your Aovowheel AW2PRO Electric Dirt Bike. Please read this manual thoroughly before using the product and retain it for future reference.
The Aovowheel AW2PRO is designed for adults, featuring 20-inch fat tires, a 48V 18Ah battery, and a 750W (1000W Peak) motor. It offers multiple riding modes and full suspension for various terrains.
2. Safety Precautions
Always prioritize safety when operating your electric bike. Failure to follow safety guidelines can result in serious injury or damage to the product.
- Wear a helmet and appropriate safety gear at all times.
- Ensure all components are securely fastened before each ride.
- Familiarize yourself with local traffic laws and regulations for electric bikes.
- Do not operate the bike under the influence of alcohol or drugs.
- Avoid riding in adverse weather conditions or on slippery surfaces.
- Regularly inspect brakes, tires, and battery for proper function.
- Keep hands and feet clear of moving parts.
3. Package Contents
Upon unpacking, verify that all items listed below are present and undamaged. If any items are missing or damaged, contact customer support.
- Aovowheel AW2PRO Electric Dirt Bike (main frame with rear wheel and battery)
- Front Wheel
- Handlebars
- Headlight
- Front Fender
- Front Basket
- Pedals (Left and Right)
- Charger
- Tool Kit (wrenches, hex keys, screwdriver)
- User Manual (this document)
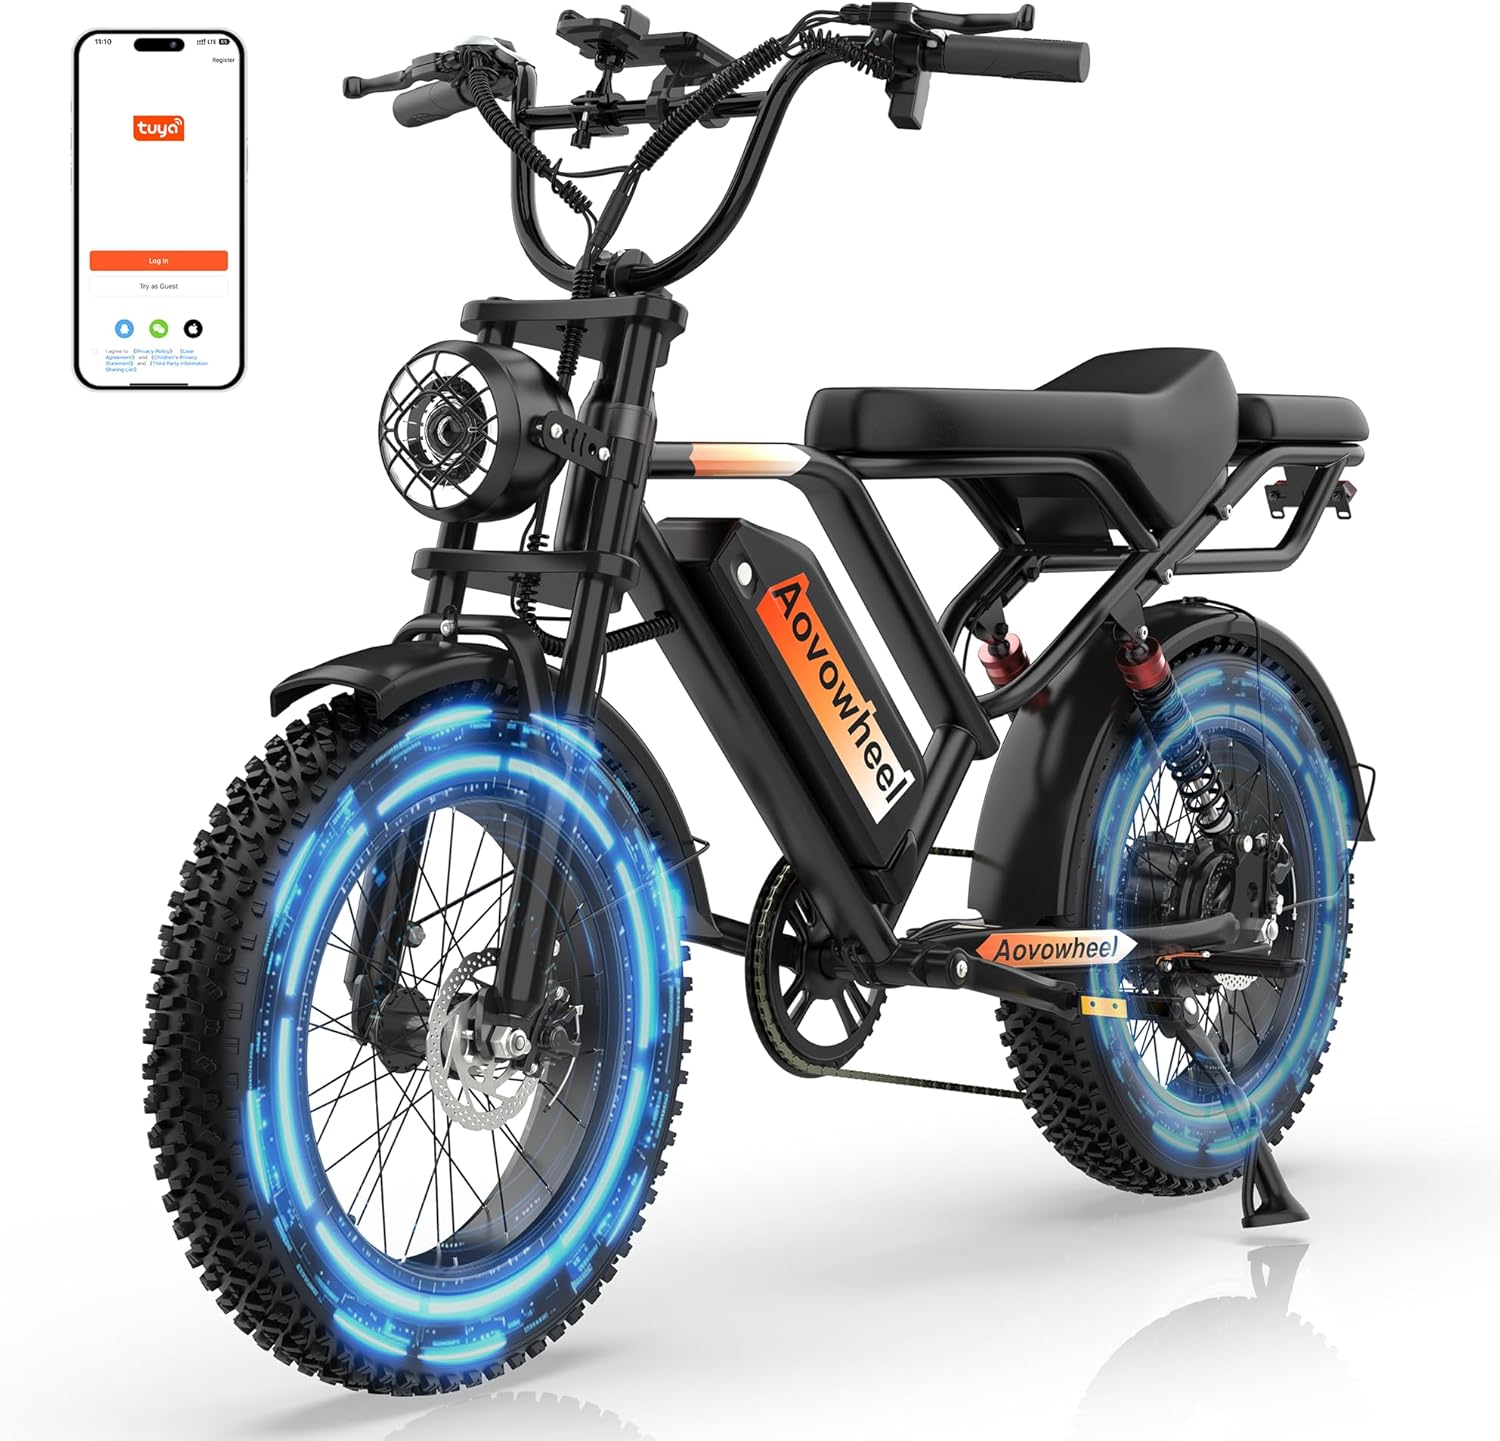
This image displays the complete Aovowheel AW2PRO Electric Dirt Bike, highlighting its robust frame, fat tires, and integrated components. The battery pack is visible on the downtube, and the headlight is mounted on the front fork.
4. Setup and Assembly
Follow these steps carefully to assemble your Aovowheel AW2PRO Electric Dirt Bike.
4.1 Unboxing
- Carefully open the packaging box.
- Remove the cardboard securing the bike, the tool kit, and foam from the box.
- Lift the bicycle out of the box.
- Open the kickstand and stand the bike upright.
- Cut and remove all foam and straps wrapped around the bike body.
4.2 Handlebar Installation
- Use a hex key from the tool kit to loosen the four screws on the clamp cover securing the handlebars and remove the cover.
- Position the handlebars into the stem, ensuring proper alignment.
- Reattach the clamp cover and tighten the four screws securely.
- Adjust the handlebar angle to a comfortable position and tighten the screws.
4.3 Front Wheel Installation
- Loosen the screws securing the front wheel and remove the spacer between the brake pads.
- Remove the bottom spacer plate from the front fork.
- Install the front wheel onto the front fork, ensuring the brake disc is aligned and inserted between the brake pads.
- Both sides of the front fork have clip washers; position them correctly before tightening the screws.
- Tighten the screws on both sides of the front wheel securely.
4.4 Headlight Installation
- Remove the screws on both sides of the headlight bracket.
- Fix the headlight onto the bracket, ensuring the washers on both sides are placed against the headlight.
- Use the appropriate tool to tighten the screws.
- Align the two interfaces of the headlight wire and connect them.
4.5 Front Fender Installation
- Remove the screws securing the fender to the front fork.
- Position the fender correctly and reattach the screws, tightening them securely.
- Tighten the screws on both sides of the fender bracket.
4.6 Pedal Installation
- Distinguish between the left and right pedals. The left pedal is marked with an "L", and the crank arm also has a corresponding marking.
- Screw the left pedal onto the crank arm in the direction indicated by the marking.
- The right pedal is installed in the same way.
- Use a tool to tighten the pedals securely.
4.7 Front Basket Installation
- Remove the screws securing the basket from the frame.
- Position the basket correctly on the frame and reattach the screws, tightening them securely.

The front basket provides convenient storage for personal belongings or small cargo, enhancing the bike's practicality for daily use.
5. Operating Instructions
5.1 Powering On/Off
- Turn on the power switch located on the battery.
- Long press the start button on the handlebar to light up the screen.
- To power off, long press the start button again until the screen turns off.
5.2 Riding Modes
Your Aovowheel AW2PRO offers three riding modes:
- Pure Electric Mode: Engage the throttle for motor-only propulsion.
- Electric Assist Mode (Pedal Assist): The motor provides assistance as you pedal. Adjust assist levels via the handlebar controls.
- Bicycle Mode: Ride as a traditional bicycle without motor assistance.

The image illustrates the three operational modes: Throttle Mode (40-70 miles range), Pedal Assist (30-35 miles range), and Bicycle Mode (30-35 miles range), allowing riders to choose based on preference and terrain.
5.3 Display and Controls
The intelligent LCD display provides real-time information:
- Speed (MPH)
- Battery Power Level
- Pedal Assist Level (PAS)
- Mileage (ODO)
Use the handlebar controls to adjust pedal assist levels and navigate display options.

The image showcases the bike's safety and comfort elements, including the clear LCD display for monitoring ride metrics, powerful headlights and taillights for visibility, responsive dual disc brakes, and an ergonomic wider seat for enhanced comfort.
6. Maintenance
Regular maintenance ensures the longevity and safe operation of your electric bike.
6.1 Battery Care
- Charge the 48V 18Ah removable battery using the provided charger. A full charge takes approximately 5 hours.
- Do not overcharge or completely drain the battery.
- Store the battery in a cool, dry place when not in use.
- If storing for extended periods, charge the battery to 50-70% every 2-3 months.

The image shows the bike's removable 48V 18Ah battery, emphasizing its UL2849 certification for safety and its capacity to provide a range of 40-70 miles on a single charge.
6.2 Tire Maintenance
- Maintain proper tire pressure (refer to tire sidewall for recommended PSI).
- Inspect 20x4.0 inch fat tires regularly for wear, punctures, or damage.
- Clean tires to remove dirt and debris that could cause punctures.

The image highlights the bike's 20-inch pneumatic fat tires, emphasizing their durability, slip-resistance, and puncture-resistance, making them suitable for various terrains including snow, mountains, beaches, and city streets.
6.3 Brake System
- Check dual disc brakes for responsiveness and proper function before each ride.
- Ensure brake pads are not excessively worn. Replace as needed.
- Keep brake discs clean and free from oil or grease.
6.4 General Cleaning
- Clean the bike regularly with a damp cloth. Avoid high-pressure washing directly on electrical components.
- Lubricate the chain periodically to ensure smooth operation.
7. Troubleshooting
| Problem | Possible Cause | Solution |
|---|---|---|
| Bike does not power on | Battery not charged or power switch off. | Ensure battery is charged and power switch is in the 'ON' position. Check connections. |
| Motor not assisting | Pedal assist level is 0 or motor connection loose. | Increase pedal assist level on the display. Check motor cable connections. |
| Brakes feel weak | Worn brake pads or loose brake cables. | Inspect and replace brake pads if worn. Adjust brake cable tension. |
| Unusual noises during ride | Loose components or chain issues. | Check all bolts and nuts for tightness. Lubricate chain. Inspect for foreign objects. |
If you encounter issues not listed here or solutions do not resolve the problem, please contact Aovowheel customer support.
8. Specifications
| Feature | Detail |
|---|---|
| Model Name | AW2PRO |
| Motor | 750W (1000W Peak) Brushless Motor |
| Battery | 48V 18Ah (864Wh) Removable Lithium Battery (UL2849 certified) |
| Max Speed | 31 mph |
| Range | 50-70 miles (Assist Mode), 50 miles (Full Throttle) |
| Charging Time | 5 hours (Fast Charging) |
| Tires | 20x4.0 inch Fat Tires |
| Suspension | Full Suspension (Suspension Front Forks X2, Rear Shock Absorber X2) |
| Brakes | Dual Disc Brakes |
| Frame Material | Aluminum |
| Max Load | 330 lbs / 150 kg |
| Recommended Height | 5'4" – 6'5" |
| Special Features | LCD Display, APP Control, GPS Anti-Theft, USB Mobile Phone Holder, Headlights, Taillights |
9. Warranty and Support
Aovowheel products come with a limited warranty. For specific warranty terms and conditions, please refer to the warranty card included with your product or visit the official Aovowheel website.
For technical support, troubleshooting assistance, or parts replacement, please contact Aovowheel customer service. Have your model number (AW2PRO) and purchase date ready when contacting support.
You can also visit the Aovowheel Store on Amazon for additional product information and support resources.