
Introduction
This manual provides detailed instructions for the installation, operation, and maintenance of your Zomolither 4-inch 1080P Mirror Dash Cam. Please read this manual thoroughly before using the device to ensure proper functionality and safety.
What's in the Box
Verify that all components are present in the package:
- 1x Mirror Dash Cam
- 1x Backup Camera
- 1x Extended Line (for backup camera)
- 1x Car Charger
- 1x User Manual
- Accessories (mounting straps/bands)
- 1x 32GB TF Card

Image: Package contents showing the mirror dash cam, rear camera, cables, car charger, and user manual.
Product Features
- 4-inch LCD Screen: User-friendly interface for clear viewing and operation.
- Dual Camera Recording: Front camera (1080P) and rear camera (720P) for simultaneous recording.
- Wide Angle Lenses: 150-degree front camera and 120-degree rear camera for comprehensive coverage.
- Six Display Modes: View front, rear, or combined camera feeds in various configurations.
- Superior Night Vision & HDR: Enhanced low-light performance and clear imaging in varied lighting conditions.
- Loop Recording: Continuous recording that overwrites older files when the memory card is full.
- G-Sensor: Automatically locks and saves video footage upon detecting sudden impacts or collisions.
- 24-Hour Parking Monitor: Functions as a surveillance system when the vehicle is parked (requires optional hardwire kit).
- Motion Detection: Automatically starts recording when motion is detected.
- Reversing Assistance: Displays guidelines on the screen when reversing for safer parking.
- Included 32GB TF Card: Provides immediate storage for recordings.
Setup and Installation
Follow these steps to install your mirror dash cam:
- Mount the Mirror Dash Cam: Securely attach the mirror dash cam over your existing rearview mirror using the provided straps. Ensure it is centered and does not obstruct your view.
- Install the Front Camera: The front camera is integrated into the mirror dash cam. Adjust its angle as needed to capture the road ahead. The lens can be rotated for optimal positioning.
- Install the Rear Camera:
- Choose a suitable location for the rear camera, typically above the license plate or on the rear window.
- Secure the rear camera using the provided mounting hardware.
- Route the extended cable from the rear camera to the main mirror dash cam unit. Hide the cable along the vehicle's trim for a neat installation.
- Connect the rear camera cable to the AV-IN port on the mirror dash cam.
- Power Connection:
- Insert the car charger into your vehicle's cigarette lighter socket.
- Connect the other end of the car charger cable to the USB power input on the mirror dash cam.
- Route the power cable discreetly to avoid interference with driving.
- Insert TF Card: Insert the provided 32GB TF card into the TF card slot on the dash cam. Ensure it is inserted correctly.
- Initial Power On: Start your vehicle. The dash cam should power on automatically and begin recording.

Image: Installation guide illustrating the placement of the front mirror dash cam and the rear camera, along with suggested cable routing paths.

Image: Detail of the front camera lens, demonstrating its 150-degree wide angle and rotational capability for angle adjustment.
Operating Instructions
Basic Operation
- Power On/Off: The device powers on automatically when the vehicle starts and powers off when the vehicle is turned off. You can also manually power it on/off using the power button.
- Recording: Recording starts automatically when the device is powered on. A red indicator light or icon on the screen typically confirms recording is active.
- Screen Display: The 4-inch LCD screen displays the live view from the cameras.
Display Modes
The dash cam supports six display modes, allowing you to view different camera combinations. Use the touch screen or physical buttons (if available) to cycle through these modes:
- Front Camera Only
- Rear Camera Only
- Front & Rear (Picture-in-Picture)
- Rear & Front (Picture-in-Picture)
- Front + Rear (Split Screen)
- Rear + Front (Split Screen)
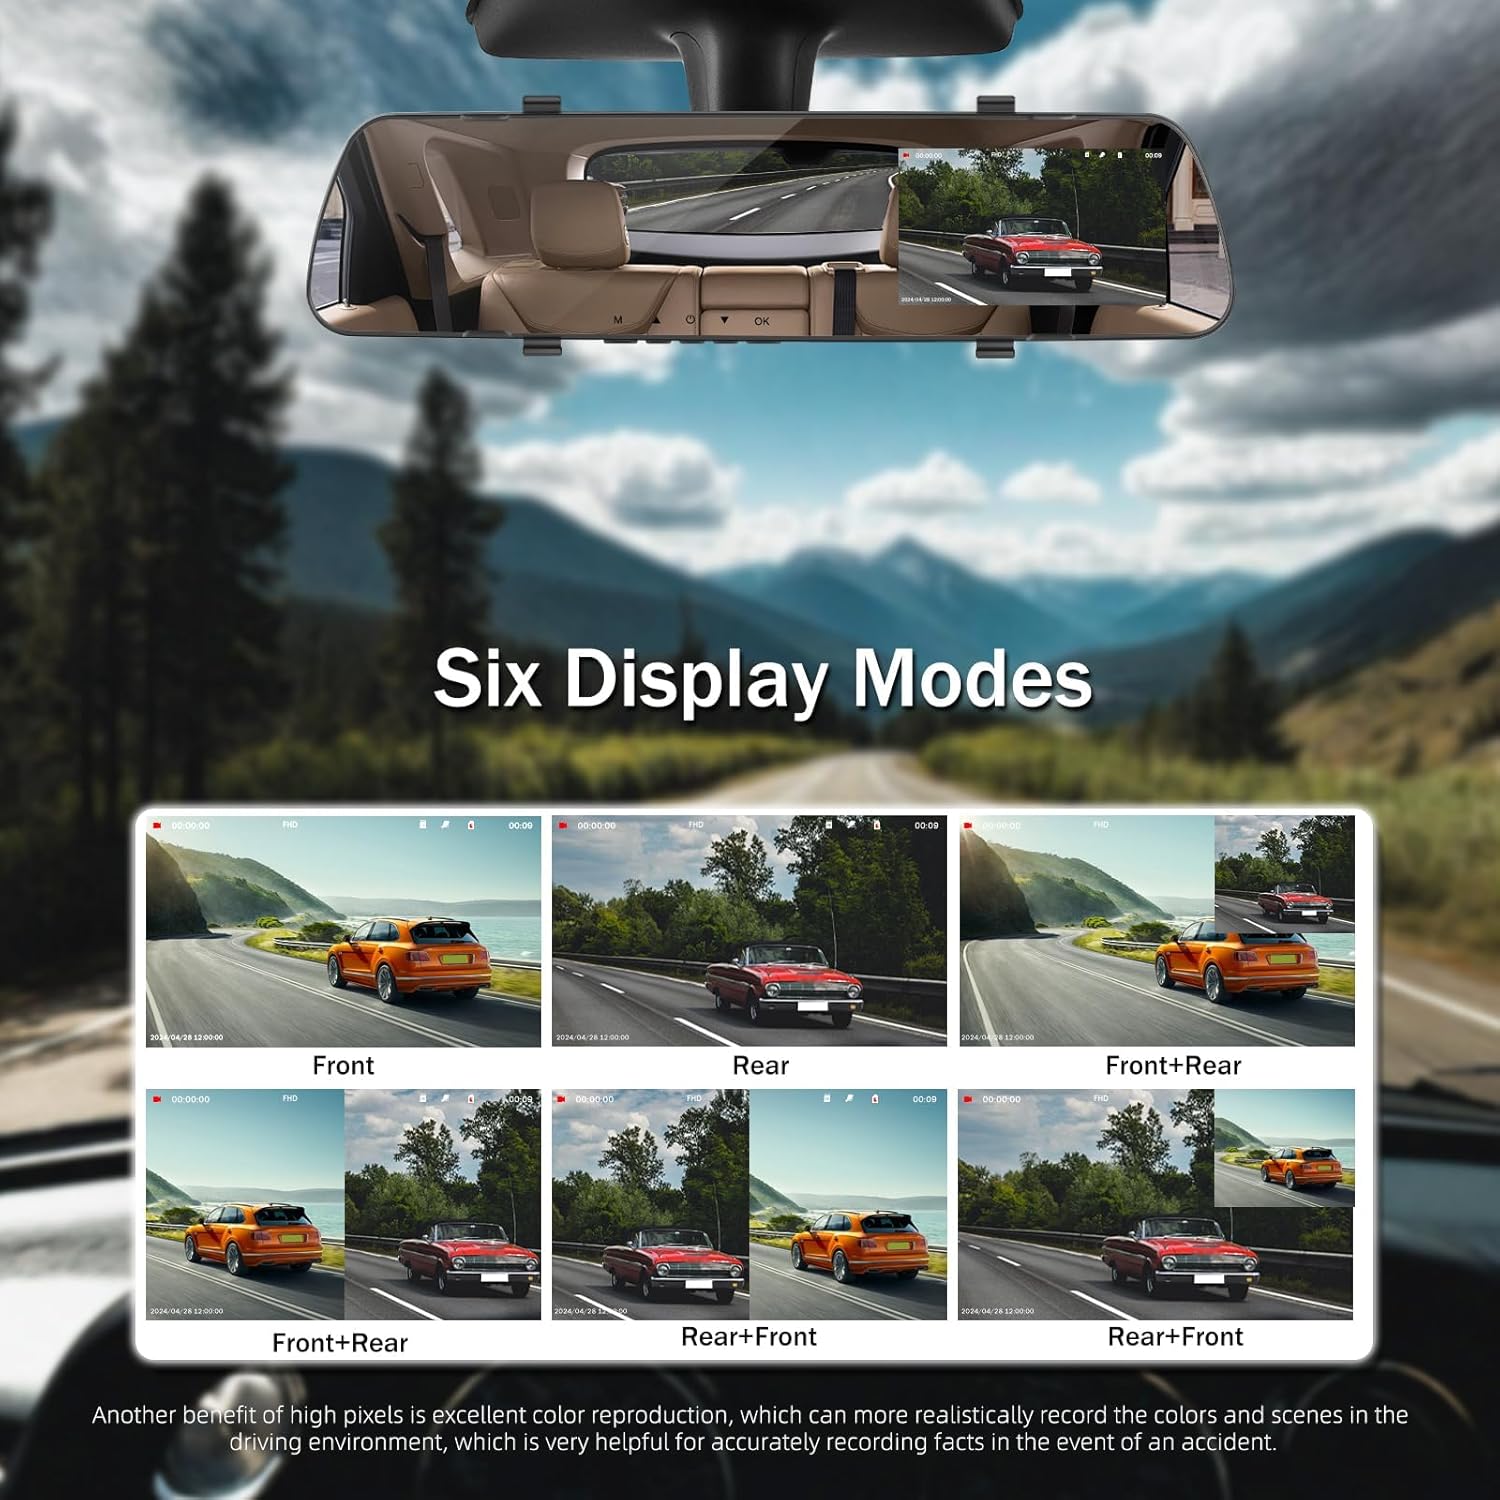
Image: Visual representation of the six available display modes, including front-only, rear-only, and various picture-in-picture or split-screen combinations.
Advanced Features
- Loop Recording: When the memory card is full, the oldest unlocked video files will be automatically overwritten by new recordings. This ensures continuous recording without manual intervention.
- G-Sensor (Emergency Recording): In the event of a sudden impact or collision, the built-in G-sensor will detect the event and automatically lock the current video file, preventing it from being overwritten by loop recording.
- Parking Monitor: To activate 24-hour parking monitoring, an optional hardwire kit (not included) is required. Once installed, the dash cam will automatically start recording if it detects a collision or motion while the vehicle is parked and turned off.
- Motion Detection: When enabled, the dash cam will automatically begin recording if it detects movement in front of the vehicle while parked.
- Night Vision & HDR: The camera automatically adjusts to low-light conditions to provide clearer video footage at night. HDR (High Dynamic Range) technology further enhances image clarity in varying light.
- Reversing Assistance: When the vehicle is put into reverse, the screen will automatically switch to the rear camera view and display parking guidelines to assist with safe parking.

Image: Demonstration of HD Night Vision and Exposure Compensation, highlighting improved visibility in dark conditions.
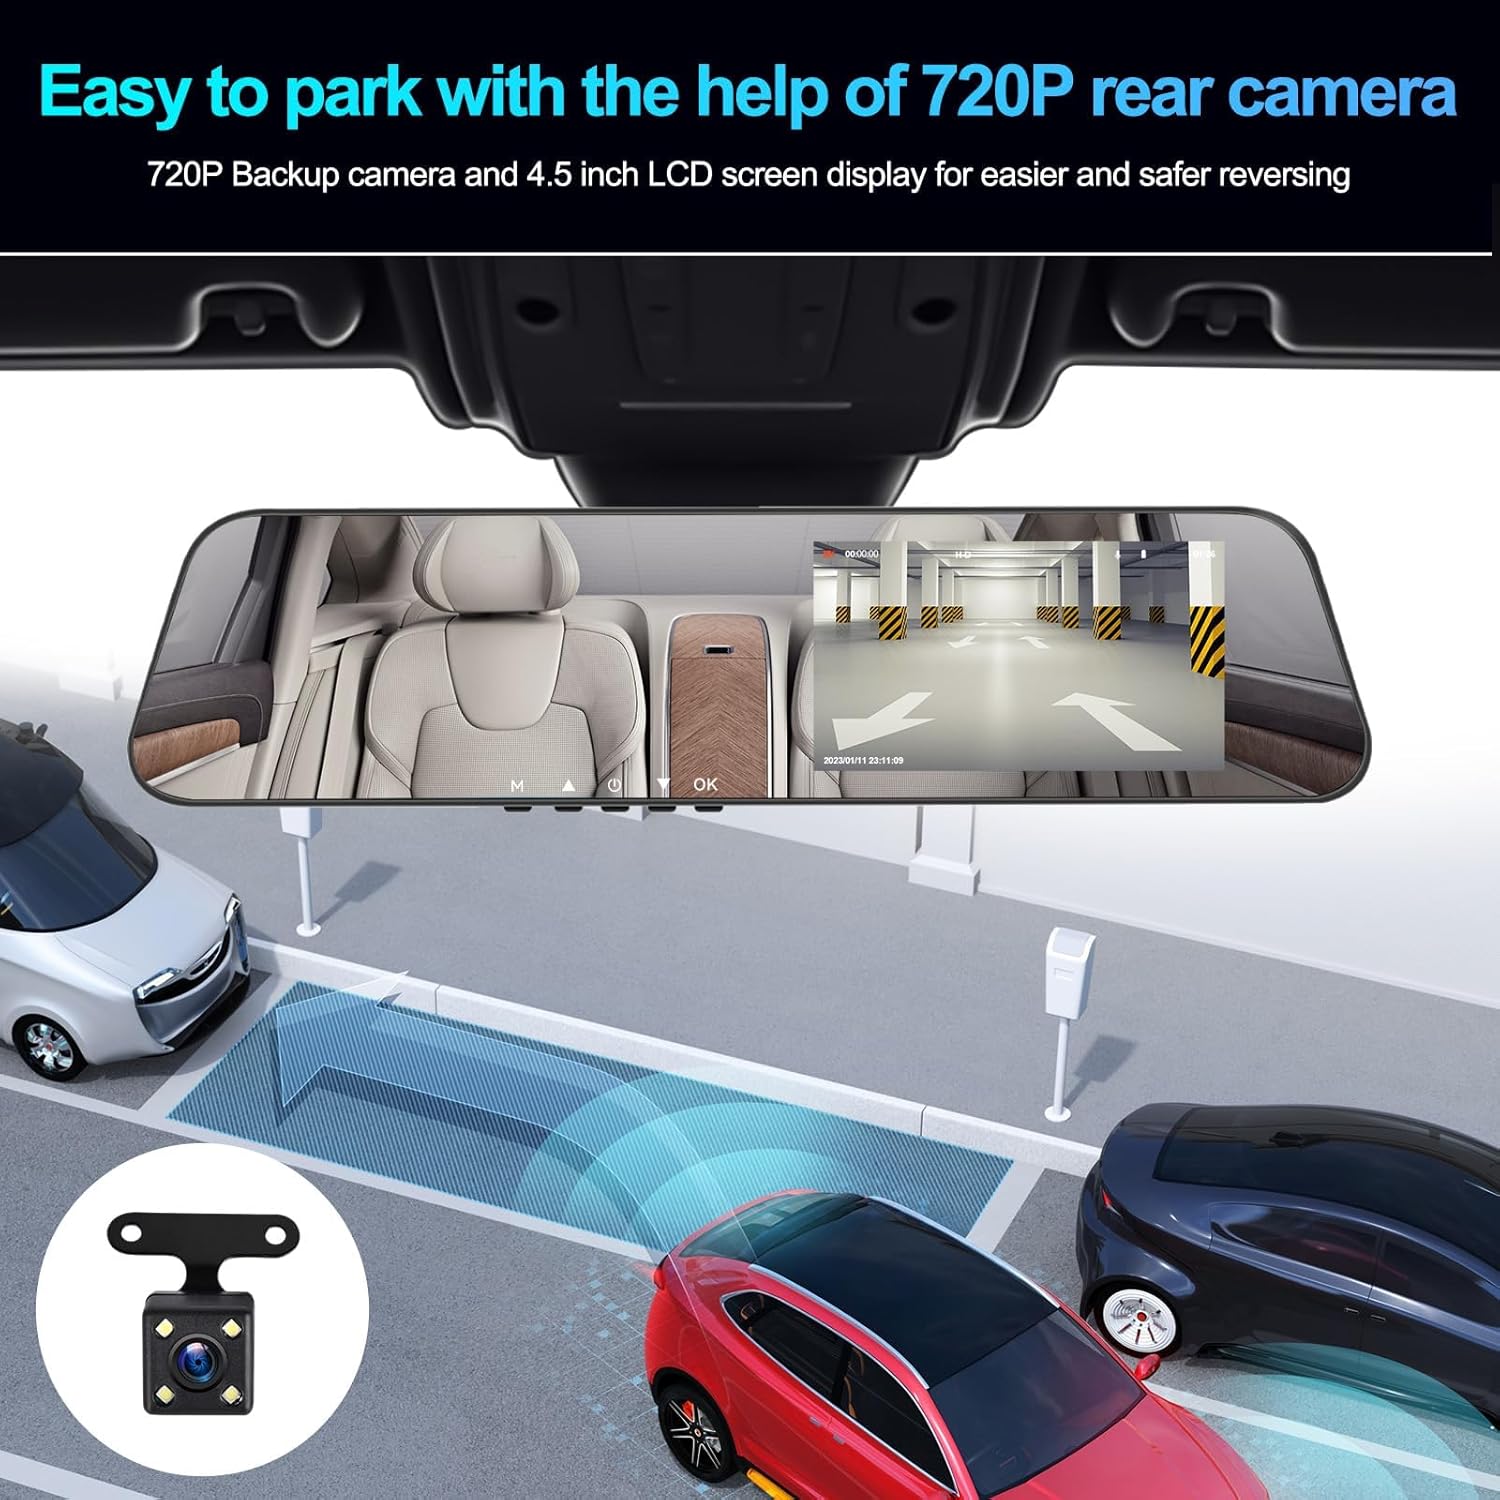
Image: Illustration of the parking assistance feature, displaying the rear camera feed with overlaid guidelines for easier reversing.

Image: Visual explanation of Motion Detection, Loop Recording, and 24-Hour Parking Monitor functionalities.
Maintenance
- Cleaning the Lenses: Regularly clean the front and rear camera lenses with a soft, lint-free cloth to ensure clear video quality. Avoid abrasive materials.
- Memory Card Management:
- Format the TF card periodically (e.g., once a month) within the dash cam's settings to maintain optimal performance and prevent data corruption.
- Replace the TF card if you notice any recording errors or performance degradation. The dash cam supports up to 128GB cards.
- Firmware Updates: Check the manufacturer's website periodically for any available firmware updates to improve performance or add new features.
- Cable Inspection: Periodically inspect all cables for any signs of wear or damage. Replace damaged cables immediately to prevent electrical issues.
Troubleshooting
| Problem | Possible Cause / Solution |
|---|---|
| Dash cam does not power on. |
|
| Recording stops or freezes. |
|
| Poor video quality. |
|
| Rear camera not displaying. |
|
| Screen too bright/dim. |
|
Specifications
- Product Dimensions: 9.2 x 0.9 x 2.8 inches
- Item Weight: 1.15 pounds
- Front Camera Video Resolution: 1080p
- Rear Camera Video Resolution: 720p
- Front Camera Angle: 150 degrees
- Rear Camera Angle: 120 degrees
- Display Screen: 4-inch LCD
- Storage: Supports TF card up to 128GB (32GB included)
- Special Features: Loop Recording, Motion Sensing, Night Vision, Parking Monitor, Touch Screen, G-Sensor, Reversing Assistance
- Connectivity Technology: Bluetooth
- Mounting Type: Windshield Mount (attaches over existing rearview mirror)
- Vehicle Service Type: Bus, Car, RV, Truck
Warranty and Support
For warranty information and technical support, please refer to the contact details provided on the product packaging or the official Zomolither website. Keep your purchase receipt as proof of purchase for any warranty claims.
If you encounter any issues not covered in this manual, please contact Zomolither customer support for assistance.