1. Introduction
This manual provides essential information for the safe and efficient operation of your LVSEDTAL CM-30A/12/24/48V MPPT Solar Controller. This device is designed for waterproof photovoltaic power generation control, ensuring stable and reliable performance for your solar energy system. Please read this manual thoroughly before installation and use.
2. Safety Instructions
- Ensure all connections are secure and correct before powering on the system.
- Do not attempt to disassemble or repair the controller yourself. Refer to qualified personnel.
- Install the controller in a well-ventilated area to prevent overheating.
- Avoid exposing the controller to direct sunlight or extreme temperatures.
- Always disconnect power from solar panels and batteries before performing any maintenance or wiring.
- Wear appropriate personal protective equipment (PPE) when working with electrical systems.
3. Product Overview
The LVSEDTAL CM-30A/12/24/48V MPPT Solar Controller is a robust device designed to optimize power harvesting from your solar panels and efficiently charge your battery bank. Key features include:
- Stability: Engineered for long-term stable operation.
- Battery Compatibility: Supports various battery types and can be charged by solar, utility, or generator power. It allows flexible scheduling of inverter charging and discharging times.
- Versatile Application: Ideal for use as a backup power supply during utility outages.
- LCD Display: Features an intuitive LCD display for easy access to operating parameters, including battery status and operating temperature.
- Comprehensive Protections: Includes temperature-controlled cooling fan, low and high voltage protection, overload protection, short circuit protection, internal fuse, and battery reverse connection protection.
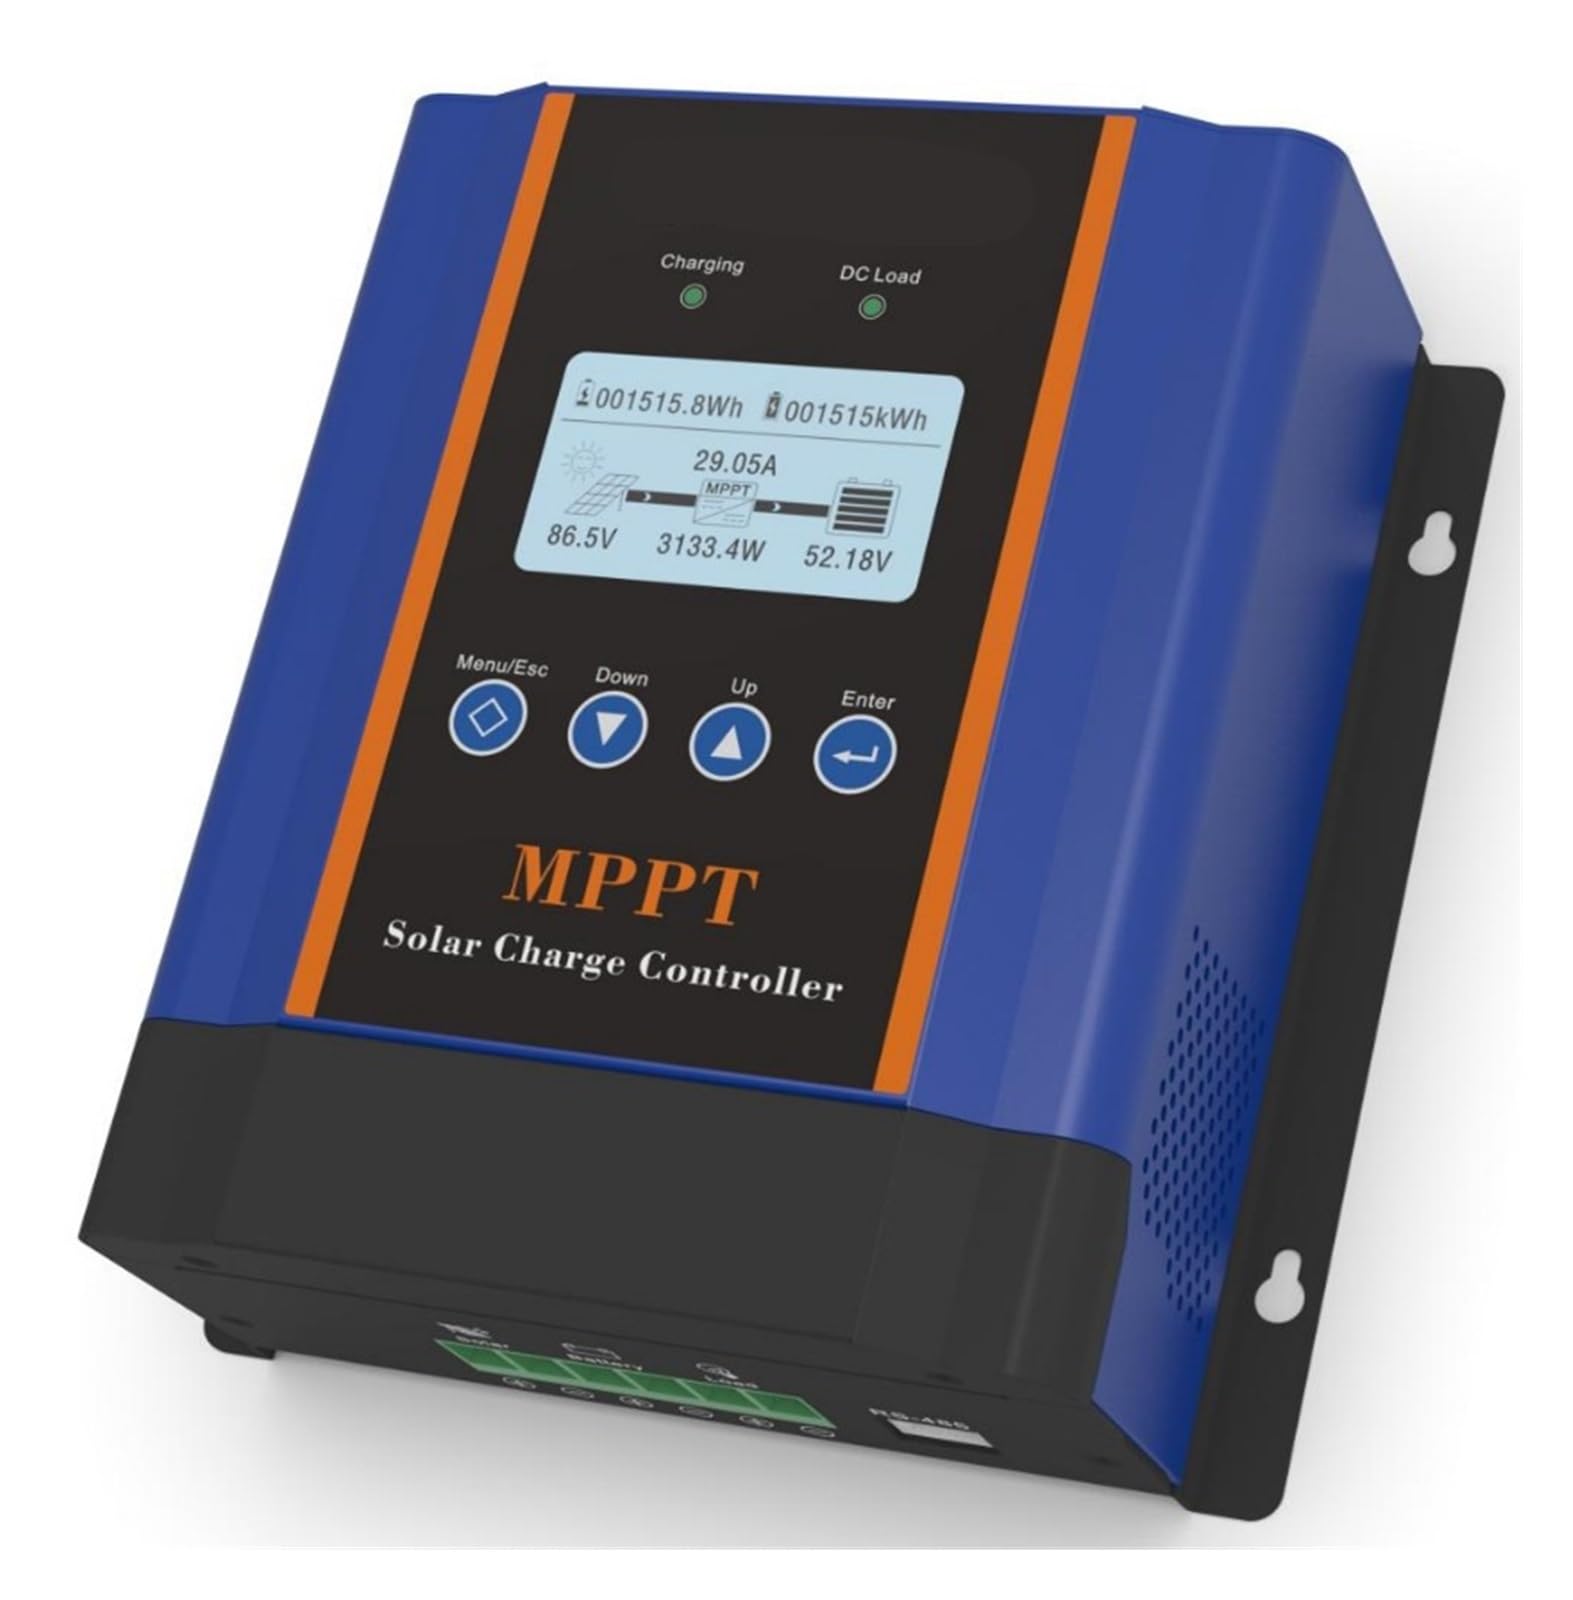
Figure 3.1: Front view of the LVSEDTAL CM-30A/12/24/48V MPPT Solar Controller, showing the LCD display and connection terminals.

Figure 3.2: Side view of the LVSEDTAL CM-30A/12/24/48V MPPT Solar Controller, illustrating the heat sink fins for efficient heat dissipation.
4. Setup
Follow these steps for proper installation of your solar controller:
- Mounting: Choose a suitable location for mounting the controller. Ensure it is protected from direct weather exposure (though waterproof, optimal performance is achieved in a sheltered environment) and has adequate ventilation.
- Battery Connection: Connect the battery to the controller's battery terminals first. Ensure correct polarity (+ to + and - to -). The controller will automatically detect the system voltage (12V, 24V, or 48V).
- Solar Panel Connection: Connect the solar panels to the controller's PV input terminals. Again, observe correct polarity. Ensure the open-circuit voltage of your solar array does not exceed the controller's maximum input voltage.
- Load Connection (Optional): If using the controller's load output, connect your DC loads to the designated load terminals. Do not exceed the maximum rated current for the load output.
- Verify Connections: Double-check all wiring for tightness and correct polarity before proceeding.
5. Operating Instructions
Once installed and powered, the controller will begin operation. The LCD display provides real-time information:
- Monitoring: The LCD displays parameters such as battery voltage, charging current, solar panel voltage, load current, and operating temperature.
- Charging Stages: The controller utilizes a three-stage charging method: constant current (MPPT), balanced charging, and float charging to optimize battery health and lifespan.
- Parameter Adjustment: Refer to the on-screen menu for any adjustable parameters, such as battery type or load control settings. Use the navigation buttons to browse and modify settings as needed.
- Error Codes: In case of a fault, the display may show an error code. Consult the troubleshooting section for guidance.
6. Maintenance
Regular maintenance ensures the longevity and optimal performance of your solar controller:
- Cleaning: Periodically clean the controller's exterior with a dry cloth. Ensure the display remains clear and readable. Do not use harsh chemicals or abrasive cleaners.
- Connections Check: Annually inspect all wiring connections for tightness and corrosion. Loose connections can lead to power loss or overheating.
- Ventilation: Ensure that the cooling fan and ventilation openings are free from dust and debris to maintain efficient heat dissipation.
- Environmental Check: Verify that the installation environment remains within the specified temperature and humidity ranges.
7. Troubleshooting
If you encounter issues with your controller, refer to the following common problems and solutions:
- No Display/No Power: Check battery connections and voltage. Ensure the battery is adequately charged. Verify the internal fuse.
- No Charging: Check solar panel connections and ensure they are receiving sufficient sunlight. Verify solar panel voltage. Ensure the controller is not in a fault state.
- Low Charging Current: Inspect solar panels for shading or dirt. Check for loose connections. Ensure battery voltage is not already high.
- Overheating: Ensure adequate ventilation around the controller. Clean any dust from the cooling fan and heat sinks. Reduce load if possible.
- Error Codes: Consult the specific error code displayed on the LCD with the manufacturer's support documentation (if available) or contact customer support.
For persistent issues, contact LVSEDTAL customer support.
8. Specifications
The following table details the technical specifications for the LVSEDTAL MPPT Solar Controller series, including the CM-30A/12/24/48V model.
| Category | Parameter | Model | |||||
|---|---|---|---|---|---|---|---|
| CM-4830A | CM-4840A | CM-4850A | CM-4860A | CM-4880A | CM-48100A | ||
| Charging | Charging Mode | MPPT automatic maximum power point tracking | |||||
| Charging Method | Three stages: constant current (MPPT), balanced charging, and float charging | ||||||
| System Type | 12V/124V/148V | Automatic recognition/manual setting | |||||
| 12V system identification voltage range | DC9V-DC15V | ||||||
| 24V system identification voltage range | DC18V-DC30V | ||||||
| 48V system identification voltage range | DC36V-DC60V | ||||||
| Response Time | Soft start time (12V/124V/148V) | <10s | |||||
| Dynamic response recovery time (12V/124V/48V) | <500us | ||||||
| Efficiency | Static power (12V/124V/48V) | <2W | |||||
| MPPT Efficiency | Machine efficiency (12V/124V/48V) | ≥96.5% | |||||
| Utilization rate of photovoltaic modules (12V/124V/48V) | <99% | ||||||
| Input Characteristics | MPPT operating voltage range (12V system) | DC18V-DC150V | |||||
| MPPT operating voltage range (24V system) | DC34V-DC150V | ||||||
| MPPT operating voltage range (48V system) | DC65V-DC150V | ||||||
| Maximum input power of solar panels (12V system) | 420W | 570W | 700W | 900W | 1100W | 1400W | |
| Maximum input power of solar panels (24V system) | 840W | 1130W | 1400W | 1700W | 2200W | 2800W | |
| Maximum input power of solar panels (48V system) | 1650W | 2270W | 2800W | 3400W | 4400W | 5600W | |
| Output Characteristics | Current limiting protection (12V/24V/48V) | 32A | 42A | 52A | 62A | 82A | 102A |
| Temperature accuracy (12V/24V/48V) | -0.02%/°C | ||||||
| Temperature compensation output adjustment (12V/24V/48V) | 14.2V (maximum temperature 25°C)*0.3 | ||||||
| Precision (12V/24V/48V) | ≤±15% | ||||||
| Protection | Input low voltage protection | Reference input characteristics | |||||
| Input high voltage protection | Reference input characteristics | ||||||
| Short circuit protection | After 5 trial runs, it will enter a protected state and restart to restore | ||||||
| Temperature protection | 90°C | ||||||
| Temperature rise protection | Reduce power output when exceeding 85°C | ||||||
| Other Parameters | Heat dissipation method | <50dB, Forced air cooling, fan speed adjusted according to temperature | |||||
| Protection level | IP21 | ||||||
| Humidity | 0-90% 6BH (non-condensing) | ||||||
| Photovoltaic module configuration | Photovoltaic module load voltage (recommended value) | ||||||
| Photovoltaic Module Configuration (12V system) | 18V-60V (30V module * 1 set, 36V module * 1 set) | ||||||
| Photovoltaic Module Configuration (24V system) | 36V-72V (2 sets of 30V modules, 2 sets of 36V modules) | ||||||
| Photovoltaic Module Configuration (48V system) | 72V-144V (30V module * 3 sets, 36V module * 3 sets) | ||||||
9. Warranty and Support
For warranty information, technical support, or service inquiries, please refer to the documentation included with your purchase or contact LVSEDTAL customer service directly. Keep your purchase receipt for warranty claims.