Allewie AW5387-2
Allewie Upholstered Queen Size Platform Bed Frame with LED Light and Charging Station Instruction Manual
Model: AW5387-2
Product Overview
This manual provides detailed instructions for the assembly, operation, and maintenance of your Allewie Upholstered Queen Size Platform Bed Frame. This bed frame features integrated LED lighting, a convenient charging station, and a sturdy, noise-free design for enhanced comfort and functionality.
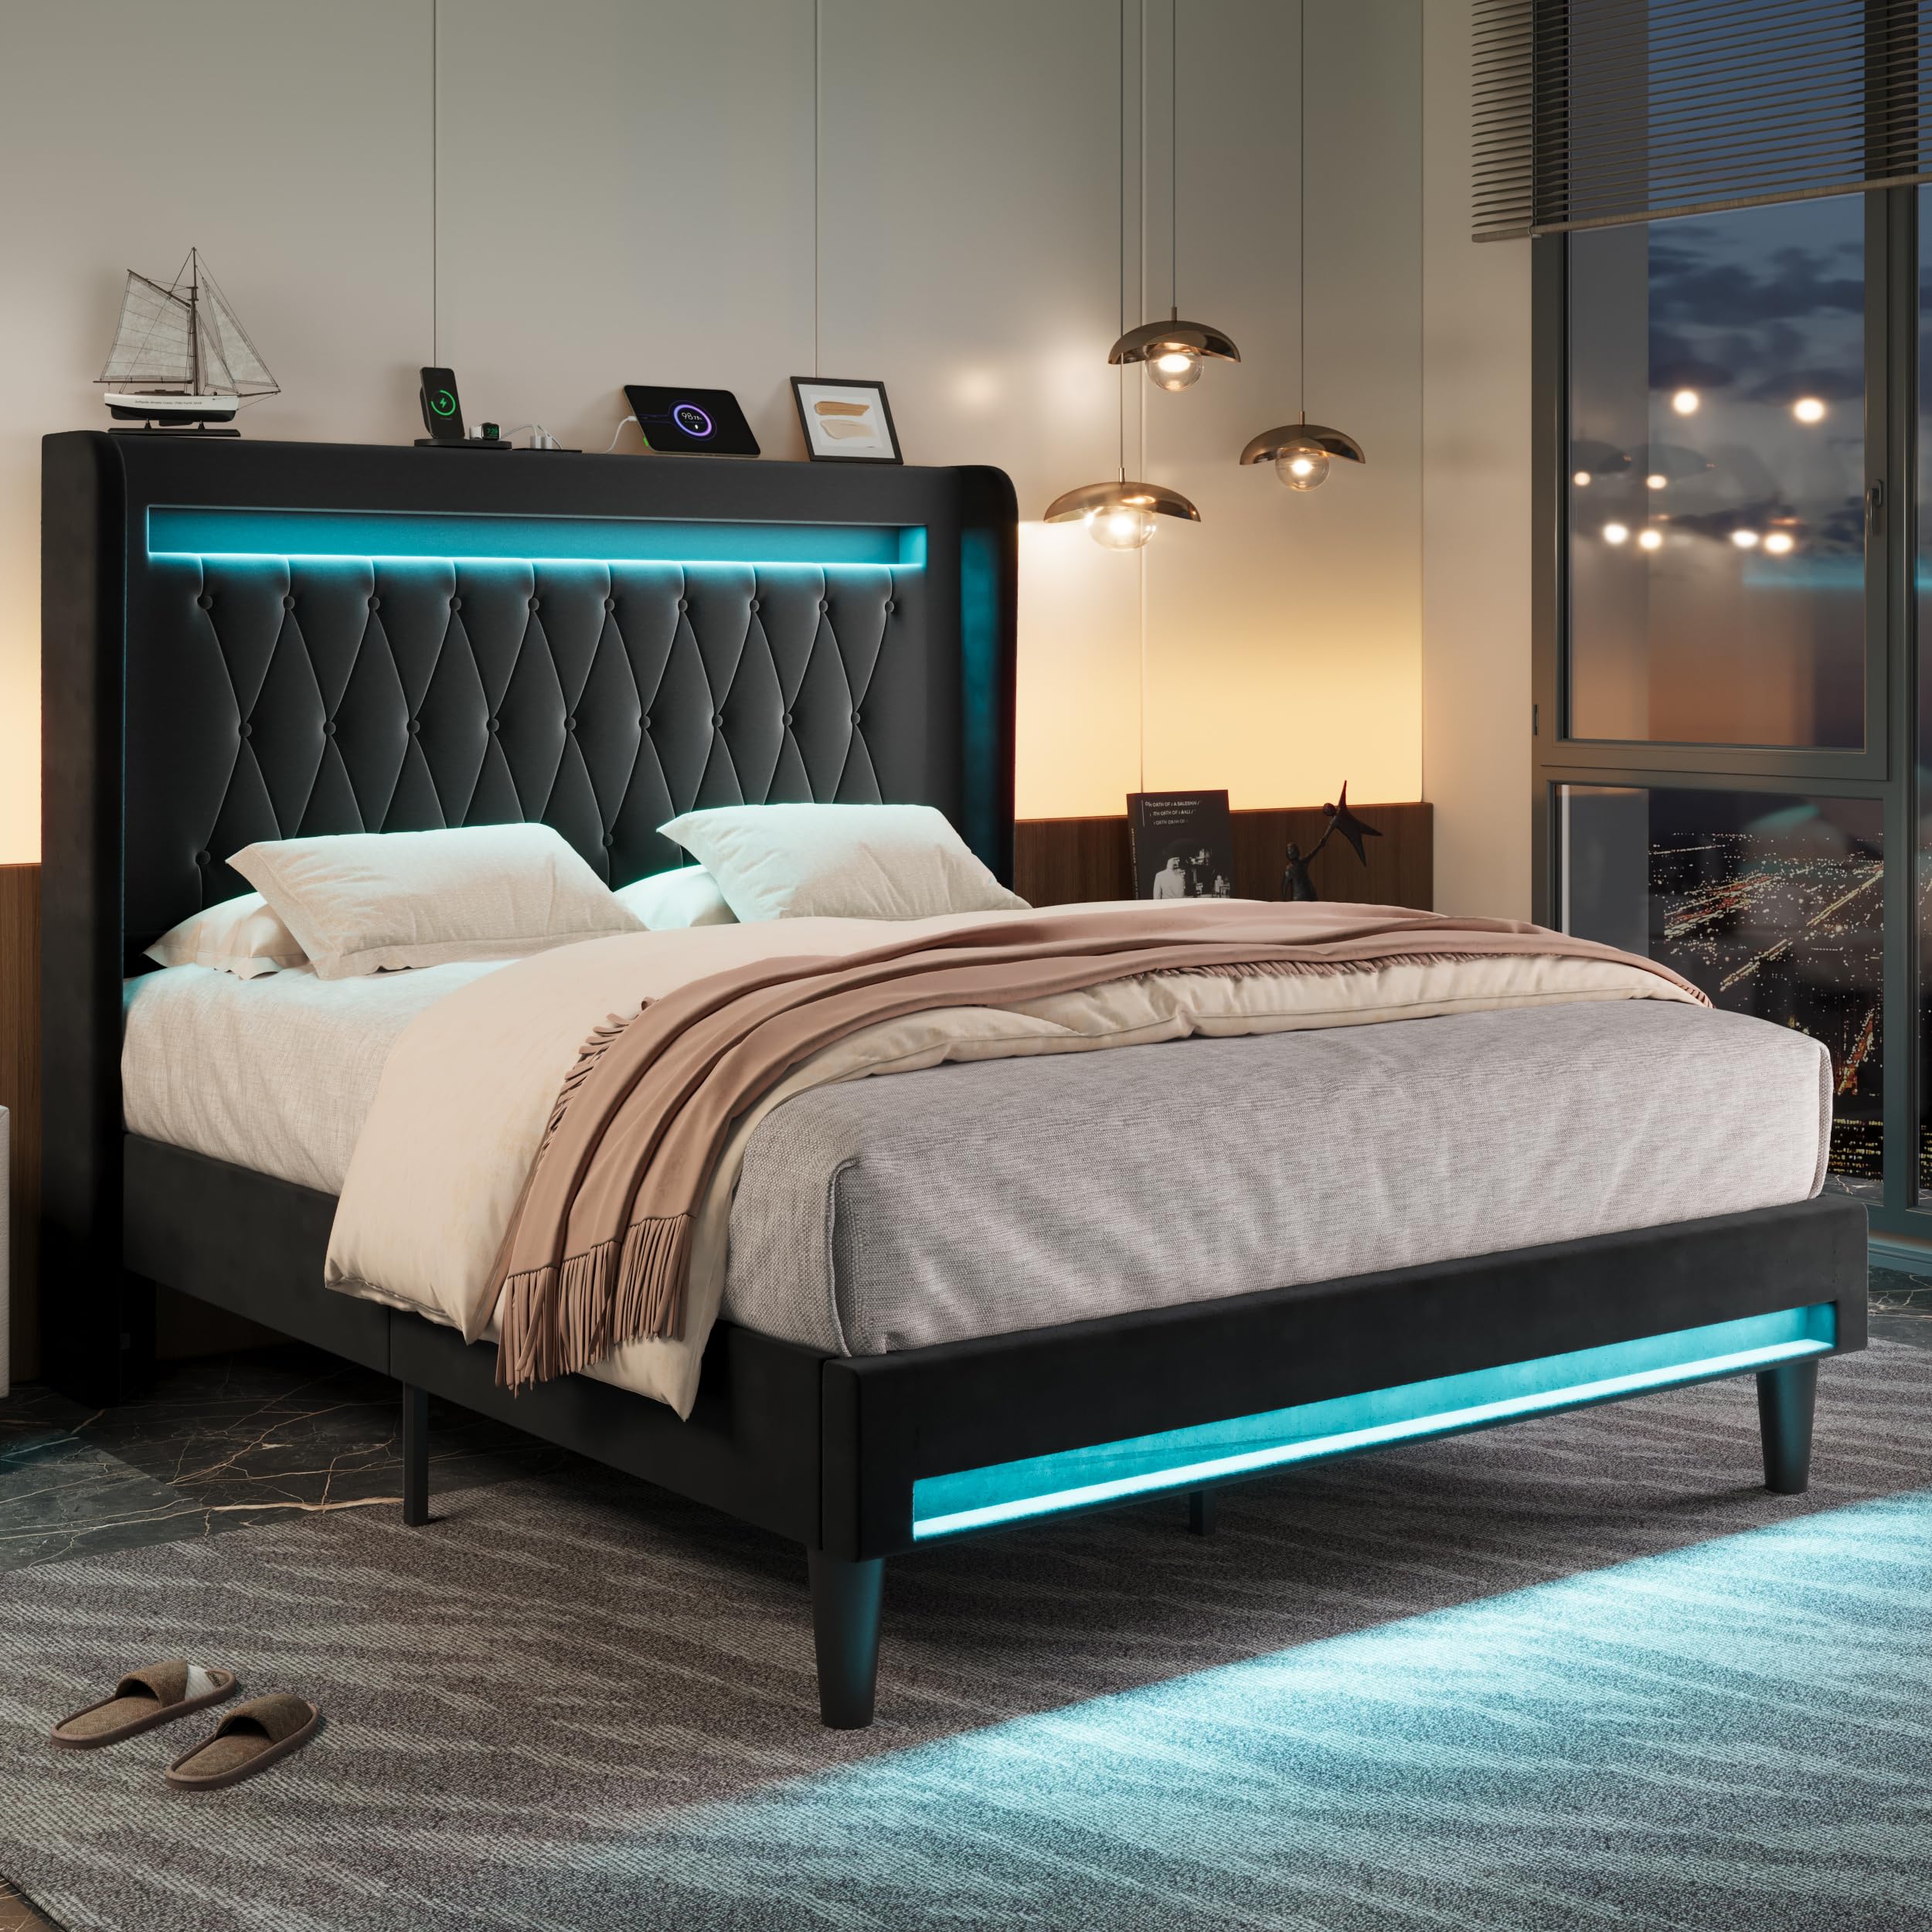
Image: The Allewie Queen Size Platform Bed Frame in black, showcasing its upholstered headboard, LED lighting, and overall design.
Safety Information
- Do not load more than 900 pounds on the bed frame. Exceeding this weight limit may cause damage to the product and potential injury.
- Keep small parts away from children during assembly to avoid choking hazards.
- Ensure all connections are secure before use. Regularly check and tighten fasteners as needed.
- Do not stand on the bed frame or use it as a ladder.
- Use only the provided power adapter for the LED lights and charging station.
Package Contents
Verify that all components are present before beginning assembly. If any parts are missing or damaged, please contact customer support.
- Headboard (with integrated LED lights and charging station)
- Side Rails
- Footboard (with integrated LED lights)
- Center Support Beam
- Wooden Slats
- Support Legs
- Hardware Pack (screws, bolts, washers, Allen wrench)
- Instruction Manual
Note: Mattress is not included.
Assembly Instructions
Assembly is designed to be straightforward with included tools and detailed instructions. It is recommended to assemble the bed frame with two people.
- Unpack Components: Carefully remove all parts from the packaging and lay them out on a clean, soft surface to prevent scratches.
- Attach Side Rails to Headboard: Connect the side rails to the headboard using the provided hardware. Ensure all bolts are finger-tightened initially.
- Attach Side Rails to Footboard: Connect the other end of the side rails to the footboard.
- Install Center Support: Secure the center support beam and its legs to the bed frame.
- Place Wooden Slats: Lay the wooden slats across the bed frame. The Velcro design ensures easy and secure placement, contributing to a noise-free experience.
- Final Tightening: Once all components are in place, fully tighten all bolts and screws using the Allen wrench. Do not overtighten.
- Connect Power: Plug in the power cord for the LED lights and charging station.
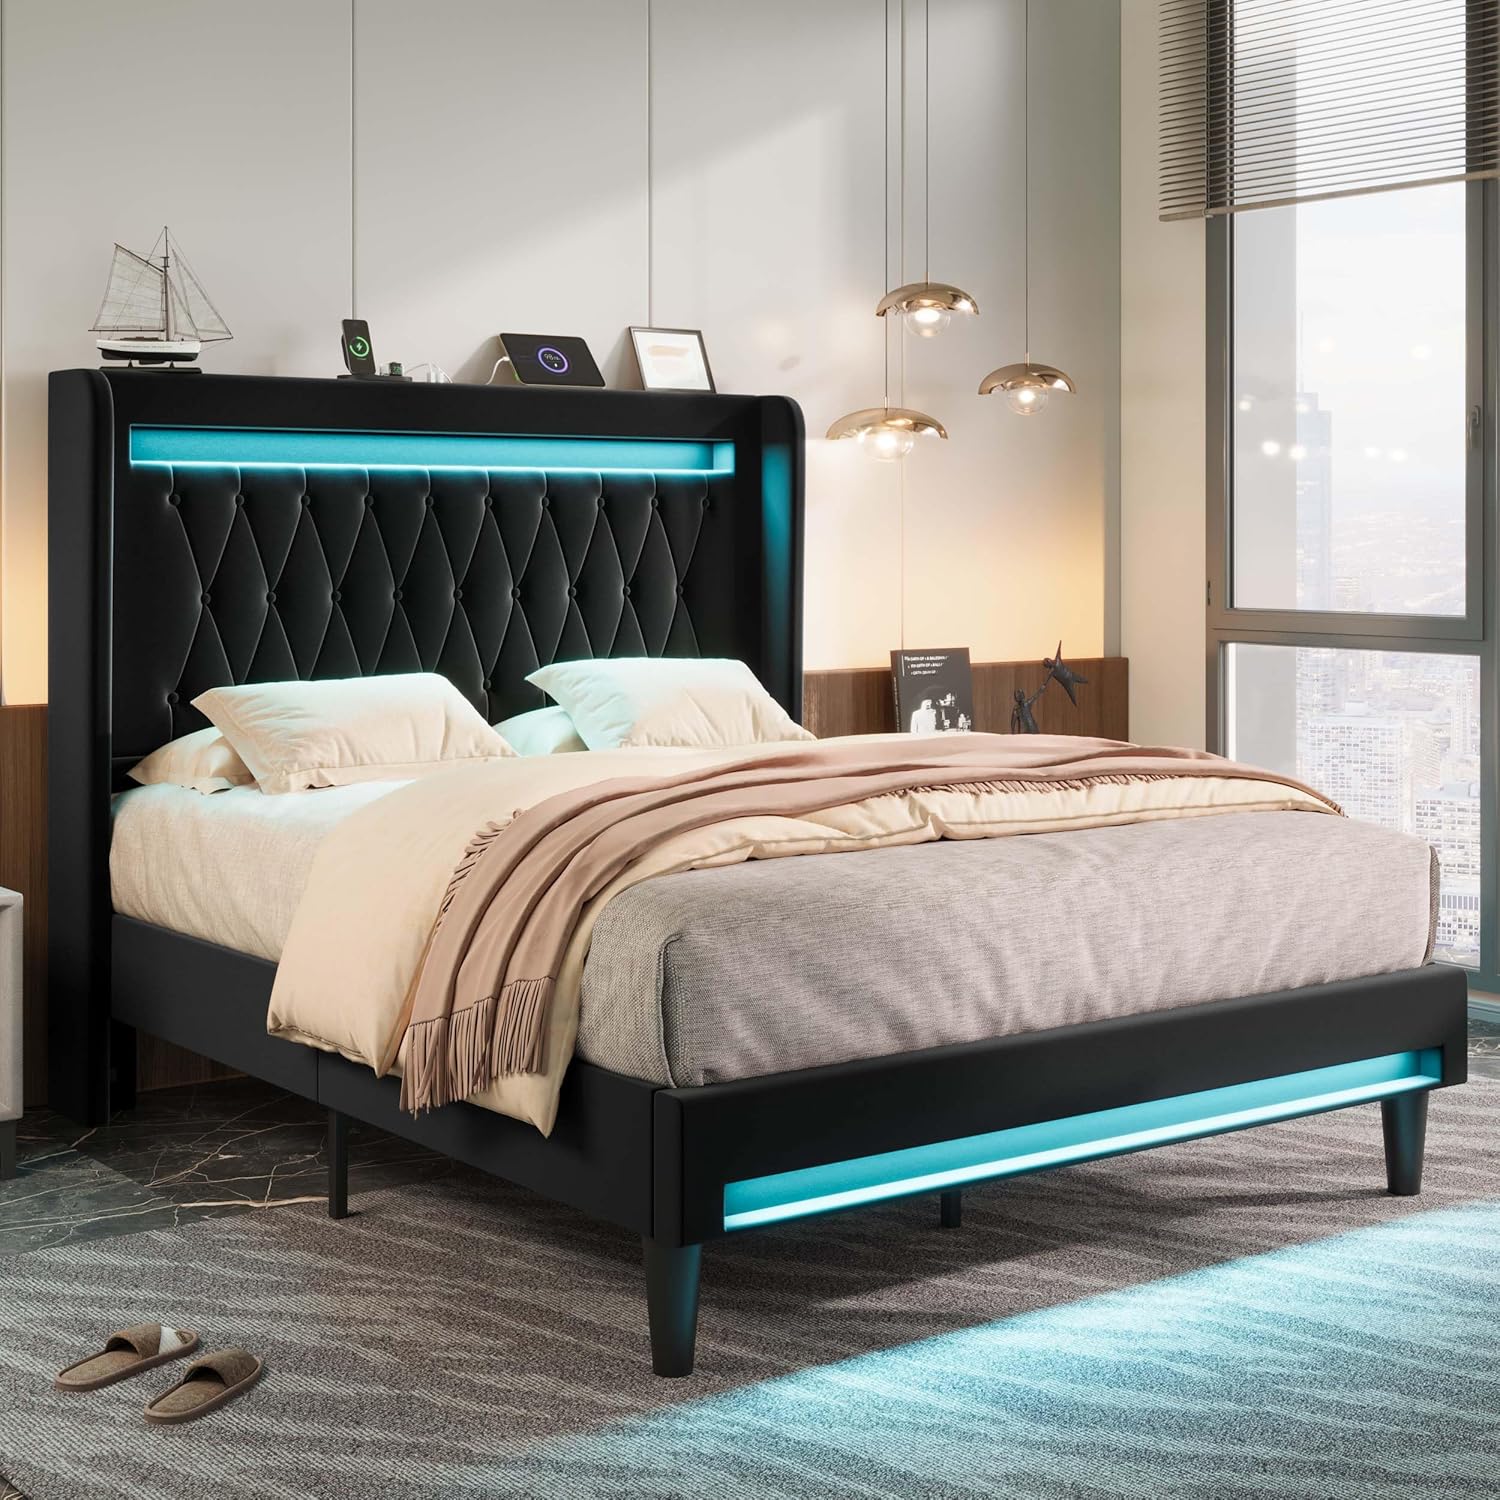
Image: Visual guide illustrating the quick installation process with Velcro-secured slats and noise-reducing foam strips.
Video: An official product video demonstrating the assembly and features of the Allewie Upholstered Bed Frame with LED Light and Charging Station.
Operating Instructions
LED Lighting System
The integrated LED lights can be controlled via a remote control or a dedicated smartphone application. This allows for customization of color, brightness, and lighting modes.
- Power On/Off: Use the power button on the remote or app to turn the LED lights on or off.
- Color Selection: Choose from a wide range of colors using the color wheel or preset color options.
- Brightness Adjustment: Increase or decrease the light intensity to your preference.
- Lighting Modes: Select from various modes including constant light, dynamic color changes, and music synchronization.
- App Control: Download the companion app (refer to packaging or product details for app name) for advanced control features and scheduling.

Image: A visual representation of the smartphone application used to control the LED lighting, showing various color and mode selections.
Charging Station
The headboard includes a built-in power strip with 2 USB ports (5V/3A) and 1 Type-C port (5V/3A) for convenient device charging.
- Connect Devices: Plug your USB or Type-C compatible devices directly into the ports located on the headboard.
- Power Source: Ensure the bed frame's main power cord is plugged into a wall outlet for the charging station to function.
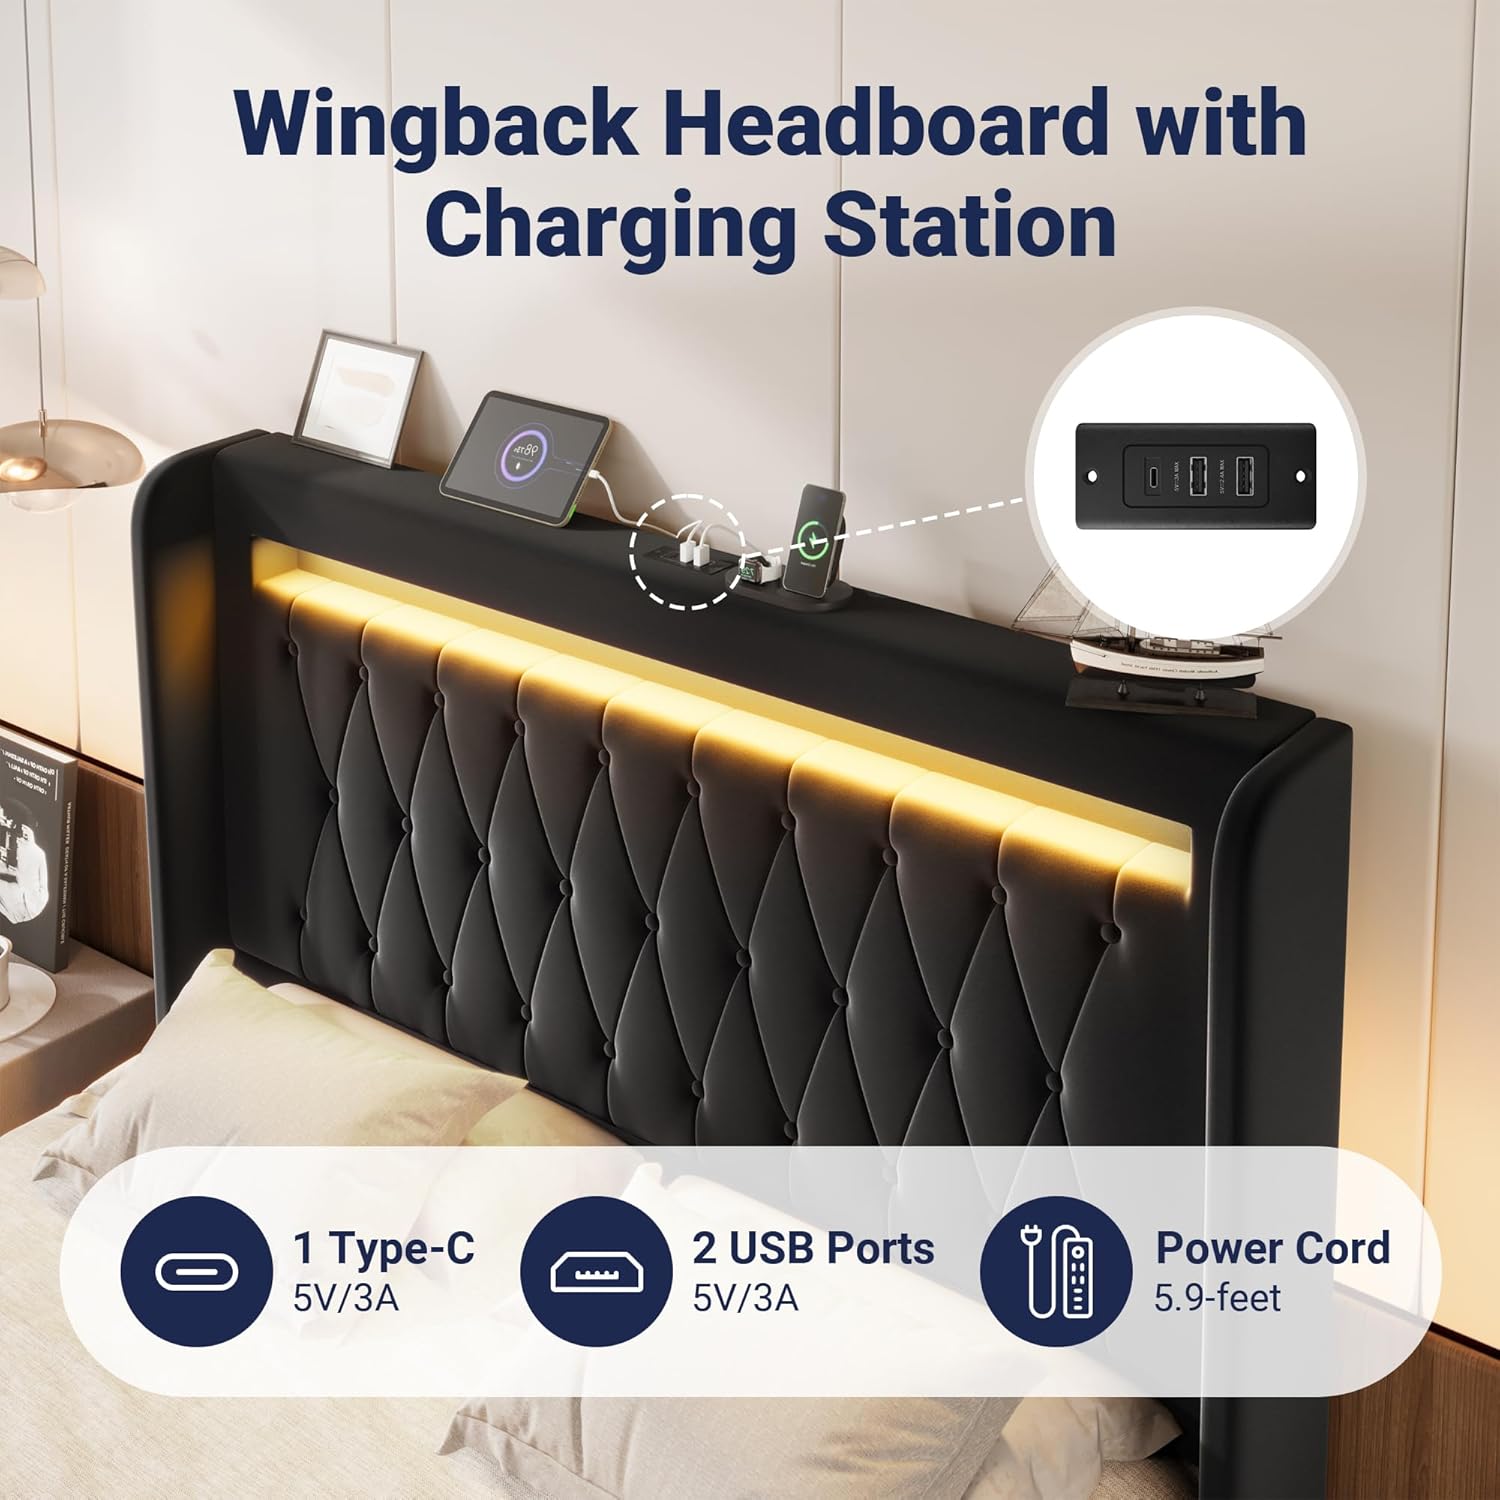
Image: A detailed view of the headboard's integrated charging station, featuring USB and Type-C ports.
Maintenance
- Cleaning Upholstery: For general cleaning, gently wipe the velvet upholstery with a soft, damp cloth. For spills, blot immediately with a clean, dry cloth. Avoid harsh chemicals or abrasive cleaners.
- Frame Inspection: Periodically check all bolts and screws to ensure they are tight. Retighten as necessary to maintain stability and prevent squeaking.
- LED Lights: The LED lights are designed for long-term use. If issues arise, check the power connection and remote control battery.
- Charging Ports: Keep charging ports free of dust and debris. Use a dry, soft brush or compressed air to clean if needed.
- Under-Bed Cleaning: The 6.3-inch ground clearance allows for easy cleaning underneath the bed, including robot vacuum access.

Image: A robot vacuum easily cleaning beneath the bed frame, demonstrating the ample ground clearance for maintenance.
Troubleshooting
| Problem | Possible Cause | Solution |
|---|---|---|
| LED lights not working | Power cord disconnected; remote battery low; app not connected. | Ensure power cord is securely plugged in. Replace remote battery. Reconnect app via Bluetooth. |
| Charging station not working | Bed frame not powered; device cable faulty. | Verify bed frame is plugged into a live outlet. Try a different charging cable or device. |
| Bed frame squeaks | Loose bolts; uneven floor; slats not properly seated. | Tighten all assembly bolts. Ensure bed is on a level surface. Check that all slats are correctly positioned and secured by Velcro. |
| Mattress sliding | No mattress stopper or insufficient friction. | The headboard design helps prevent mattress sliding. Ensure the mattress is properly aligned with the frame. |
Specifications
| Model Number | AW5387-2 |
| Size | Queen |
| Product Dimensions (L x W x H) | 83.5"L x 61.8"W x 46.9"H |
| Weight Capacity | 900 lbs |
| Material | MDF Board, Metal, Velvet |
| Headboard Material | Velvet |
| Color | Black |
| Special Features | LED Lights, USB & Type-C Charging Station, Wingback Design, Noise-Free, Easy Assembly |
| Included Components | Headboard, Light kit included, Slats |
| Required Assembly | Yes |
| UPC | 749655444721 |

Image: Detailed dimensions and weight capacity of the Queen size bed frame.
Warranty and Support
For warranty information, product support, or to report missing/damaged parts, please contact Allewie customer service. Refer to your purchase documentation for specific warranty terms and contact details.
Typically, Allewie products come with a manufacturer's warranty covering defects in materials and workmanship. Keep your proof of purchase for warranty claims.
For further assistance, you may visit the official Allewie store on Amazon: Allewie Store
Ask a question about this manual
Ask about setup, troubleshooting, compatibility, parts, safety, or missing instructions. Manuals+ will review the question and use this page’s manual context to help answer it.