1. Introduction
This manual provides detailed instructions for the installation, operation, and maintenance of your Vorally Android 14 Car Stereo. Please read this manual thoroughly before using the product to ensure proper functionality and safety. Keep this manual for future reference.
2. Product Overview
The Vorally Android 14 Car Stereo is a 7-inch 2-DIN multimedia system designed to enhance your in-car experience. It features an Android 14 operating system, wireless CarPlay and Android Auto, GPS navigation, Bluetooth connectivity, and various multimedia functions.

Figure 2.1: Front view of the Vorally Android 14 Car Stereo, showing the 7-inch display and physical control buttons.

Figure 2.2: Overview of the stereo's primary features and capabilities.
3. Specifications
| Feature | Description |
|---|---|
| Model Number | VIKA-CHANZH-565A |
| Operating System | Android 14 |
| Screen Size | 7-inch 2.5D IPS Touch Screen |
| Screen Resolution | 1280 x 720 pixels |
| Memory | 4GB RAM + 64GB ROM |
| Processor | 4-Core |
| Connectivity | Wireless CarPlay, Wireless/Wired Android Auto, Bluetooth, WiFi |
| Navigation | Built-in GPS module, external GPS antenna |
| Radio | FM/RDS Radio (18 preset stations) |
| Audio Formats | MP3/WMA/MP2/OGG/AAC/M4A/MA4/FLAC/APE/3GP/WAV |
| Video Formats | Mpeg1/Mpeg2/Mpeg4/SP/ASP/GMC/XVID/H.263/H.264 |
| Picture Formats | BMP/JPG/GIF/PNG |
| Input/Output | AHD Backup Camera Input, 3 USB ports, RCA Input/Output |
| Special Features | Steering Wheel Control (SWC), Split Screen, EQ Adjustable |
| Material | Plastic, Metal |
| Unit Weight | 2.65 pounds (1200 Grams) |
| Compatible Vehicles | Caliber 2009-2011, Journey 2009-2011, Challenger 2009-2011, Avenger 2009-2011, Ram Pickup Series 2009-2011, Commander 2008-2011, Compass 2009-2011, Patriot 2009-2011, GrandCherokee 2005-2011, Liberty 2008-2011, Wrangler/Unlimited 2007-2015, Sebring 2007-2010, Aspen 2007-2010, 300C 2007-2010, Cirrus 2007-2010 |
4. Setup and Installation
4.1 Package Contents
Before beginning installation, verify that all components are present in the package:
- Vorally Android 14 Car Stereo Head Unit
- Power Cable
- RCA Input/Output Cables
- USB Cables (x3)
- Camera Input Cable
- GPS Antenna
- Instruction Manual
- Canbus Box (if applicable for your vehicle model)
- Radio Adaptor
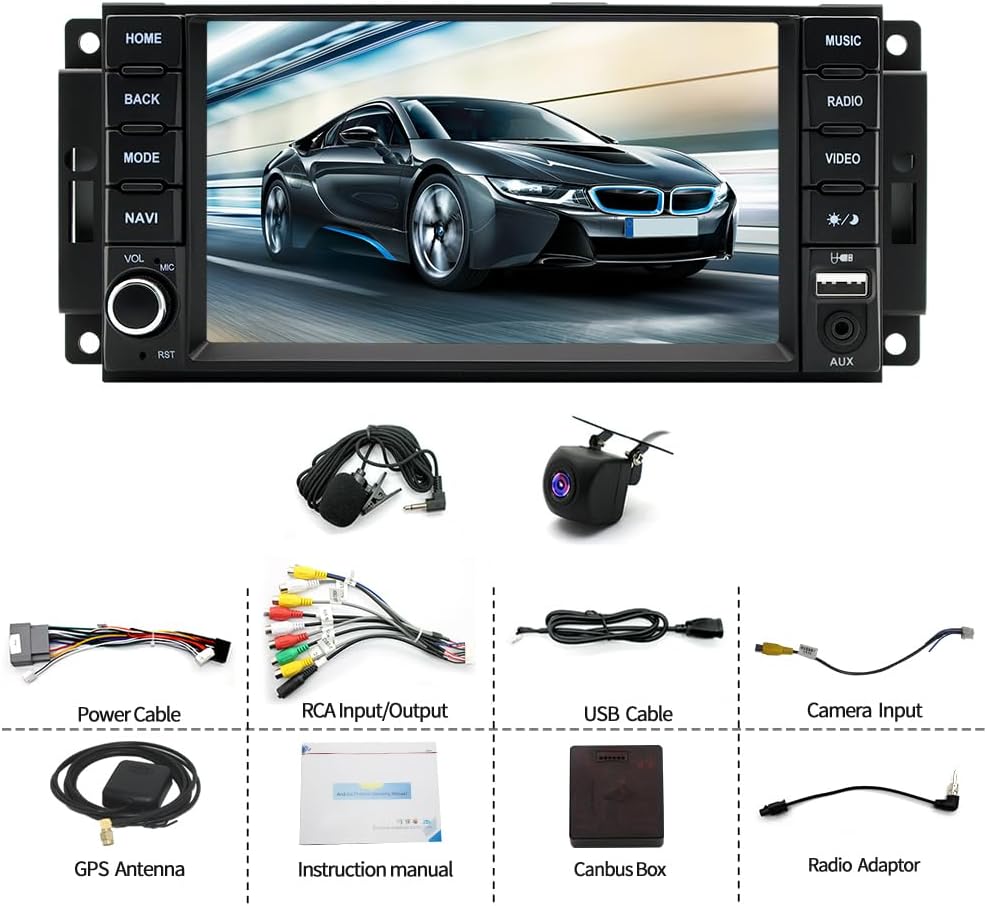
Figure 4.1: Contents of the product package.
4.2 Wiring Diagram
Refer to the following diagram for proper connection of all cables. Incorrect wiring can damage the unit or your vehicle's electrical system. If you are unsure about any connections, consult a professional installer.

Figure 4.2: Rear panel wiring connections of the car stereo.
4.3 General Installation Steps
- Preparation: Disconnect the vehicle's negative battery terminal before starting any electrical work.
- Remove Old Unit: Carefully remove your existing car stereo from the dashboard.
- Connect Wiring: Connect the power cable, RCA cables, USB cables, GPS antenna, and camera input cable to the new head unit according to the wiring diagram. Ensure all connections are secure.
- Canbus Box (if applicable): If your vehicle requires a Canbus box for steering wheel controls or other vehicle data integration, connect it as per the specific instructions provided with the Canbus unit.
- Test Connections: Before fully reassembling the dashboard, temporarily reconnect the battery and power on the unit to test basic functions (power, audio, display).
- Secure Unit: Once tested, carefully slide the new stereo into the dashboard opening and secure it with the mounting brackets.
- Reassemble: Reassemble the dashboard trim and reconnect the battery.
5. Operating Instructions
5.1 Basic Operation
- Power On/Off: Press the power button (usually marked with a power symbol) to turn the unit on or off.
- Volume Control: Use the volume knob or on-screen controls to adjust the audio level.
- Touch Screen: Navigate the interface by tapping, swiping, and pinching on the 7-inch touch screen.
- Home Screen: The home screen provides access to frequently used applications and widgets.
5.2 Wireless CarPlay and Android Auto
This unit supports both wireless CarPlay and Android Auto, allowing seamless integration with your smartphone.
- Enable Bluetooth and Wi-Fi: On your smartphone, ensure Bluetooth and Wi-Fi are enabled.
- Pair Device: On the car stereo, go to the Bluetooth settings and pair your smartphone.
- Initiate Connection: Once paired, the system should prompt you to start CarPlay or Android Auto. Follow the on-screen instructions. For Android devices, wired connection is also an option via USB.

Figure 5.1: Wireless CarPlay and Android Auto interface.
5.3 GPS Navigation
The stereo includes a built-in GPS module and supports various navigation applications.
- GPS Antenna: Ensure the external GPS antenna is properly installed and positioned for optimal signal reception.
- Map Applications: Access pre-installed navigation apps or download others from the Google Play Store via Wi-Fi.
- Online/Offline Maps: The system supports both online navigation (requires Wi-Fi/hotspot) and offline maps (requires pre-downloaded map data).
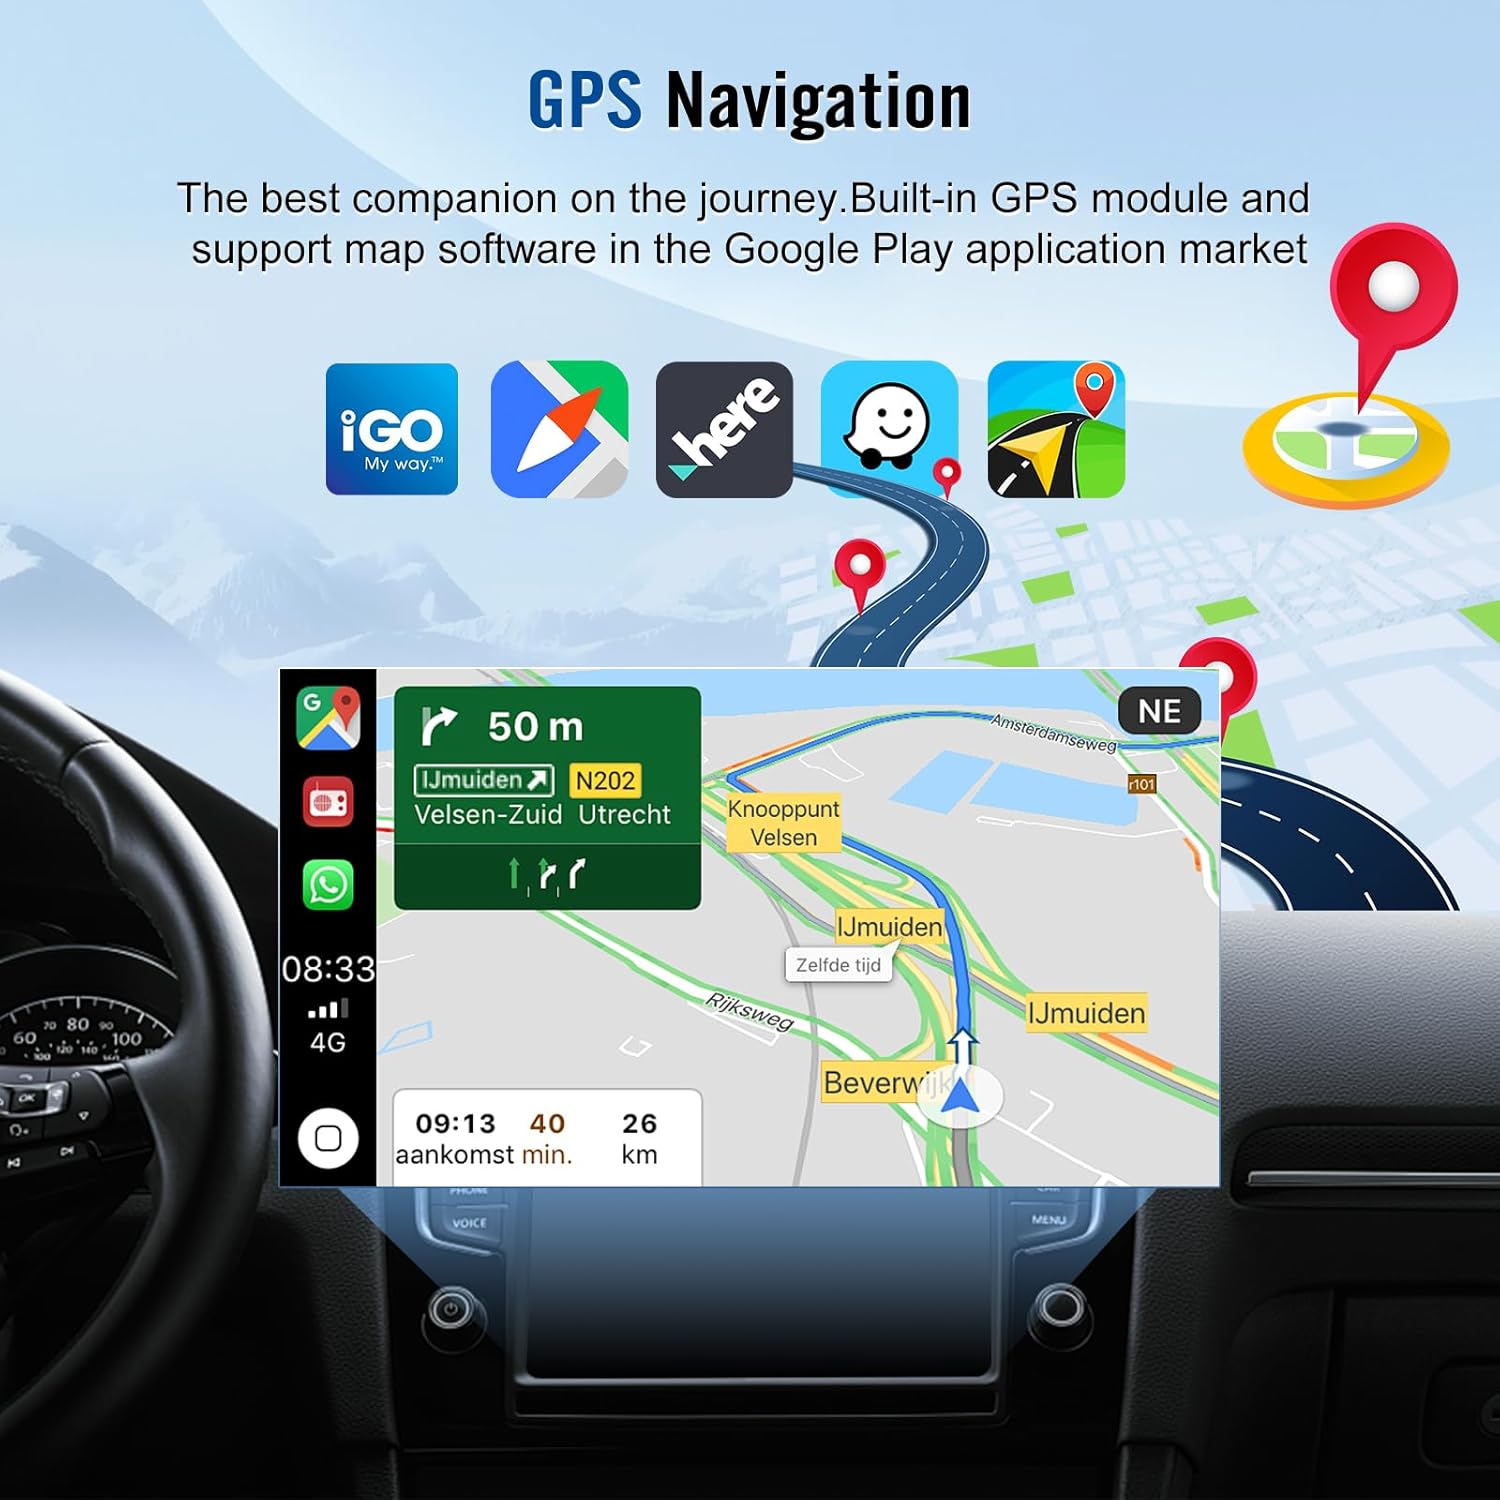
Figure 5.2: GPS Navigation interface with map display.
5.4 Bluetooth Functionality
Connect your smartphone via Bluetooth for hands-free calling and audio streaming.
- Pairing: Go to the Bluetooth menu on the stereo, search for your device, and pair.
- Hands-Free Calling: Make and receive calls directly from the stereo interface. The built-in microphone and external mic jack ensure clear communication.
- Music Playback: Stream audio from your phone to the car stereo.
5.5 FM/RDS Radio
Tune into your favorite radio stations with the built-in FM/RDS tuner.
- Station Search: Use the on-screen controls to scan for available stations.
- Preset Stations: Save up to 18 of your preferred stations for quick access.
- RDS Functionality: Radio Data System (RDS) displays station information such as song title or program name where available.
5.6 AHD Backup Camera
The system supports an AHD backup camera for enhanced safety during reversing.
- Automatic Display: When the vehicle is shifted into reverse gear, the camera feed will automatically display on the screen.
- Guidelines: Dynamic parking guidelines may be displayed to assist with parking maneuvers.

Figure 5.3: AHD 1080P Backup Camera view.
5.7 Steering Wheel Control (SWC)
Integrate your vehicle's existing steering wheel controls with the stereo for convenient operation.
- Configuration: After installation, access the SWC settings in the stereo's menu to map your steering wheel buttons to specific functions (e.g., volume, track skip, call answer).
5.8 Split Screen Functionality
The split screen feature allows you to run two applications simultaneously on the display.
- Activation: Typically, this can be activated by long-pressing an app icon or using a dedicated split-screen button in the system interface.
- Usage: For example, you can view navigation on one side and control music playback on the other.
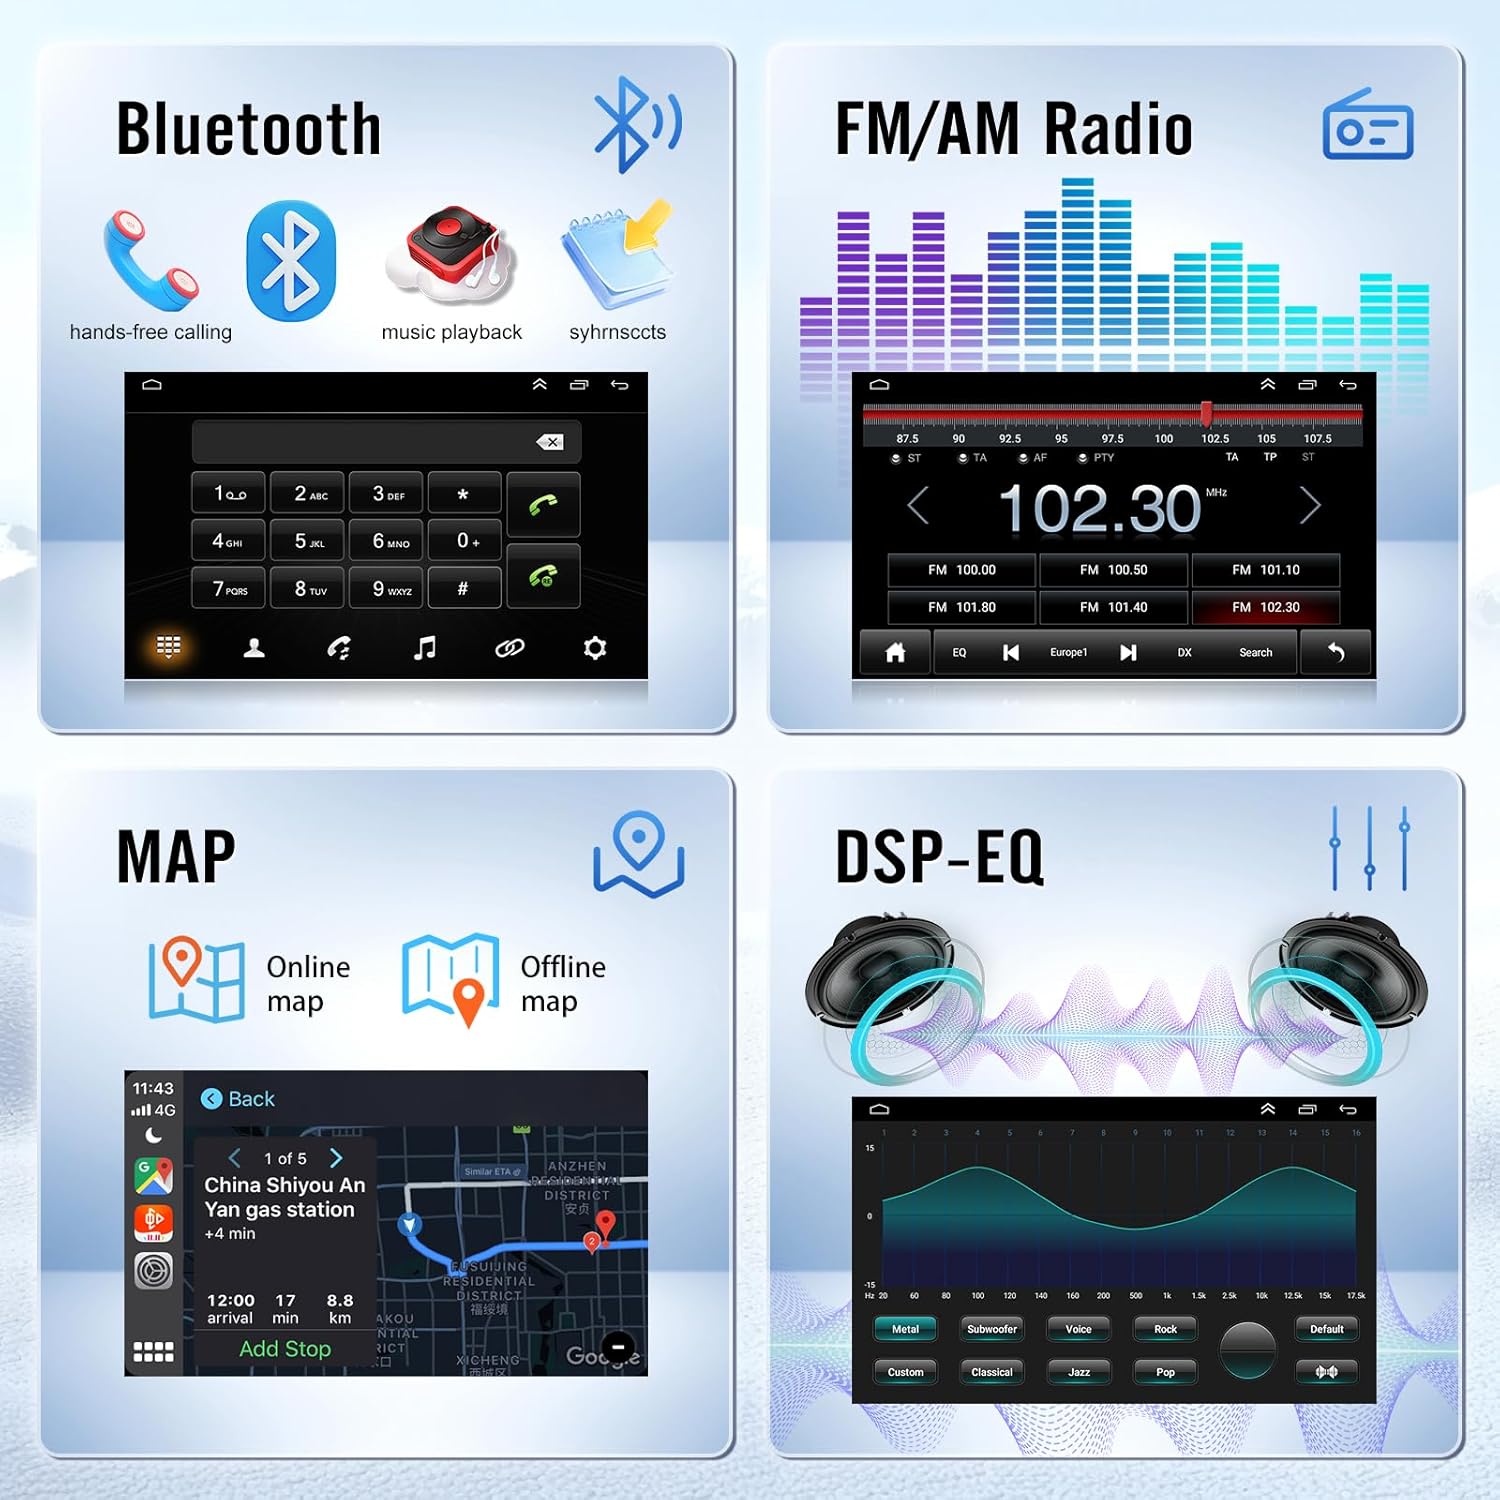
Figure 5.4: Bluetooth, FM Radio, Map, and DSP-EQ interfaces.
6. Maintenance
- Screen Cleaning: Use a soft, lint-free cloth to clean the touch screen. For stubborn smudges, lightly dampen the cloth with water or a screen-safe cleaner. Avoid abrasive materials or harsh chemicals.
- Software Updates: Periodically check for software updates through the system settings or the manufacturer's website to ensure optimal performance and access to new features.
- General Care: Keep the unit free from dust and debris. Avoid exposing it to extreme temperatures or direct sunlight for extended periods.
7. Troubleshooting
If you encounter issues with your car stereo, refer to the following common problems and solutions:
| Problem | Possible Cause | Solution |
|---|---|---|
| Unit does not power on | Loose power connection, blown fuse, vehicle battery issue | Check power cable connections. Inspect vehicle fuses. Ensure vehicle battery is charged. |
| No sound | Volume too low, mute activated, speaker wiring issue, incorrect audio source | Increase volume. Check if mute is active. Verify speaker connections. Select correct audio source. |
| GPS signal lost or inaccurate | GPS antenna obstructed or improperly installed, poor satellite reception | Ensure GPS antenna has a clear view of the sky. Check antenna connection. Move to an open area. |
| CarPlay/Android Auto not connecting | Bluetooth/Wi-Fi off, incorrect pairing, phone software issue | Ensure Bluetooth and Wi-Fi are on. Re-pair device. Restart phone and stereo. Try wired connection for Android. |
| Touch screen unresponsive | System freeze, temporary software glitch | Perform a soft reset (locate the RST pinhole and press with a thin object). If issue persists, disconnect battery for 5 minutes. |
| Backup camera not displaying | Camera wiring issue, camera malfunction, incorrect input selected | Check camera power and video signal connections. Ensure vehicle is in reverse. |
If the problem persists after attempting these solutions, please contact customer support.
8. Warranty and Support
For warranty information and technical support, please refer to the warranty card included in your product packaging or visit the official Vorally website. Keep your purchase receipt as proof of purchase.
Online Support: Visit Vorally on Amazon


