1. Introduction
Thank you for purchasing the Allewie King Size LED Bed Frame with Charging Station. This manual provides detailed instructions for assembly, operation, maintenance, and troubleshooting to ensure safe and efficient use of your new bed frame. Please read this manual thoroughly before assembly and retain it for future reference.
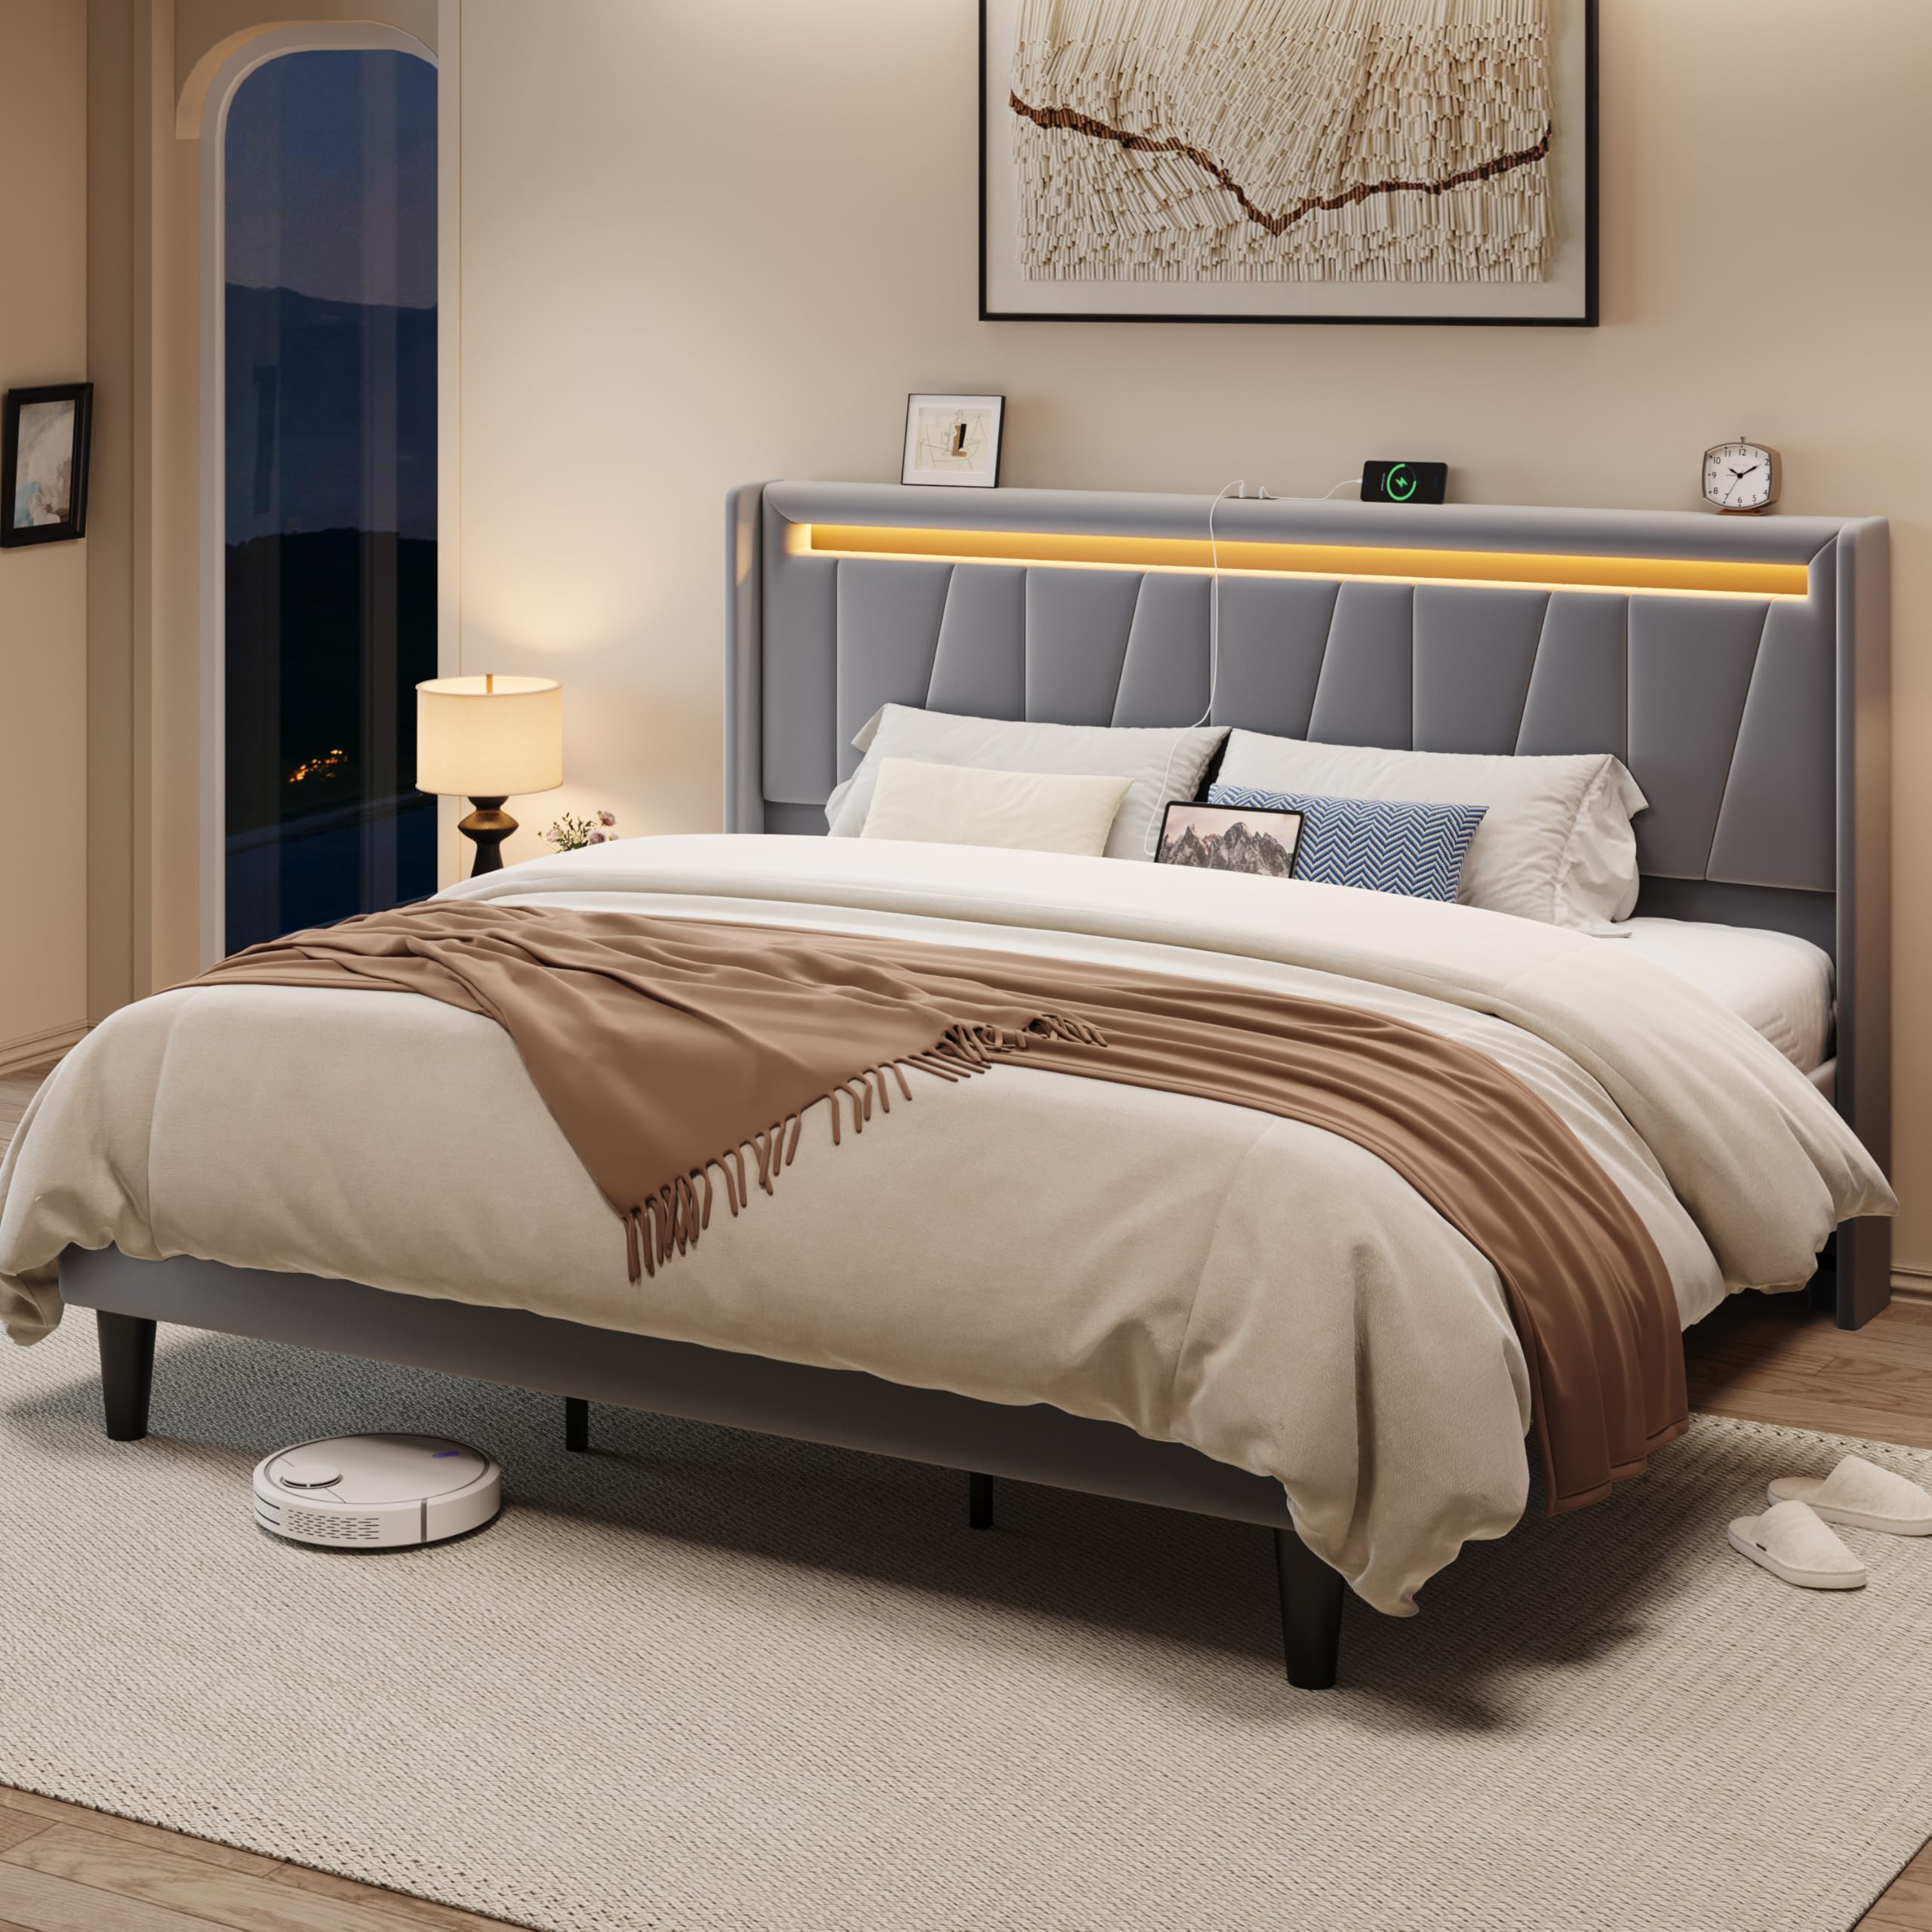
Image 1.1: The Allewie King Size LED Bed Frame in Grey, featuring a velvet upholstered headboard with integrated LED lighting and a charging station.
2. Safety Information
Please observe the following safety precautions to prevent injury or damage to the product:
- Read all instructions: Ensure you understand all assembly steps before beginning.
- Two-person assembly recommended: Some steps may require assistance.
- Keep children and pets away: Small parts can be a choking hazard.
- Use on a level surface: Assemble the bed frame on a soft, clean, and level surface to prevent scratches.
- Do not overtighten screws: Overtightening can damage components.
- Maximum weight capacity: Do not exceed the maximum weight capacity of 900 pounds.
- Electrical safety: Ensure the charging station is connected to a suitable power outlet. Do not expose to moisture.
3. Package Contents
Verify that all components are present before beginning assembly. If any parts are missing or damaged, contact customer support.
3.1. Parts List
- Headboard with integrated LED and Charging Station
- Side Rails (2)
- Footboard
- Center Support Beam
- Support Legs (various sizes)
- Wooden Slats with Velcro
- Hardware Pack (screws, bolts, Allen wrench)
- LED Remote Control
3.2. Tools Required (Not Included)
- Phillips Head Screwdriver (optional, for some screws)
- Rubber Mallet (optional, for gentle tapping)
4. Setup and Assembly
Follow these steps carefully for proper assembly. It is recommended to have two people for assembly.
4.1. Preparation
- Unpack all components and lay them out on a soft, clean surface to prevent damage.
- Identify all parts using the provided parts list.
4.2. Assembly Steps
- Attach Side Rails to Headboard: Align the side rails with the pre-drilled holes on the headboard. Secure them using the provided bolts and Allen wrench. Do not fully tighten yet.
- Attach Side Rails to Footboard: Connect the other end of the side rails to the footboard, securing with bolts.
- Install Center Support Beam: Place the center support beam along the length of the frame. Attach any necessary support legs to the beam and secure the beam to the headboard and footboard.
- Install Wooden Slats: Unroll the wooden slats. The slats feature a velcro design for easy and secure attachment to the bed frame. Ensure the EVA mute bars are positioned correctly to reduce noise.
- Final Tightening: Once all components are in place, carefully tighten all bolts and screws.
- Connect Power: Plug the power cord from the headboard's charging station into a wall outlet.

Image 4.1: Detail of the bed frame's construction, highlighting the velcro slat attachment, EVA mute bars for noise reduction, and the robust metal and wood structure.
Video 4.1: Official Allewie product video demonstrating key features and potentially assembly steps for the LED bed frame with charging station.
5. Operating Instructions
5.1. LED Lighting System
The integrated RGB LED lighting system can be controlled via the included remote control or a dedicated smartphone application.
- Remote Control: Point the remote control towards the headboard. Use the color buttons to select static colors, the brightness buttons to adjust intensity, and the mode buttons to cycle through dynamic scenes.
- Smartphone App: Download the recommended app (refer to packaging or product information for app name). Follow the app's instructions to pair it with your bed frame's LED system. The app offers advanced controls for over 6,000 colors, 30 dynamic scenes, music synchronization, and timing functions.

Image 5.1: Visual representation of the LED lighting features, including color customization, brightness control, dynamic scenes, music mode, timing, and dual control options (app and remote).
5.2. Charging Station
The headboard features a built-in charging station with 2 USB ports and 1 Type-C port.
- Ensure the bed frame's power cord is plugged into a functional wall outlet.
- Connect your devices (phones, tablets, etc.) to the USB (5V/2.4A) or Type-C (5V/3A) ports using appropriate charging cables.
- The charging station provides convenient power access for your electronic devices.

Image 5.2: Detailed view of the integrated charging station on the headboard, featuring two USB ports and one Type-C port for convenient device charging.
6. Maintenance
Regular maintenance will help prolong the life and appearance of your bed frame.
- Cleaning the Velvet Upholstery: Gently vacuum the velvet fabric regularly to remove dust and debris. For spills, blot immediately with a clean, dry cloth. For stubborn stains, use a mild fabric cleaner specifically designed for velvet, testing on an inconspicuous area first. Do not rub vigorously.
- Frame Care: Wipe metal and wood components with a soft, damp cloth. Avoid harsh chemicals or abrasive cleaners.
- Check Connections: Periodically check all bolts and screws to ensure they remain tight. Retighten if necessary to maintain stability and prevent squeaks.
- Electrical Components: Keep the charging station and LED lights dry. Do not attempt to repair electrical components yourself.
7. Troubleshooting
If you encounter issues with your bed frame, refer to the following common problems and solutions:
| Problem | Possible Cause | Solution |
|---|---|---|
| Bed frame is wobbly or squeaks | Loose bolts or screws; improper slat placement. | Ensure all bolts and screws are securely tightened. Check that wooden slats are properly seated and the EVA mute bars are in place. |
| LED lights not working | Power cord disconnected; remote control battery dead; app not paired. | Verify the power cord is securely plugged into a working outlet. Replace remote control batteries. Re-pair the smartphone app if necessary. |
| Charging station not working | Power cord disconnected; faulty device cable. | Confirm the bed frame's power cord is plugged in. Try a different charging cable or device to rule out cable issues. |
8. Specifications
| Feature | Detail |
|---|---|
| Model Number | AW753869 |
| Size | King |
| Product Dimensions (L x W x H) | 84" x 78" x 47" |
| Weight Capacity | 900 lbs |
| Recommended Mattress Thickness | 8-12 inches |
| Box Spring Required | No |
| Materials | Metal, Wood, Velvet Upholstery |
| Included Components | Headboard, LED Light, Slats |
| Charging Station | 2 USB Ports (5V/2.4A), 1 Type-C Port (5V/3A) |
| LED Features | RGB, 6000+ colors, 30 dynamic scenes, App & Remote Control, Music Mode, Timing Function |
| Assembly Required | Yes |
| Special Features | Fade Resistant, Squeak Resistant (EVA mute bars) |

Image 8.1: Dimensional diagram of the Allewie King Size LED Bed Frame, illustrating its overall length, width, height, and weight capacity.
9. Warranty & Support
9.1. Warranty Information
Allewie products are designed for quality and durability. For specific warranty details regarding your bed frame, please refer to the warranty card included in your package or visit the official Allewie website. Typically, bed frames come with a limited manufacturer's warranty covering defects in materials and workmanship under normal use.
9.2. Customer Support
If you have any questions, require assistance with assembly, or need to report missing/damaged parts, please contact Allewie customer support:
- Online: Visit the Allewie Store on Amazon for FAQs and contact options.
- Email: Refer to your product packaging or warranty card for direct email support.