1. Introduction
The VEVOR 7-in-1 Wi-Fi Weather Station provides comprehensive monitoring of various environmental conditions. This system includes an outdoor sensor that measures temperature, humidity, rainfall, wind speed, wind direction, UV index, and sunlight intensity, along with an indoor display unit that presents this data clearly. With Wi-Fi connectivity, you can access real-time weather information via a dedicated mobile application.

Image 1.1: Overview of the VEVOR 7-in-1 Wi-Fi Weather Station, showing the outdoor sensor unit, the indoor display, and a smartphone displaying app data.
2. Safety Instructions
- Read all instructions carefully before installation and operation.
- Do not expose the display unit to extreme temperatures, direct sunlight, or moisture.
- Ensure the outdoor sensor is mounted securely to prevent damage from wind or other environmental factors.
- Use only the provided power adapter for the display unit.
- Keep the device away from strong electromagnetic fields.
- Do not attempt to disassemble or repair the unit yourself. Contact customer support for assistance.
3. Package Contents
Verify that all items listed below are included in your package:
- 1 x Display Unit
- 1 x Wireless Outdoor Sensor
- 1 x Adapter (for display unit)
- 1 x Aluminum Alloy Rod
- 1 x Mounting Bracket
- 1 x Plastic Mounting Cover
- 6 x Set of Screws & Nuts
- 1 x Screwdriver
- 2 x Rubber Pads
- 4 x Self-Tapping Screws
- 4 x Plastic Expansion Tubes
- 1 x Ni-MH Rechargeable Battery (for outdoor sensor)
- 1 x Battery Charger (for Ni-MH battery)
- 1 x User Manual

Image 3.1: Visual representation of the included components and the dimensions of the display and outdoor sensor unit.
4. Product Overview
4.1 Outdoor Sensor
The outdoor sensor is a 7-in-1 unit designed to measure various weather parameters. It is solar-powered with a rechargeable Ni-MH battery for continuous operation. The sensor features an IPX6 waterproof rating for durability in harsh weather conditions.

Image 4.1: Illustration of the seven weather parameters measured by the outdoor sensor: rainfall, sunlight, wind direction, humidity, temperature, UV index, and wind speed.
4.2 Display Unit
The indoor display unit features a 7-inch TFT color screen that presents all collected weather data. It offers 4 brightness levels for optimal viewing day or night. The display connects to your home Wi-Fi network to transmit data to the mobile application.

Image 4.2: The 7-inch display unit, highlighting its features such as weather forecast, alert notifications, comfort level, moon phase, and four adjustable brightness settings.
5. Installation
5.1 Outdoor Sensor Installation
The outdoor sensor should be installed in an open area, free from obstructions, to ensure accurate readings for wind, rain, and sunlight. Common locations include rooftops, patios, farms, or gardens. The wireless transmission range is up to 328.08 ft (100 m).
- Battery Installation: Before first use, install the included Ni-MH rechargeable battery into the outdoor sensor. Ensure correct polarity.
- Solar Panel Adjustment: Adjust the solar panel on the sensor to face the optimal angle for maximum sunlight exposure throughout the day.
- Mounting: Attach the aluminum alloy rod to the mounting bracket using the provided screws and nuts. Secure the outdoor sensor unit to the top of the rod.
- Secure Placement: Mount the assembly to a stable surface using the self-tapping screws and plastic expansion tubes. Ensure the sensor is level for accurate rainfall measurements.

Image 5.1: Details of the outdoor sensor's design, including double-layer waterproof housing, support for Ni-MH battery charging, and an upgraded, simplified installation process.
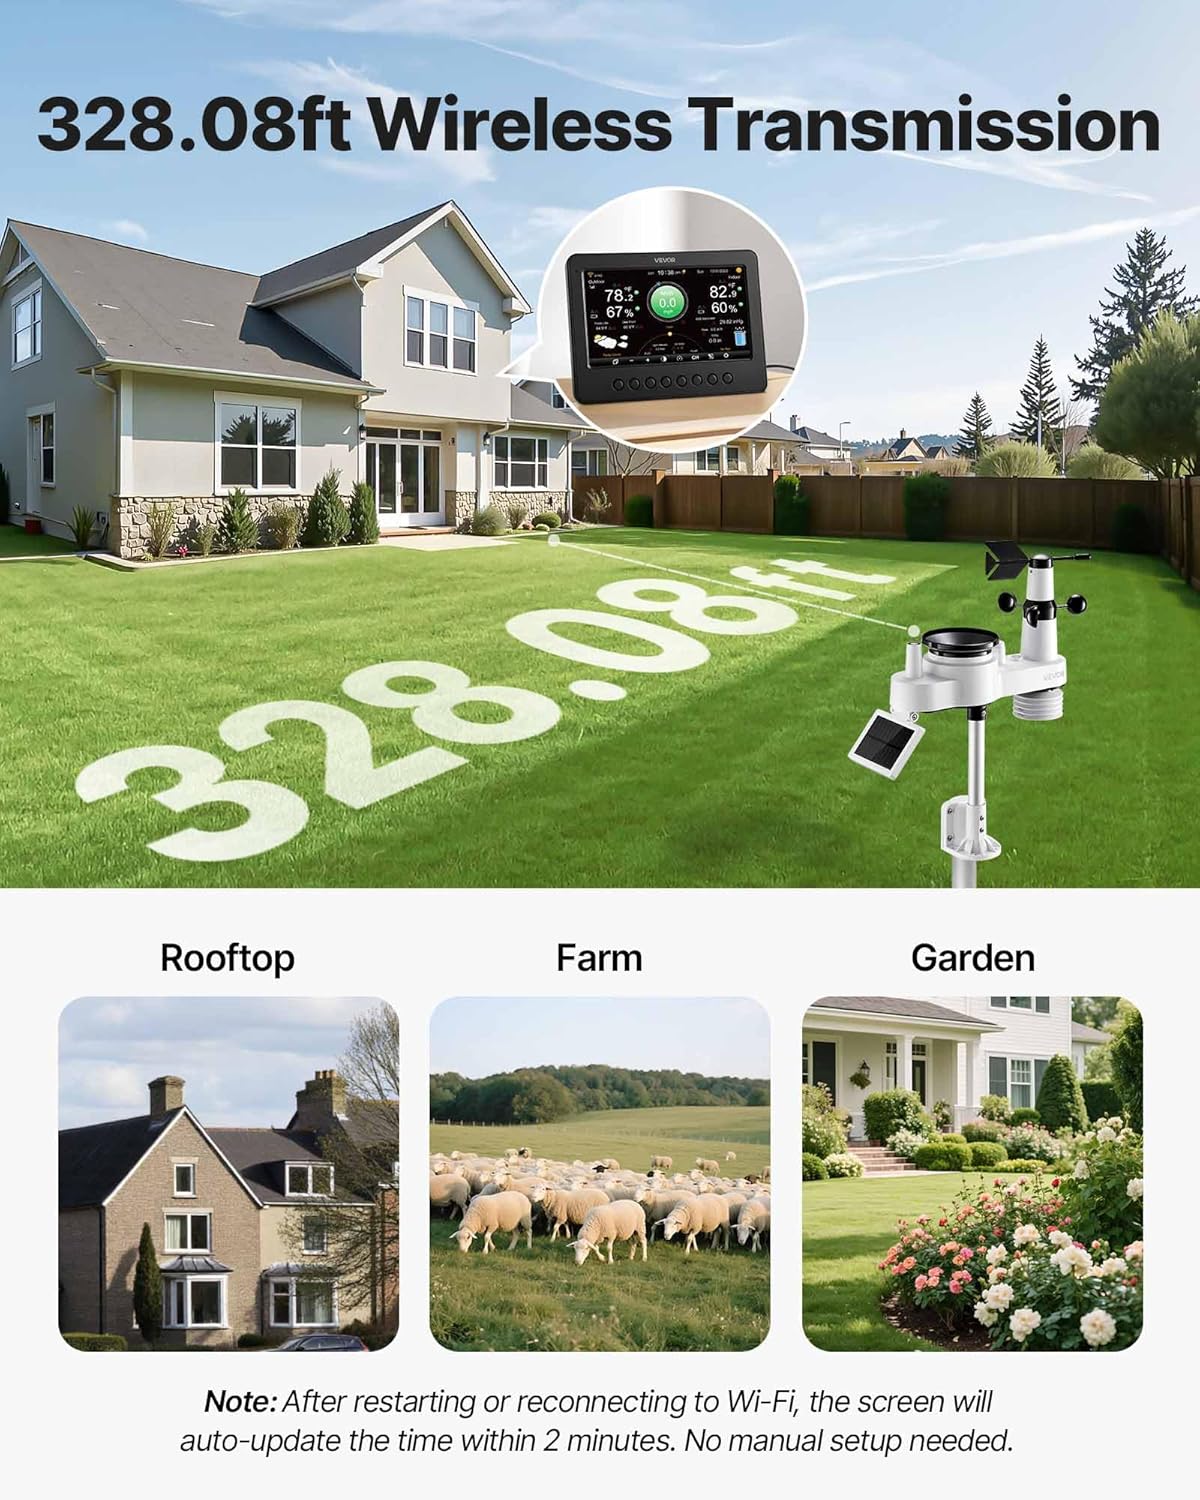
Image 5.2: The outdoor sensor installed in a typical environment, illustrating its wireless transmission capability and suggesting ideal mounting locations such as rooftops, farms, and gardens.
5.2 Display Unit Setup
- Power Connection: Connect the provided adapter to the display unit and plug it into a power outlet. The display will power on automatically.
- Sensor Pairing: The display unit will automatically attempt to pair with the outdoor sensor. Ensure the sensor is powered on and within range.
- Wi-Fi Connection: Follow the on-screen prompts to connect the display unit to your 2.4 GHz Wi-Fi network. This enables data synchronization with the mobile app.
- App Download: Download the 'Smart Life' app from your smartphone's app store.
- App Pairing: Open the Smart Life app and follow the instructions to add your VEVOR weather station. This will allow you to view, store, and analyze weather data remotely.
6. Operation
6.1 Reading the Display
The 7-inch TFT display provides a clear overview of current weather conditions. Information includes:
- Indoor and Outdoor Temperature (Fahrenheit/Celsius)
- Indoor and Outdoor Humidity
- Wind Speed and Direction
- Rainfall Data (hourly, daily, weekly, monthly)
- UV Index and Sunlight Intensity
- Dew Point
- Moon Phases
- 6-12 Hour Weather Forecast
- Time and Date
Use the buttons on the display unit to navigate through different data views or adjust settings like brightness.
6.2 Wi-Fi Smart Remote Control (Smart Life App)
Once connected to Wi-Fi and paired with the Smart Life app, you can:
- View real-time weather data from anywhere.
- Access historical data and trends.
- Set custom alerts for high/low temperature, wind speed, or rainfall.
- Share weather data with others.
7. Maintenance
- Cleaning: Periodically clean the outdoor sensor, especially the rain collector and wind cups, to ensure accurate readings. Use a soft, damp cloth. Do not use abrasive cleaners.
- Solar Panel: Keep the solar panel on the outdoor sensor clean and free from debris to maximize charging efficiency.
- Battery: The outdoor sensor uses a rechargeable Ni-MH battery. While solar-assisted, ensure the battery is charging effectively. If the battery performance degrades significantly, it may need replacement.
- Firmware Updates: Check the Smart Life app periodically for any available firmware updates for your weather station to ensure optimal performance and new features.
8. Troubleshooting
- No Data on Display:
Solution: Ensure the outdoor sensor is powered on and within the 328.08 ft (100 m) transmission range. Check battery levels in the outdoor sensor. Re-pair the sensor with the display unit if necessary. - Wi-Fi Connection Issues:
Solution: Verify your Wi-Fi network is 2.4 GHz. Ensure the display unit is within range of your Wi-Fi router. Restart both the display unit and your router. Re-enter Wi-Fi credentials if needed. - Inaccurate Readings:
Solution: Check the outdoor sensor's placement. Ensure it is free from obstructions (e.g., trees, buildings) that might affect wind, rain, or sunlight measurements. Clean the rain collector and wind cups. Ensure the sensor is level. - Display Not Responding:
Solution: Disconnect and reconnect the power adapter to the display unit. If the issue persists, contact customer support. - App Not Updating Data:
Solution: Ensure the display unit is connected to Wi-Fi and has an active internet connection. Check your smartphone's internet connection. Restart the Smart Life app.
9. Specifications
| Feature | Detail |
|---|---|
| Item Model Number | YT60311 |
| Power Supply (Outdoor Sensor) | Solar-Assisted with Ni-MH Rechargeable Battery |
| Sensor Functions | 7-in-1 (Temperature, Humidity, Rainfall, Wind Speed, Wind Direction, UV, Sunlight) |
| Sensor Transmission Distance | 328.08 ft / 100 m |
| Display Screen | 7-Inch TFT Color Screen |
| Wi-Fi Frequency | 2.4 GHz |
| Adapter Input (Display) | AC 100-240V, 50/60Hz, 0.4A |
| Adapter Output (Display) | DC 5V, 1000mA, 5W |
| Sensor Waterproof Rating | IPX6 |
| Main Material | ABS + PC |
| Temperature Accuracy | ± 1.8°F |
| Wind Speed Accuracy | ± 0.5 m/s (<5m/s) |
| Weather Data Refresh Rate | Every 20 Seconds |

Image 9.1: Details on the precision and refresh rate of the weather station's measurements, including temperature and wind speed accuracy, and the Wi-Fi connection feature.
10. Warranty and Support
For warranty information, technical support, or service inquiries, please refer to the official VEVOR website or contact VEVOR customer service directly. Keep your purchase receipt as proof of purchase.
Manufacturer: VEVOR
Model: YT60311


