AVASTA Vela
AVASTA Vela Hybrid Bike User Manual
Model: Vela | 26 Inch, 6-Speed
Introduction
This manual provides essential information for the safe and efficient use of your AVASTA Vela Hybrid Bike. Please read these instructions thoroughly before assembly and operation to ensure proper function and longevity of your bicycle. Retain this manual for future reference.

Figure 1: The AVASTA Vela Hybrid Bike, featuring a beige frame, basket, and rear rack.
Product Features
- Premium Frame: Constructed from high tensile steel for urban durability.
- Responsive V-Brakes: Dual alloy V-brakes provide reliable stopping power in various conditions.
- Ergonomic Design: Features a low-step frame for easy mounting and swept-back handlebars for an upright, comfortable riding posture. Includes a brown synthetic leather saddle with shock-absorbing springs.
- Commuter-Ready Accessories: Equipped with full-coverage fenders to minimize road splash and a rear rack capable of supporting up to 25 lbs of cargo.
- 6-Speed Gearing: Shimano RD-TY21 derailleur with twist shifters for smooth gear changes.
- Wheel Size: 26-inch wheels balance speed and stability for diverse terrains.
Setup and Assembly
Your AVASTA Vela Hybrid Bike arrives approximately 85% pre-assembled. The remaining assembly steps are straightforward and typically involve attaching the front wheel, handlebars, and pedals. A basic toolkit is included.
Assembly Steps:
- Unpacking: Carefully remove all components from the packaging. Inspect for any shipping damage.
- Front Wheel Installation: Attach the front wheel to the fork. Ensure the quick-release skewer or axle nuts are securely tightened.
- Handlebar Attachment: Insert the handlebar stem into the fork steerer tube and tighten the stem bolts. Adjust the handlebar angle for comfort.
- Pedal Installation: Identify the left (L) and right (R) pedals. The left pedal threads counter-clockwise, and the right pedal threads clockwise. Tighten securely with a wrench.
- Seat Post Adjustment: Insert the seat post into the frame and adjust the saddle height to allow for a slight bend in your knee when the pedal is at its lowest point. Secure the quick-release lever or bolt.
- Basket and Fender Installation: Attach the front basket and fenders as per the included hardware.
- Pre-Ride Check: Before your first ride, ensure all bolts and quick releases are tightened, brakes are functioning correctly, and tires are inflated to the recommended pressure.
It is recommended to have your bicycle inspected and tuned by a professional bike mechanic after initial assembly to ensure all components are correctly adjusted for optimal safety and performance.

Figure 2: Detachable metal basket and dual alloy V-brake assembly.
Operating Instructions
Gear Shifting:
The AVASTA Vela is equipped with a 6-speed Shimano derailleur system and twist shifters. To change gears, rotate the shifter on the handlebar. Shift to a lower gear (larger cog on the rear wheel) for easier pedaling on inclines, and to a higher gear (smaller cog) for faster speeds on flat terrain or descents. Always shift while pedaling lightly to ensure smooth transitions.

Figure 3: Shimano RD-TY21 6-speed derailleur and twist shifters.
Braking:
Your bike features dual alloy V-brakes. The right lever typically controls the rear brake, and the left lever controls the front brake. Apply both brakes simultaneously and gradually for controlled stopping. Avoid sudden, hard application of the front brake, especially at high speeds, as this can cause loss of control.

Figure 4: Detail of the V-brake mechanism.
Riding Posture:
The Vela bike is designed for a comfortable, upright riding position, reducing strain on your back and neck. Adjust the saddle and handlebar height to achieve a posture that feels natural and allows for good visibility and control.

Figure 5: Illustration of comfortable upright riding posture.
Maintenance
Regular maintenance is crucial for the safety, performance, and lifespan of your bicycle.
Daily Checks:
- Tire Pressure: Check tire pressure before each ride. Refer to the sidewall of your tires for the recommended PSI range.
- Brakes: Ensure brake levers are firm and responsive, and brake pads make full contact with the wheel rims.
- Quick Releases/Bolts: Verify that all quick releases and bolts (wheels, seat post, handlebars) are securely tightened.
Weekly/Monthly Maintenance:
- Chain Lubrication: Clean and lubricate the chain regularly, especially after riding in wet or dusty conditions. This prevents premature wear.
- Cleaning: Wash your bike with mild soap and water, then rinse and dry thoroughly. Avoid high-pressure washers on bearings.
- Cable Inspection: Check brake and shifter cables for fraying or corrosion. Replace if necessary.
- Component Tightness: Periodically check all nuts and bolts for proper tightness.

Figure 6: Ergonomic saddle and rear cargo rack, requiring occasional inspection for wear.
Troubleshooting
This section addresses common issues you might encounter with your AVASTA Vela Hybrid Bike.
| Problem | Possible Cause | Solution |
|---|---|---|
| Brakes feel spongy or weak | Loose cable, worn pads, misaligned pads | Check cable tension, inspect and replace brake pads if worn, adjust pad alignment. |
| Gears not shifting smoothly | Derailleur out of adjustment, dirty/dry chain, bent hanger | Clean and lubricate chain, adjust derailleur limits and cable tension. Consult a mechanic for a bent hanger. |
| Tire loses air quickly | Puncture, leaky valve stem, improperly seated tire | Inspect tire for punctures, check valve stem, ensure tire is properly seated on the rim. Repair or replace inner tube. |
| Creaking noises | Loose components (pedals, crank, seat post), dry bearings | Tighten all bolts, lubricate moving parts. If persistent, professional inspection is recommended. |
For issues not listed here or if you are unsure about a repair, please consult a qualified bicycle mechanic.
Specifications
| Feature | Detail |
|---|---|
| Bike Type | Hybrid Bike |
| Model Name | Vela |
| Brand | AVASTA |
| Age Range | Adult |
| Number of Speeds | 6 |
| Wheel Size | 26 Inches |
| Frame Material | High Tensile Carbon Steel |
| Frame Size | 16.5 Inches |
| Minimum User Height | 157 Centimeters (4'11") |
| Suspension Type | Rigid |
| Brake Style | V Brake (Dual Alloy) |
| Included Components | Basket, Bell, Cargo Rack, Kickstand, Tool Kit |
| Assembly Required | Yes (85% pre-assembled) |
| Approximate Weight | 35 lbs |
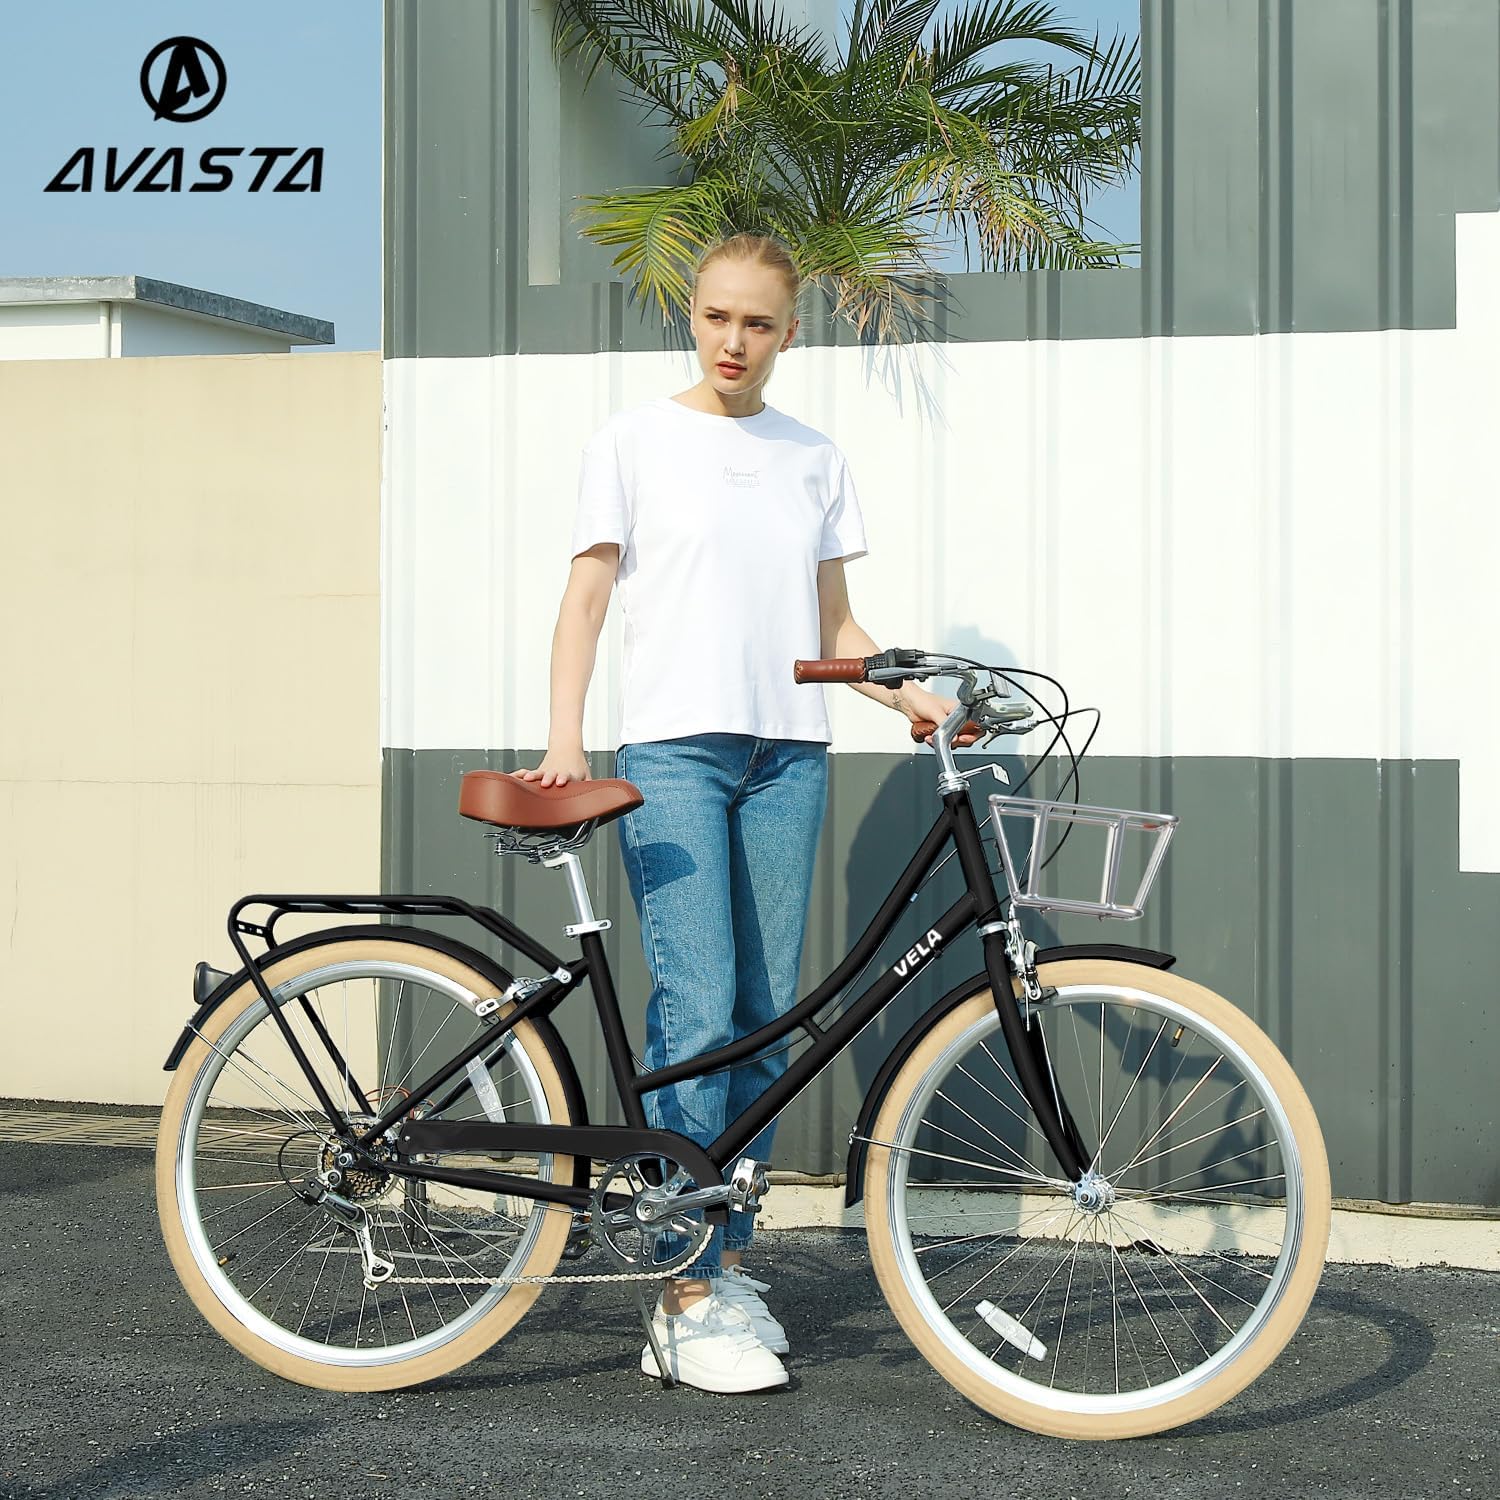
Figure 7: Detailed size chart for the AVASTA Vela Hybrid Bike.
Warranty and Support
Warranty Information:
The AVASTA Vela Hybrid Bike comes with a Limited Warranty. Please refer to the warranty card included with your purchase for specific terms, conditions, and duration of coverage. Keep your proof of purchase for warranty claims.
Customer Support:
For technical assistance, parts inquiries, or warranty claims, please contact AVASTA customer service. You can find contact information on the AVASTA brand store or through your retailer.
Visit the official AVASTA store for more information: AVASTA Brand Store