1. Product Overview
The Portta HDMI Video Capture Card is designed for capturing and streaming HDMI video signals up to 1080p at 60 frames per second (fps) via USB 3.0. It features 4K HDMI input and loop-out capabilities, a 3.5mm audio output, and a microphone input, making it suitable for various applications including game streaming, live broadcasts, and content creation.
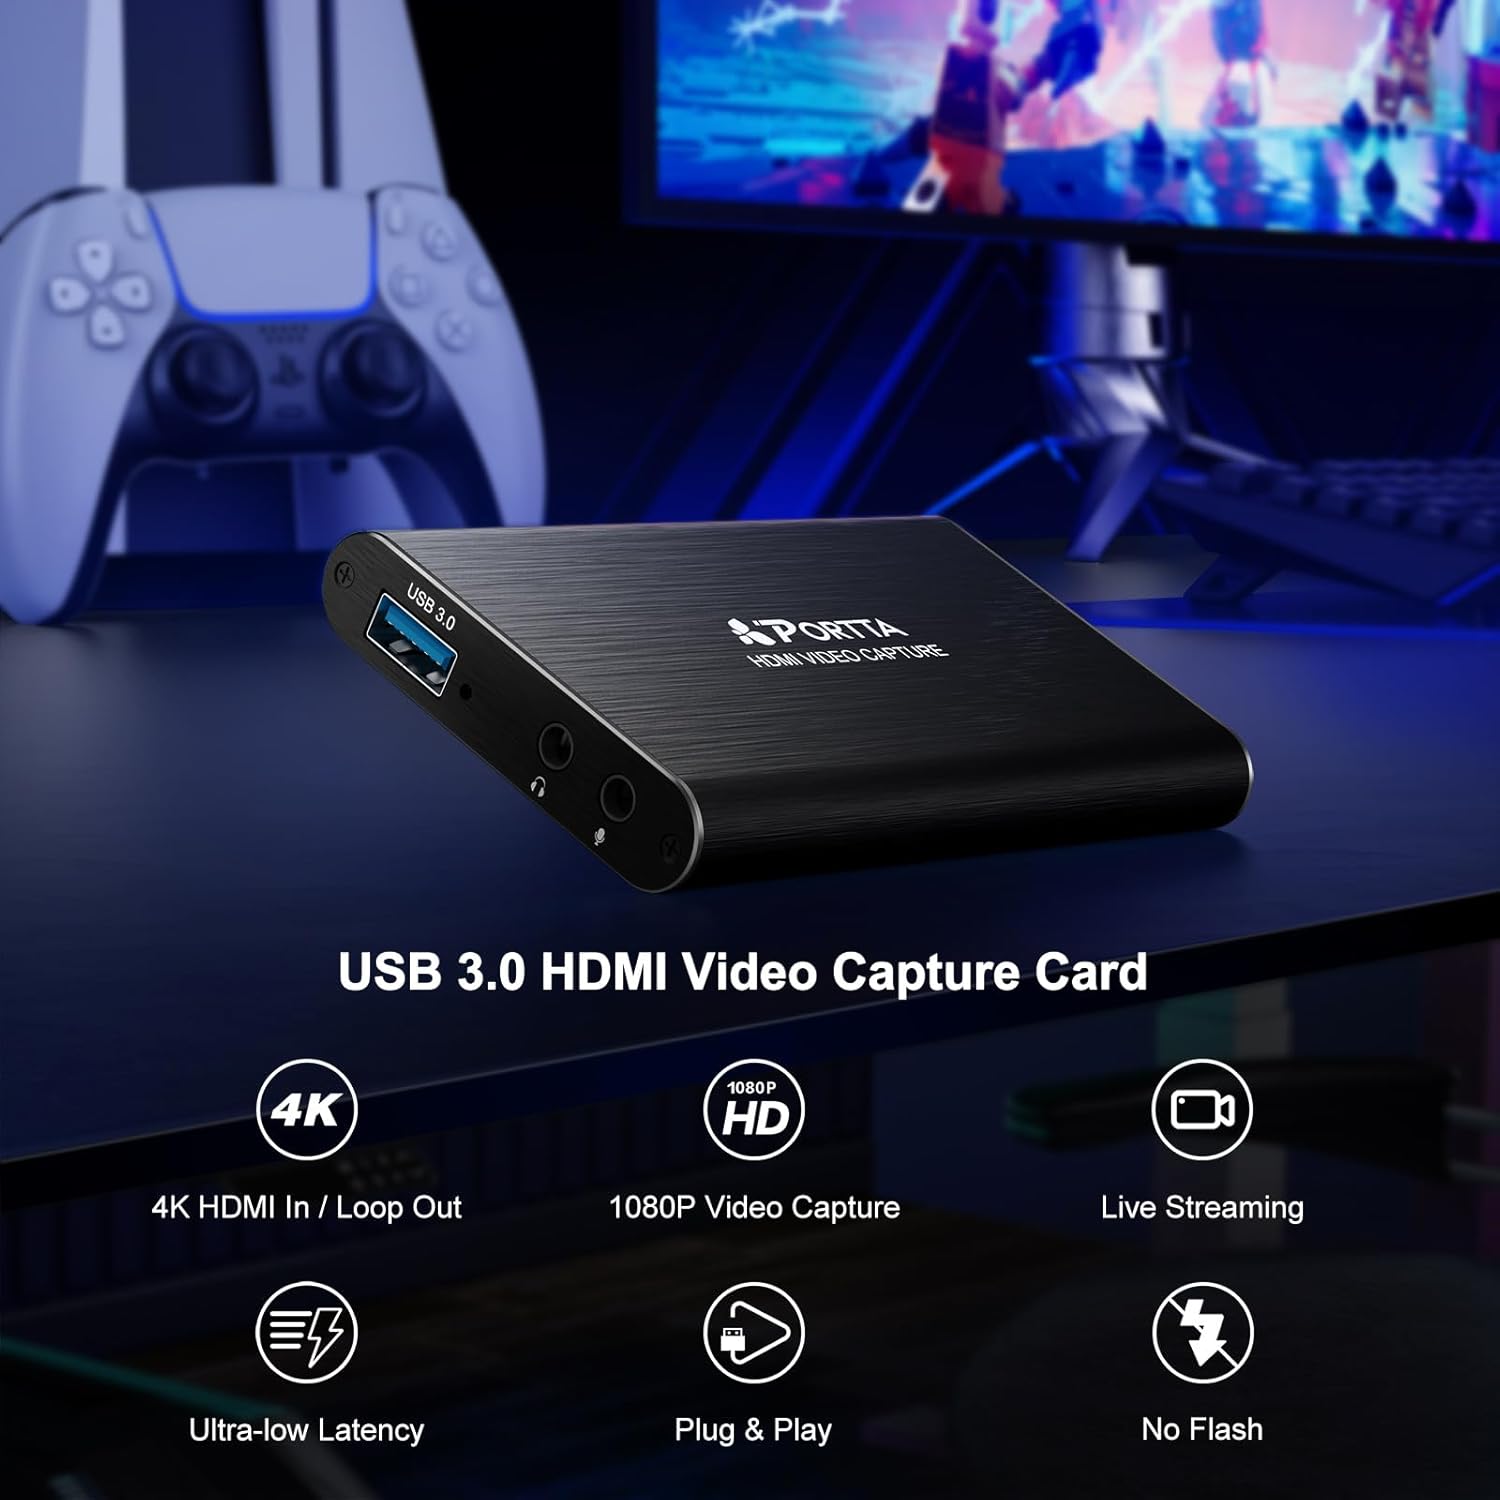
Image: Front view of the Portta HDMI Video Capture Card, highlighting the USB 3.0 port, 3.5mm audio output, and microphone input.

Image: Rear view of the Portta HDMI Video Capture Card, illustrating the HDMI input and HDMI loop-out ports, along with an IN/OUT indicator.
2. Package Contents
Verify that all items are present in the package:
- Portta HDMI Video Capture Card (x1)
- USB-A to USB-A 3.0 Data Cable (x1)
- HDMI Cable (x1)
- User Manual (x1)
3. System Requirements
To ensure optimal performance, your computer system should meet the following minimum specifications:
- Operating System: Windows 7/8/10/11 or later; macOS 10.8+ (Intel/Apple Silicon; Metal support recommended); Linux (kernel 2.6.38+, e.g., Ubuntu 18.04+; X11/Wayland)
- CPU: Quad-core Intel Core i5 / Ryzen 5 or higher
- Memory: 8 GB RAM or more
- Graphics: DirectX 10.1 or OpenGL 3.3 compatible GPU (DirectX 11 / Metal recommended)
- Storage: SSD recommended for high-bitrate recording
The device is plug-and-play and does not require driver installation.
4. Setup Instructions
Follow these steps to connect and set up your Portta HDMI Video Capture Card:
- Connect HDMI Input: Connect your HDMI source device (e.g., game console, camcorder, PC) to the HDMI INPUT port on the capture card using an HDMI cable.
- Connect HDMI Loop-Out (Optional): If you wish to view your source content on a separate display while capturing, connect an HDMI cable from the HDMI LOOP OUTPUT port on the capture card to your monitor or TV.
- Connect to Computer: Connect the USB-A to USB-A 3.0 data cable from the USB 3.0 port on the capture card to an available USB 3.0 port on your computer. The device will be automatically recognized.
- Connect Audio Devices (Optional):
- For microphone input, connect a microphone to the Mic In 3.5mm jack.
- For audio monitoring, connect headphones (TRS only) or speakers to the 3.5mm Audio Output jack.
Note: Microphone audio is not routed through the HDMI OUT port.

Image: Connection diagram for the capture card, showing an HDMI source (game console) connected to the input, a TV connected to the loop-out, and a laptop connected via USB 3.0 for capture.
5. Operating Instructions
The Portta HDMI Video Capture Card is compatible with various UVC/UAC-compliant applications, including OBS Studio. The following instructions focus on using OBS Studio, a popular free and open-source software for video recording and live streaming.
5.1. Using with OBS Studio (Windows/macOS/Linux)
- Download and Install OBS Studio: If you haven't already, download OBS Studio from its official website (obsproject.com) and install it on your computer.
- Launch OBS Studio: Open the OBS Studio application.
- Add Video Source:
- In the "Sources" box at the bottom left, click the "+" icon.
- Select "Video Capture Device".
- Choose "Create new" and give it a name (e.g., "Portta Capture"). Click "OK".
- In the properties window, select "USB3 Video" (or similar) from the "Device" dropdown menu.
- Configure resolution/FPS if needed (e.g., 1920x1080, 60 FPS). Click "OK".

Image: Step-by-step guide within OBS Studio to add the video capture device as a source.
- Add Audio Source (Optional):
- In the "Sources" box, click the "+" icon.
- Select "Audio Input Capture".
- Choose "Create new" and name it (e.g., "Portta Mic"). Click "OK".
- Select "USB3 Digital Audio" (or similar) from the "Device" dropdown. Click "OK".
- Adjust Audio Properties:
- In the "Audio Mixer" section, click the gear icon next to your audio source (e.g., "Portta Mic").
- Select "Advanced Audio Properties".
- For "Audio Monitoring", select "Monitor and Output" if you want to hear the audio through your computer's speakers/headphones while streaming/recording.

Image: Guide on configuring advanced audio properties in OBS Studio for monitoring and output.
- Start Recording/Streaming: In the "Controls" section, click "Start Recording" or "Start Streaming" as desired.
5.2. macOS OBS Operation Notes
For macOS users, you may need to grant OBS Studio specific permissions:
- Go to OBS Studio > Settings > Review App Permissions.
- Ensure "Screen Recording", "Camera", and "Microphone" access are granted. Follow system prompts until "Access Granted" appears for each.

Image: macOS system settings showing how to grant necessary permissions (Screen Recording, Camera, Microphone) to OBS Studio.
6. Maintenance
To ensure the longevity and optimal performance of your Portta HDMI Video Capture Card, follow these maintenance guidelines:
- Cleaning: Use a soft, dry cloth to clean the exterior of the device. Avoid using liquid cleaners or solvents, as they may damage the finish or internal components.
- Storage: Store the device in a cool, dry place away from direct sunlight, extreme temperatures, and high humidity when not in use.
- Cable Management: Avoid bending or kinking cables excessively. Proper cable management helps prevent damage to the connectors and wires.
- Ventilation: Ensure the device has adequate ventilation during operation to prevent overheating.
7. Troubleshooting
If you encounter issues with your Portta HDMI Video Capture Card, refer to the following common troubleshooting steps:
- No Video Signal:
- Ensure all HDMI cables are securely connected to both the source device, capture card, and display (if using loop-out).
- Verify that the HDMI source device is powered on and outputting a signal.
- Check the resolution settings of your source device. The capture card supports up to 4K@60Hz (YUV 4:2:0) input, but does not support HDR or CEC.
- Try a different HDMI cable or source device to rule out cable or source issues.
- No Audio:
- Confirm that the audio source is enabled in your capture software (e.g., OBS Studio).
- Check the volume levels on your computer and within the capture software.
- If using the 3.5mm audio output, ensure headphones/speakers are properly connected and functioning. Note that only TRS headphones are supported.
- Remember that microphone audio connected to the 3.5mm Mic In port is not routed to the HDMI loop-out.
- Poor Capture Quality or Lag:
- Ensure your computer meets the recommended system requirements, especially for CPU, RAM, and graphics.
- Connect the capture card to a USB 3.0 port on your computer for optimal bandwidth. USB 2.0 ports may result in lower performance.
- Close unnecessary applications running in the background to free up system resources.
- If recording high-bitrate content, use an SSD for storage.
- Verify that your capture software settings (resolution, FPS, bitrate) are appropriate for your system's capabilities.
- Device Not Recognized:
- Try connecting the capture card to a different USB 3.0 port on your computer.
- Restart your computer.
- Ensure the USB cable is not damaged.
8. Specifications
| Model Number | HCC101-1BK |
| Brand | Portta |
| Compatible Devices | Laptop, Camcorder, PS4, PS5, Xbox, Nintendo Switch |
| Connector Type | HDMI, USB 3.0, 3.5mm Audio |
| HDMI Input Resolution | Up to 4K@60Hz (YUV 4:2:0) |
| HDMI Loop-Out Resolution | Up to 4K@60Hz (YUV 4:2:0) |
| Capture Resolution | Up to 1080p@60Hz via USB 3.0 |
| Audio Input | 3.5mm Microphone In |
| Audio Output | 3.5mm Audio Out (TRS Only) |
| Dimensions (L x W x H) | 4.02 x 2.72 x 0.49 inches |
| Item Weight | 68 Grams |
| HDCP Support | HDCP 1.4 (input only) |
| HDR Support | Not supported |
| CEC Support | Not supported |

Image: Physical dimensions of the Portta HDMI Video Capture Card.
9. Warranty and Support
The Portta HDMI Video Capture Card comes with a hassle-free 2-year warranty and lifetime technical support.
For any questions or assistance, please contact Portta customer service. Refer to the contact information provided in the included user manual or visit the official Portta website for support resources.