Introduction
This manual provides detailed instructions for the Yottamaster Mac mini M4 Dock (Model M4S2-9P). This 9-in-1 docking station is designed to expand the connectivity and storage capabilities of your Mac mini M4 or M4 Pro, featuring an M.2 NVMe/SATA SSD enclosure, multiple USB ports, audio jacks, and card readers, along with a built-in cooling fan. Please read this manual thoroughly before use to ensure proper installation and operation.
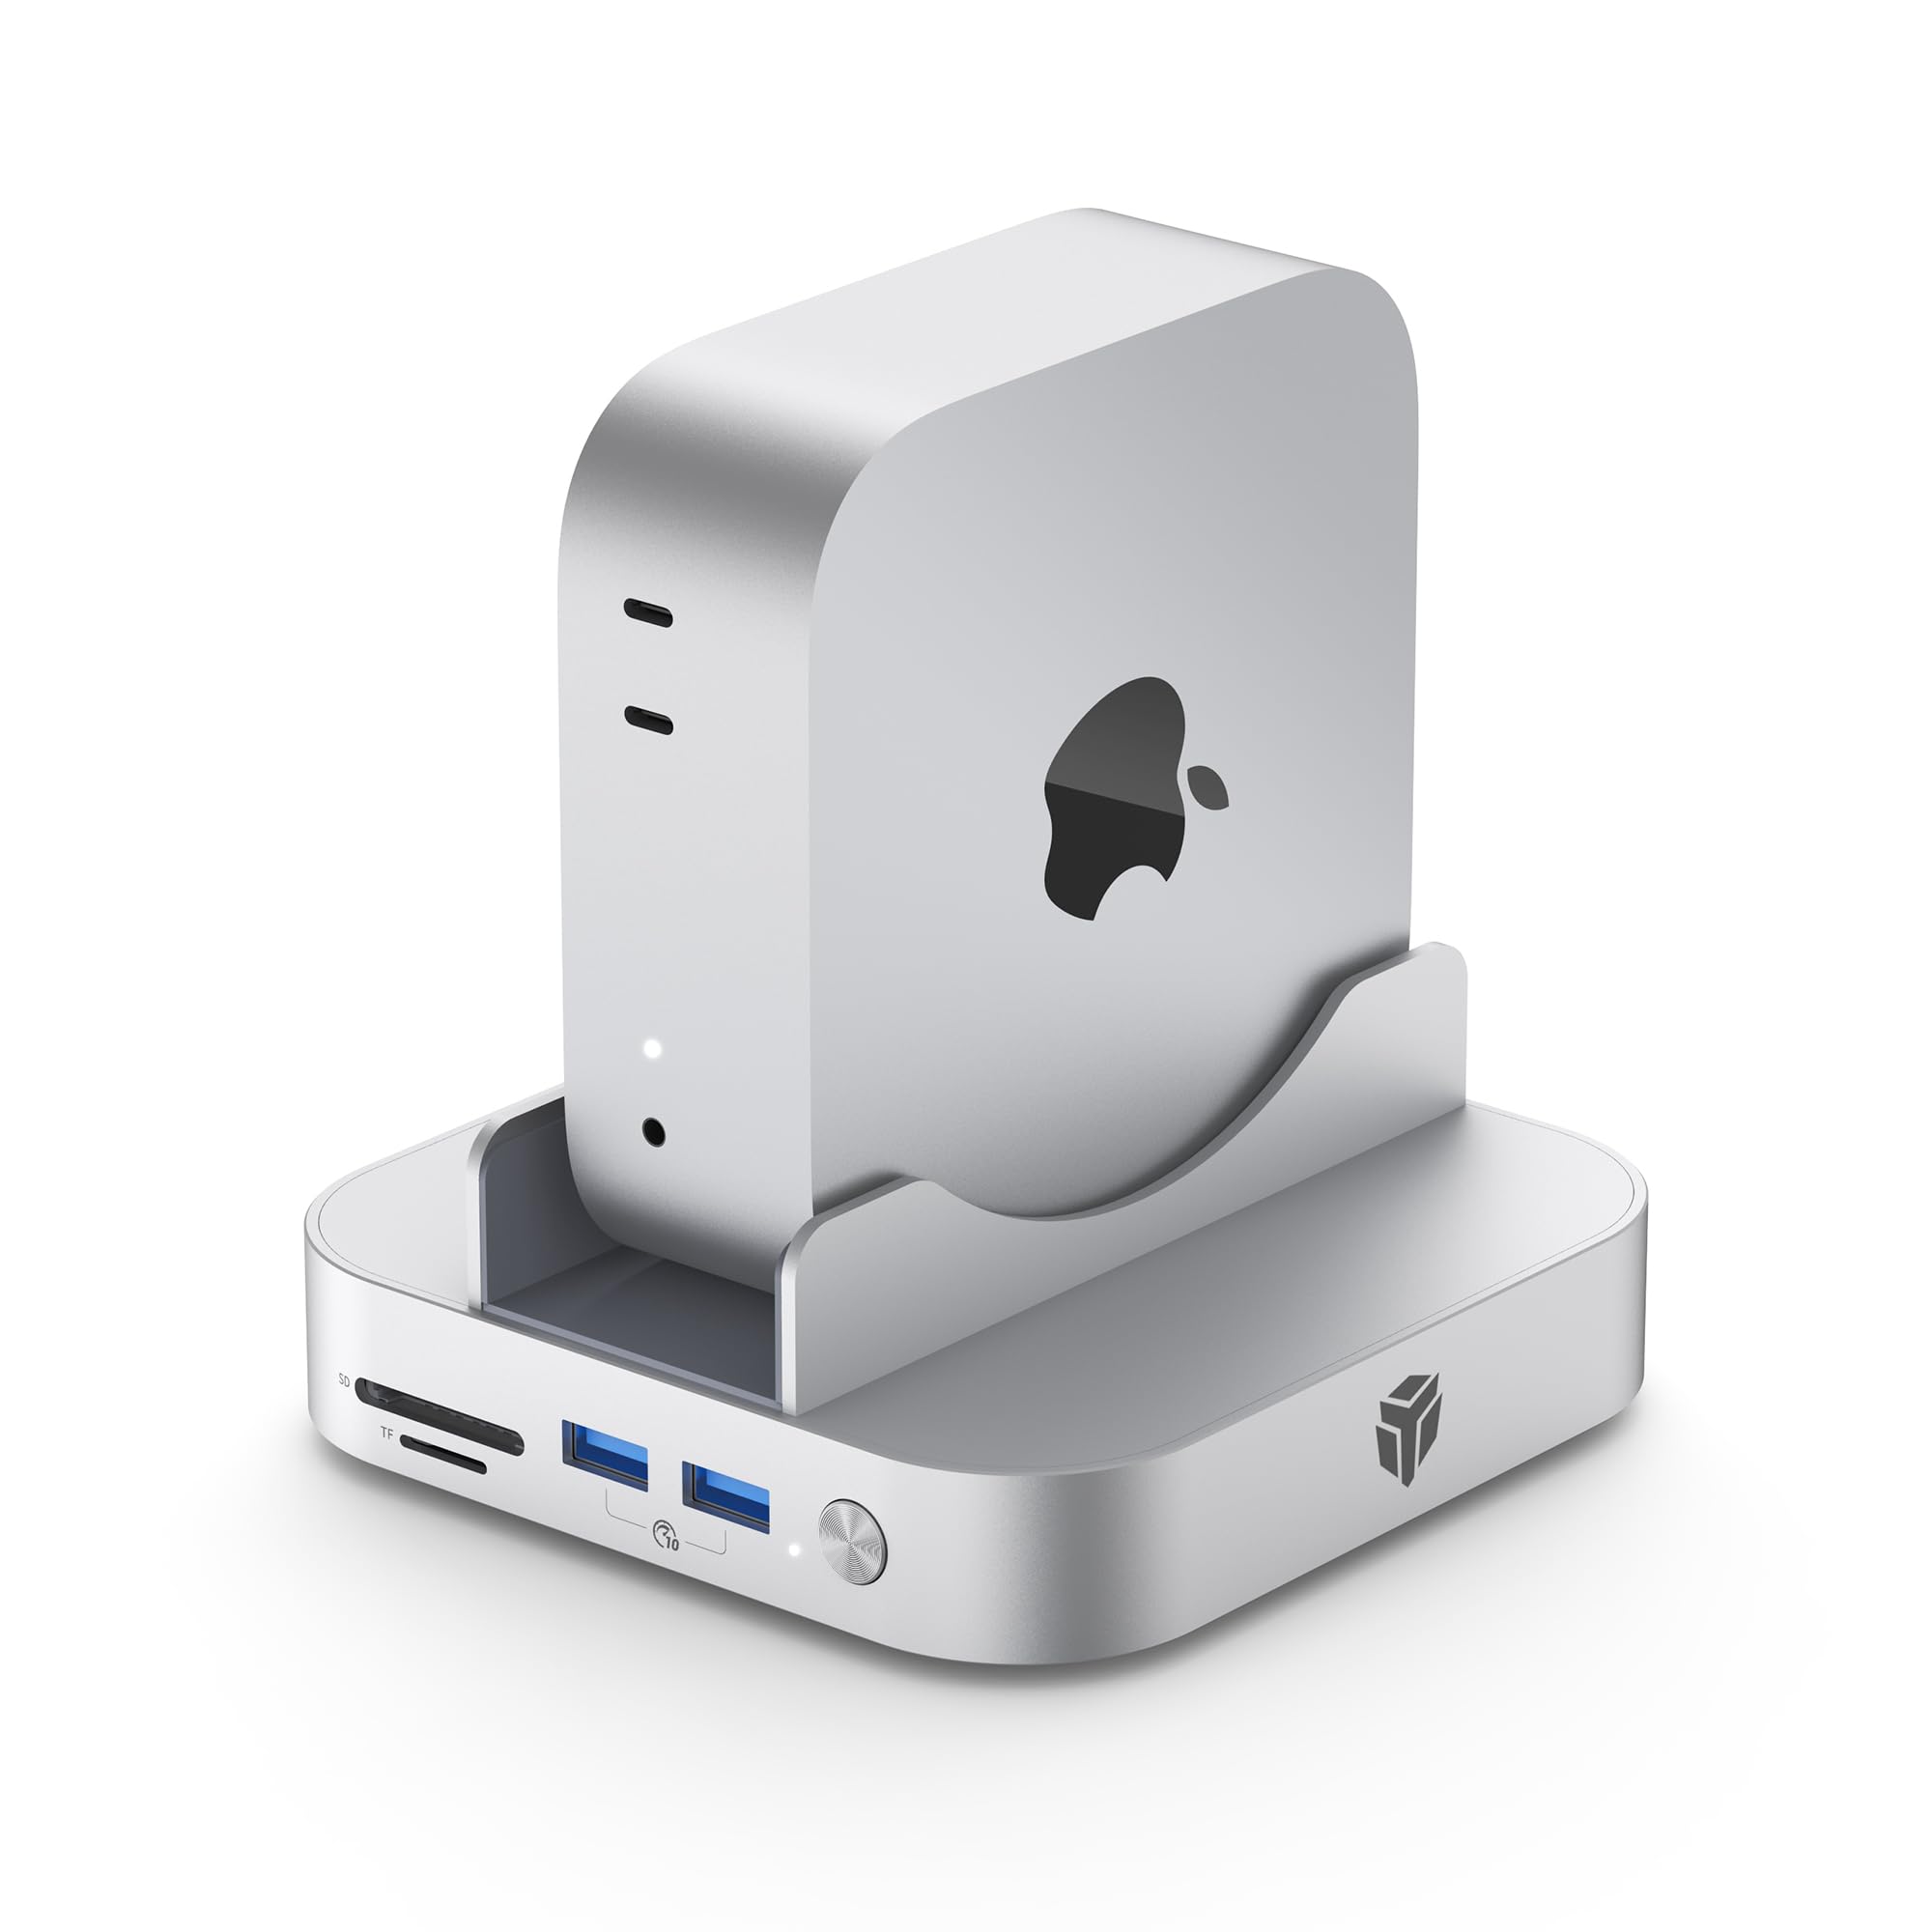
Image: The Yottamaster Mac mini M4 Dock with a Mac mini inserted, showcasing its compact design and integration.
Package Contents
Verify that all items listed below are included in your package. If any items are missing or damaged, please contact customer support.
- Yottamaster M4S2-9P Dock
- User Manual
- Screw for SSD installation
- Silicone Thermal Pad
- Cooling Vest (for SSD)
- Screwdriver
- 0.15m USB-C to USB-C Cable
- DC 12V 3A Power Adapter

Image: A visual representation of all items included in the Yottamaster Mac mini M4 Dock package, numbered for easy identification.
Product Overview
Familiarize yourself with the various ports and features of your Yottamaster Mac mini M4 Dock.

Image: Detailed diagram illustrating the front and rear ports of the Yottamaster Mac mini M4 Dock, including TF/SD card slots, USB-A, USB-C, 3.5mm audio jacks, DC 12V input, and power button.
- Front Ports:
- TF/SD Card Reader (3.0)
- 2 x USB-A 3.2 (10Gbps)
- Power Button
- Rear Ports:
- DC 12V Power Input
- 3.5mm Audio Out
- 3.5mm Mic In
- 2 x USB-A 2.0 (480Mbps)
- 1 x USB-C 3.2 (10Gbps) - PC IN
Setup
1. Installing an M.2 SSD (Optional)
The dock supports M.2 NVMe/SATA SSDs (2280 size only) up to 8TB for expanded storage.
- Carefully remove the magnetic bottom cover plate of the dock.
- Insert your M.2 2280 SSD into the M.2 slot. Ensure it is fully seated.
- Secure the SSD with the provided screw.
- Apply the silicone thermal pad and cooling vest onto the SSD for optimal heat dissipation.
- Replace the magnetic bottom cover plate.

Image: Diagram showing the internal structure of the SSD enclosure, including the M.2 slot, cooling vest, and magnetic bottom cover plate, with an SSD being inserted.
2. Connecting the Dock to Your Mac mini
- Place your Mac mini M4 or M4 Pro securely into the stand cradle of the dock.
- Connect the provided USB-C to USB-C cable from the "PC IN" port on the rear of the dock to an available USB-C/Thunderbolt port on your Mac mini.
- Connect the DC 12V power adapter to the "DC 12V" port on the rear of the dock, then plug it into a power outlet.
- Press the power button on the front of the dock to turn it on.
Video: An overview of the Yottamaster Mac mini M4 Dock, demonstrating its features and how it integrates with the Mac mini to expand connectivity and storage, addressing common limitations.
Operating Instructions
Using USB Ports
- USB-A 3.2 (10Gbps): Use the two front USB-A ports for high-speed data transfer devices such as external SSDs or flash drives.
- USB-A 2.0 (480Mbps): The two rear USB-A ports are suitable for connecting peripherals like keyboards, mice, or printers.
- USB-C 3.2 (10Gbps): The rear USB-C port is primarily for connecting the dock to your Mac mini.
Using Card Readers
Insert SD or TF (MicroSD) cards into the corresponding slots on the front of the dock. The card reader supports high-speed data transfer for quick access to your media files.
Using Audio Jacks
Connect headphones or speakers to the 3.5mm Audio Out jack. Use the 3.5mm Mic In jack for external microphones.
SSD Data Transfer
Once an M.2 SSD is installed and the dock is powered on and connected, the SSD will appear as an external drive on your Mac mini. You can then transfer files at speeds up to 10Gbps.

Image: A Mac mini M4 Dock connected to a monitor, illustrating high-speed data transfer capabilities (10Gbps) for large files and creative applications.
Cooling Fan Operation
The built-in cooling fan automatically activates to maintain optimal operating temperatures for the dock and any installed SSD, ensuring stable performance during heavy use.

Image: An illustration of the Yottamaster Mac mini M4 Dock's built-in cooling fan, showing airflow to dissipate heat and maintain stable operation.
Video: A demonstration of the Yottamaster 9-in-1 Mac mini M4 Dock, highlighting the M.2 SSD enclosure installation, port functionality, and the benefits of its integrated design for a streamlined workspace.
Specifications
| Feature | Description |
|---|---|
| Model | M4S2-9P |
| Compatibility | Mac mini M4, Mac mini M4 Pro (also compatible with Windows, Linux, Android, HarmonyOS devices via USB-C) |
| SSD Enclosure | M.2 NVMe/SATA (2280 size only), up to 8TB |
| USB-A Ports | 2 x USB-A 3.2 (10Gbps), 2 x USB-A 2.0 (480Mbps) |
| USB-C Port | 1 x USB-C 3.2 (10Gbps) - PC IN |
| Card Reader | TF/SD Card Reader (3.0) |
| Audio Jacks | 1 x 3.5mm Audio Out, 1 x 3.5mm Mic In |
| Cooling | Built-in Cooling Fan |
| Material | Aluminum Alloy |
| Power Input | DC 12V 3A |

Image: The Yottamaster Mac mini M4 Dock shown in various computing environments, emphasizing its wide compatibility beyond just Mac systems, including Windows, Linux, Android, and HarmonyOS.
Maintenance
- Cleaning: Use a soft, dry cloth to wipe the exterior of the dock. Avoid using liquid cleaners or solvents.
- Ventilation: Ensure the cooling fan vents are not obstructed to maintain proper airflow and prevent overheating.
- Cable Management: Keep cables organized to prevent strain on ports and accidental disconnections.
- Storage: When not in use for extended periods, disconnect the power adapter and store the dock in a cool, dry place.
Troubleshooting
- Issue: Dock is not powering on.
- Solution: Ensure the DC 12V power adapter is securely connected to both the dock and a working power outlet. Press the power button on the front of the dock.
- Issue: SSD is not detected.
- Solution:
- Verify the M.2 SSD is correctly installed and secured within the enclosure.
- Ensure the SSD is compatible (M.2 NVMe/SATA, 2280 size).
- Check if the dock is powered on and properly connected to your Mac mini via the "PC IN" USB-C port.
- For new SSDs, it may need to be initialized and formatted through Disk Utility on macOS.
- Issue: USB devices are not recognized or are slow.
- Solution:
- Ensure the dock is powered on.
- Try connecting the device to a different USB port on the dock.
- For high-speed devices, use the 10Gbps USB-A ports on the front.
- Ensure the USB-C connection between the dock and Mac mini is secure.
- Issue: Card reader is not working.
- Solution:
- Ensure the SD/TF card is fully inserted into the correct slot.
- Test with a different card to rule out card issues.
- Verify the dock is powered on and connected to your Mac mini.
Warranty and Support
The Yottamaster Mac mini M4 Dock (Model M4S2-9P) comes with a 1-Year Manufacturer's Warranty. This warranty covers defects in materials and workmanship under normal use. It does not cover damage caused by misuse, accidents, unauthorized modifications, or external causes.
For technical support, warranty claims, or further assistance, please contact Yottamaster customer service through their official website or the retailer where the product was purchased. Please have your product model number and purchase information ready.
Yottamaster Official Website: www.yottamaster.com