1. Introduction
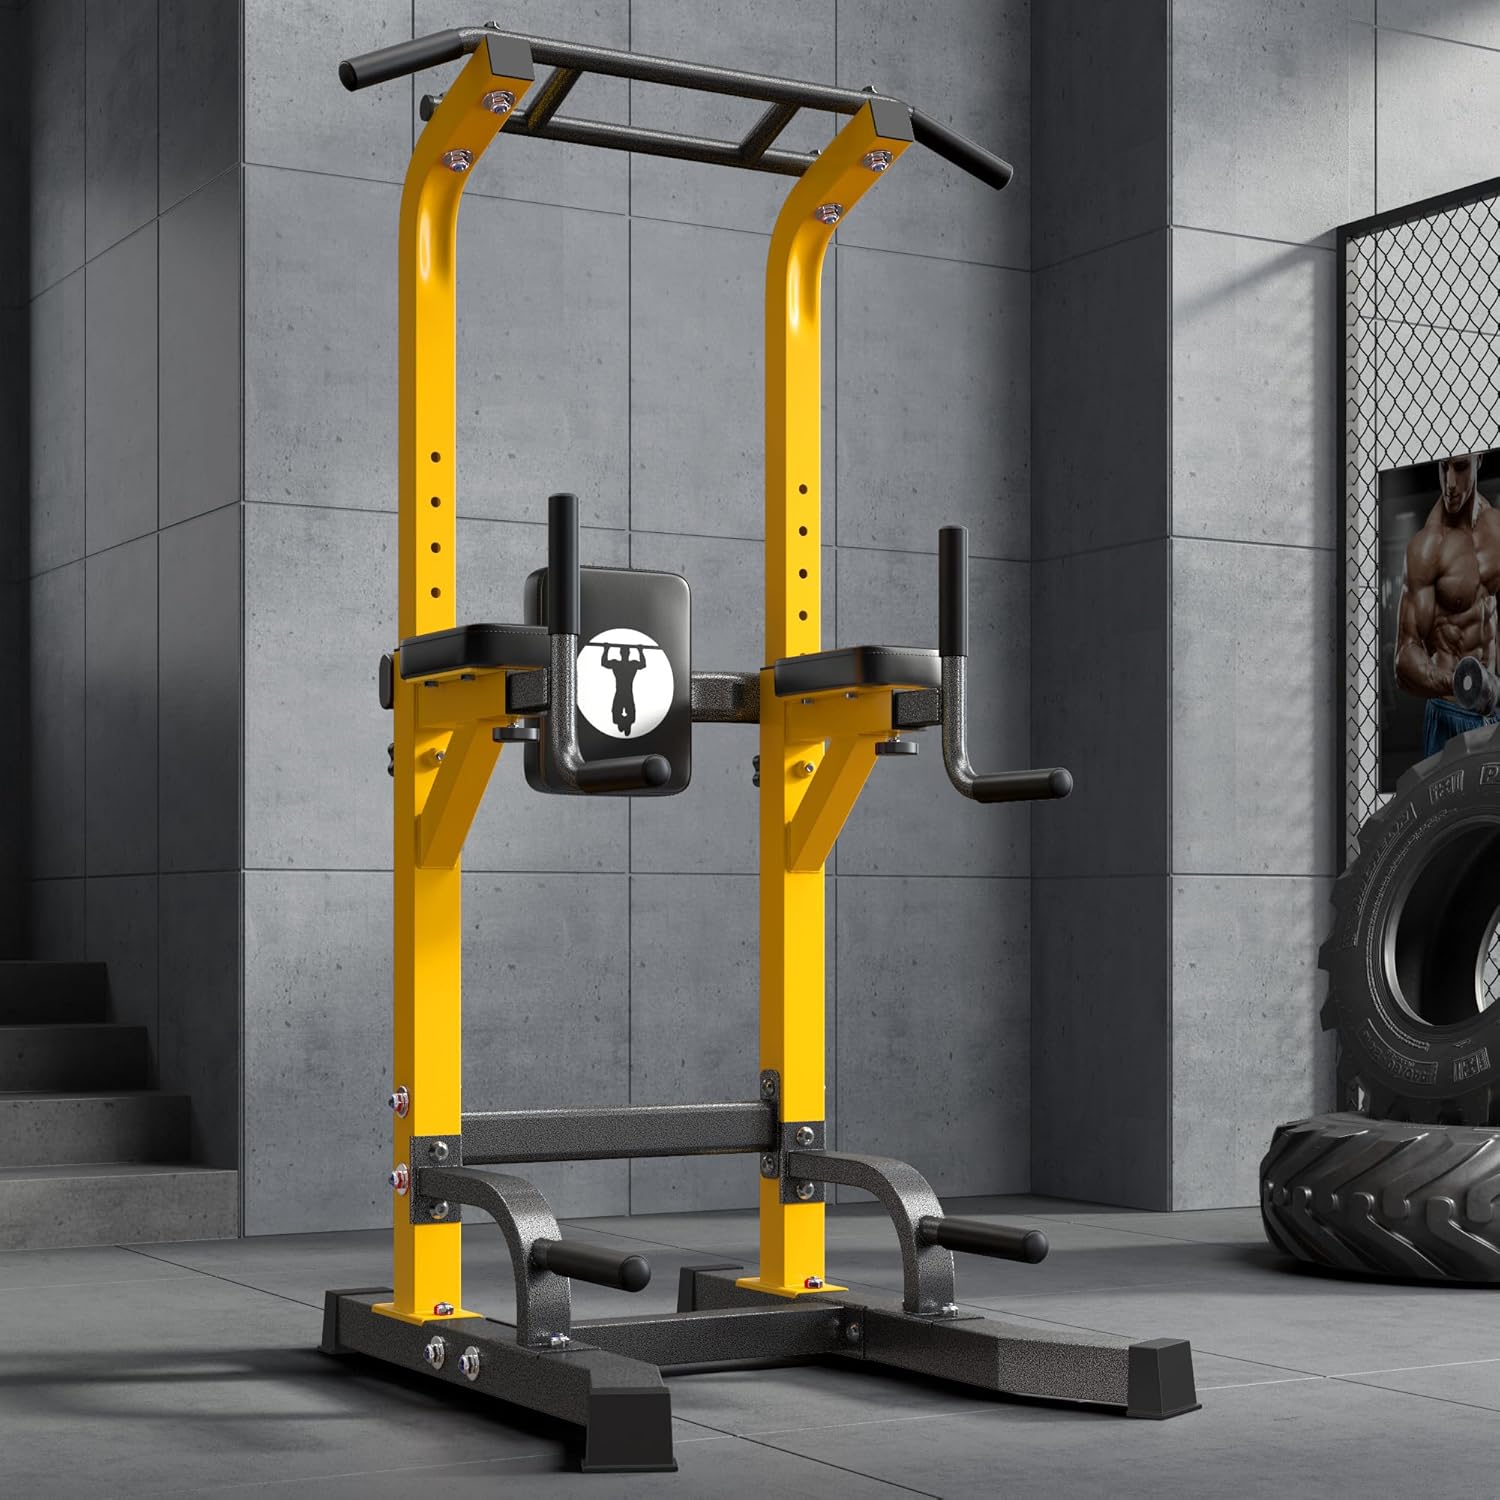
This manual provides essential instructions for the safe assembly, operation, and maintenance of your SogesHome Power Tower Pull Up Bar Dip Station. Designed for comprehensive strength training, this equipment supports various exercises for a full-body workout. Please read this manual thoroughly before use and retain it for future reference.
2. Safety Information
- Always consult with a healthcare professional before starting any new exercise program.
- Ensure all bolts, nuts, and connections are securely tightened before each use. Regularly inspect the equipment for wear and tear.
- Place the power tower on a flat, stable surface. Use a protective mat if necessary.
- Maintain a clear area of at least 2 feet (60 cm) around the equipment during use.
- Do not exceed the maximum weight capacity of 330 pounds (150 kg).
- Children should only use the equipment under strict adult supervision.
- Perform warm-up exercises before using the power tower.
- Stop exercising immediately if you experience pain, dizziness, or discomfort.
3. Package Contents
Verify that all components are present and undamaged before beginning assembly. If any parts are missing or damaged, contact customer support.
- Main Frame Components (Vertical Supports, Base Bars)
- Pull-Up Bar Assembly
- Dip Station Arms with Elbow Pads
- Back Pad
- Adjustable Handle Bars
- Hardware Kit (Bolts, Washers, Nuts, Wrenches)
- User Manual
4. Assembly Instructions
Assemble the power tower on a soft, flat surface to prevent damage. It is recommended to have two people for assembly.
4.1 Before Assembly
- Unpack all components and lay them out.
- Identify all parts using the provided parts list (not included in this text, refer to physical manual).
- Ensure you have the necessary tools (a socket wrench may be helpful in addition to the provided tools).
4.2 Assembly Steps
- Assemble the Base: Connect the base bars to the main vertical supports. Ensure the outward-angled square tube design is correctly oriented for stability. Secure with bolts and nuts, but do not fully tighten yet.
- Attach Lower Support Bars: Connect any lower horizontal support bars between the vertical supports.
- Install Dip Station Arms and Back Pad: Attach the dip station arms, including the elbow pads, and the back pad to the main vertical supports at the desired height.
- Install Pull-Up Bar: Secure the pull-up bar assembly to the top of the vertical supports.
- Install Adjustable Handle Bars: Attach the adjustable handle bars to the lower sections of the vertical supports.
- Final Tightening: Once all parts are assembled, go back and securely tighten all bolts and nuts. Ensure the safety lock nuts are fully engaged.
- Stability Check: Gently shake the assembled power tower to ensure it is stable and all connections are secure.


5. Operating Instructions (Exercises)
The SogesHome Power Tower supports a variety of strength training exercises. Adjust the height of the pull-up bar and dip station as needed for your comfort and exercise requirements (10 adjustable height levels from 65.7" to 87").
5.1 Pull-Ups
- Grip the pull-up bar with an overhand grip, hands slightly wider than shoulder-width apart.
- Hang freely, then pull your body upwards until your chin clears the bar.
- Slowly lower yourself back to the starting position.
5.2 Dips
- Place your hands on the dip handles, palms facing inward, and lift your body so your arms are straight.
- Lower your body by bending your elbows until your shoulders are below your elbows.
- Push back up to the starting position.
5.3 Vertical Knee Raises / Leg Raises
- Rest your forearms on the elbow pads and your back against the back pad. Grip the handles for stability.
- Keeping your back straight, slowly raise your knees towards your chest.
- Lower your legs with control.
5.4 Push-Ups
- Use the lower adjustable handle bars or the base of the power tower for elevated push-ups.
- Maintain a straight body line from head to heels.
- Lower your chest towards the handles, then push back up.

6. Maintenance
- Regular Cleaning: Wipe down the equipment with a damp cloth after each use to remove sweat and dust. Avoid abrasive cleaners.
- Inspect Connections: Periodically check all bolts, nuts, and connections to ensure they remain tight. Tighten if necessary.
- Check for Wear: Inspect padding, grips, and structural components for any signs of wear, cracks, or damage. Replace worn parts immediately.
- Storage: Store the power tower in a dry, cool place away from direct sunlight and extreme temperatures.
7. Troubleshooting
| Problem | Possible Cause | Solution |
|---|---|---|
| Equipment feels unstable or wobbly. | Loose bolts/nuts; uneven floor. | Ensure all bolts and nuts are fully tightened. Move the equipment to a flat, level surface or use shims under the base. |
| Squeaking noises during use. | Loose connections; metal-on-metal friction. | Tighten all connections. Apply a small amount of silicone lubricant to contact points if necessary (avoiding grips). |
| Difficulty adjusting height. | Adjustment pin stuck; debris in holes. | Ensure the adjustment pin is fully disengaged. Clean any debris from the adjustment holes. |
8. Specifications
| Feature | Detail |
|---|---|
| Brand | SogesHome |
| Model Number | NSDUS-40YKMF6210O-Pro |
| Material | Alloy Steel |
| Color | Yellow |
| Handle Type | Fixed |
| Maximum Weight Recommendation | 330 Pounds (150 kg) |
| Adjustable Height Range | 65.7" to 87" (10 levels) |
| Item Package Dimensions (L x W x H) | 47 x 15.5 x 6 inches |
| Package Weight | 49 Pounds |

9. Warranty and Support
SogesHome is committed to providing high-quality products and customer satisfaction. This product comes with a standard manufacturer's warranty against defects in materials and workmanship. For specific warranty details, please refer to the documentation included with your purchase or contact customer service.
If you have any questions about the product, require assistance with assembly, or need to report a missing/damaged part, please contact SogesHome customer support. Our service purpose is to make high-quality products and be enthusiastic about every customer.