1. Introduction
This manual provides comprehensive instructions for the installation, operation, and maintenance of your Ossuret 7-inch Android 13 Carplay Autoradio. Please read this manual thoroughly before using the device to ensure proper functionality and safety. This unit is designed to enhance your driving experience with advanced multimedia and navigation features.
2. Package Contents
Verify that all items listed below are included in your package. If any items are missing or damaged, please contact customer support.
- Main Autoradio Unit
- Power Cable
- USB Cable (4-pin)
- USB Cable (6-pin)
- GPS Antenna
- RCA Cable
- External Microphone
- Rear Camera Input RCA Cable
- Canbus Decoder (if applicable)
- Radio Antenna Adapter Cable

3. Compatible Vehicle Models
This Ossuret Autoradio is compatible with the following Opel/Vauxhall/Holden models:
- Opel/Vauxhall/Holden Antara (from 2005)
- Opel/Vauxhall/Holden Astra H (from 2004)
- Opel/Vauxhall/Holden Corsa C (2004-2006)
- Opel/Vauxhall/Holden Corsa D (from 2006)
- Opel/Vauxhall/Holden Meriva (from 2004)
- Opel/Vauxhall/Holden Signum (from 2003)
- Opel/Vauxhall/Holden Tigra Twintop (from 2004)
- Opel/Vauxhall/Holden Vectra C (from 2004)
- Opel/Vauxhall/Holden Vivaro 6
- Opel/Vauxhall/Holden Zafira (from 2005)
4. Setup and Installation
Installation of this autoradio requires technical knowledge and experience with car electronics. It is highly recommended to seek professional installation to avoid damage to the unit or your vehicle.
4.1 Pre-Installation Check
- Ensure the vehicle's ignition is off and the battery is disconnected before starting installation.
- Confirm compatibility with your vehicle model and year.
- Identify the existing wiring harness and dashboard opening.
4.2 Wiring Connections
- Power Cable: Connect the provided power cable to the vehicle's power supply, ensuring correct polarity (ACC, B+, GND).
- USB Cables: Connect the 4-pin and 6-pin USB cables to the corresponding ports on the autoradio. These can be routed to a convenient location for external USB devices.
- GPS Antenna: Mount the GPS antenna in a location with a clear view of the sky, typically on the dashboard or under the windshield, and connect it to the unit.
- RCA Cables: Connect RCA cables for audio output (e.g., to external amplifiers) or video input/output as needed.
- External Microphone: Connect the external microphone for improved call quality and route it to a suitable position (e.g., near the sun visor).
- Rear Camera Input: If installing a rear view camera, connect its video output to the dedicated RCA input on the autoradio.
- Canbus Decoder: If your vehicle requires a Canbus decoder for steering wheel controls or other vehicle data integration, connect it according to the vehicle-specific wiring diagram.
- Radio Antenna: Connect the vehicle's radio antenna using the provided adapter cable if necessary.
4.3 Mounting the Unit
Carefully insert the autoradio into the dashboard opening, securing it with the appropriate mounting brackets. Ensure all cables are properly routed and not pinched.

5. Operating Instructions
5.1 Power On/Off
The unit will typically power on automatically with the vehicle's ignition. To manually power off, press and hold the power button (if available) or turn off the vehicle's ignition.
5.2 Wireless Carplay / Android Auto
This autoradio supports wireless Apple Carplay and Android Auto via the pre-installed Zlink application. This allows seamless integration with your smartphone for navigation, music, calls, and other apps.
- Ensure your smartphone's Wi-Fi and Bluetooth are enabled.
- On the autoradio, open the Zlink application.
- Follow the on-screen prompts to connect your phone via Bluetooth first, then confirm the Wi-Fi connection.
- Once connected, your phone's Carplay or Android Auto interface will appear on the autoradio screen.

5.3 Bluetooth Functionality
The unit features Bluetooth for hands-free calling and audio streaming.
- Pairing: Go to the Bluetooth settings on the autoradio and your smartphone. Search for available devices on your phone and select the autoradio (e.g., "Ossuret Car"). Confirm the pairing code if prompted.
- Hands-free Calling: Once paired, you can make and receive calls directly from the autoradio screen. The built-in microphone captures your voice.
- Bluetooth Music (A2DP): Stream audio from your phone to the autoradio wirelessly.
- Phonebook Download: The unit supports downloading your phone's contacts for easy access.

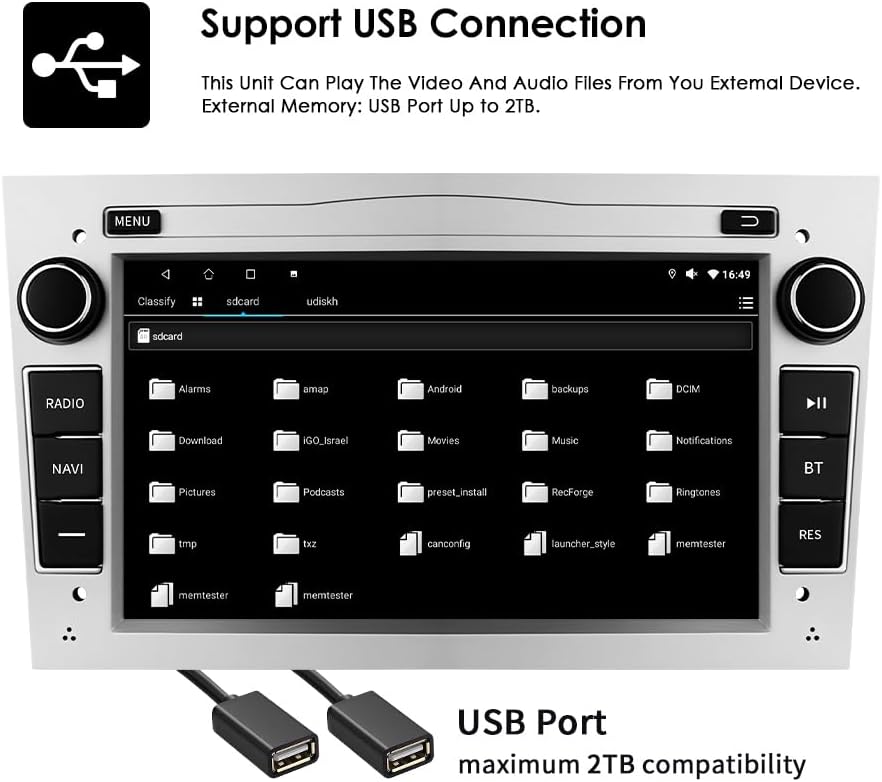
5.4 USB Connection
Connect external USB devices to play audio and video files or access other data. The unit supports USB storage up to 2TB.
- Insert your USB drive into one of the provided USB ports.
- Navigate to the file explorer or media player application on the autoradio.
- Select the USB device to browse and play your media files.
5.5 Multimedia Playback
The autoradio supports various audio and video formats for local playback.
- Music Formats: MP3, WMA, AAC, RM, FLAC, etc.
- Video Formats: MPEG-1/2/4, H.264, H.263, VC1, RV, RMVB, DivX, Sorenson Spark, VP8, AVS Stream, etc.

5.6 GPS Navigation
The unit comes with preloaded European maps and supports both online and offline navigation.
- Access the navigation application from the main menu.
- Enter your destination to receive turn-by-turn voice guidance.
- Connect to Wi-Fi for online map updates and real-time traffic information.
5.7 Steering Wheel Control
The autoradio is compatible with your vehicle's factory steering wheel controls, allowing you to manage volume, change tracks, and answer calls without taking your hands off the wheel. Configuration may be required in the unit's settings menu.
5.8 Rear View Camera Input
When a compatible rear view camera is connected, the display will automatically switch to the camera feed when the vehicle is put into reverse gear, providing a clear view of obstacles behind the vehicle.
6. Maintenance
To ensure the longevity and optimal performance of your Ossuret Autoradio, follow these maintenance guidelines:
- Screen Cleaning: Use a soft, lint-free cloth to gently wipe the touchscreen. For stubborn smudges, slightly dampen the cloth with water or a screen-safe cleaner. Avoid harsh chemicals or abrasive materials.
- General Cleaning: Keep the unit free from dust and debris. Use a soft brush or compressed air to clean vents and button crevices.
- Software Updates: Periodically check for software updates from the manufacturer to ensure you have the latest features and bug fixes.
- Avoid Extreme Temperatures: Do not expose the unit to extreme heat or cold, as this can affect performance and lifespan.
7. Troubleshooting
If you encounter issues with your autoradio, refer to the following common problems and solutions:
| Problem | Possible Cause | Solution |
|---|---|---|
| No power | Incorrect wiring, blown fuse, vehicle battery issue | Check power connections, inspect fuses, ensure vehicle battery is charged. |
| No sound | Volume too low, incorrect audio settings, speaker wiring issue | Increase volume, check audio output settings, verify speaker connections. |
| GPS signal lost/weak | Antenna obstruction, poor antenna placement | Ensure GPS antenna has a clear view of the sky, reposition if necessary. |
| Bluetooth not connecting | Bluetooth off, incorrect pairing, interference | Ensure Bluetooth is enabled on both devices, re-pair, move away from other wireless devices. |
| Touchscreen unresponsive | Software glitch, screen damage | Restart the unit. If problem persists, contact support. |
If the problem persists after attempting these solutions, please contact Ossuret customer support for further assistance.
8. Specifications
Below are the technical specifications for the Ossuret Autoradio Model B0FPLCMTNZ:
| Feature | Specification |
|---|---|
| Brand | Ossuret |
| Model Number | B0FPLCMTNZ |
| Operating System | Android 13 |
| RAM | 2 GB |
| ROM | 32 GB |
| CPU | 4Core*A53 1.5Ghz |
| Screen Size | 7 Inches |
| Screen Resolution | 1024 x 600 |
| Touch Screen Type | Capacitive |
| Connectivity Technology | Bluetooth, USB, Wi-Fi |
| Special Features | Wireless Carplay/Android Auto, GPS Navigation, DSP Support |
| Compatible Devices | Smartphone |
| Total HDMI Ports | 1 |
| Audio Output Mode | Stereo |
| Video Encoding | H.264, H.265/HEVC, MPEG-4 |
| Number of Channels | 4 |
| Control Method | Touch, Voice |
| Origin | China |
9. Warranty and Support
9.1 Warranty Information
This Ossuret Autoradio comes with a 1-year manufacturing warranty from the date of purchase. This warranty covers defects in materials and workmanship under normal use. It does not cover damage caused by improper installation, accident, misuse, abuse, neglect, unauthorized modification, or normal wear and tear.
9.2 Customer Support
For technical assistance, warranty claims, or any questions regarding your Ossuret Autoradio, please contact your retailer or the Ossuret customer support team. Have your model number (B0FPLCMTNZ) and proof of purchase ready when contacting support.


