1. Introduction
Thank you for choosing the Diboniur 520ml Manual Mini Chopper. This versatile kitchen tool is designed to simplify your food preparation by efficiently chopping and slicing various ingredients. This manual provides essential information for the safe and effective use, assembly, operation, and maintenance of your new chopper.
Please read these instructions carefully before first use and retain them for future reference.
2. Important Safety Instructions
- Sharp Blades: The blades are extremely sharp. Handle with extreme care to avoid injury. Always use the blade protector when storing.
- Keep Away from Children: This appliance is not a toy. Keep it out of reach of children.
- Proper Use: Use the chopper only for its intended purpose of chopping and slicing food. Do not attempt to chop hard items like ice, coffee beans, or bones.
- Do Not Overfill: Do not exceed the maximum capacity of the bowl (520ml) to ensure efficient operation and prevent damage.
- Stable Surface: Always operate the chopper on a stable, flat, and dry surface.
- Cleaning: Refer to the 'Maintenance and Cleaning' section for proper cleaning instructions. The main unit is hand wash only.
- Inspection: Before each use, inspect the chopper for any damage. Do not use if any part is broken or damaged.
3. Package Contents
Your Diboniur Manual Mini Chopper package includes the following components:
- Chopper Bowl (520ml capacity)
- Lid with Pull Mechanism and Handle
- Stainless Steel Blade Assembly
- Julienne Slicer Attachment (3mm)
- Mandoline Slicer Attachment
- Cleaning Brush
4. Product Components
Familiarize yourself with the different parts of your Diboniur Mini Chopper:
- Chopper Bowl: Transparent container for holding ingredients. Features a non-slip base for stability.
- Lid with Pull Mechanism: Contains the durable nylon drawstring and handle for operating the chopping blades.
- Blade Assembly: Features 420 stainless steel blades designed for efficient chopping. Includes a unique 360° scraper for thorough processing.
- Slicer Attachments: Interchangeable attachments for julienne and mandoline slicing.
- Cleaning Brush: For safe and effective cleaning of blades and attachments.

Image: Key features of the Diboniur Mini Chopper, including the durable drawstring, 360-degree scraper blade, non-slip base, and thickened material for durability.

Image: Detail of the 420 stainless steel blade, emphasizing its sharp, efficient, and dishwasher-safe design.
5. Setup and Assembly
Before first use, wash all parts that will come into contact with food. Ensure all components are dry before assembly.
- Place the chopper bowl on a stable, flat surface.
- Carefully place the blade assembly onto the central pin inside the chopper bowl. Ensure it sits securely.
- Add your desired ingredients into the bowl. Do not overfill.
- Align the lid with the bowl and twist it clockwise until it locks securely into place.
6. Operating Instructions
6.1. Chopping Ingredients
- Prepare ingredients by cutting them into small, manageable pieces that fit easily into the bowl.
- Place the prepared food into the chopper bowl.
- Securely attach the lid by twisting it until it clicks into place.
- Hold the chopper firmly with one hand. With the other hand, pull the handle of the drawstring horizontally.
- Release the handle, allowing the string to retract. Repeat this pulling motion until the desired consistency is achieved.
- For best results, avoid continuous pulling. Allow the blades to stop between pulls.

Image: Visual guide demonstrating the steps for chopping food using the pull mechanism.
Recommended Pulls for Various Foods:
- Garlic: Approximately 15 pulls for finely minced.
- Tomatoes: Approximately 15 pulls for salsa consistency.
- Onions: Approximately 15 pulls for finely diced.
- Carrots: Approximately 20 pulls for finely chopped.
- Avocado (for baby food): Approximately 20 pulls for smooth puree.
- Apples (for baby food): Approximately 25 pulls for smooth puree.
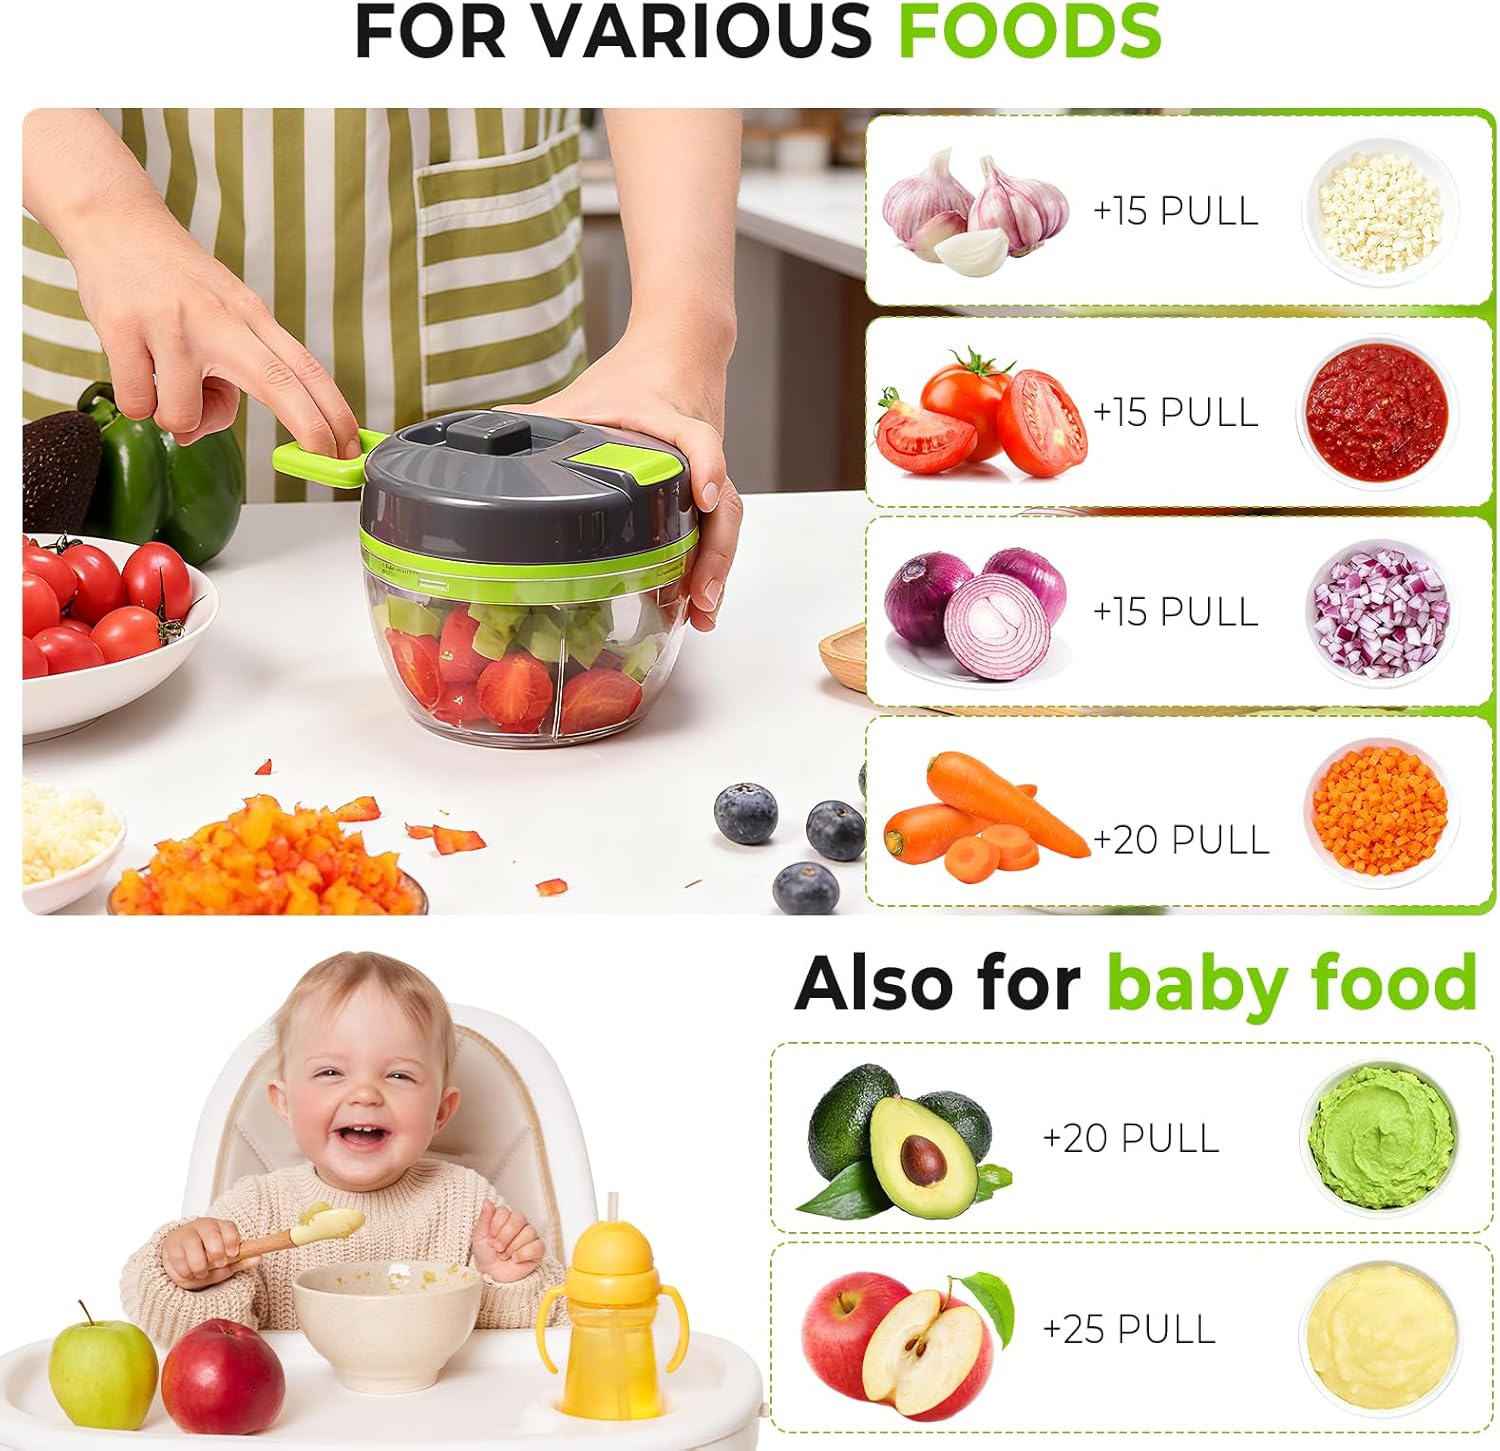
Image: Guide showing the approximate number of pulls required for chopping different ingredients to desired textures, including options for baby food.
6.2. Slicing Ingredients (Julienne & Mandoline)
- Remove the chopping blade assembly from the bowl.
- Secure the green cutter base onto the chopper bowl.
- Carefully insert either the 3mm Julienne Blade or the Mandoline Slicer Blade into the designated slot on the cutter base until it clicks securely.
- Hold the chopper firmly. Place the ingredient onto the slicer and move it back and forth across the blade to slice.
- Always use the provided food holder or a protective glove when slicing to protect your fingers from the sharp blades.

Image: Demonstration of the 3mm Julienne Blade attachment, showing its use for creating julienne strips from carrots.

Image: Demonstration of the Mandoline Slicer attachment, illustrating its use for smooth and even slicing of cucumbers.
7. Maintenance and Cleaning
Proper cleaning and maintenance will extend the life of your Diboniur Mini Chopper.
- Disassembly: After each use, carefully disassemble all parts: remove the lid, then the blade assembly or slicer attachment from the bowl.
- Hand Washing (Main Unit): The chopper bowl and lid with pull mechanism should be washed by hand using warm, soapy water. Rinse thoroughly and dry immediately. Do not immerse the lid in water for extended periods.
- Dishwasher Safe (Blades/Attachments): The stainless steel blade assembly and slicer attachments are dishwasher safe. For best results and longevity, place them on the top rack.
- Cleaning Brush: Use the provided cleaning brush to safely remove food residue from the blades and intricate parts of the attachments.
- Drying: Ensure all parts are completely dry before reassembling or storing to prevent rust and bacterial growth.
- Storage: Store the chopper in a dry place. Always store the blade assembly with its protective cover.
8. Troubleshooting
| Problem | Possible Cause | Solution |
|---|---|---|
| Food not chopping evenly. | Ingredients are too large or bowl is overfilled. Not enough pulls. | Cut ingredients into smaller pieces. Do not overfill the bowl. Increase the number of pulls. |
| Handle is difficult to pull or stuck. | Lid not securely fastened. Food jammed in blades. | Ensure the lid is twisted and locked into place. Disassemble and clear any food obstructions from the blades. |
| Chopper slides during use. | Surface is wet or slippery. | Ensure the operating surface is dry and clean. The non-slip base requires a dry surface for optimal grip. |
9. Specifications
- Brand: Diboniur
- Model Number: 8027
- Color: Grey-green
- Dimensions (L x W x H): 13 x 12.8 x 12.8 cm
- Capacity: 520 Milliliters
- Material: PP, PS, Stainless Steel
- Item Weight: 340 Grams
- Care Instructions: Hand wash (main unit), Dishwasher safe (blades/attachments)
- UPC: 726018187877
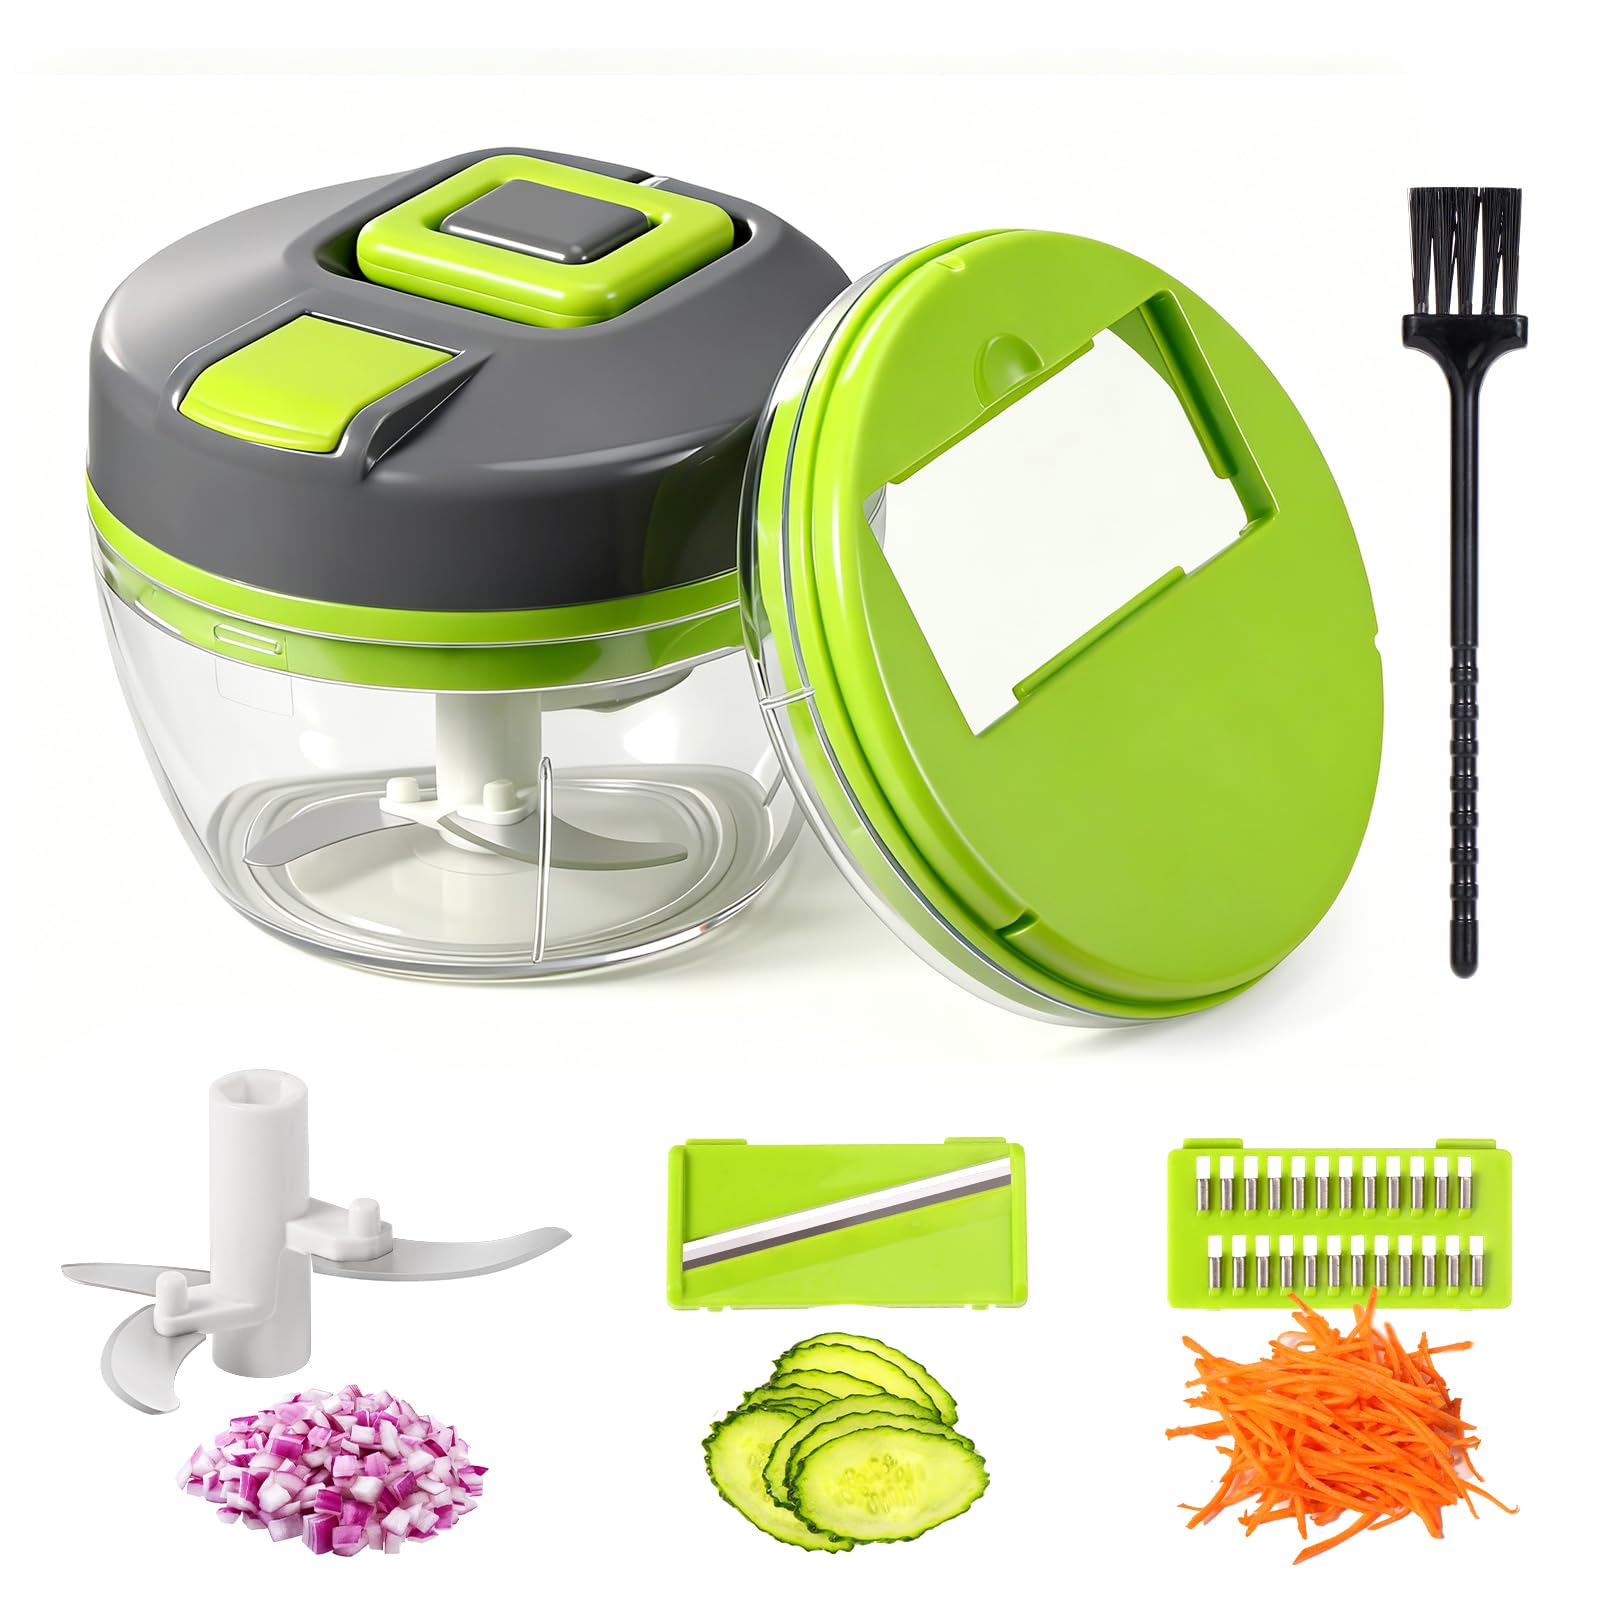
Image: Detailed product dimensions for the Diboniur Mini Chopper, illustrating the size of the bowl, lid, and blade components, along with the 520ml capacity.
10. Warranty and Support
Information regarding specific warranty terms is not provided in this manual. Please refer to your purchase documentation or contact the retailer for warranty details.
For product support, questions, or concerns, please contact Diboniur customer service through the retailer's platform or the official Diboniur website if available. Spare parts availability information is currently unavailable.