
XRGTOPKEY XRG-001
XRGTOPKEY Mini Bike Pump XRG-001 User Manual
160 PSI with Gauge & Flexible Hose, Presta & Schrader Valves
Introduction
Thank you for choosing the XRGTOPKEY Mini Bike Pump XRG-001. This compact and versatile pump is designed for efficient inflation of bicycle tires and other inflatables, featuring a built-in pressure gauge, flexible extension hose, and compatibility with both Presta and Schrader valves. This manual provides essential information for proper setup, operation, and maintenance to ensure optimal performance and longevity of your pump.

Image: The XRGTOPKEY Mini Bike Pump, showcasing its compact design, integrated pressure gauge, and flexible extension hose.
What's in the Box
Please check the package contents to ensure all items are present:
- 1 x Mini Bike Pump
- 1 x Extension Hose
- 1 x Frame Mount Bracket
- 2 x Mounting Screws
- 1 x Inflatable Cone
- 1 x Ball Needle
Setup
Attaching the Frame Mount Bracket
The included frame mount bracket allows you to conveniently carry the pump on your bicycle.
- Identify a suitable location on your bicycle frame, typically near the water bottle cage mounts.
- Position the frame mount bracket and align its holes with the mounting holes on your bike frame.
- Use the two provided mounting screws to secure the bracket firmly to the frame. Do not overtighten.
- Slide the mini bike pump into the bracket. The pump should fit snugly and be held securely.

Image: The XRGTOPKEY Mini Bike Pump shown mounted on a bicycle frame, demonstrating its portability.
Operating Instructions
Understanding Valve Compatibility (Presta & Schrader)
This pump is designed for both Presta and Schrader valves without needing separate adapters. The extension hose features a dual-valve design.
- For Schrader Valves: The Schrader side of the hose connector is typically the wider opening. Ensure the internal mechanism is set for Schrader.
- For Presta Valves: To switch to Presta mode, rotate the Schrader end of the hose connector counter-clockwise. This will reveal the narrower Presta opening.

Image: Visual guide for switching the pump's hose connector between Schrader and Presta valve configurations.
Inflation Procedure
- Prepare the Valve:
- For Presta valves, unscrew the valve cap and then unscrew the small nut at the top of the valve stem to open it.
- For Schrader valves, simply remove the valve cap.
- Attach the Extension Hose: Screw the flexible extension hose onto the pump's outlet.
- Connect to Tire Valve: Firmly push the appropriate end of the extension hose onto the tire valve. For Presta valves, ensure it's pushed down far enough to engage. For Schrader valves, push down and then flip the lever (if present) to lock it.
- Inflate: Begin pumping by pushing and pulling the pump handle. Monitor the integrated pressure gauge to reach the desired PSI (Pounds per Square Inch) or Bar. The maximum pressure is 160 PSI / 11 Bar.
- Disconnect: Once the desired pressure is reached, unlock the hose from the valve (if applicable) and quickly pull it off. For Presta valves, screw the small nut back down and replace the valve cap. Replace the cap on Schrader valves.

Image: A user demonstrating the inflation process with the XRGTOPKEY Mini Bike Pump, highlighting the gauge and valve connection.
Versatile Inflation Options
Beyond bicycle tires, the pump can inflate various items using the included accessories:
- Ball Needle: For sports balls (basketballs, soccer balls, etc.). Screw the ball needle into the Schrader end of the extension hose.
- Inflatable Cone: For inflatable toys, swim rings, or balloons. Insert the inflatable cone into the Schrader end of the extension hose.

Image: The XRGTOPKEY Mini Bike Pump demonstrating its multipurpose use with a ball needle and inflatable cone for various items.
Instructional Video
Video: A detailed demonstration of how to use the XRGTOPKEY Mini Bike Pump, including connecting the gauge and extension hose for inflation.
Maintenance
- Cleaning: Wipe the pump body with a clean, damp cloth after use to remove dirt and grime. Avoid using harsh chemicals.
- Lubrication: Periodically apply a small amount of silicone-based lubricant to the pump's piston seal to maintain smooth operation.
- Storage: Store the pump in a dry, cool place away from direct sunlight and extreme temperatures. Ensure the extension hose is neatly coiled to prevent kinks.
- Check Connections: Regularly inspect the hose and valve connectors for any signs of wear or damage. Replace if necessary to prevent air leaks.
Troubleshooting
| Problem | Possible Cause | Solution |
|---|---|---|
| Pump not inflating tire / Air leaking | Valve not properly engaged; hose connection loose; pump seal worn. | Ensure the hose is firmly pushed onto the valve and locked (if applicable). Check that the valve type (Presta/Schrader) is correctly set on the hose. Inspect the pump's internal seals for damage. |
| Pressure gauge not working or inaccurate | Gauge malfunction; air leak in the system. | Verify the hose is securely attached to both the pump and the tire valve. If the issue persists, contact customer support. |
| Slow inflation | Small pump volume; partial air leak. | Mini pumps inherently have smaller air volume per stroke compared to floor pumps. Ensure no air leaks from connections. Continue pumping until desired pressure is reached. |
| Difficulty switching between Presta and Schrader | Incorrect rotation or debris. | Ensure you are rotating the Schrader end of the hose connector counter-clockwise to expose the Presta opening. Check for any debris obstructing the mechanism. |
Specifications
- Model Number: XRG-001
- Brand: XRGTOPKEY
- Material: Anodized Aluminum
- Color: Black
- Power Source: Hand Powered
- Maximum Pressure: 160 PSI / 11 Bar
- Hose Length: 6.61 inches (16.8 cm)
- Shrinkage Length: 6.56 inches (16.66 cm)
- Stretched Length: 10.3 inches (26.21 cm)
- Weight: Approximately 4.76 oz (135g)
- Valve Compatibility: Presta & Schrader
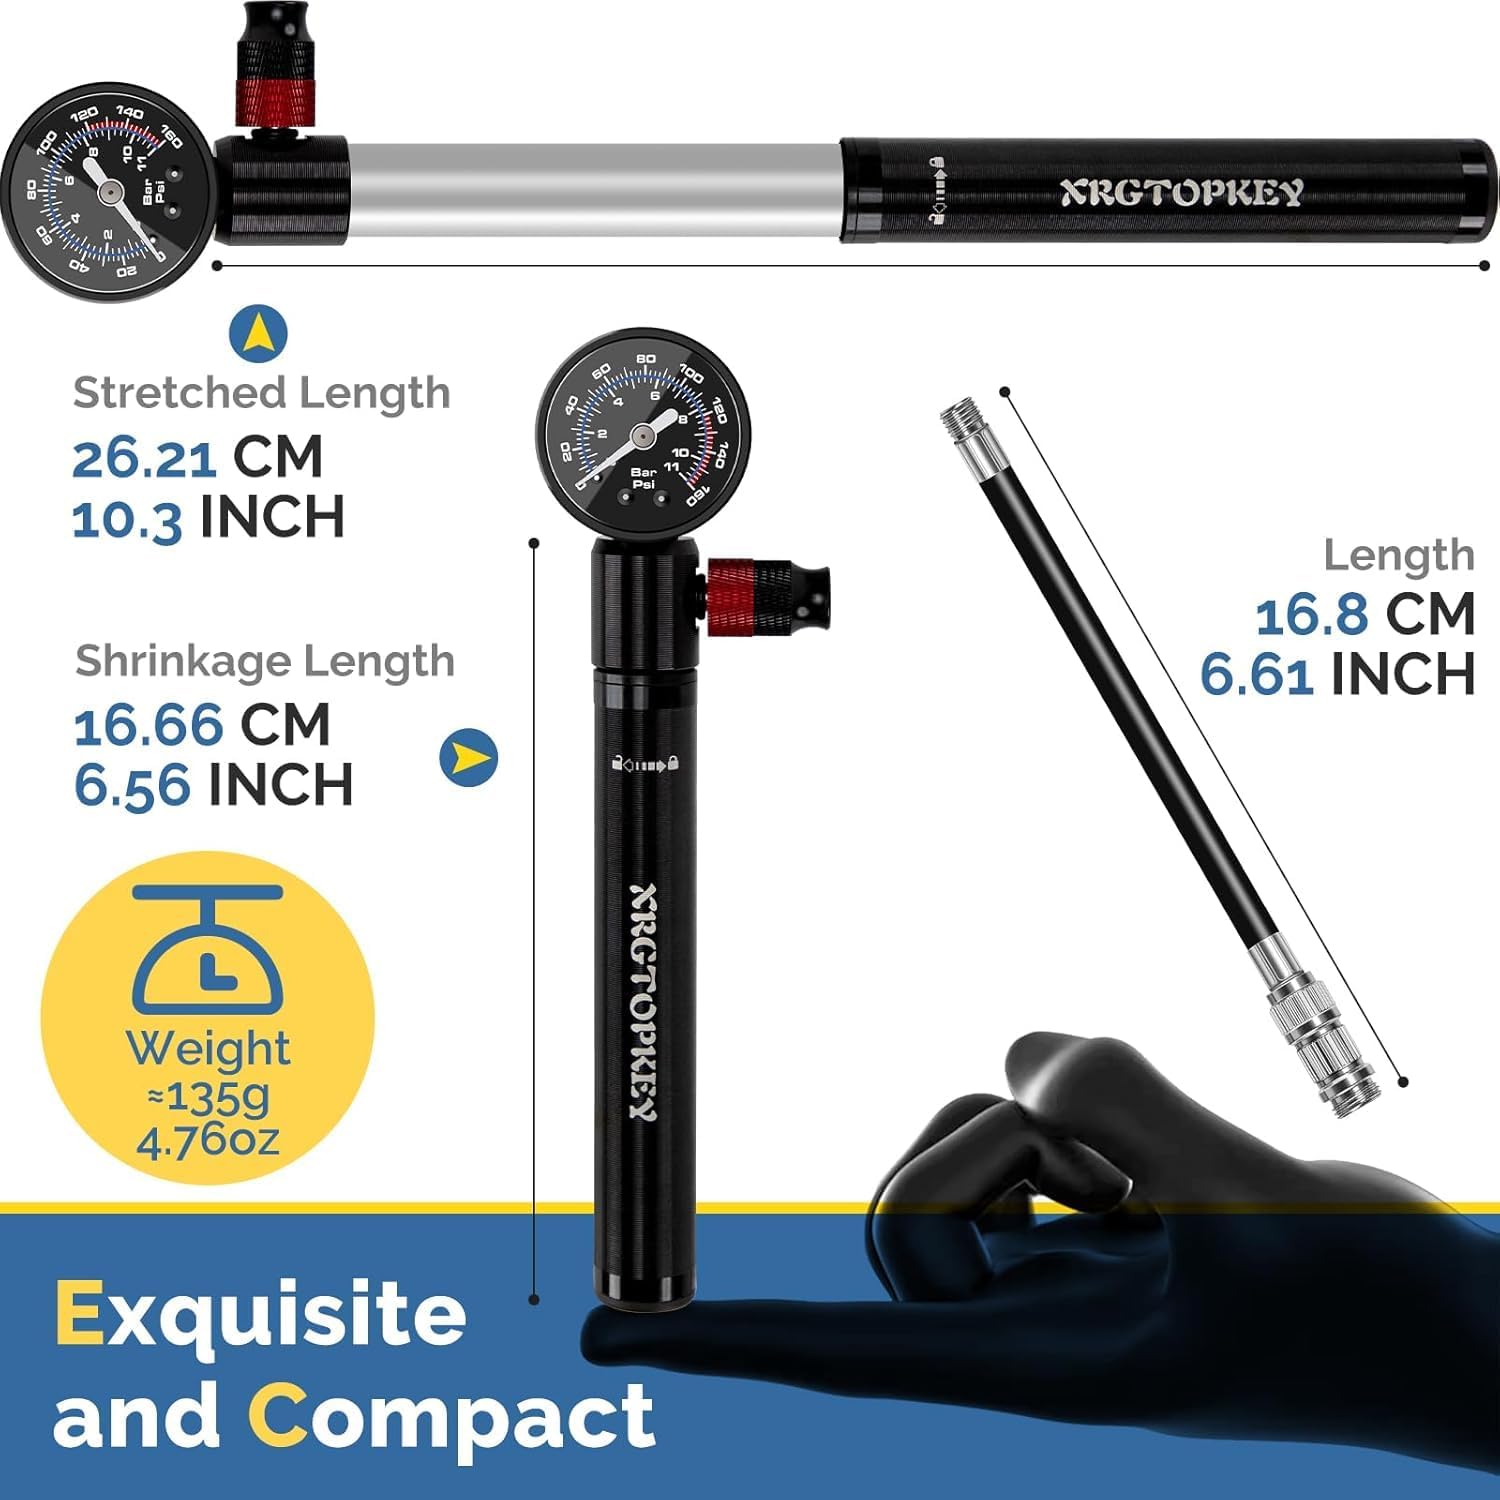
Image: Detailed view of the XRGTOPKEY Mini Bike Pump's dimensions and weight, highlighting its compact and exquisite design.
Warranty Information
This product is intended for its specified use. Please note the following safety information:
- Warning: Contains small parts. Not suitable for children under 3 years.
For specific warranty details or claims, please refer to the product packaging or contact the manufacturer directly.
Support
If you encounter any issues or have questions regarding your XRGTOPKEY Mini Bike Pump that are not covered in this manual, please contact the manufacturer or your retailer for assistance. Provide your product model number (XRG-001) and a detailed description of the issue when seeking support.
Ask a question about this manual
Ask about setup, troubleshooting, compatibility, parts, safety, or missing instructions. Manuals+ will review the question and use this page’s manual context to help answer it.