
1. Introduction
This manual provides essential information for the proper use, installation, and maintenance of the uxcell 2136-8M-20 Timing Belt. This synchronous belt is designed for reliable power transmission in various industrial applications.
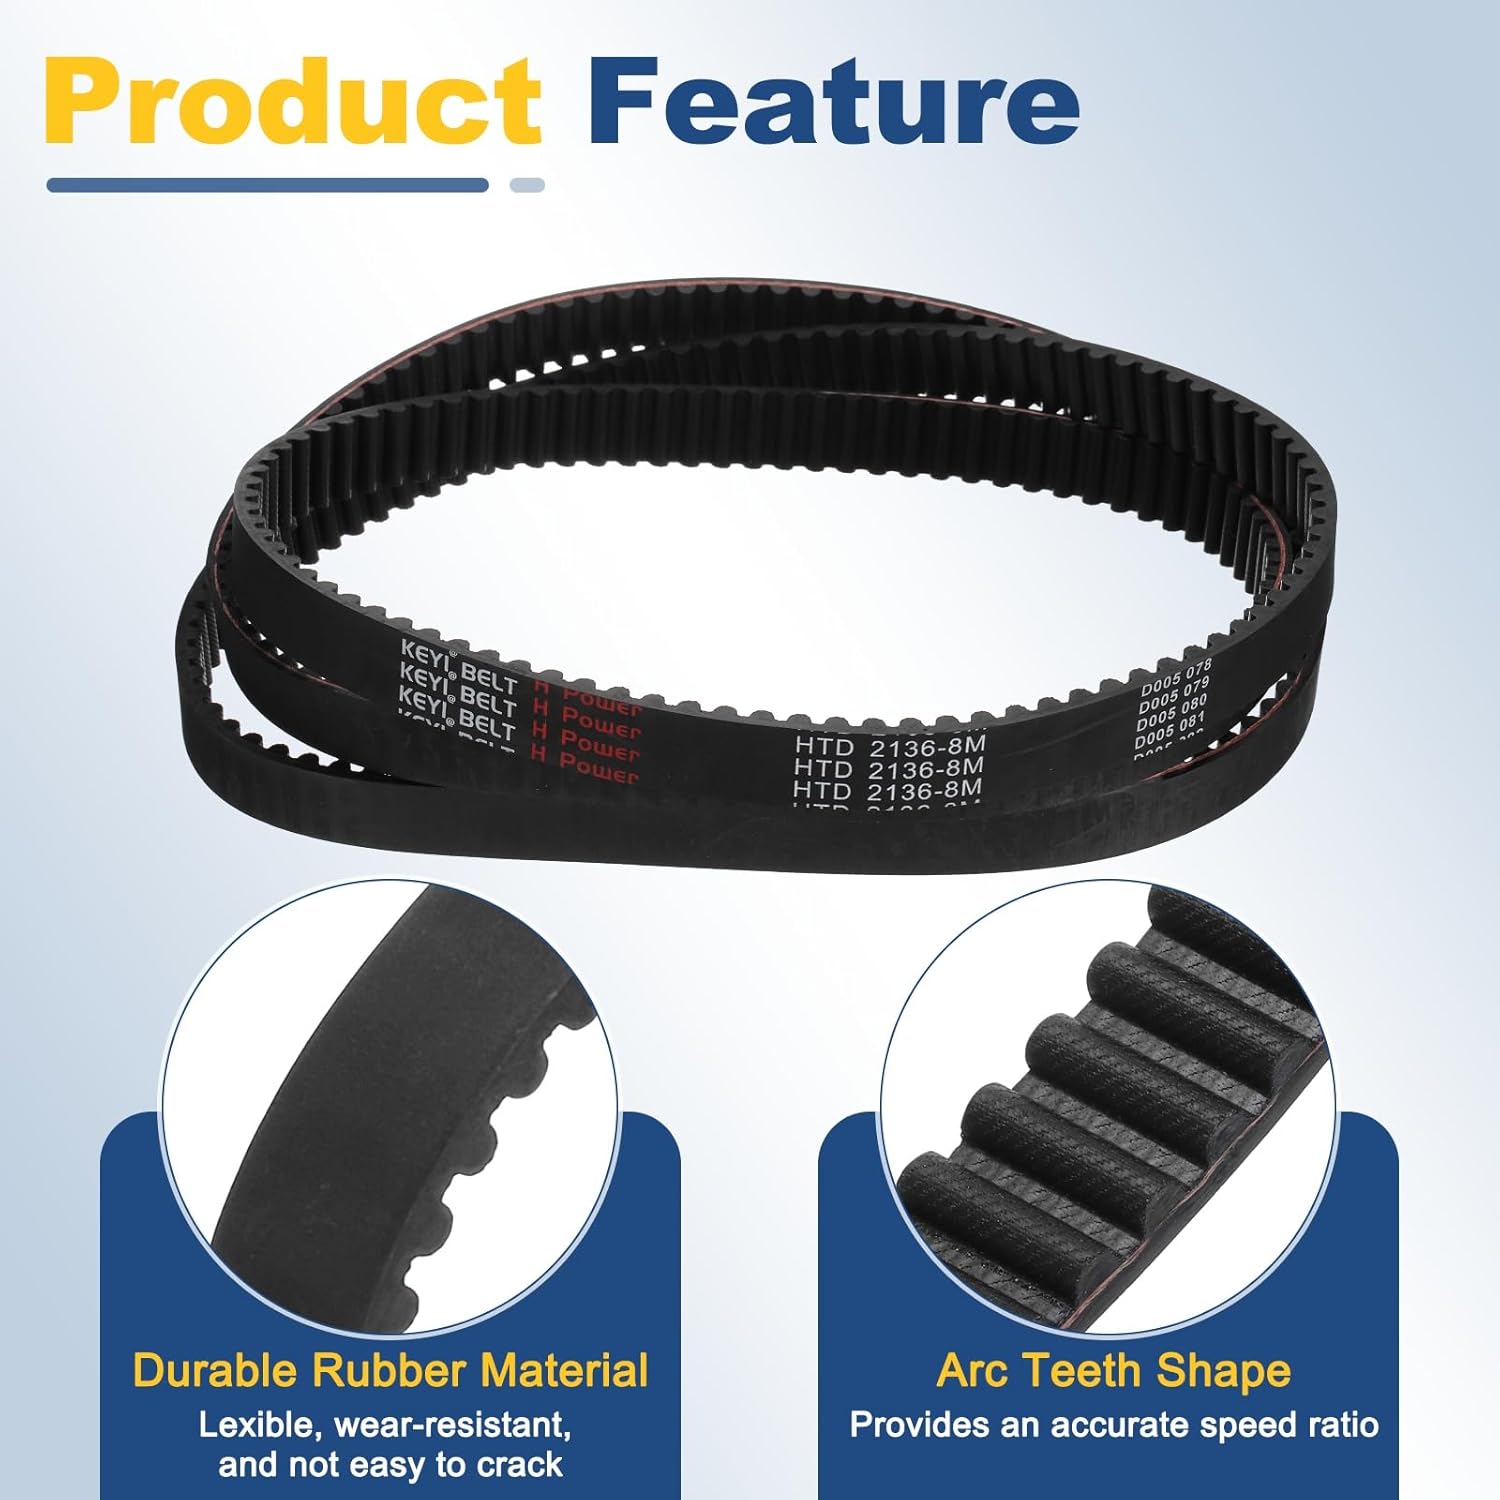
Image: The uxcell timing belt highlighting its durable rubber material and arc teeth shape.
Key Features:
- Durable Rubber Material: Flexible, wear-resistant, and designed to prevent cracking.
- Glass Fiber Wire: Embedded for high tensile strength and load-bearing capacity, ensuring stable transmission.
- Arc Tooth Profile: Ensures optimal meshing with pulleys, reducing friction and noise, and providing an accurate speed ratio with anti-slip transmission.
- High Power Transmission: Capable of transmitting 3-5 times greater power than trapezoidal tooth pulleys, suitable for high-power and high-torque applications.
2. Specifications
The following table details the technical specifications for the uxcell 2136-8M-20 Timing Belt.

Image: Diagram illustrating the dimensions and tooth profile of the 8M timing belt.
| Specification | Value |
|---|---|
| Model | 2136-8M-20 |
| Pitch Circumference | 2136mm / 84.09 inches |
| Width | 20mm / 0.79 inches |
| Height | 5.6mm / 0.22 inches |
| Teeth Pitch | 8mm / 0.31 inches |
| Teeth Height | 3.38mm / 0.13 inches |
| Number of Teeth | 267 Teeth |
| Material | Rubber with Glass Fiber Wire |
Note: Manual measurements may have slight variations.
3. Setup and Installation
Proper installation is crucial for the optimal performance and longevity of the timing belt. Always refer to the equipment manufacturer's specific instructions for belt replacement and tensioning.

Image: Various power transmission components including a timing belt, pulleys, and bearings.
- Safety First: Ensure all power to the machinery is disconnected and locked out before beginning any installation work.
- Inspect Components: Before installing the new belt, inspect pulleys, bearings, and other associated components for wear, damage, or misalignment. Replace any worn parts.
- Clean Surfaces: Clean all pulley grooves and contact surfaces to remove any debris, oil, or grease that could affect belt grip or cause premature wear.
- Install Belt: Carefully place the timing belt onto the pulleys. Avoid forcing or prying the belt, as this can damage the internal cords. Ensure the belt teeth fully engage with the pulley grooves.
- Tensioning: Adjust the tensioning mechanism according to the equipment manufacturer's specifications. Correct tension is vital:
- Too loose: Can lead to tooth jumping, slippage, and premature wear.
- Too tight: Can cause excessive load on bearings, increased friction, and reduced belt life.
- Alignment: Verify that the pulleys are correctly aligned. Misalignment can cause uneven belt wear, noise, and reduced efficiency.
- Initial Run-in: After installation, run the machinery at a reduced speed for a short period and re-check the belt tension and alignment.

Image: A timing belt correctly installed on a machinery component, demonstrating proper engagement.
4. Operating Guidelines
Once installed, the timing belt operates as a critical component in synchronous power transmission. Adhere to the following guidelines for optimal performance:
- Maintain Proper Load: Operate the machinery within its specified load limits to prevent excessive stress on the belt.
- Avoid Sudden Starts/Stops: Rapid acceleration or deceleration can induce shock loads, potentially damaging the belt teeth or internal structure.
- Environmental Conditions: Ensure the operating environment is within the belt's temperature and chemical resistance specifications. Extreme conditions can degrade belt material.
- Regular Monitoring: Periodically observe the belt during operation for any unusual noises, vibrations, or signs of slippage.
5. Maintenance
Regular maintenance extends the life of your timing belt and ensures consistent performance. Always perform maintenance with the machinery powered off and secured.
- Tension Check: Regularly check and adjust belt tension. If the belt cannot maintain proper tension after adjustment, it indicates wear and requires replacement.
- Visual Inspection: Periodically inspect the belt for signs of wear, such as:
- Cracks or fraying on the belt surface.
- Missing or damaged teeth.
- Excessive glazing or hardening of the rubber.
- Signs of foreign material embedded in the belt or pulley grooves.
- Cleaning: Keep the belt and pulley area clean from dust, dirt, and other contaminants. Avoid using harsh chemicals that could degrade the rubber.
- Storage: Store spare belts in a cool, dry place away from direct sunlight, high humidity, and ozone-generating equipment. Avoid bending or creasing belts during storage.
- Replacement: Replace the timing belt if any significant wear or damage is observed, or according to the machinery manufacturer's recommended service intervals.
6. Troubleshooting Common Issues
This section addresses common problems encountered with timing belts and potential solutions.
| Problem | Possible Cause & Solution |
|---|---|
| Belt Slippage / Tooth Jumping |
|
| Excessive Noise (Whining, Squealing) |
|
| Premature Belt Wear / Cracking |
|
| Belt Edge Wear |
|
7. Warranty and Support
For information regarding product warranty or technical support, please refer to the uxcell official website or contact your point of purchase. Ensure you have your product model number (2136-8M-20) available when seeking support.
This product is subject to a standard return policy of 30 days for refund or replacement, as per the purchase terms.
For further assistance, you may visit the uxcell Store on Amazon.