
1. Introduction
Thank you for choosing the SFGSUP Wireless Tire Inflator. This portable air compressor is designed for convenient and efficient inflation of various items, including car tires, motorcycle tires, bicycle tires, and sports balls. It features a digital manometer, a powerful 150 PSI maximum pressure, a rechargeable battery, and an integrated LED light for emergency situations.
Please read this manual thoroughly before using the product to ensure safe and optimal operation. Keep this manual for future reference.
2. Product Contents
The package includes the following items:
- Electric Bicycle Pump (Wireless Tire Inflator) x1
- Air Hose x1
- Presta/Schrader/Dunlop Valve Adapter x1
- Buoy Nozzle x1
- Ball Needle x1
- Storage Bag x1
- User Manual x1
3. Safety Information
To prevent injury or damage to the product, please observe the following safety precautions:
- Do not leave the inflator unattended during operation.
- Keep out of reach of children.
- Do not use the inflator near flammable liquids or gases.
- Avoid prolonged continuous operation. Allow the device to cool down after 15 minutes of continuous use for at least 10 minutes.
- Ensure the correct pressure setting for the item being inflated to avoid over-inflation or damage.
- Do not point the air nozzle at people or animals.
- Use only the provided accessories and adapters.
4. Product Overview
Familiarize yourself with the main components and features of your SFGSUP Wireless Tire Inflator.
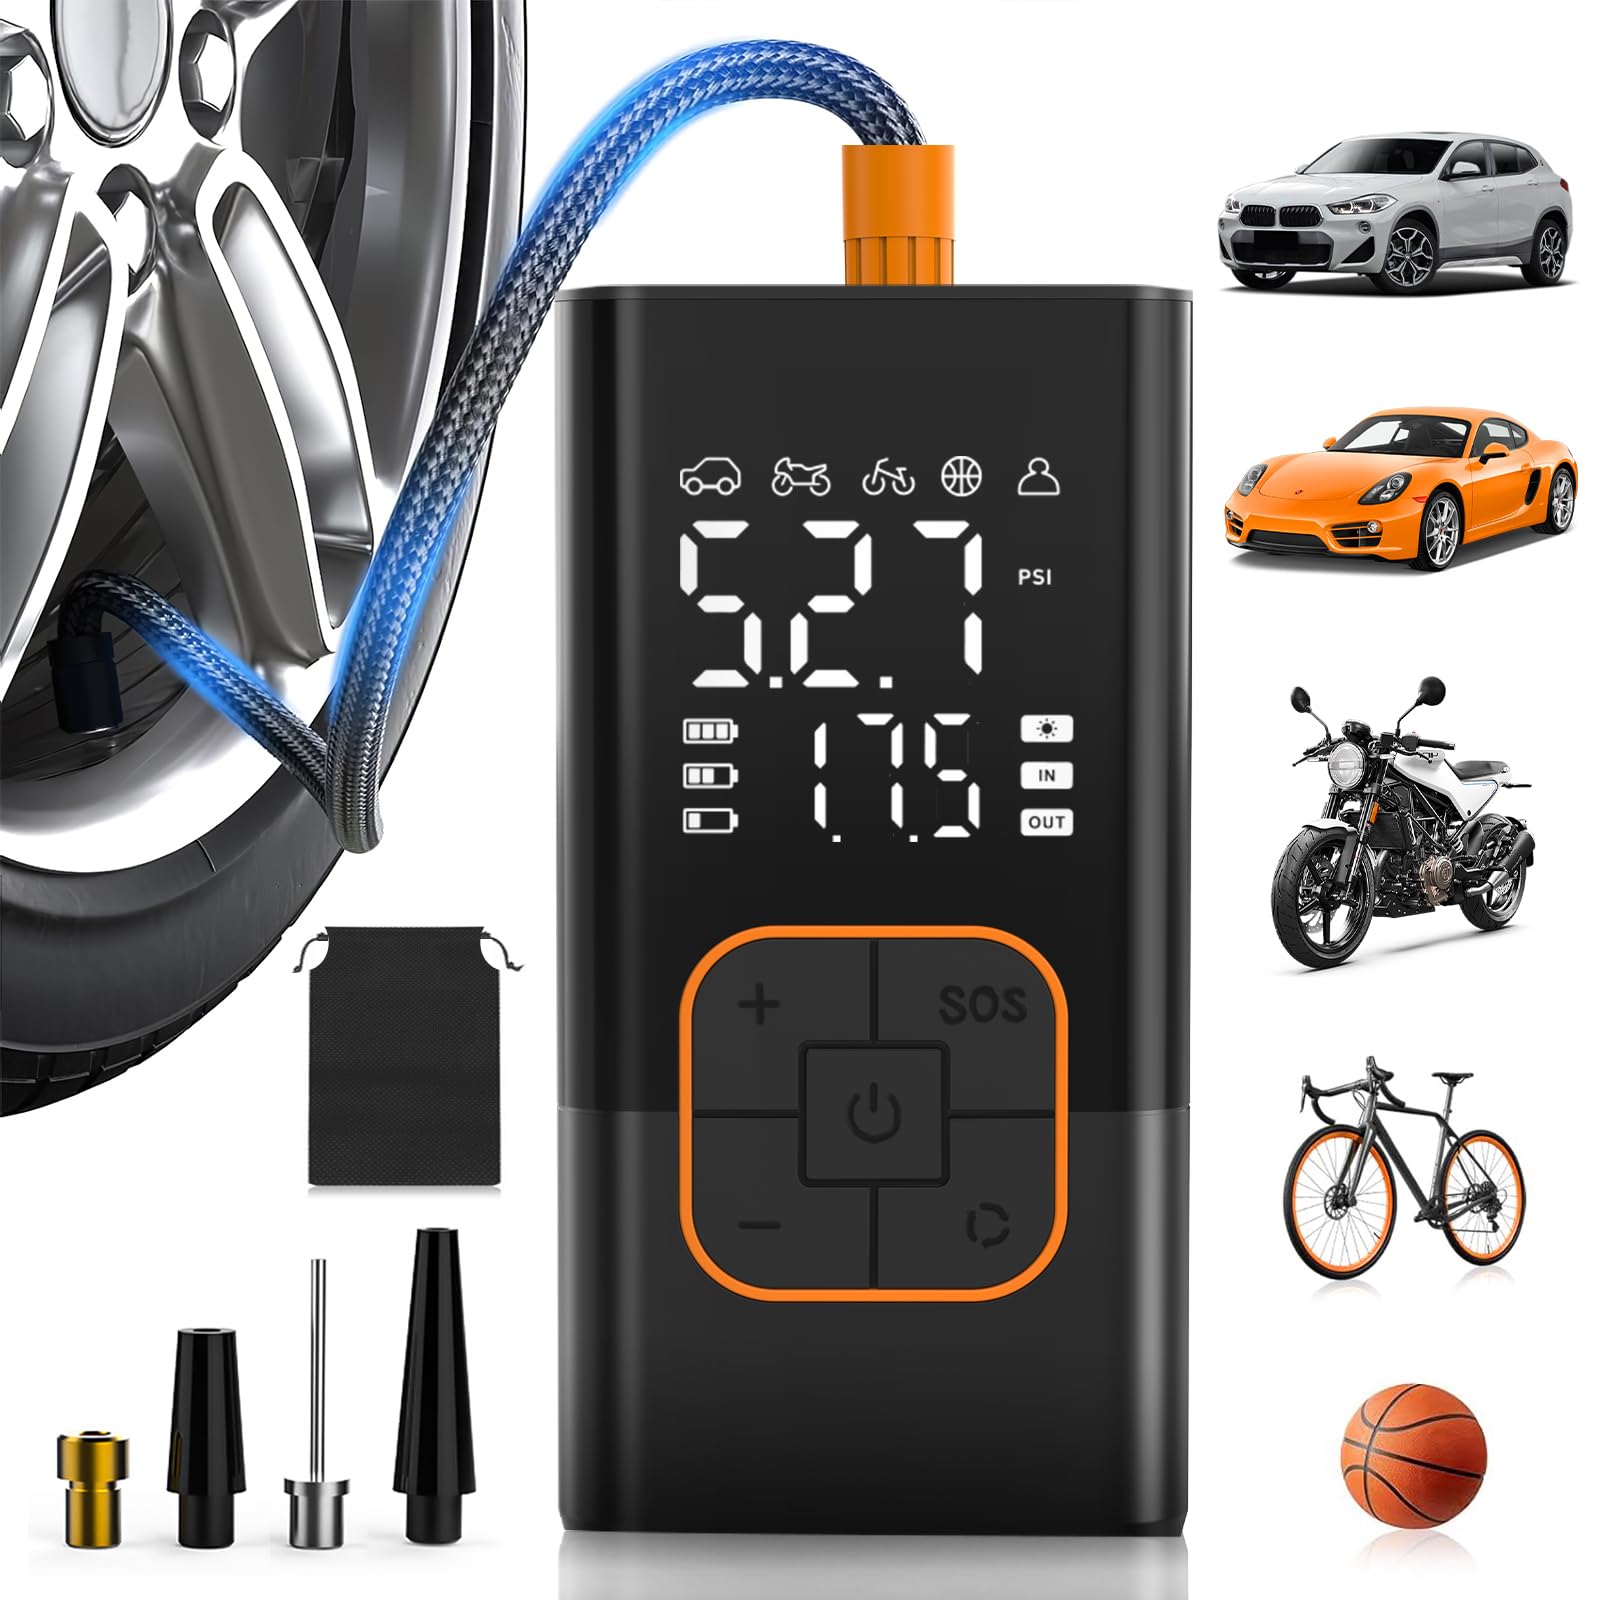
Image: Main view of the SFGSUP Wireless Tire Inflator, showing its compact design, digital display, and control panel.

Image: The compact size of the inflator, measuring 13.4 x 6.6 x 5 cm, shown next to a soda can for scale, and indicating a net weight of 0.45 kg.
5. Setup and Charging
5.1 Initial Charging
Before first use, fully charge the inflator. The device is equipped with a 4000 mAh high-capacity rechargeable battery.
- Connect the provided USB-C cable to the inflator's charging port.
- Connect the other end of the cable to a suitable USB power adapter (not included) or a USB port.
- The display will indicate the charging status. Charge until the battery indicator shows full.
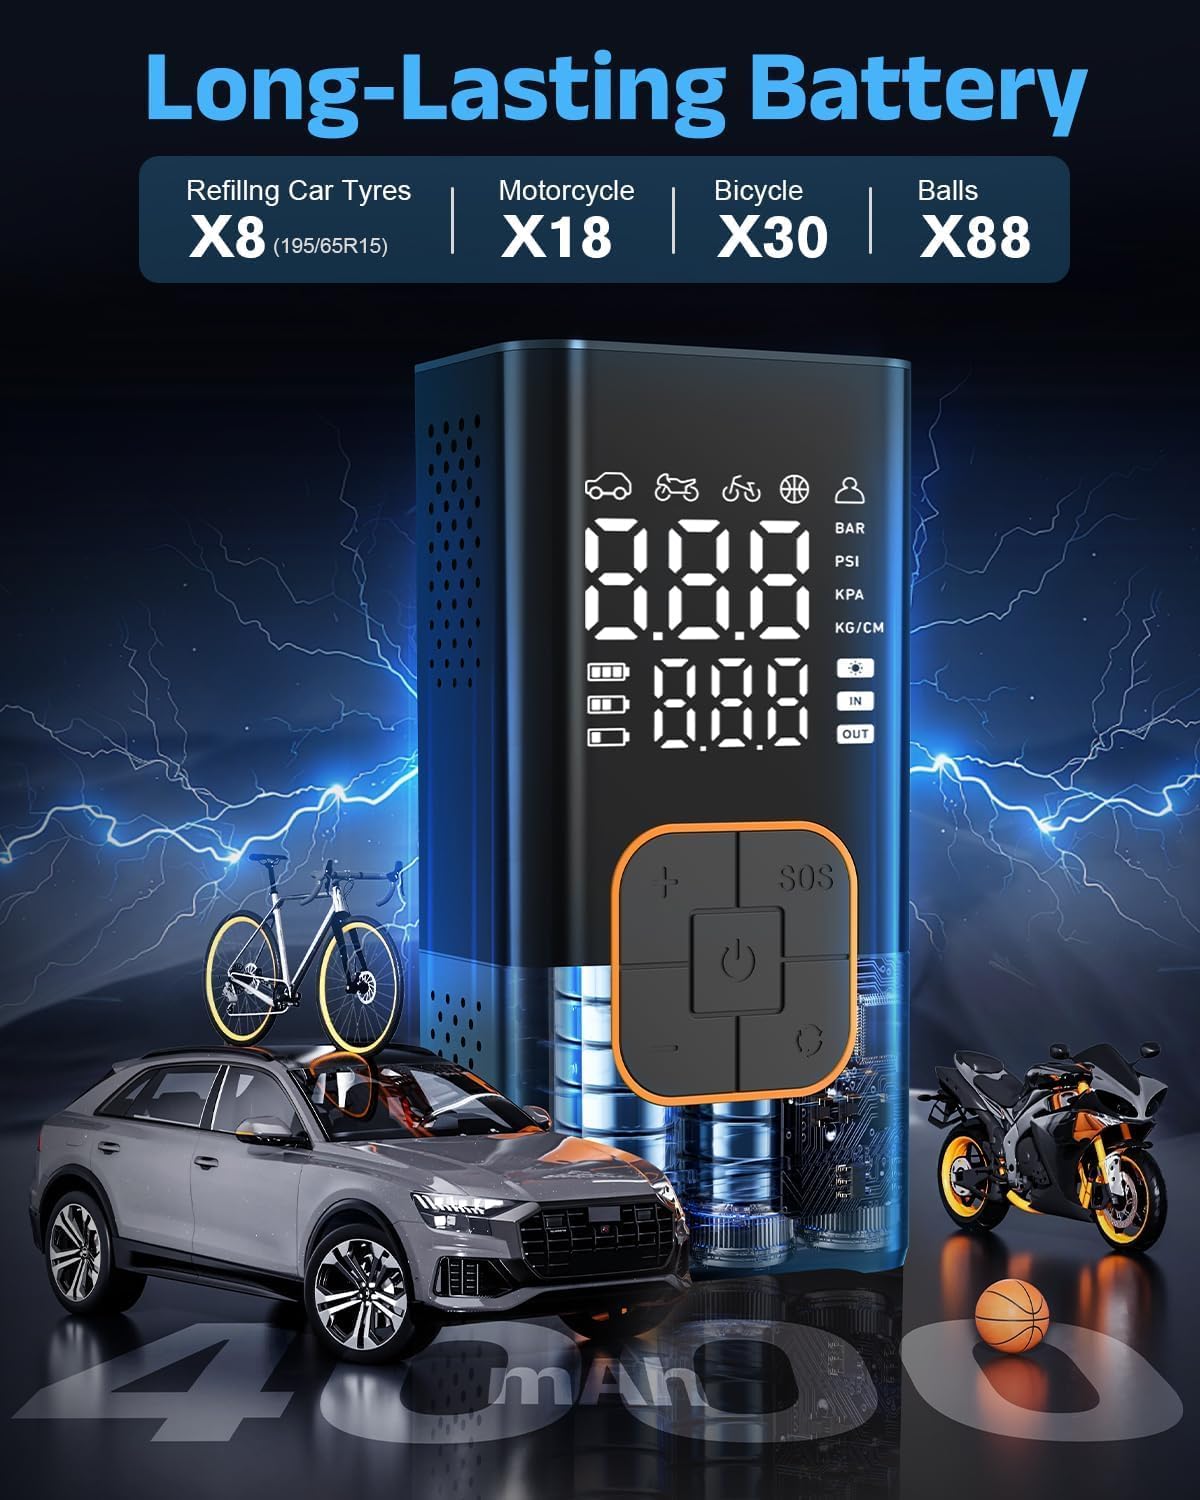
Image: The inflator's battery capacity and estimated inflation counts for car tires (x8), motorcycles (x18), bicycles (x30), and balls (x88) on a single charge.
5.2 Attaching the Air Hose
- Screw the air hose securely into the inflator's air outlet port.
- Select the appropriate nozzle adapter (Presta/Schrader/Dunlop valve adapter, buoy nozzle, or ball needle) for your item and attach it to the other end of the air hose.
6. Operating Instructions
6.1 Powering On/Off
- Press and hold the power button (⑂) to turn the inflator on.
- Press and hold the power button again to turn it off. The device will also automatically shut off after a period of inactivity.
6.2 Setting Pressure and Modes
The inflator features a dual LED display showing real-time and preset pressure values, and supports 4+N intelligent modes.

Image: The dual display showing both the current tire pressure and the target preset pressure for accurate inflation, with an automatic stop feature.
- Mode Selection: Press the mode button (often indicated by a car/motorcycle/bicycle/ball icon) to cycle through preset modes: Car, Motorcycle, Bicycle, Ball, and Custom.
- Unit Selection: Press the unit button (often indicated by "UNIT" or "M") to switch between pressure units: PSI, KPA, BAR, and KG/CM².
- Adjusting Preset Pressure: Use the '+' and '-' buttons to increase or decrease the target pressure value. The custom mode allows setting any pressure between 3 and 150 PSI.

Image: Recommended pressure ranges for different inflation types: Custom (3-150 PSI), Motorcycle (26-43 PSI), Bike (30-120 PSI), Car (30-42 PSI), and Ball (4-16 PSI).
6.3 Inflation Process
- Connect the air hose with the appropriate adapter to the item you wish to inflate.
- The display will show the current pressure of the item.
- Set your desired target pressure using the mode and +/- buttons.
- Press the start/stop button (often indicated by a play/pause icon or a circle) to begin inflation.
- The inflator will automatically stop once the preset pressure is reached.
- Disconnect the air hose from the item.

Image: The inflator's fast inflation capability, showing it can inflate a 195/65R15 car tire from 30 PSI to 36 PSI in approximately 1.5 minutes.

Image: An illustration of the internal 17# cylinder and motor, emphasizing the efficient air flow for quick inflation, comparing its performance to older models.
6.4 LED Light Functions
The integrated LED light offers three modes for emergency situations:
- Normal Light: For general illumination.
- SOS Mode: Emits the international distress signal (three short, three long, three short flashes).
- Strobe Mode: Provides a flashing light for increased visibility.
Press the light button (often indicated by a light bulb icon) to cycle through these modes.
6.5 Power Bank Function
The inflator can also serve as a mobile power source for your electronic devices.
- Connect your device's charging cable to the USB-A output port on the inflator.
- The inflator will begin charging your device.

Image: The inflator being used to charge a smartphone via its USB-A port, while also demonstrating its LED light with Normal, Strobe, and SOS modes.
7. Maintenance
- Storage: Store the wireless tire inflator in a dry, clean environment. Avoid humid or dusty conditions.
- Cooling: After 15 minutes of continuous operation, allow the pump to cool down for at least 10 minutes to prevent overheating and extend its lifespan.
- Cleaning: Wipe the exterior of the inflator with a soft, damp cloth. Do not use harsh chemicals or abrasive cleaners.
- Battery Care: For optimal battery life, charge the device regularly, even if not in frequent use. Avoid completely draining the battery for extended periods.
8. Troubleshooting
If you encounter issues with your SFGSUP Wireless Tire Inflator, refer to the following common problems and solutions:
| Problem | Possible Cause | Solution |
|---|---|---|
| Inflator does not turn on. | Low battery or no charge. | Charge the device fully using the USB-C cable. |
| No air comes out during inflation. | Hose not securely attached; nozzle blocked; incorrect mode selected. | Ensure hose and adapter are tightly connected. Check for obstructions in the nozzle. Verify the correct inflation mode is selected. |
| Inflator stops prematurely. | Preset pressure reached; device overheated. | This is normal if the preset pressure is met. If not, allow the device to cool down for 10 minutes. |
| Inaccurate pressure reading. | Loose connection to valve; sensor issue. | Ensure the nozzle is firmly attached to the valve. If the problem persists, contact customer support. |
If the problem persists after trying these solutions, please contact SFGSUP customer support.
9. Specifications
| Feature | Detail |
|---|---|
| Model Number | CZK-5641C |
| Maximum Pressure | 150 PSI |
| Air Flow Capacity | 50 Litres per minute |
| Battery Capacity | 4000 mAh (2 Lithium-ion batteries) |
| Voltage | 12 Volts |
| Noise Level | 80 Decibels |
| Dimensions (L x W x H) | 13.4 x 6.6 x 5 cm (5.28 x 2.6 x 1.97 inches) |
| Weight | 435.45 grams (0.96 lbs) |
| Material | Acrylonitrile Butadiene Styrene (ABS) |
| Power Source | Battery Powered |
| Hose Length | 15 cm (5.9 inches) |
| Included Components | Rechargeable battery, flashlight |
10. Warranty and Support
10.1 Manufacturer's Warranty
This product comes with a 2-year manufacturer's warranty. Please retain your proof of purchase for warranty claims.
10.2 Customer Support
For any questions, technical assistance, or warranty claims, please contact SFGSUP customer support through your purchase platform or the contact information provided with your product packaging.