1. Introduction
This manual provides comprehensive instructions for the Zopsc 48MP Digital Camera. Please read this manual carefully before using the camera to ensure proper operation and to maximize your user experience. Keep this manual for future reference.
2. Package Contents
Verify that all items listed below are included in your package:
- 1 x Zopsc 48MP Digital Camera
- 1 x Charging Cable
- 1 x Lanyard
- 1 x User Manual (this document)

Image: The Zopsc 48MP Digital Camera, its USB charging cable, and a black lanyard are displayed together on a white background.
3. Product Overview
Familiarize yourself with the camera's components and controls.
3.1 Front View

Image: The front of the Zopsc 48MP Digital Camera, featuring the lens, flash, and a 2.4-inch display screen showing an image of a puppy and a kitten.
3.2 Rear View and Controls

Image: The rear of the Zopsc 48MP Digital Camera, highlighting the 2.4-inch HD display and the control buttons on the right side, including power, menu, zoom, and navigation.
- Power Button: Turns the camera on/off.
- Shutter Button: Takes photos or starts/stops video recording.
- Mode Button: Switches between photo and video modes.
- Zoom Buttons: Controls 8x digital zoom.
- Display Screen: 2.4-inch HD display for framing shots and reviewing content.
4. Setup
4.1 Inserting the Memory Card
- Locate the memory card slot on the side of the camera.
- Insert a compatible memory card (up to 64GB, not included) into the slot until it clicks into place. Ensure the card is inserted in the correct orientation.
4.2 Inserting and Charging the Battery
The camera comes with a built-in 550mAh battery.
- Connect the camera to a power source using the provided USB charging cable.
- The charging indicator light will illuminate. Once fully charged, the light may change color or turn off.
4.3 Powering On/Off
- To power on: Press and hold the Power Button for approximately 3 seconds.
- To power off: Press and hold the Power Button again for approximately 3 seconds.
5. Operating Instructions
5.1 Taking Photos

Image: A close-up of the Zopsc 48MP Digital Camera's front, highlighting the lens and flash, with text overlay indicating "HD Photography".
- Ensure the camera is in photo mode (use the Mode button if necessary).
- Frame your shot using the 2.4-inch display screen.
- Press the Shutter Button to capture the image.
- The camera supports 48MP maximum image resolution.
- Utilize the 12 available photo frames for creative effects.
5.2 Recording Videos
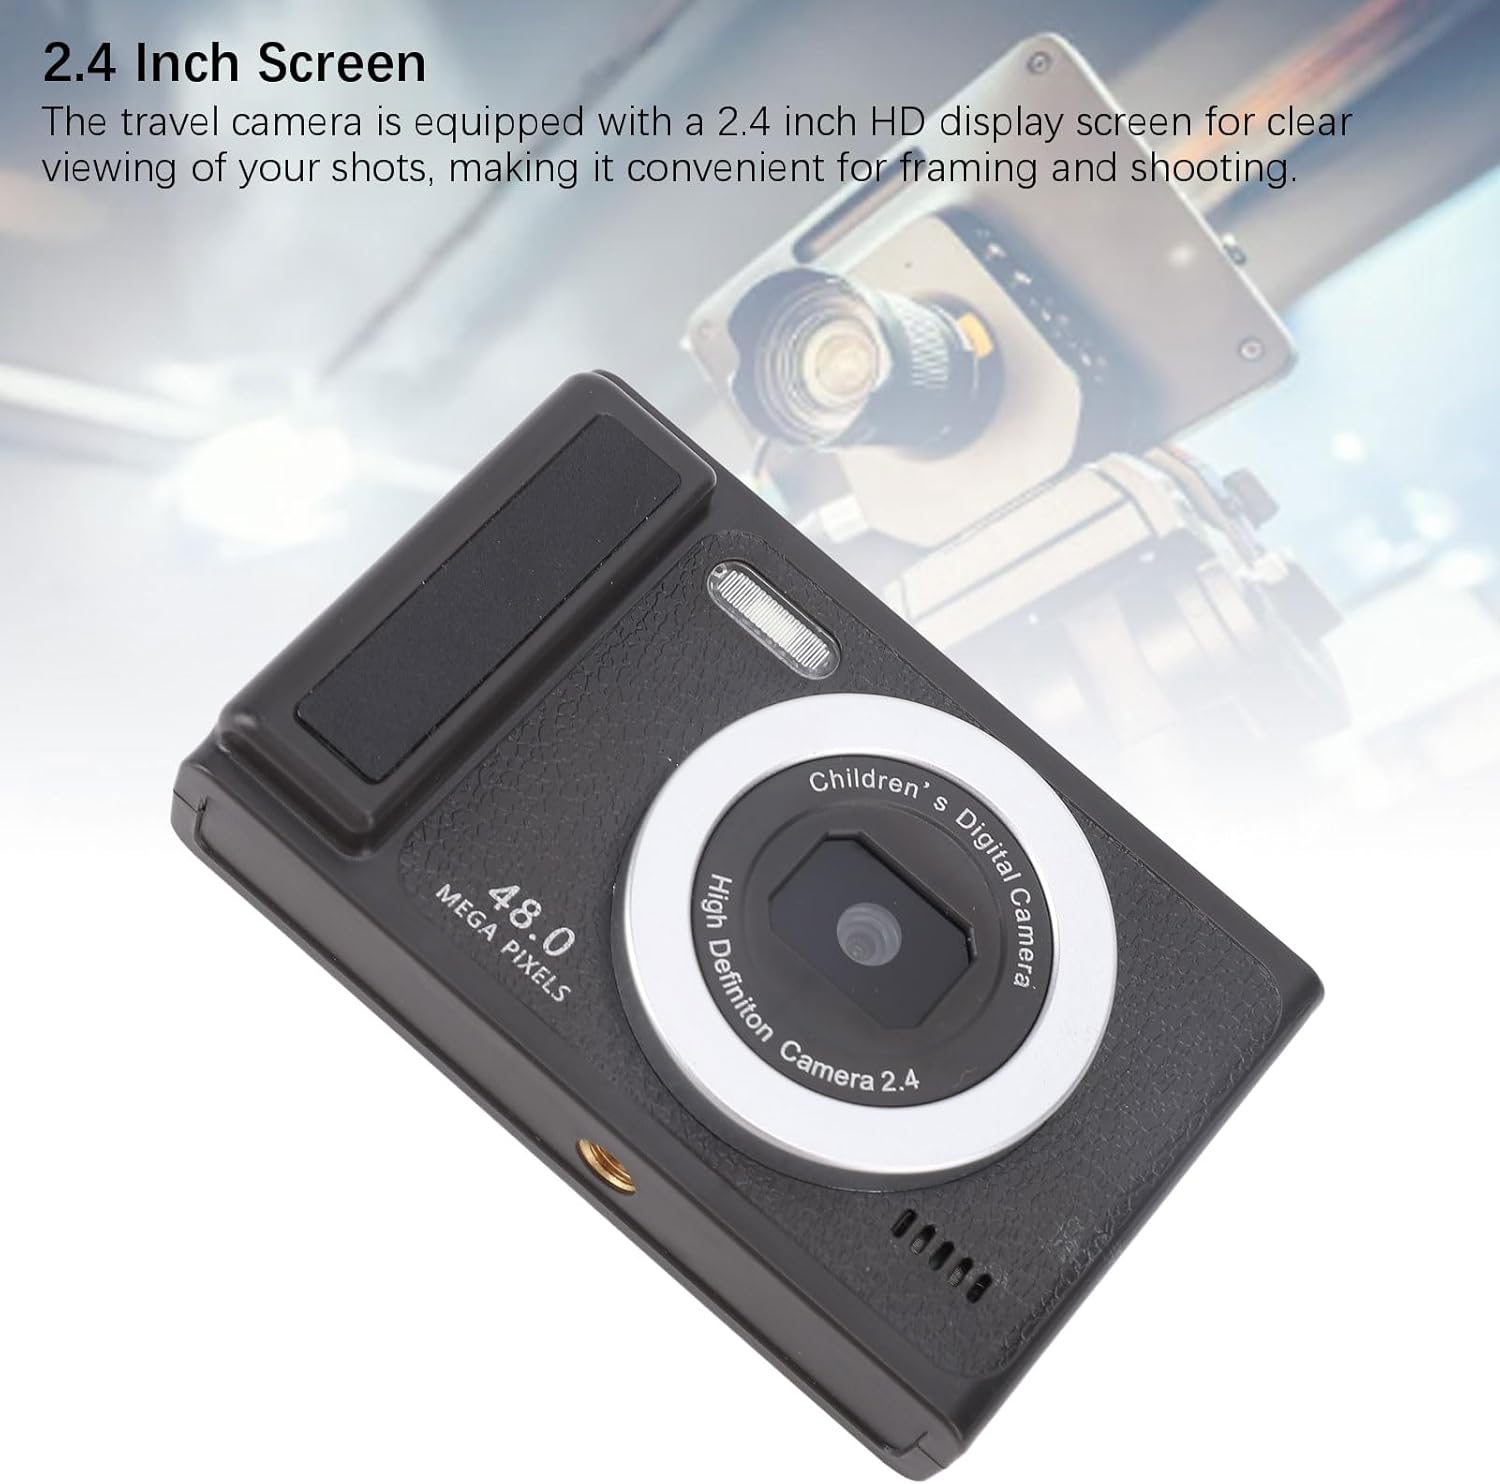
Image: A close-up of the Zopsc 48MP Digital Camera's front, highlighting the lens, with text overlay indicating "Superior Video Recording".
- Switch the camera to video mode using the Mode Button.
- Press the Shutter Button once to start recording. A timer or indicator will appear on the screen.
- Press the Shutter Button again to stop recording.
- The camera supports 1080P maximum video resolution.
- Utilize the 9 available recording frames for creative effects.
5.3 Zoom Function
The camera features 8x digital zoom.
- Use the Zoom In button to magnify the subject.
- Use the Zoom Out button to widen the view.
5.4 Fill Light
The built-in fill light can be activated to provide additional illumination in low-light conditions. Refer to the on-screen menu for activation options.
5.5 White Balance
Adjust white balance settings to ensure accurate color representation under different lighting conditions. The camera supports both automatic and manual white balance settings, accessible via the camera's menu.
5.6 Connecting to a Computer
To transfer photos and videos to your computer:
- Ensure the camera is powered on.
- Connect the camera to your computer using the provided USB cable.
- The camera should appear as a removable disk drive on your computer. You can then access and transfer your files.
6. Maintenance
6.1 Cleaning the Camera
- Use a soft, dry cloth to clean the camera body.
- For the lens and screen, use a specialized lens cleaning cloth and solution to avoid scratches.
- Do not use harsh chemicals or abrasive materials.
6.2 Battery Care
- Avoid exposing the camera to extreme temperatures.
- Charge the battery regularly, even if the camera is not in use, to maintain battery health.
6.3 Storage
When not in use, store the camera in a cool, dry place, away from direct sunlight and moisture.
7. Troubleshooting
If you encounter issues with your camera, refer to the following common problems and solutions:
| Problem | Possible Cause / Solution |
|---|---|
| Camera does not power on. |
|
| Cannot take photos/record videos. |
|
| Images are blurry. |
|
| Camera not recognized by computer. |
|
8. Specifications
| Feature | Detail |
|---|---|
| Brand | Zopsc |
| Item Type | Digital Camera |
| Material | ABS |
| Maximum Image Resolution | 48MP |
| Maximum Video Resolution | 1080P |
| Zoom | 8x Digital Zoom |
| White Balance | Auto/Manual |
| Auto Focus | Support |
| Lens | Fixed 100 Degree Angle |
| Battery Type | 550mAh Built-in Battery |
| Storage Support | Up to 64GB (Memory Card Not Included) |
| Connection Type | USB |
| WiFi Connection | Not Supported |
| Fill Light | Support |
| Display Screen | Approx. 2.4 inch HD |
| Bottom Interface | 1/4 inch Screw Interface (for tripod mounting) |
| Photo Frames | 12 Types |
| Recording Frames | 9 Types |
9. Warranty and Support
9.1 Manufacturer's Warranty
This Zopsc Digital Camera is covered by a manufacturer's warranty for 90 days from the date of purchase. Please retain your proof of purchase for warranty claims. The warranty covers defects in materials and workmanship under normal use.
9.2 Customer Support
For technical assistance, troubleshooting, or warranty inquiries, please contact Zopsc customer support through the retailer's platform or the official Zopsc website. Please have your product model and purchase information ready when contacting support.