Introduction
Thank you for choosing the EMG Gaming Controller Artic Devo PC01. This manual provides essential information for the proper setup, operation, and maintenance of your new gaming controller. Please read this manual thoroughly before use to ensure optimal performance and longevity of the device.
The EMG Artic Devo PC01 is a versatile gaming controller designed for multi-platform compatibility, offering advanced features for an enhanced gaming experience. It supports PC, Nintendo Switch, Android, and iOS devices.
Product Overview
Controller Components
The EMG Artic Devo PC01 features a standard controller layout with several advanced components:
- Mechanical ABXY Buttons: For precise and responsive input.
- Hall Effect Joysticks: Provides drift-free, accurate control.
- Hall Effect Triggers: Offers smooth and precise analog input with adjustable travel distance.
- Programmable Back Buttons (M1, M2): Two customizable buttons on the rear for advanced control.
- Built-in Motion Sensor: For motion-controlled gaming experiences.
- Changeable Faceplate: Allows for customization of the controller's appearance.
- USB-C Port: For charging and wired connection.
- USB Dongle Storage: A dedicated slot under the faceplate for the PC USB dongle.
Package Contents
- EMG Gaming Controller Artic Devo PC01
- USB-C Charging Cable
- USB Dongle (for PC connection)
- Interchangeable D-pad options
- Interchangeable Thumbstick options
- User Manual
- Carrying Case

Image: Front view of the EMG Gaming Controller Artic Devo PC01, showcasing its button layout and design.

Image: The EMG Gaming Controller Artic Devo PC01 with its customizable faceplate detached, revealing the internal structure.

Image: Rear view of the EMG Gaming Controller Artic Devo PC01, highlighting the programmable back buttons and charging pins.
Setup
Charging the Controller
- Connect the provided USB-C cable to the controller's USB-C port (located on the top edge).
- Connect the other end of the USB-C cable to a USB power source (e.g., PC, USB wall adapter).
- The indicator lights on the controller will show charging status. Once fully charged, the lights will change or turn off.
Connecting to Devices
The EMG Artic Devo PC01 supports multiple connection methods:
1. PC Connection (Wireless via USB Dongle)
- Retrieve the USB dongle from its storage slot under the controller's faceplate.
- Insert the USB dongle into an available USB port on your PC.
- Turn on the controller. It should automatically pair with the dongle. The indicator lights will confirm a successful connection.

Image: Top view of the EMG Gaming Controller Artic Devo PC01, showing the USB-C port for charging and wired connection.
2. PC Connection (Wired)
- Connect the controller to your PC using the provided USB-C cable.
- The PC should automatically detect the controller.
3. Nintendo Switch Connection
- On your Nintendo Switch, go to System Settings > Controllers and Sensors > Disconnect Controllers.
- Then, go to Change Grip/Order.
- Press and hold the pairing button on the EMG controller until the indicator lights flash rapidly.
- Once paired, the controller will be recognized by the Switch.
4. Android/iOS Connection (Bluetooth 5.3)
- Ensure Bluetooth is enabled on your Android or iOS device.
- Turn on the EMG controller and press and hold the pairing button until the indicator lights flash rapidly.
- On your device, search for Bluetooth devices and select "EMG PC01" (or similar name) from the list.
- Once paired, the indicator lights on the controller will stabilize.
Customizing D-pad and Thumbsticks
The controller comes with interchangeable D-pad and thumbstick options to suit your preference.
- Gently pull off the existing D-pad or thumbstick from the controller.
- Align the desired D-pad or thumbstick with its base and push it firmly into place until it clicks.

Image: Various D-pad options for the EMG Gaming Controller Artic Devo PC01, allowing users to customize their control preference.
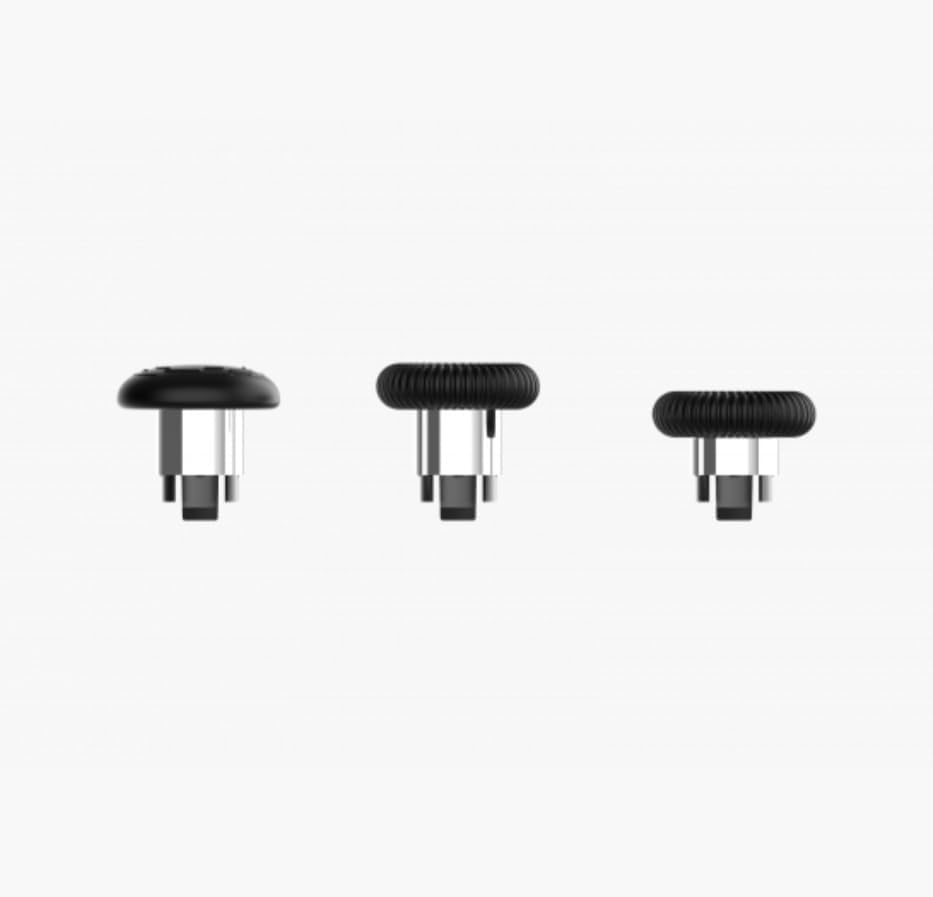
Image: A selection of interchangeable thumbstick options for the EMG Gaming Controller Artic Devo PC01, providing different heights and grips.
Operating Instructions
Power On/Off
- Power On: Press the Home button once.
- Power Off: Press and hold the Home button for 3-5 seconds. The controller will also automatically power off after a period of inactivity.
Adjusting Trigger Travel Distance
The Hall Effect triggers offer three adjustable travel distance options. Consult the controller's specific buttons or switches (usually located near the triggers) to cycle through the short, medium, and long travel settings. This allows for optimization based on game type (e.g., short travel for shooting games, long for racing games).
Programming Back Buttons (M1, M2)
The two back buttons (M1 and M2) can be programmed to replicate other button inputs for convenience.
- Press and hold the Program button (refer to controller diagram for location) for 3 seconds until the indicator light flashes.
- Press the M1 or M2 button you wish to program.
- Press the button (e.g., A, B, X, Y, L1, R1, etc.) you want M1/M2 to emulate.
- Press the Program button again to save the setting. The indicator light will stop flashing.
Motion Sensor Functionality
The built-in motion sensor is automatically active when connected to compatible platforms (e.g., Nintendo Switch) and games that support motion controls. No additional setup is typically required.
Maintenance
Cleaning
- Use a soft, dry cloth to wipe the controller's surface.
- For stubborn dirt, slightly dampen the cloth with water or a mild cleaning solution. Avoid excessive moisture.
- Do not use harsh chemicals, abrasive cleaners, or solvents.
Storage
When not in use, store the controller in a cool, dry place away from direct sunlight and extreme temperatures. The provided carrying case is ideal for protection during storage and transport.
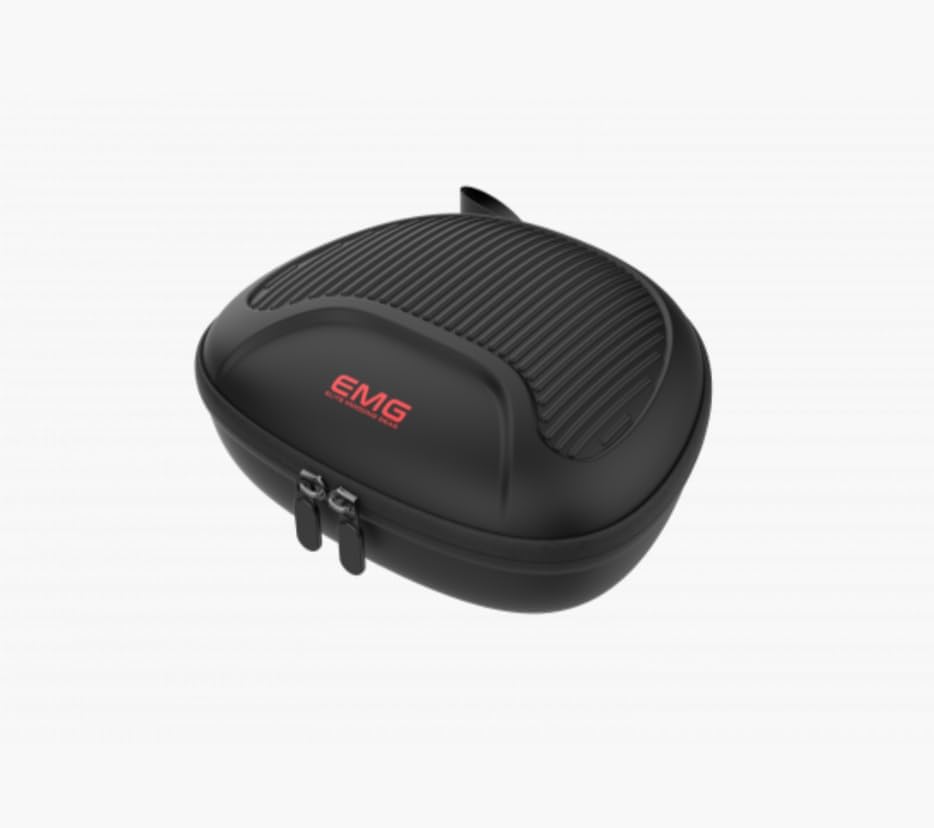
Image: The protective carrying case for the EMG Gaming Controller Artic Devo PC01, designed for safe storage and transport.
Battery Care
- Avoid fully discharging the battery frequently.
- If storing for an extended period, charge the battery to approximately 50% to prolong its lifespan.
Troubleshooting
Controller Not Turning On
- Ensure the controller is charged. Connect it to a power source and wait a few minutes before attempting to power on.
- If the issue persists, try a different charging cable or power adapter.
Connection Issues
- For Wireless (PC): Ensure the USB dongle is securely inserted into the PC and the controller is within range. Try re-pairing by pressing the pairing button on the controller.
- For Bluetooth (Android/iOS/Switch): Ensure Bluetooth is enabled on your device. Forget the controller from your device's Bluetooth settings and attempt to pair again. Ensure the controller is in pairing mode (rapidly flashing lights).
- For Wired: Try a different USB-C cable or a different USB port on your device.
Buttons/Joysticks Not Responding
- Ensure the controller is properly connected and powered on.
- Restart the controller and the connected device.
- Check for any physical obstructions or debris around the buttons or joysticks.
- If using a PC, ensure controller drivers are up to date.
Motion Sensor Not Working
- Verify that the game and platform you are using support motion controls.
- Ensure the controller is properly connected to the device.
- Try recalibrating the motion sensor if your device or game offers this option.
Specifications
| Feature | Detail |
|---|---|
| Model Number | PC01 |
| Connectivity | Bluetooth 5.3, Wired (USB-C), 2.4GHz Wireless (via USB Dongle) |
| Compatibility | PC, Nintendo Switch, Android, iOS |
| Battery Capacity | 1000 mAh Lithium Battery |
| Sensor Type | Hall Effect (Joysticks & Triggers), Built-in Motion Sensor |
| Programmable Buttons | 2 Back Buttons (M1, M2) |
| Trigger Adjustment | 3 Travel Distance Options |
| Dimensions | 19 x 17 x 7 cm |
| Weight | 700 grams |
| ASIN | B0FPCY6TM5 |
| Release Date | 2025 August 31 |
Warranty and Support
For warranty information and technical support, please refer to the warranty card included with your product or visit the official EMG website. Keep your proof of purchase for warranty claims.
If you encounter any issues not covered in this manual, please contact customer support for assistance.