1. Safety Instructions
Please read and understand all safety instructions before installing, operating, or maintaining this product. Failure to follow these instructions may result in electric shock, fire, or serious injury.
- This product is for indoor use only. Do not expose to rain or moisture.
- Ensure the power supply voltage matches the product's requirements.
- Always disconnect from power before cleaning or servicing.
- Do not operate if the power cord is damaged.
- Ensure proper ventilation to prevent overheating. Do not block ventilation openings.
- Avoid direct eye exposure to the light source.
- Mount the fixture securely to prevent accidental falls.
- Keep away from flammable materials.
2. Package Contents
Verify that all items listed below are included in your package:
- Par Lights (Quantity: 4)
- Remote Control (Quantity: 1)
- Power Cord (Quantity: 4)
- Handle (Quantity: 8)
- Knob (Quantity: 8)
- Instruction Manual (Quantity: 1)

Image: Contents of the BETOPPER LPC017 package.
3. Product Overview
The BETOPPER LPC017 is a 54x3W LED RGB 3-in-1 stage par light designed for various lighting applications. It features a high-brightness LED panel, premium RGB LEDs for vivid colors, and an enlarged housing for efficient heat dissipation and quiet operation.
Key Features:
- One-Piece High-Brightness LED Panel: Delivers up to 30% more light with uniform distribution.
- Premium RGB LEDs: High-quality full-color LEDs for excellent color saturation and smooth mixing.
- One-Piece Enlarged Housing: Improves internal airflow, accelerates heat dissipation, and ensures quiet operation.
- Infrared Remote Control: Simple and intuitive control for colors, brightness, strobe speed, and modes.
- Multiple Operating Modes: Auto, Sound-Active, DMX512, Master/Slave.
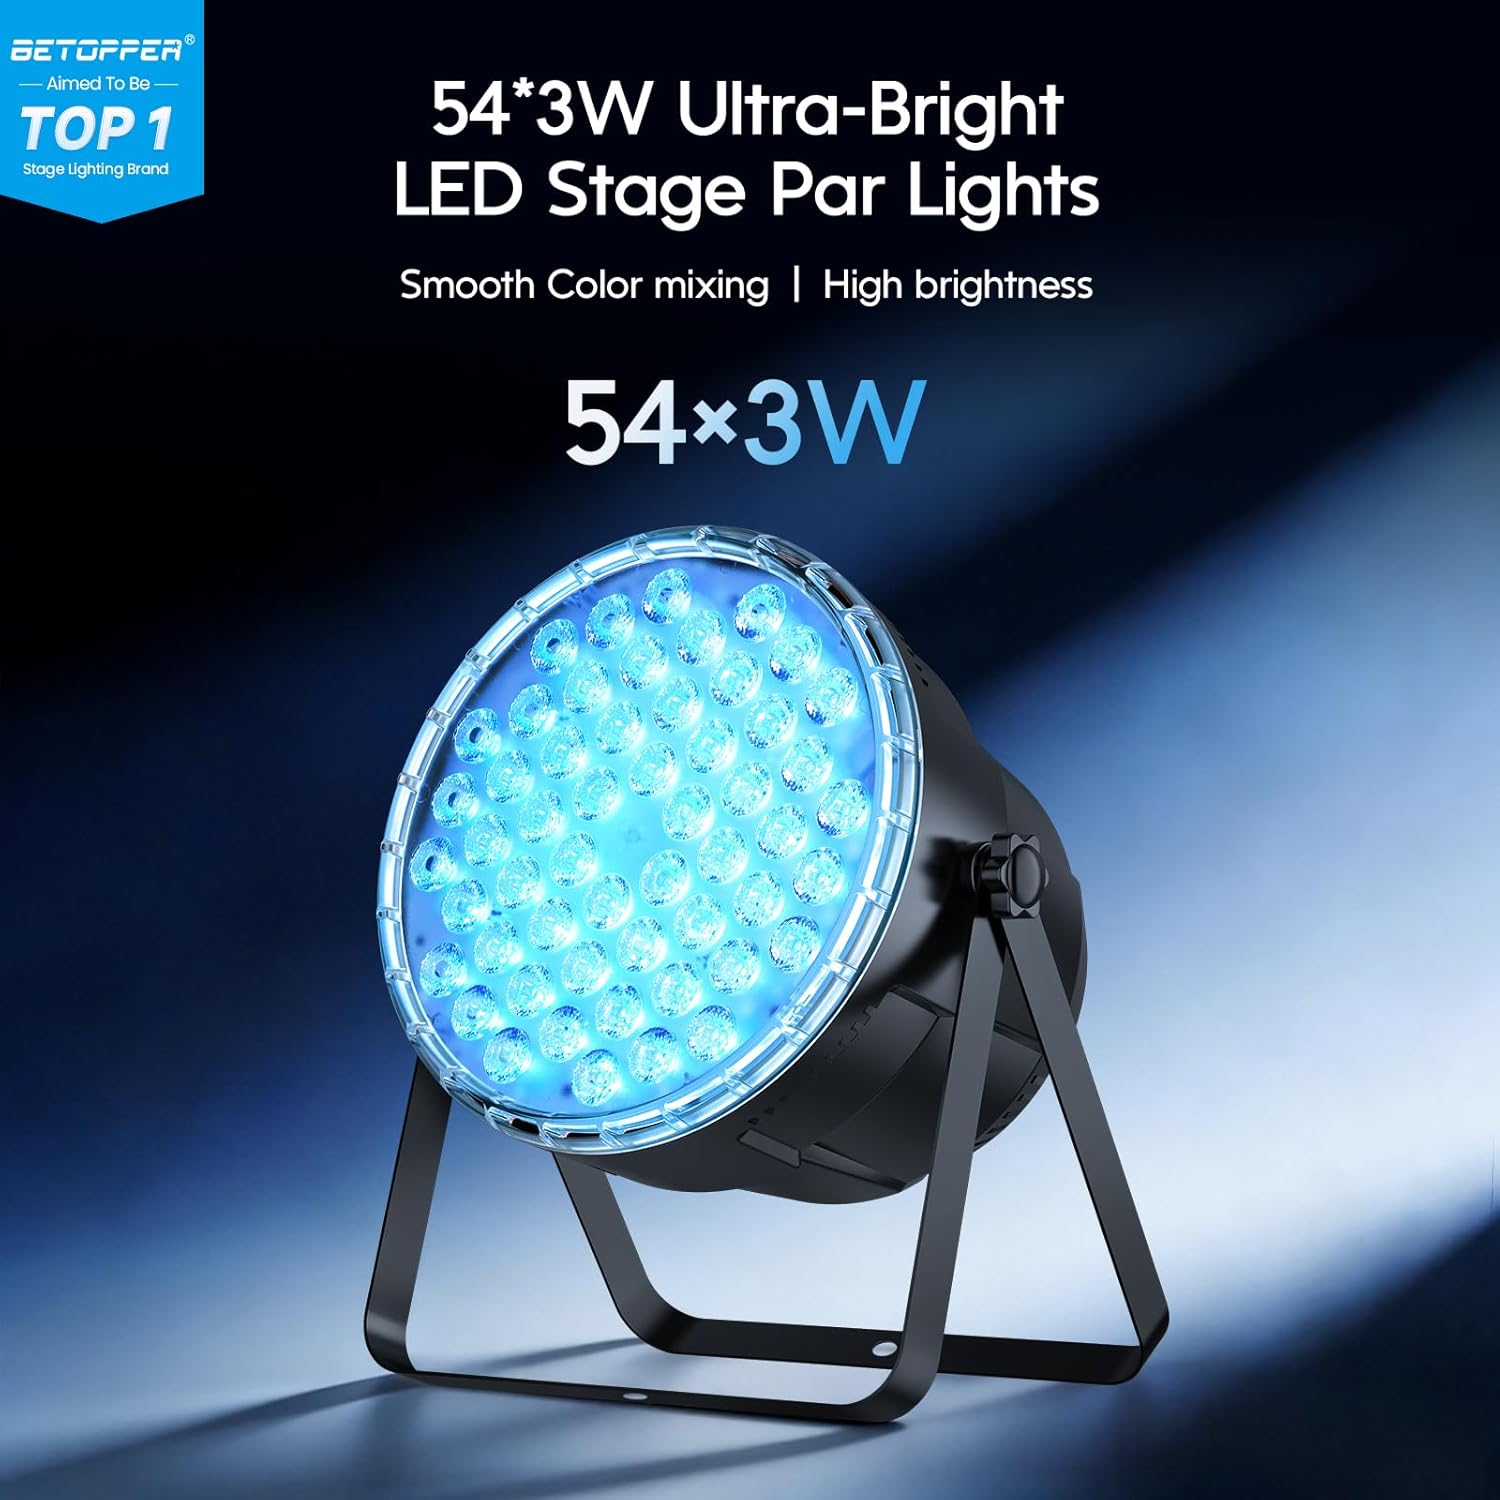
Image: Front view of the LPC017 Par Light.

Image: Rear panel with DMX ports and controls.
4. Setup
The BETOPPER LPC017 par lights offer flexible installation options for various environments.
Mounting Options:
- Floor Placement: Use the adjustable bracket to position the light on a flat surface.
- T-Bar/Truss Mounting: Securely attach the light to a T-bar or truss using appropriate clamps (not included) and the provided handles. Ensure the fixture is stable and safely secured.
The adjustable bracket allows for a 360-degree angle adjustment to direct light as needed.

Image: Setup options and dimensions for the LPC017.
Power Connection:
Connect the provided power cord to the power input on the rear of the fixture and then to a suitable power outlet.
DMX Connection (Optional):
For DMX control, connect a DMX cable from your DMX controller to the DMX IN port of the first fixture. For multiple fixtures, daisy-chain them by connecting the DMX OUT of the first fixture to the DMX IN of the next, and so on.
5. Operating Modes
The BETOPPER LPC017 offers several operating modes for versatile lighting control.
Remote Control Operation:
The included infrared remote control provides easy access to various functions:
- On/Off: Power the light on or off.
- Fixed Code: Select a specific color or effect.
- Sound: Activate sound-active mode.
- Auto: Cycle through automatic programs.
- Fade: Smooth color transitions.
- Jump: Abrupt color changes.
- Red, Green, Blue, Pink, Yellow: Select individual colors.
- Mixed Light: Access pre-mixed color combinations.
- DMX: Enable DMX control mode.
- Strobe: Activate strobe effect (speed is fixed).
- Speed +/-: Adjust the speed of dynamic effects.
- Brightness +/-: Adjust the overall brightness.
Note:
- To exit DMX function, click ON/OFF to restart the light.
- The speed in Strobe mode is fixed and cannot be adjusted.

Image: Remote control functions for the LPC017.
Automatic Mode:
In Auto mode, the light fixture cycles through pre-programmed color changes and effects without external input. This is ideal for quick setup and continuous operation.
Sound-Active Mode:
The Sound-Active mode allows the light to react to music or ambient sound. The internal microphone detects sound, and the light patterns change in sync with the beat.
DMX512 Control:
For advanced control, connect the fixture to a DMX controller. Refer to the DMX channel chart (usually provided in a separate DMX manual or on the product display) to control individual parameters such as color, dimmer, strobe, and mode.
Master/Slave Mode:
Connect multiple LPC017 fixtures using DMX cables. Set one fixture as the 'Master' and the others as 'Slave'. The slave units will then mirror the master unit's operations, ensuring synchronized lighting effects.
Video: Demonstration of various lighting effects and color changes of the Betopper LPC017 Par Lights.
Video: Demonstration of Betopper Moving Head and Par Light Bundle effects, showcasing the par lights in a combined setup.
6. Maintenance
Regular maintenance ensures the longevity and optimal performance of your BETOPPER LPC017 par lights.
- Cleaning: Periodically clean the lens and housing with a soft, lint-free cloth. Do not use abrasive cleaners or solvents. Ensure the fixture is unplugged before cleaning.
- Ventilation: Keep ventilation openings clear of dust and debris to maintain proper airflow and prevent overheating.
- Inspection: Regularly inspect power cords, DMX cables, and mounting hardware for any signs of damage or wear. Replace damaged components immediately.
- Storage: When not in use, store the lights in a dry, dust-free environment, preferably in their original packaging or a protective case.
7. Troubleshooting
If you encounter issues with your BETOPPER LPC017 par lights, refer to the following common problems and solutions:
| Problem | Possible Cause | Solution |
|---|---|---|
| Light does not turn on. | No power, faulty power cord, or internal issue. | Check power connection and outlet. Try a different power cord. If problem persists, contact support. |
| Remote control not working. | Dead battery, obstruction, or remote out of range. | Replace remote battery. Ensure no obstructions between remote and light. Operate within specified range. |
| DMX control not responding. | Incorrect DMX address, faulty cable, or incorrect mode. | Verify DMX address settings. Check DMX cable connections. Ensure light is in DMX mode. Restart the light by cycling power. |
| Light is overheating. | Blocked ventilation or prolonged use in high temperatures. | Ensure ventilation openings are clear. Allow the fixture to cool down. Operate in a well-ventilated area. |
| Colors are not mixing correctly. | Internal software issue or DMX setting conflict. | Reset the fixture by cycling power. If using DMX, check DMX channel settings for color mixing. |
8. Specifications
Detailed technical specifications for the BETOPPER LPC017 par lights:
| Specification | Detail |
|---|---|
| Model Number | LPC017 |
| Light Source Type | Light Emitting Diode (LED) |
| LED Quantity & Power | 54 x 3W RGB 3-in-1 LEDs |
| Wattage | 162 watts (Max) |
| Color Rendering Index | 85 |
| Material | Acrylonitrile Butadiene Styrene (ABS) |
| Shape | Round |
| Product Dimensions | 8.6"L x 8.6"W x 8.6"H (21.8cm L x 21.8cm W x 21.8cm H) |
| Item Weight | 12.23 pounds (5.55 kg) |
| Power Source | Corded Electric |
| Control Modes | Remote Control, Auto, Sound-Active, DMX512, Master/Slave |
| Included Components | Remote Control, Par Lights |
| Batteries Required? | No (for light fixture) |
9. Warranty and Support
BETOPPER products are designed for durability and performance. For warranty information, please refer to the documentation included with your purchase or contact BETOPPER customer support directly.
Customer Support:
If you have any questions, require technical assistance, or need to report an issue, please contact BETOPPER customer support through the retailer's platform or the official BETOPPER website. Please have your model number (LPC017) and purchase details ready when contacting support.


