
IMAYCC MN-221A 12V Remote Battery Disconnect Switch 240A Instruction Manual
Model: MN-221A
1. Product Overview
The IMAYCC MN-221A Remote Battery Disconnect Switch is designed to provide convenient and effective battery management for various 12V vehicles. It helps prevent battery drain during long-term parking, protects against wiring deterioration, and offers an anti-theft solution by remotely cutting off power. This device features both remote and manual control options, along with intelligent automatic power-off functions based on battery voltage levels.
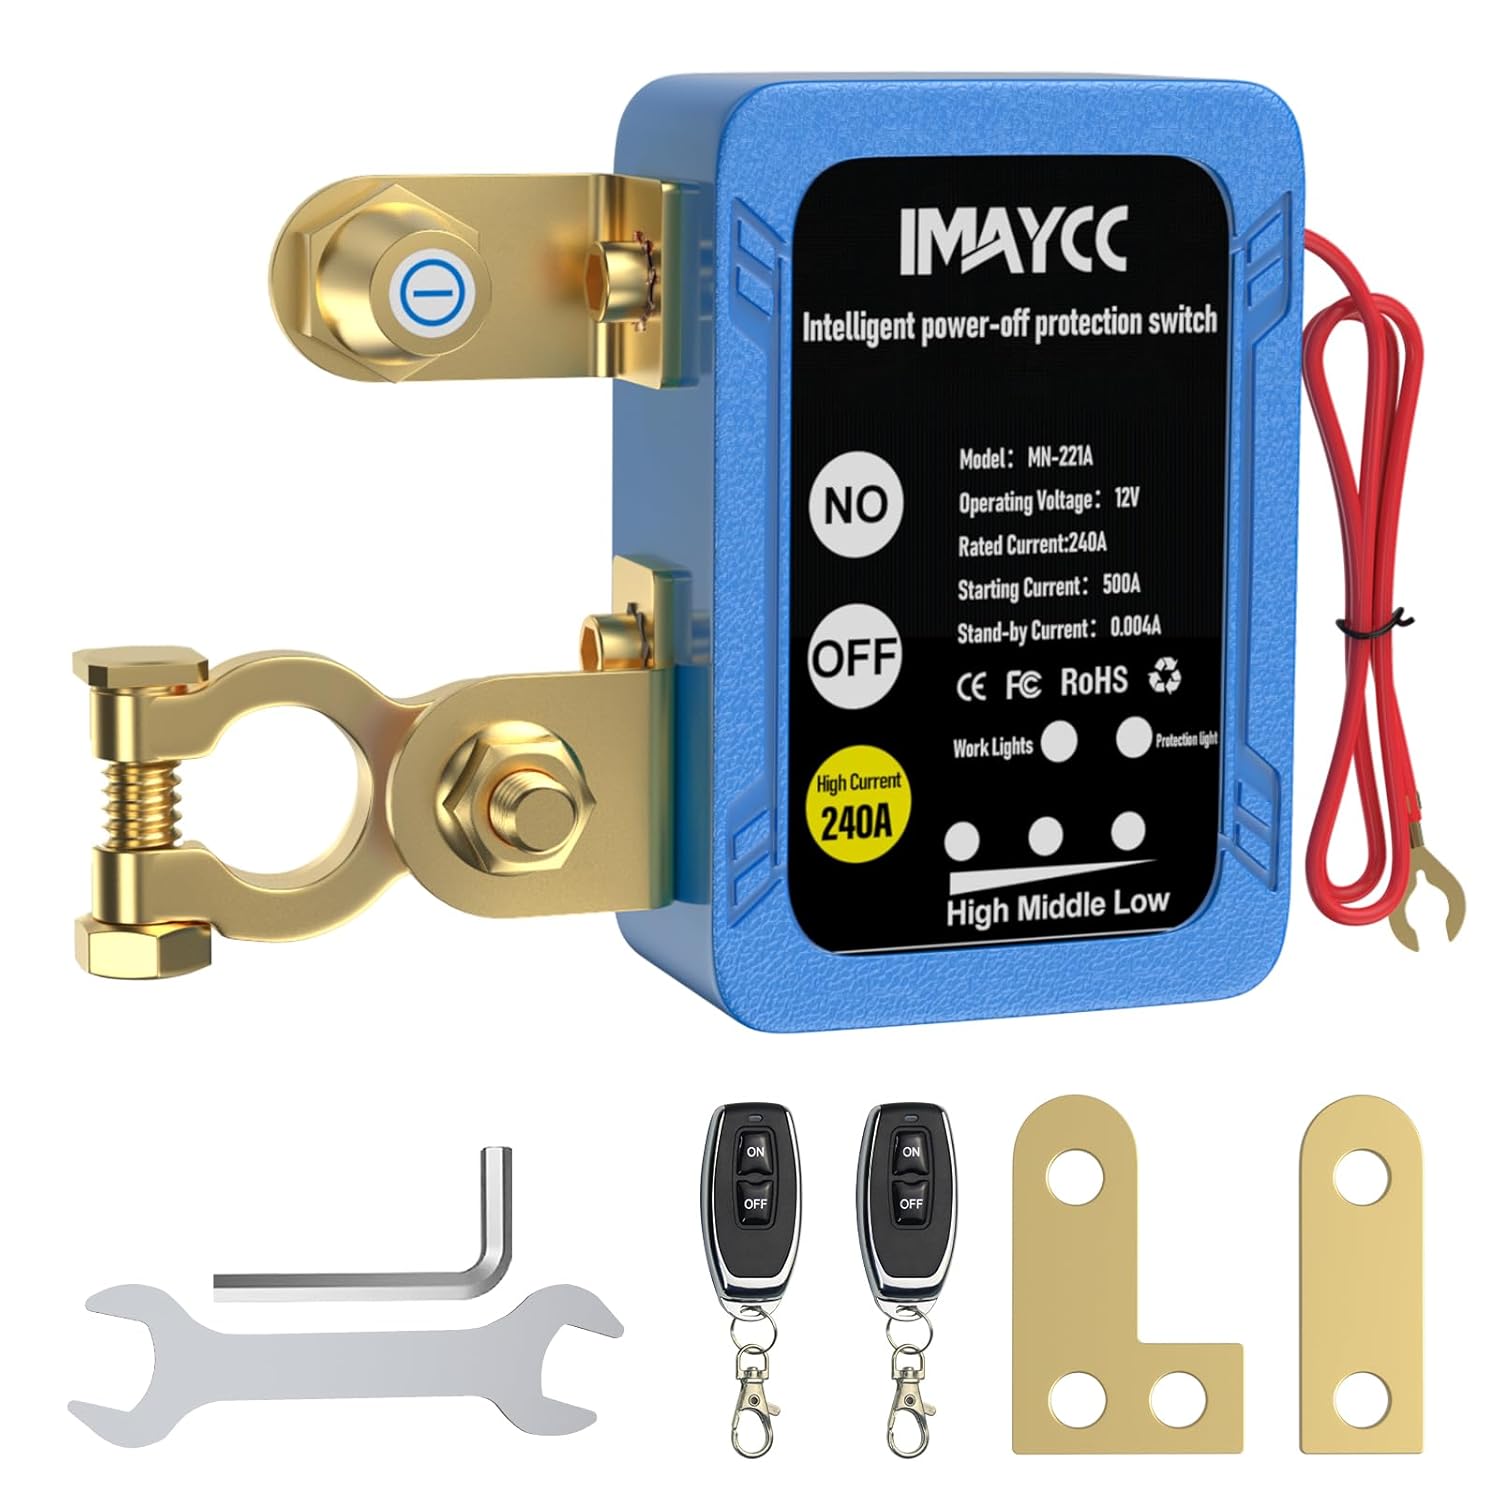
Figure 1: IMAYCC MN-221A Remote Battery Disconnect Switch and accessories.
2. Package Contents
- Cut off Switch x 1
- Remote controller x 2
- Manual x 1
3. Safety Information
- Always disconnect the vehicle's battery before attempting installation to prevent electrical shock or damage.
- Ensure correct polarity when connecting the switch. This switch is designed for negative pole installation.
- Wear appropriate safety gear, including gloves and eye protection, during installation.
- Do not operate the remote control while driving, as the system is designed to disable remote functions at higher voltages to prevent accidental power cut-off.
- Verify that the switch dimensions (3.3"x2.4"x1.4") allow for proper installation and hood closure in your vehicle's battery compartment.
4. Installation Instructions
This battery disconnect switch is designed for negative terminal installation. Ensure your vehicle's negative pole is compatible (9-13 mm and 15-17mm). For side-mounted batteries, alternative connecting pieces are provided for adjustment.
Step-by-Step Installation:
- Disconnect Negative Terminal: Locate your vehicle's battery. Using an appropriate wrench, loosen and remove the cable from the negative (-) terminal of the battery.
- Install Disconnect Switch: Connect the main clamp of the IMAYCC switch to the negative (-) terminal of the battery. Ensure a secure and tight connection.
- Connect Vehicle's Negative Cable: Attach the vehicle's original negative cable (the one you just removed) to the other terminal of the IMAYCC disconnect switch. Tighten securely.
- Connect Positive Power Wire: Connect the thin red wire from the IMAYCC switch to the positive (+) terminal of the vehicle's battery. This provides power to the switch's internal electronics.
- Adjust Mounting (if necessary): If your battery has side-mounted terminals, use the provided alternative connecting pieces to adjust the switch's position for optimal fit and clearance.

Figure 2: General installation of the switch on a top-post battery.
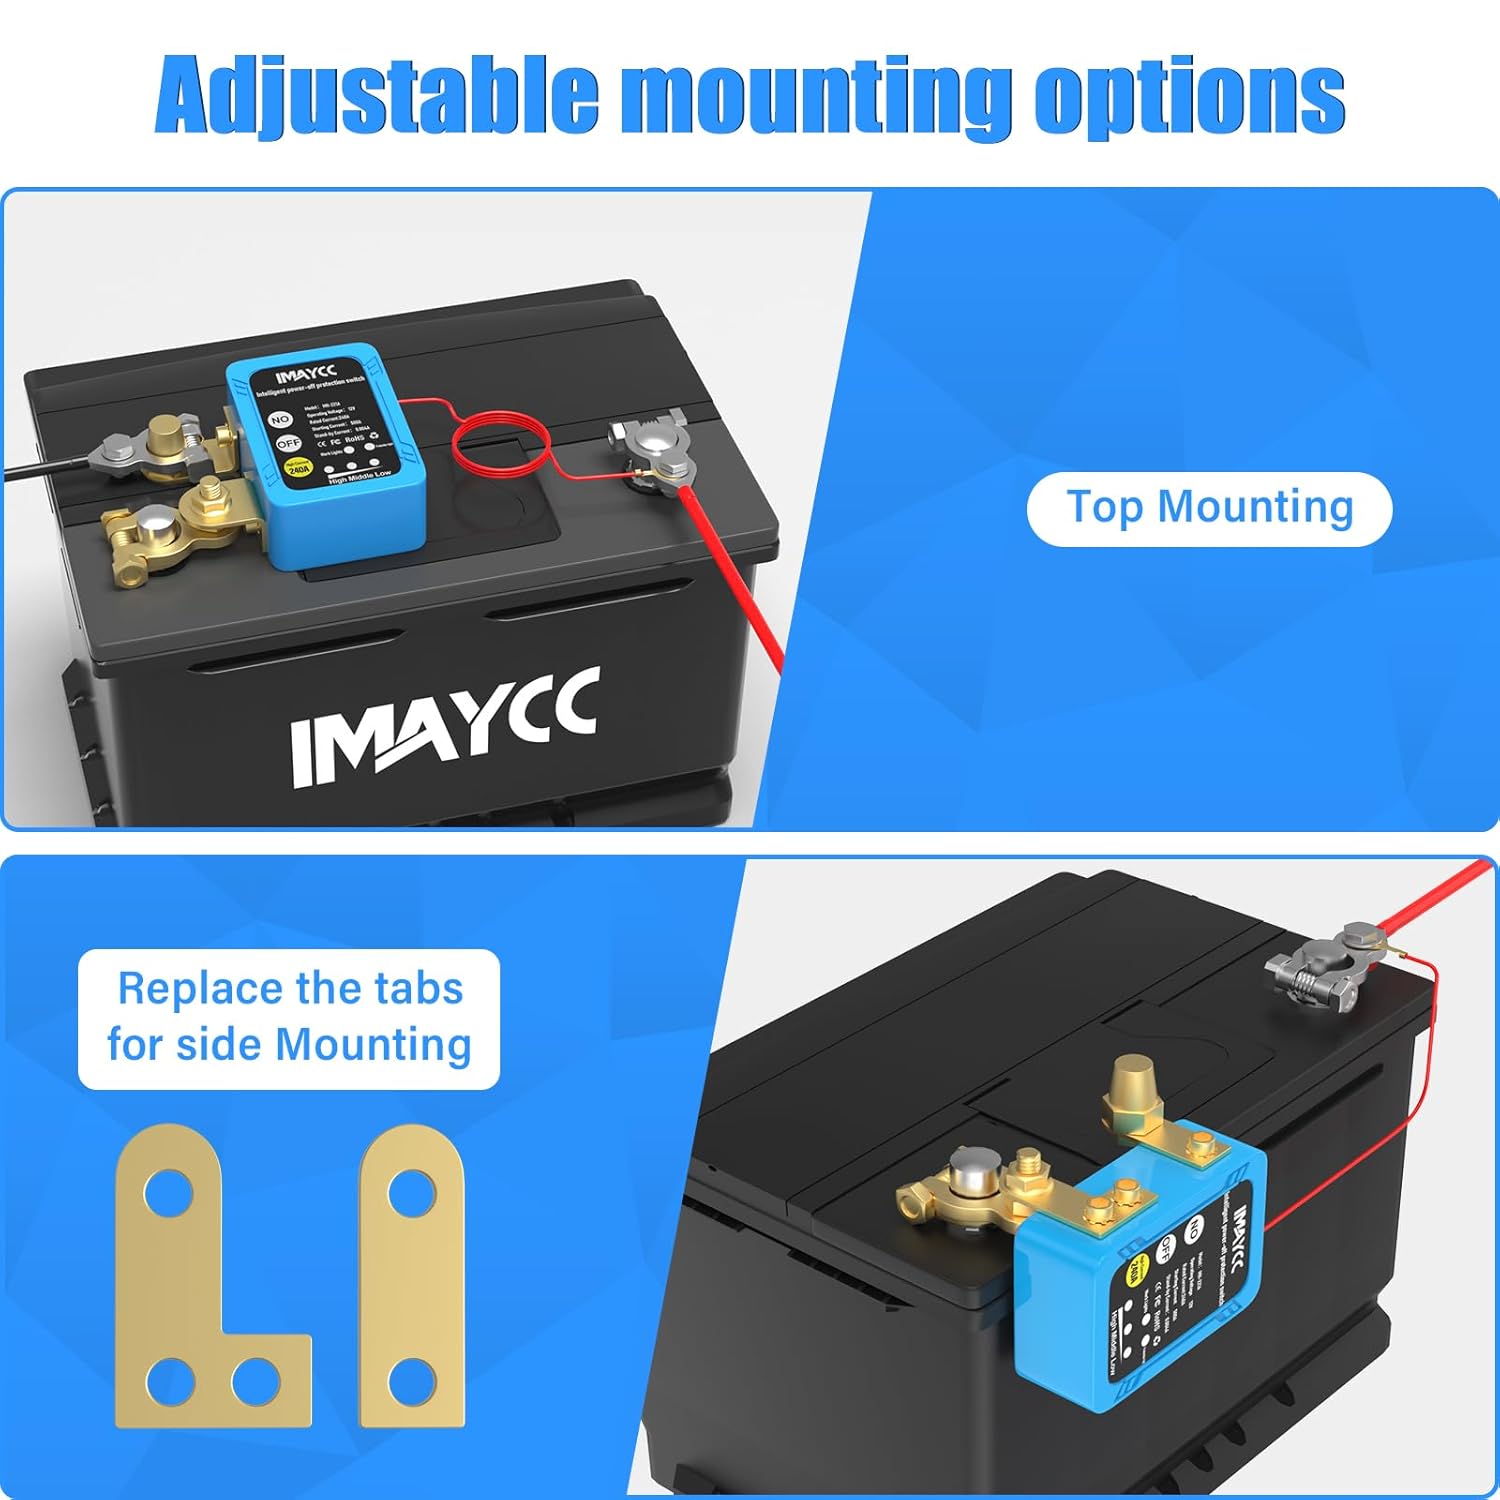
Figure 3: Adjustable mounting options for different battery types.
Video 1: Official IMAYCC installation guide for the Remote Battery Disconnect Switch.
5. Operating Instructions
Remote Control Operation:
- Press the ON button on the remote controller to connect the battery and supply power to the vehicle.
- Press the OFF button on the remote controller to disconnect the battery and cut off power to the vehicle.
Manual Switch Operation:
- The switch unit itself has ON and OFF buttons for direct manual control.
Automatic Functions:
- Low Voltage Protection: If the battery voltage drops below 11.8V, the remote control function will be disabled, and the switch will automatically cut off power after 120 seconds to conserve battery life.
- Driving Safety Feature: When the voltage is higher than 13.5V (typically when the engine is running), the remote control will be disabled to prevent accidental power cut-off while the vehicle is in operation. In this state, only the manual switch on the unit can control the power.

Figure 4: Low voltage protection and remote control disablement features.

Figure 5: Voltage indicator lights on the switch unit.
Video 2: Demonstration of the IMAYCC Kill Switch with remote control functionality.
6. Specifications
| Feature | Specification |
|---|---|
| Model | MN-221A |
| Operating Voltage | 12V (DC) |
| Rated Current | 240A |
| Instantaneous Current | 500A |
| Standby Power Consumption | 3mA |
| Operating Temperature | -22°F to 194°F (-30°C to 90°C) |
| Power-off Threshold | 11.8V ± 0.2V |
| Remote Control Failure Voltage | 13.5V ± 0.1V |
| Remote Control Distance | Up to 80m |
| Protection Grade | IP54 |
| Product Dimensions (L x W x H) | 4.33 x 5.12 x 1.77 inches (8.4 x 6.1 x 3.5 cm) |
| Compatibility | Most 12V cars, boats, RVs, trailers, trucks, ATVs, UTVs, motorcycles with displacement less than 4.0L. Negative pole: 9-13 mm and 15-17mm. |

Figure 6: Detailed specifications and component overview.

Figure 7: Wide range of vehicle compatibility.
7. Troubleshooting
- Remote not responding: Check battery voltage. If below 11.8V, the remote function is disabled. If above 13.5V (engine running), remote is also disabled. Ensure remote battery is functional.
- No power to vehicle after activation: Verify all connections are secure and tight. Check the vehicle's main fuses. Ensure the switch's manual button is not stuck in the OFF position.
- Battery still draining: While the switch prevents major parasitic drains, ensure there are no other direct connections bypassing the switch or significant electrical issues within the vehicle.
8. Maintenance
- Regularly inspect battery terminals and switch connections for corrosion or looseness. Clean as needed.
- Keep the switch unit clean and free from excessive dirt or moisture.
- Store remote controllers in a safe place to prevent accidental activation or damage.
9. Warranty and Support
For warranty information or technical support, please refer to the contact details provided with your purchase documentation or visit the official IMAYCC website. Keep your proof of purchase for any warranty claims.