1. Introduction
Thank you for choosing the My Little Pony Pinkie Pie Edition Wireless Mouse. This device combines a unique 3D character design with advanced dual-mode wireless technology, offering both 2.4GHz and Bluetooth connectivity. Designed for comfort and precision, this mouse is compatible with various operating systems, enhancing your computing experience.
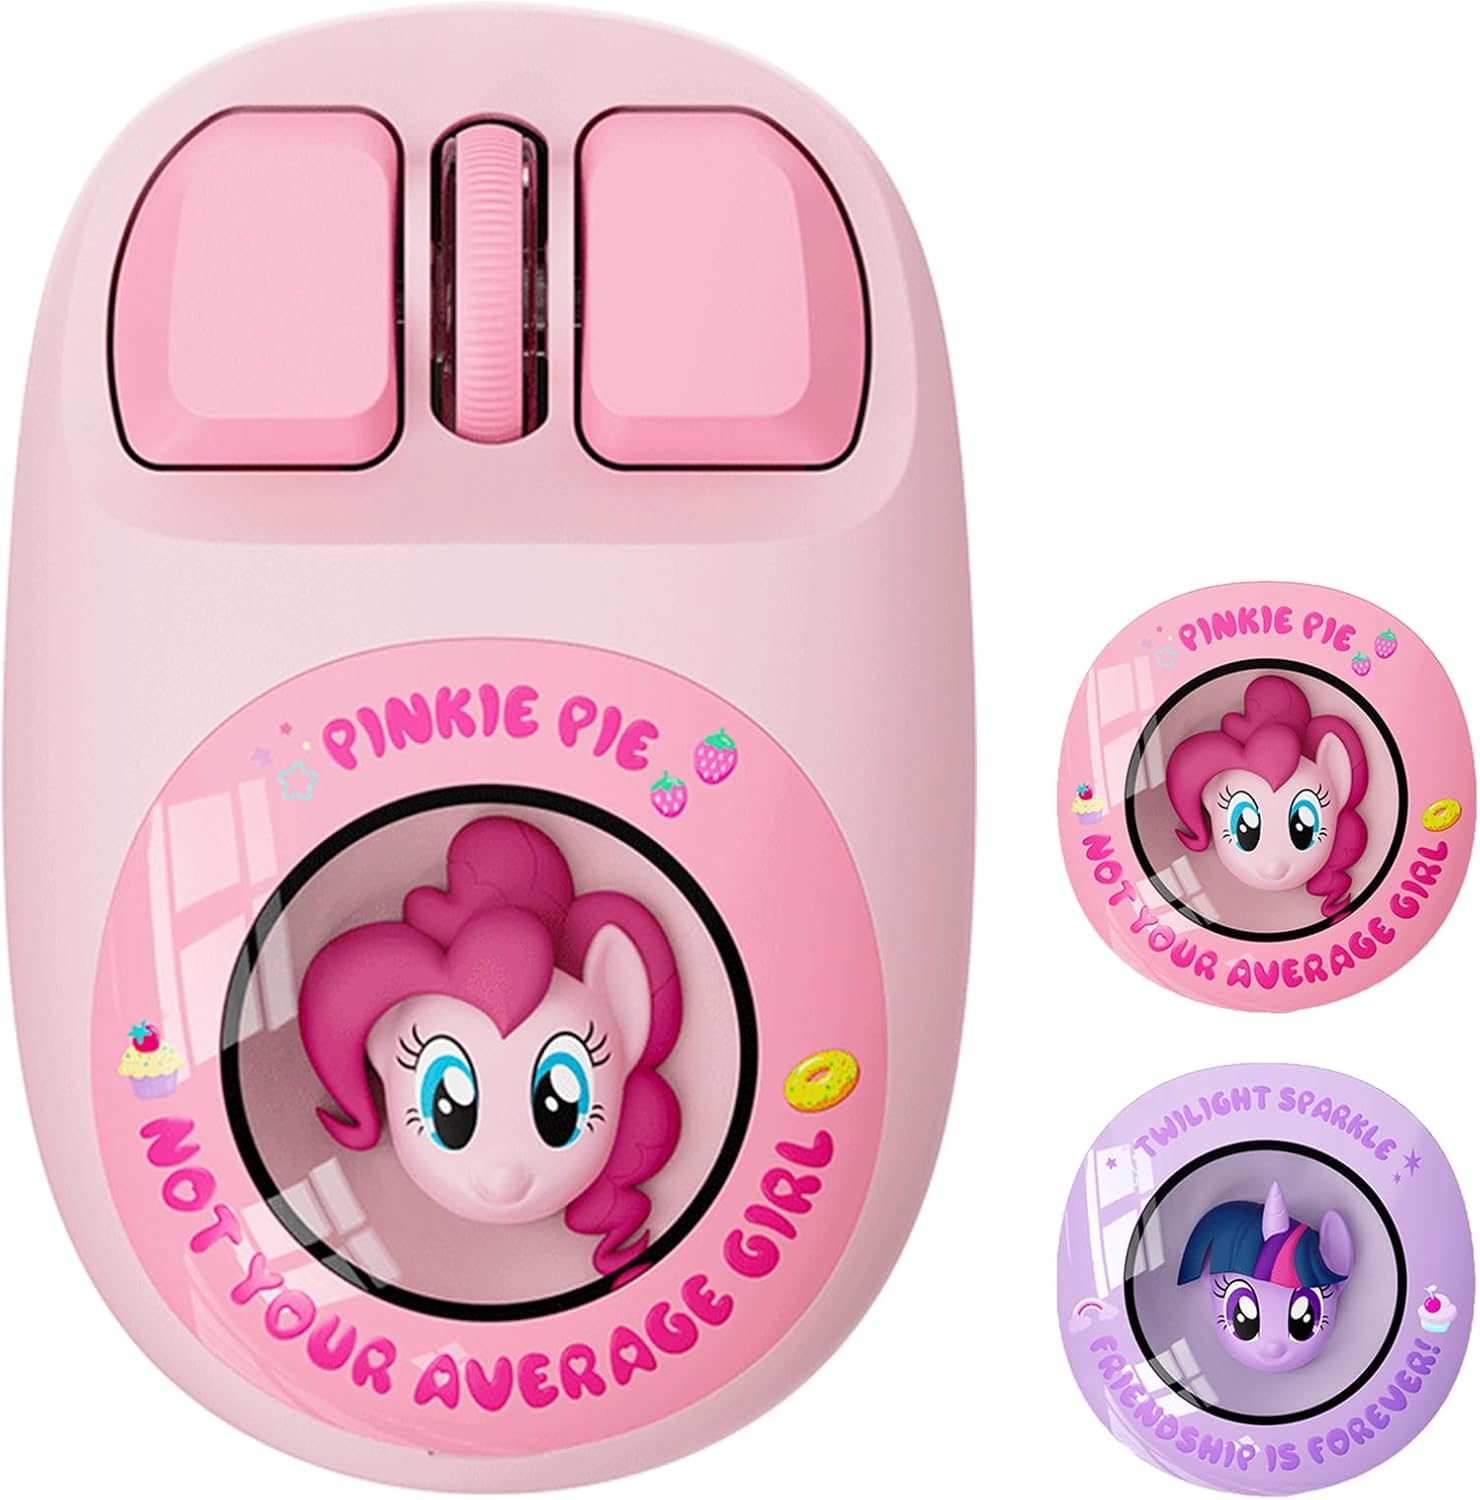
Image: Top view of the My Little Pony Pinkie Pie Edition Wireless Mouse.
2. Package Contents
Please verify that all items are present in your package:
- My Little Pony Pinkie Pie Edition Wireless Mouse
- USB Receiver (stored inside the mouse)
- Charging Cable
- User Manual (this document)

Image: The My Little Pony Pinkie Pie Edition Wireless Mouse, its charging cable, USB receiver, and user manual, displayed alongside its retail packaging.
3. Setup
3.1. Installing the Battery and USB Receiver
- Gently remove the magnetic top cover of the mouse, which features the 3D Pinkie Pie character.
- Insert one AA battery into the battery compartment, ensuring correct polarity.
- Locate the USB receiver stored next to the battery compartment. Remove it.
- Replace the magnetic top cover securely.

Image: The bottom view of the mouse with the battery compartment open, revealing the battery and the storage slot for the USB receiver.
3.2. Connecting the Mouse
The mouse supports dual-mode connectivity: 2.4GHz wireless via USB receiver and Bluetooth.
2.4GHz Wireless Connection:
- Plug the USB receiver into an available USB port on your computer.
- Turn on the mouse using the power switch located on the underside.
- The mouse should automatically connect to your computer.
Bluetooth Connection:
- Turn on the mouse using the power switch.
- Press the mode button (usually located near the power switch on the underside) to switch to Bluetooth mode. The indicator light will flash, indicating it's in pairing mode.
- On your computer, navigate to Bluetooth settings.
- Search for available devices and select the My Little Pony Wireless Mouse.
- Follow any on-screen prompts to complete the pairing process.

Image: The mouse shown connected to a laptop via 2.4GHz USB receiver and a smartphone via Bluetooth, illustrating its dual-mode capability.
4. Operating Instructions
4.1. Basic Functions
- Left Click: Primary selection and activation.
- Right Click: Accesses contextual menus.
- Scroll Wheel: Scrolls through documents and web pages. Can also be clicked for middle-click functionality.
- Forward/Backward Buttons: (If applicable) Navigate web pages or folders.
4.2. DPI Adjustment
The mouse features adjustable DPI (Dots Per Inch) settings, allowing you to change cursor sensitivity. Press the DPI button (usually located near the scroll wheel) to cycle through available DPI settings (e.g., 800/1200/1600 DPI).

Image: The mouse on a desk next to a laptop, with an overlay indicating 1600 DPI precision control.
5. Charging and Battery
The mouse is equipped with a rechargeable battery. Use the provided charging cable to connect the mouse to a USB power source (e.g., computer USB port, USB wall adapter).
- The scroll wheel flashes red when the battery is low.
- It glows solid green while charging.
- The light turns off when fully charged.
- The mouse can be used while charging.
5.1. Auto-Sleep Mode
To conserve battery life, the mouse will automatically enter a sleep mode after a period of inactivity. To wake it up, simply move the mouse or click any button.

Image: The mouse highlighting its 300mAh battery and auto-sleep mode for extended battery life.
6. Maintenance
To ensure optimal performance and longevity of your mouse:
- Clean the mouse regularly with a soft, dry cloth.
- Avoid using harsh chemicals or abrasive cleaners.
- Keep the optical sensor on the underside clean and free from dust or debris.
- Store the USB receiver inside the mouse when not in use or during travel to prevent loss.
7. Troubleshooting
- Mouse not responding:
- Ensure the mouse is powered on.
- Check battery level and charge if necessary.
- For 2.4GHz connection, ensure the USB receiver is securely plugged into the computer.
- For Bluetooth connection, verify that Bluetooth is enabled on your device and the mouse is properly paired.
- Try restarting your computer.
- Lagging or erratic cursor movement:
- Clean the optical sensor on the underside of the mouse.
- Ensure you are using the mouse on a suitable surface (non-reflective, opaque).
- Check for interference from other wireless devices.
- Adjust the DPI setting to a lower sensitivity if the cursor is too fast.
- Connection drops frequently:
- Ensure the mouse is within the effective range of your computer (typically up to 10 meters).
- Avoid placing large metal objects between the mouse and the receiver/device.
- Re-pair the Bluetooth connection or re-insert the USB receiver.
8. Specifications
| Brand | My Little Pony |
| Model Number | 652 |
| Connectivity | Dual-Mode (2.4GHz Wireless, Bluetooth) |
| DPI Settings | Adjustable (e.g., 800/1200/1600) |
| Buttons | 4-button configuration with scroll wheel |
| Compatibility | Windows 7/8/10/11, macOS |
| Power Source | 1 x AA Battery (included) |
| Dimensions | 10.01 x 5.79 x 0.1 cm |
| Weight | 78 g |
| Special Features | Portable, Ergonomic Design, Silent Clicks |

Image: The mouse displayed with icons representing compatibility with Windows, Mac, and Android operating systems.
9. Warranty and Support
For warranty information or technical support, please refer to the product packaging or contact the manufacturer directly. Keep your purchase receipt for warranty claims.