Introduction
This manual provides comprehensive instructions for the KOQICALL EN-B31+O1-N 1+15 Wireless Queue Calling System. This system is designed to efficiently manage customer flow by displaying and broadcasting the next service number in real-time. Please read this manual thoroughly before operating the device to ensure proper setup and functionality.
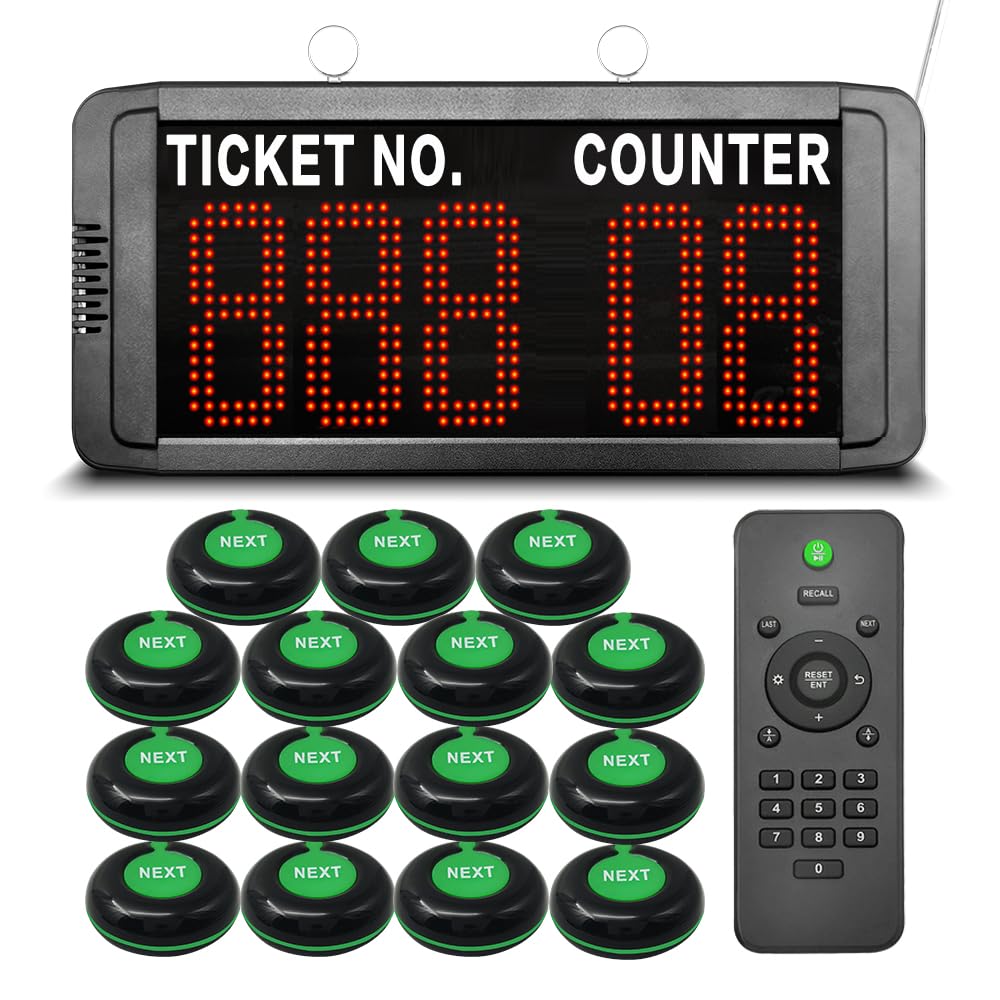
Figure 1: Main components of the KOQICALL Wireless Queue Calling System, including the LED display, several 'NEXT' call buttons, and a remote control.
Setup
- Unpacking: Carefully remove all components from the packaging. Verify that all items listed in the product description are present.
- Power Connection: Connect the power adapter to the LED display unit and plug it into a standard electrical outlet. The display will power on automatically.
- Placement: Position the LED display where it is clearly visible to waiting customers. It can be mounted on a wall or placed on a desktop.
- Call Button Placement: Distribute the "NEXT" call buttons to each service counter or staff member responsible for calling customers. These buttons are waterproof.
- Initial Power-On: The system is ready for use once powered. The display will show the default starting number (e.g., 001) and counter number (e.g., 01).

Figure 2: The queue calling system in various operational environments such as a bank, hospital, and post office, demonstrating its versatility.
Operating Instructions
Calling the Next Customer
- To call the next customer, press the "NEXT" button on the corresponding counter's transmitter.
- The LED display will automatically increment the ticket number and show the counter number.
- A voice announcement will broadcast the called number and direct the customer to the specific counter.

Figure 3: Illustration of the customer calling process: a staff member presses the 'NEXT' button, and the display shows the ticket number and counter, directing the customer.
Voice Announcements and Volume Control
- The default voice announcement is "Ding-dong + please number XXX go to counter XX".
- The display receiver allows adjustment of voice mode, volume, number of prompts, and LED number color.
- A voice reminder with only a "ding-dong" sound (without broadcasting the number) can be selected.
- To adjust the volume, press the '+' or '-' keys on the remote control while the system is in standby mode.
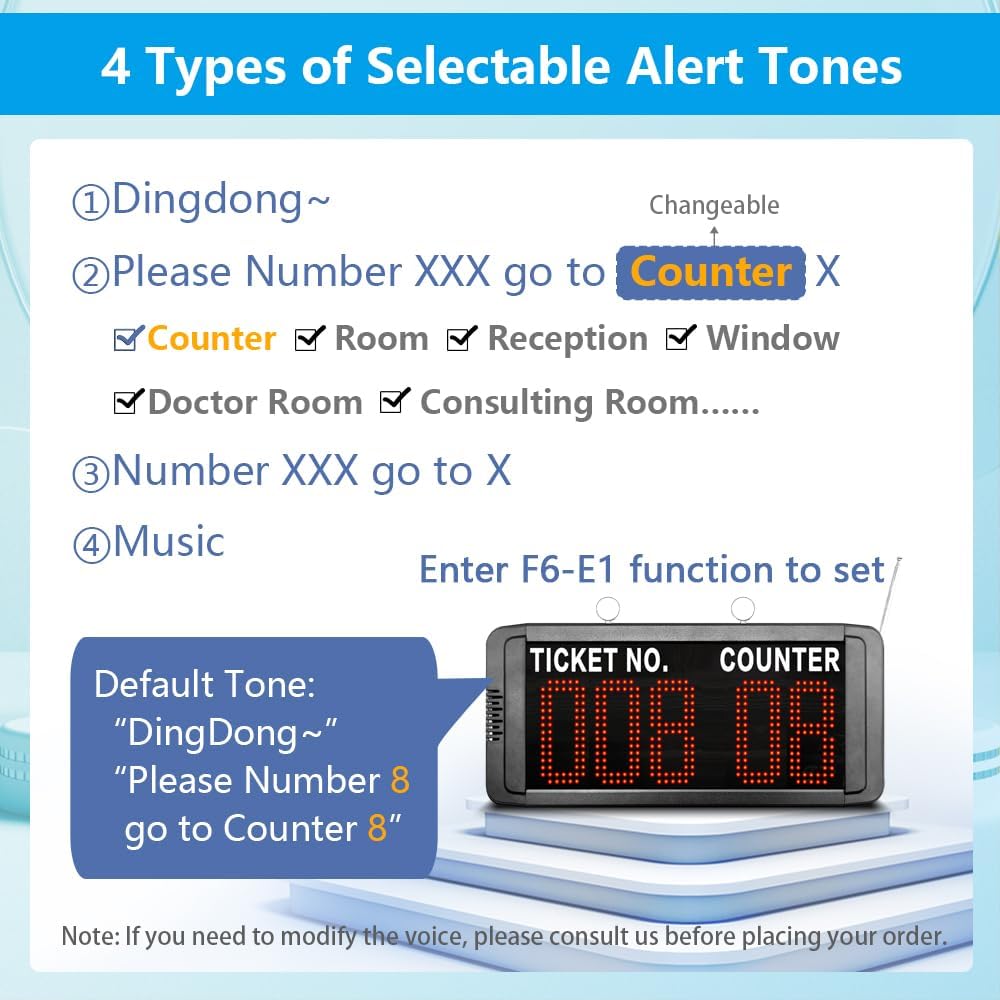
Figure 4: Overview of the four selectable alert tones and customizable counter names for voice announcements.
Setting Start and End Numbers
- The system can store up to 999 numbers, displayed sequentially from 001 to 999 by default.
- You can limit the call range on the display (e.g., setting it to 50-100) for enhanced flexibility. Refer to the detailed programming instructions in the full manual for specific steps.
Quickly Resetting the Number
- To quickly reset the number to the preset starting value, press the up and down keys simultaneously on the display unit.
- Alternatively, use the remote control: press the "RESET/ENT" button three times consecutively.
- This function is useful when you need to restart calling from the initial number (e.g., 001) after reaching a higher number.

Figure 5: Instructions for turning the display ON/OFF with the remote and resetting the ticket number.
Power-off Memory Function
- When the power-off memory function is enabled, the last called number is automatically stored.
- Upon reconnection of power, the system will resume calling from the last stored number +1. For example, if the last number was 005, the next call will be 006.
Video Demonstration: How the System Works
Video 1: A demonstration of the KOQICALL Wireless Queue Calling System in operation, showing how numbers are called and displayed.
Maintenance
- Cleaning: Use a soft, dry cloth to clean the display unit and call buttons. Avoid abrasive cleaners or solvents.
- Power Supply: Ensure the power adapter is securely connected and free from damage.
- Storage: If storing the system for an extended period, disconnect the power and store components in a dry, cool place.
Troubleshooting
| Problem | Possible Cause | Solution |
|---|---|---|
| Display not turning on. | No power supply or faulty adapter. | Check power connection and adapter. Ensure the outlet is functional. |
| Call button not responding. | Button out of range or low battery (if applicable). | Ensure button is within operational range of the display. Check and replace button battery if necessary (refer to full manual for battery type). |
| No voice announcement. | Volume too low or voice mode disabled. | Adjust volume using the remote control. Check voice mode settings on the display. |
| Number not resetting. | Incorrect reset procedure. | Press display's up/down keys simultaneously OR press remote's "RESET/ENT" button three times. |
Specifications
- Model Number: EN-B31+O1-N 1+15
- Ticket Number Range: 000-999
- Counter Number Range: 00-99 and A-Z
- Call Buttons: 15 Waterproof "NEXT" Call Buttons
- Display Type: LED Broadcast Display
- Features: Power-off Memory, Adjustable Start/End Numbers, Quick Reset, Adjustable Voice Mode/Volume, 3.5MM External Speaker Jack
- Package Dimensions: 14.96 x 10.24 x 2.36 inches
- Item Weight: 3.3 pounds
- Manufacturer: Quanzhou Koqi Electronic Co., Ltd

Figure 6: Key functional specifications of the system, including number ranges and external connectivity.
Warranty
For detailed warranty information, please refer to the warranty card included with your product packaging or visit the official KOQICALL website. Keep your purchase receipt as proof of purchase for any warranty claims.
Support
If you encounter any issues or have questions not covered in this manual, please contact KOQICALL customer support. Contact details can typically be found on the product packaging, the official KOQICALL website, or through your retailer.


