Introduction
The Vividia VS-2329 is a portable sewer pipe inspection camera system designed for detailed visual inspection of pipes, drains, ducts, and other hard-to-reach areas. This manual provides essential information for the safe and effective operation, maintenance, and troubleshooting of your device.
Package Contents
Please verify that all items listed below are included in your package:
- VS-2329 Pipe Inspection Camera System
- Charger
- User Manual (this document)
- Industrial Carrying Case

Image: The durable industrial carrying case for the VS-2329 system, designed for transport and protection.
Product Overview
Familiarize yourself with the main components of the Vividia VS-2329 system.
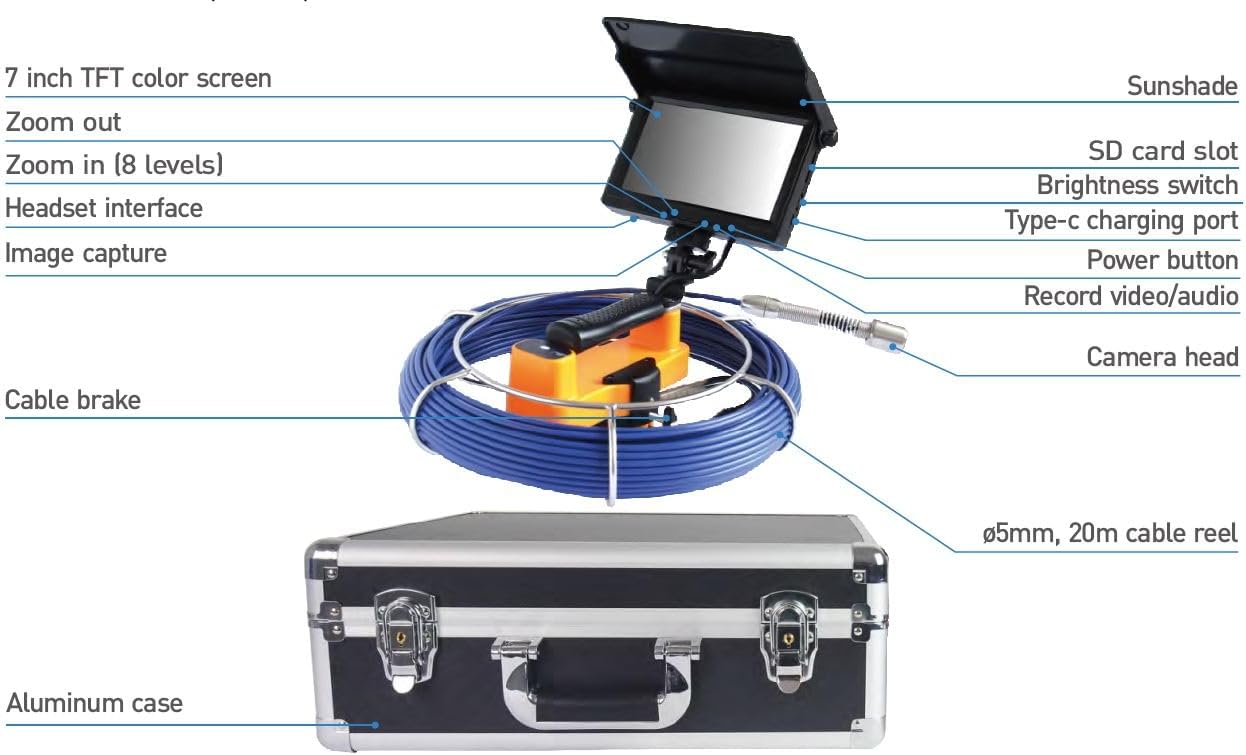
Image: Labeled diagram showing the 7-inch TFT color screen, sunshade, SD card slot, brightness switch, headset interface, Type-C charging port, image capture button, power button, record video/audio button, camera head, cable brake, 5mm 20m cable reel, and aluminum case.
Key Components:
- 7-inch TFT Color Monitor: Provides a clear display of the inspection area.
- Camera Head: 23mm diameter, waterproof (IP68), with 12 adjustable LED lights.
- Push-Rod Cable: 30m (98 ft) long glass fiber cable for extended reach.
- Control Unit: Integrated with the monitor, featuring controls for recording, zoom, and LED brightness.
- Rechargeable Battery: 6000mAh for portable operation.
- Industrial Carrying Case: For protection and transport.
Setup
1. Charging the Battery
Before first use, fully charge the integrated 6000mAh lithium battery. Connect the provided charger to the Type-C charging port on the monitor unit and to a power outlet. The charging indicator will show the charging status. A full charge provides approximately 4 hours of operation.
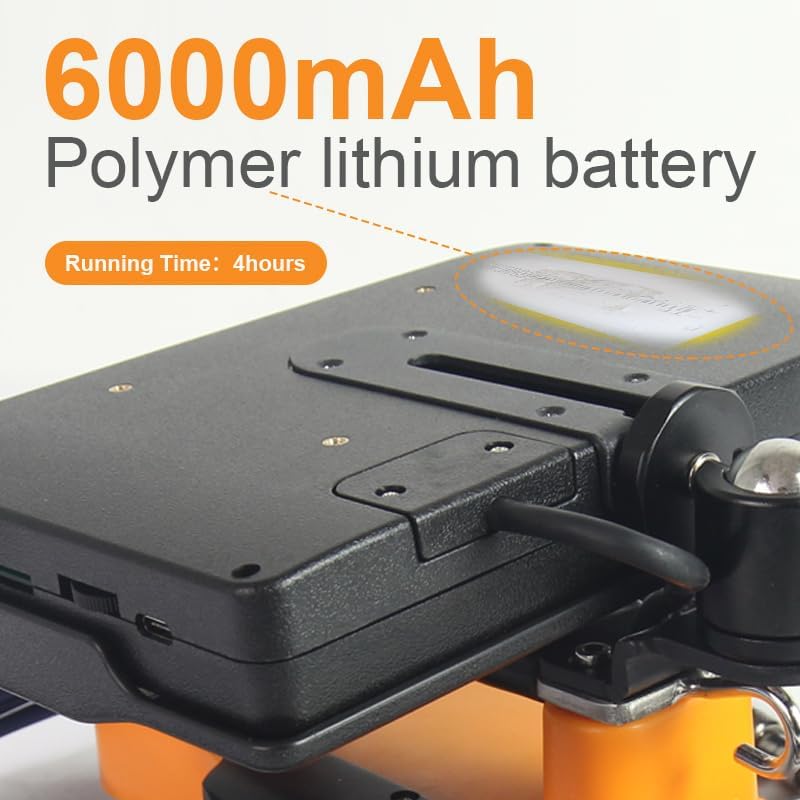
Image: Close-up of the 6000mAh polymer lithium battery, indicating a running time of 4 hours.
2. Inserting the TF Card
Locate the SD card slot on the monitor unit. Insert the included 8GB TF card (or another compatible MicroSD card) into the slot until it clicks into place. This card is necessary for recording photos and videos.
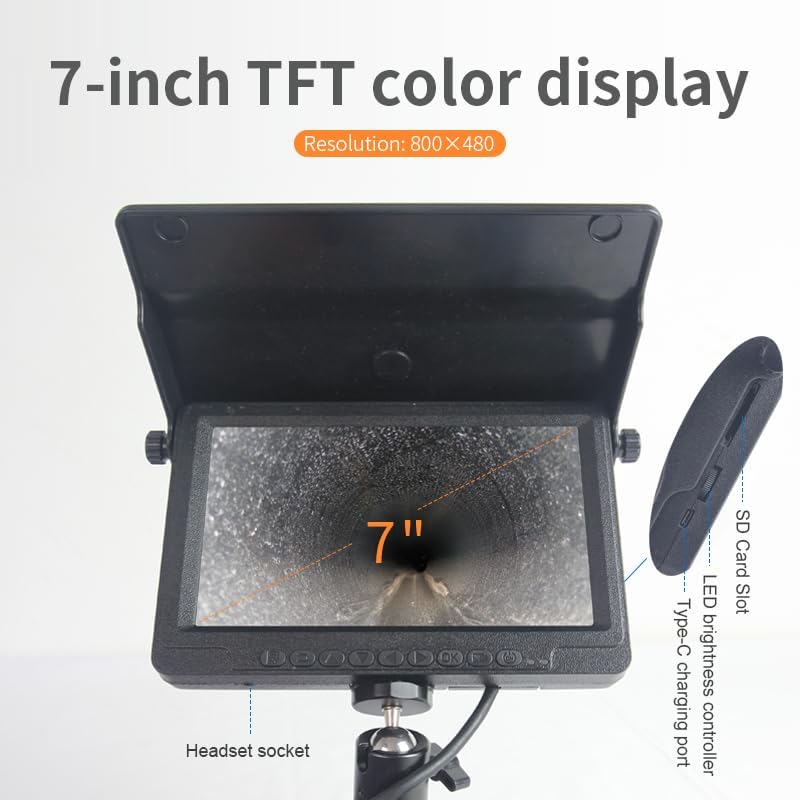
Image: The 7-inch TFT color display, highlighting the SD card slot, LED brightness controller, and Type-C charging port.
3. Connecting the Camera Head and Cable
Ensure the camera head is securely connected to the push-rod cable. The cable reel should be placed on a stable surface. The camera head is designed to be waterproof (IP68 rated) for use in wet environments.

Image: The 23mm camera head with its flexible spring, designed for navigating bends in pipes.

Image: The cable reel holding the blue 30-meter push-rod cable, with a handle for easy deployment.
Operating Instructions
1. Powering On/Off
Press and hold the Power button on the monitor unit to turn the system on or off. The 7-inch TFT color screen will display the live feed from the camera.

Image: The front panel of the 7-inch monitor, showing the array of control buttons below the screen.
2. Adjusting LED Brightness
Use the LED brightness controller (often a rotary knob or dedicated buttons) on the monitor unit to adjust the intensity of the 12 LED lights on the camera head. This helps illuminate dark inspection areas.
3. Digital Zoom
The monitor features an 8-level digital zoom function. Use the designated zoom buttons (Zoom In / Zoom Out) to magnify or reduce the view on the screen for closer inspection of details.
4. Recording Photos and Videos
- To capture a photo: Press the "Image Capture" button. Photos are saved as JPEG files to the TF card.
- To record a video: Press the "Record Video/Audio" button to start recording. Press it again to stop. Videos are saved as AVI files to the TF card.
5. Deploying the Camera
Carefully feed the camera head and push-rod cable into the pipe or inspection area. Use the cable brake to control the cable's deployment and retraction. Monitor the screen for the live feed. The camera head's flexible spring helps it navigate bends.

Image: Close-up of the deep waterproof lens of the camera head, showing its 80-degree viewing angle.
Maintenance
Cleaning
- After each use, especially in dirty environments, clean the camera head and cable with a damp cloth. Avoid harsh chemicals.
- Ensure the camera lens is clean for clear images.
- Wipe down the monitor and control unit with a soft, dry cloth.
Storage
- Store the system in its industrial carrying case to protect it from dust, moisture, and physical damage.
- Ensure the cable is neatly coiled on the reel before storage.
- Store in a cool, dry place away from direct sunlight.
Battery Care
- To prolong battery life, avoid fully discharging the battery frequently.
- If storing for extended periods, charge the battery to approximately 50-70% and recharge every few months.
Troubleshooting
| Problem | Possible Cause | Solution |
|---|---|---|
| No image on screen |
|
|
| Poor image quality |
|
|
| Cannot record photos/videos |
|
|
| Short battery life |
|
|
Specifications
| Feature | Detail |
|---|---|
| Model Name | VS-2329 |
| Brand | VIVIDIA |
| Camera Head Diameter | 23mm / 0.9in |
| Waterproof Rating | IP68 |
| LED Lights | 12 adjustable LEDs |
| Video Capture Resolution | 720x576 |
| Effective Still Resolution | 0.41 MP |
| Push-Rod Cable Length | 30m / 98ft |
| Screen Size | 7 Inches TFT Color |
| Screen Resolution | 800x480 |
| Digital Zoom | 8-level |
| Connectivity Technology | MicroSD Card, USB-C |
| File Format (Video/Photo) | AVI / JPEG |
| Battery Capacity | 6000mAh |
| Battery Runtime | Up to 4 hours |
| Manufacturer | Vividia Technologies |
Warranty Information
The Vividia VS-2329 Portable Sewer Pipe Inspection Camera comes with a 1-year manufacturer's warranty. This warranty covers defects in materials and workmanship under normal use. Please retain your proof of purchase for warranty claims. For specific terms and conditions, please refer to the warranty card included with your product or contact customer support.
Customer Support
If you encounter any issues or have questions regarding your Vividia VS-2329 system that are not addressed in this manual, please contact Vividia customer support. You can typically find contact information on the manufacturer's website or on the product packaging.
When contacting support, please have your product model number (VS-2329) and purchase details ready.