1. Setup
Follow these steps to properly set up your Antarctic Star 10L Compact Mini Fridge.
1.1 Unboxing and Initial Placement
Carefully remove the mini fridge from its packaging. Ensure all packing materials are discarded responsibly. Place the unit on a flat, stable surface. For optimal performance, ensure there is at least 3 inches (7.6 cm) of clearance on all sides of the refrigerator to allow for proper ventilation.

Image: The Antarctic Star 10L Compact Mini Fridge, illustrating its compact size and dimensions for proper placement.
1.2 Power Connection
The mini fridge supports both AC (Alternating Current) and DC (Direct Current) power. Use the appropriate power cord for your intended use.
- AC Power (100-120V): For household use, connect the AC power cord to the AC port on the back of the unit and then to a standard wall outlet.
- DC Power (12V): For car use, connect the DC power cord to the DC port on the back of the unit and then to your vehicle's 12V cigarette lighter socket.

Image: Rear view of the mini fridge, highlighting the AC and DC power input ports and the power switch.
1.3 Shelf Installation
The mini fridge includes removable shelves to customize storage space. Gently slide the shelves into the desired grooves inside the unit until they click into place. To remove, simply slide them out.

Image: Interior of the mini fridge demonstrating the flexibility of removable shelves for various storage needs.
Video: An overview of the Antarctic Star Compact Mini Fridge, including its design and internal features.
2. Operating Instructions
This section details how to operate your mini fridge for optimal cooling and storage.
2.1 Powering On and Cooling
After connecting the appropriate power source, locate the ON/OFF/COOL switch on the back of the unit. Slide the switch to the "COOL" position to activate the cooling function. The thermoelectric technology will begin to cool the interior.
- The unit can cool up to 32°F (18°C) below ambient temperature.
- Expect cooling from 86°F (30°C) to 64°F (18°C) within 1 hour, to 50°F (10°C) within 2 hours, and to 40°F (4°C) within 3 hours.

Image: The interior of the mini fridge, showcasing its capacity for various beverages and snacks.
2.2 Door Latch and Portability
The mini fridge features a secure door latch to prevent accidental opening. To open, press the latch inward. The integrated carrying handle on top allows for easy portability, making it suitable for various locations like bedrooms, offices, dorms, or travel.
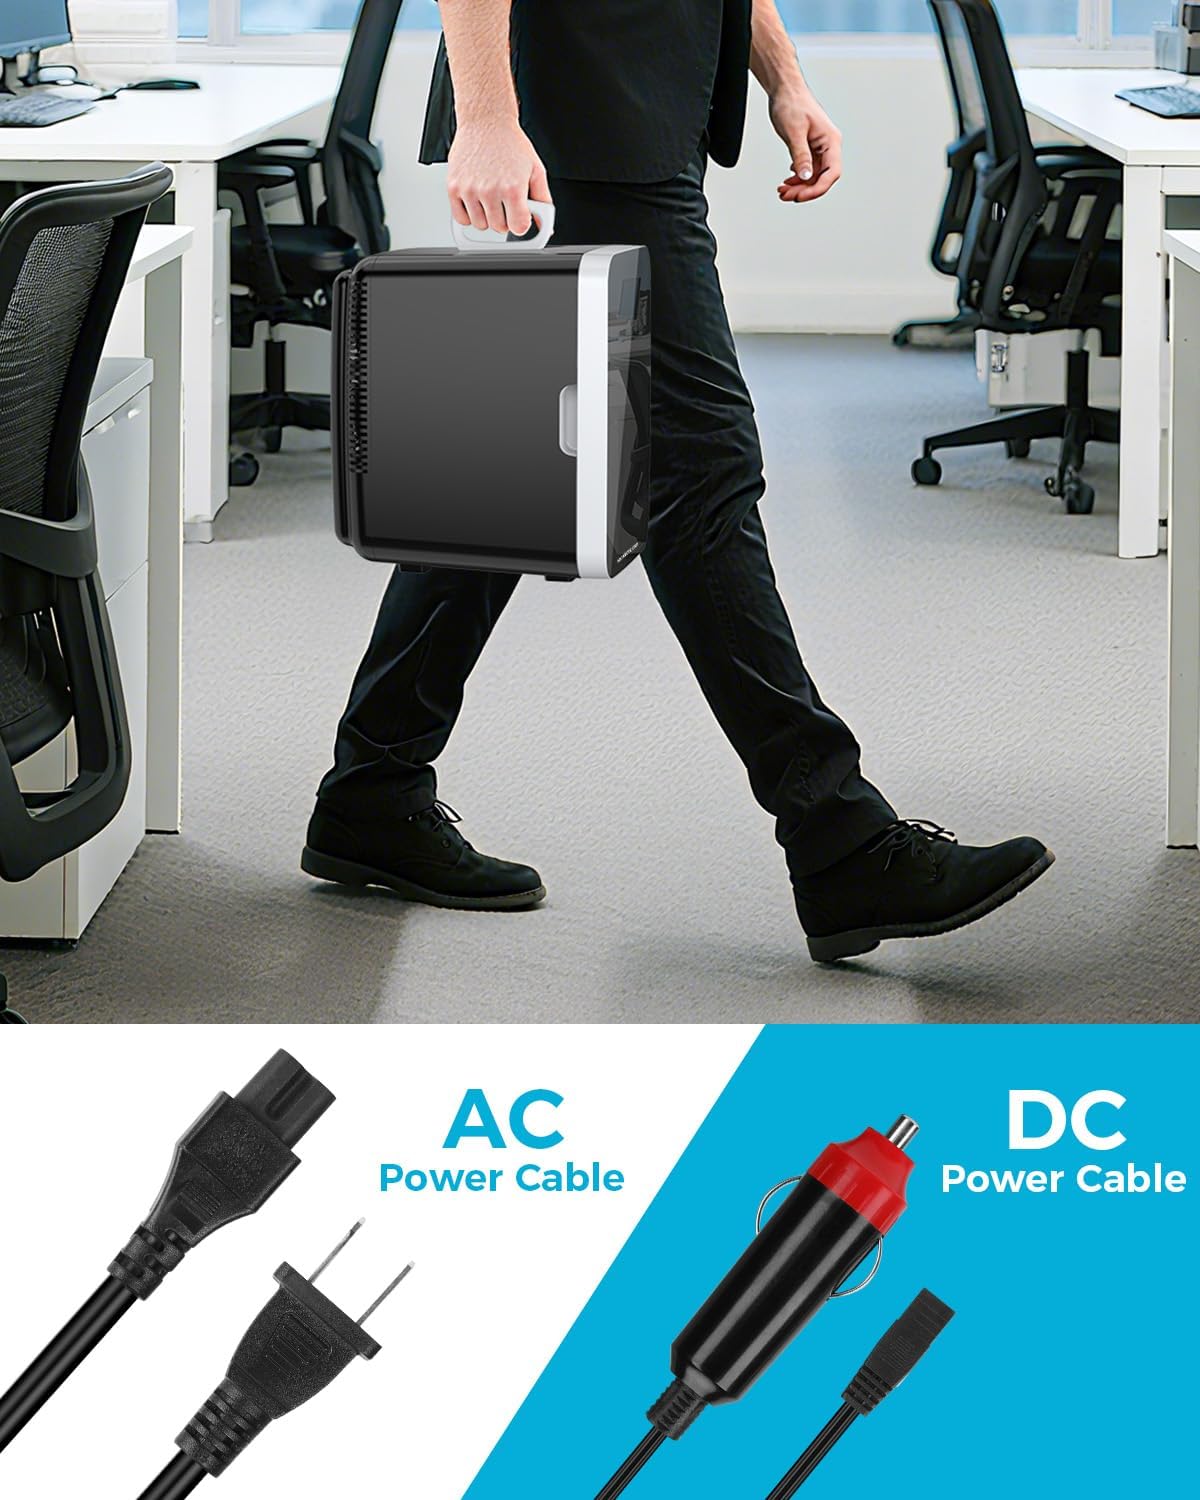
Image: A person carrying the mini fridge, demonstrating its portability and the convenience of the top handle.
Video: Demonstrates the versatility of the mini fridge for use in various settings like offices, dorms, or bathrooms.
2.3 Quiet Operation
The upgraded cooling fan operates at a low noise level of 38 dB, ensuring minimal disruption in quiet environments such as bedrooms, offices, or nurseries.

Image: The mini fridge positioned quietly next to a bed, emphasizing its low noise level suitable for sleeping environments.
3. Maintenance
Regular maintenance ensures the longevity and efficient operation of your mini fridge.
3.1 Cleaning
Before cleaning, always unplug the unit from the power source. Wipe the interior and exterior surfaces with a soft cloth dampened with mild soap and water. Avoid abrasive cleaners or harsh chemicals. Ensure the unit is completely dry before plugging it back in.
3.2 Defrosting
This mini fridge features manual defrost. If ice buildup occurs on the interior cooling plate, unplug the unit and allow the ice to melt naturally. Place a towel or a small container at the bottom to catch any melted water. The unit has a small drainage catch at the bottom to manage condensation.
4. Troubleshooting
If you encounter any issues with your mini fridge, refer to the following common problems and solutions:
- Unit is not cooling:
- Ensure the power cord is securely plugged into both the unit and the power outlet.
- Verify the power switch is set to "COOL".
- Check if the power outlet is functional.
- Excessive noise:
- Ensure the unit is placed on a stable, level surface.
- Check for any obstructions around the fan vents on the back of the unit.
- Excessive condensation/water inside:
- This is normal for thermoelectric cooling units. Perform manual defrost as described in the Maintenance section.
- Ensure the door is closed properly and the seal is intact.
For further assistance, please refer to the detailed troubleshooting guide in the full user manual or contact customer support.
5. Specifications
| Feature | Detail |
|---|---|
| Brand Name | Antarctic Star |
| Model Info | LY2010-AS |
| Item Weight | 8.38 pounds |
| Product Dimensions | 12.8"D x 9.8"W x 13.9"H |
| Capacity | 10 Liters |
| Annual Energy Consumption | 100 Kilowatt Hours |
| Installation Type | Freestanding |
| Special Features | Compact, Energy Efficient, Lightweight, Low Noise, Portable |
| Color | Black |
| Voltage | 110 Volts |
| Defrost System | Manual |
| Shelves | 2 |
| Certification | ETL |
6. Warranty
This product is covered by the manufacturer's standard warranty. Please refer to the warranty card included in your product packaging for specific terms and conditions, or visit the Antarctic Star official website for more information.
7. Customer Support
For any questions, technical assistance, or service requests, please contact Antarctic Star customer support. Contact information can typically be found in your product manual or on the official Antarctic Star website.
You can also visit the Antarctic Star Store on Amazon for additional product information and support resources.


