1. Introduction
This manual provides essential instructions for the safe installation, operation, and maintenance of your AOOCHU HBP1500II Dual Voltage Pool Pump. Please read this manual thoroughly before installation and use, and retain it for future reference. Proper adherence to these instructions will ensure optimal performance and longevity of your pump.
1.1 Safety Information
Always prioritize safety. Incorrect installation or operation can lead to serious injury or property damage. Observe all local codes and ordinances. Disconnect power before performing any service or maintenance.
- Electrical Safety: Ensure the power supply matches the pump's voltage requirements. All electrical wiring should be performed by a qualified electrician and comply with local electrical codes.
- Water Safety: Always fill the pump with water before initial use to prevent motor overheating and damage.
- Placement: Install the pump in a well-ventilated area, protected from direct sunlight and extreme weather conditions.
2. Specifications
Detailed technical specifications for the AOOCHU HBP1500II Pool Pump:
| Feature | Specification |
|---|---|
| Model | HBP1500II (GH1832) |
| Color | Black |
| Material | Iron, PP |
| Voltage | 115/230V, 60Hz |
| Power | 1500W |
| Current | 12.3/6.1A |
| Horsepower | 2HP |
| Motor Type | Pure Copper Motor |
| Maximum Flow | 430L/min (6815GPH) |
| Maximum Lift | 17m/55ft |
| Rotation Speed | 3450rpm |
| CAP | 124-148µF |
| Noise Level | Approximately 70dB |
| Suitable Temperature | Max 50℃/122℉ |
| Net Weight | 12.5kg/27lbs |
| Gross Weight | 14kg/30lbs |
| Package Size | 62 x 24.5 x 35 cm / 24 x 9.6 x 13 inches |

Figure 2.1: Side view of the pump with approximate dimensions (57cm/22.4in total length, 31.5cm/12.4in motor length, 24.7cm/9.7in basket length).

Figure 2.2: Front view of the pump with approximate dimensions (29.2cm/11.5in height, 25.1cm/9.9in width at basket, 13cm/5.1in width at motor base).
3. Package Contents
Verify that all items are present in the package:
- 1x Dual Voltage Pool Pump (HBP1500II)
- 4x Connectors
- 1x English Manual (this document)
- Other Accessories for Assembly

Figure 3.1: Overview of the package contents, showing the main pump unit, various connectors, and the instruction manual.
4. Setup and Installation
Follow these steps for proper installation of your pool pump:
- Placement: Position the pump on a solid, level surface near the pool, ensuring it is protected from rain and direct sunlight. Allow adequate space for ventilation and maintenance.
- Electrical Connection:
WARNING: All electrical work must be performed by a qualified electrician and comply with all local and national electrical codes.
The pump supports dual voltage (115V/230V). Locate the voltage regulating switch on the motor housing and set it to match your power supply. Ensure the pump is unplugged before adjusting this switch. - Plumbing Connection: Connect the pump to your pool's filtration system using appropriate plumbing and the provided connectors. Ensure all connections are tight and leak-free.
- Priming the Pump: Before starting the pump for the first time, or after any maintenance that drains the pump, it is crucial to fill the pump housing with water. Open the transparent cover (see Figure 5.1) and fill the strainer basket area completely with water. Close the cover securely. This prevents the motor from running dry and overheating.

Figure 4.1: The AOOCHU HBP1500II pool pump, showing the main unit, power cord, and ground wire connection point.

Figure 4.2: Detail of the power plug, which should be connected to a properly grounded outlet.
5. Operating Instructions
Once the pump is properly installed and primed:
- Power On: Plug the pump into a suitable electrical outlet. The pump should start automatically.
- Monitor Performance: Observe the water flow and listen for any unusual noises. The pump is designed for efficient filtration, indicated by strong water circulation.
- Check Strainer Basket: Periodically check the transparent cover of the strainer basket (Figure 5.1) to monitor debris accumulation. A full basket will reduce pump efficiency.
- Power Off: To stop the pump, simply unplug it from the power source.
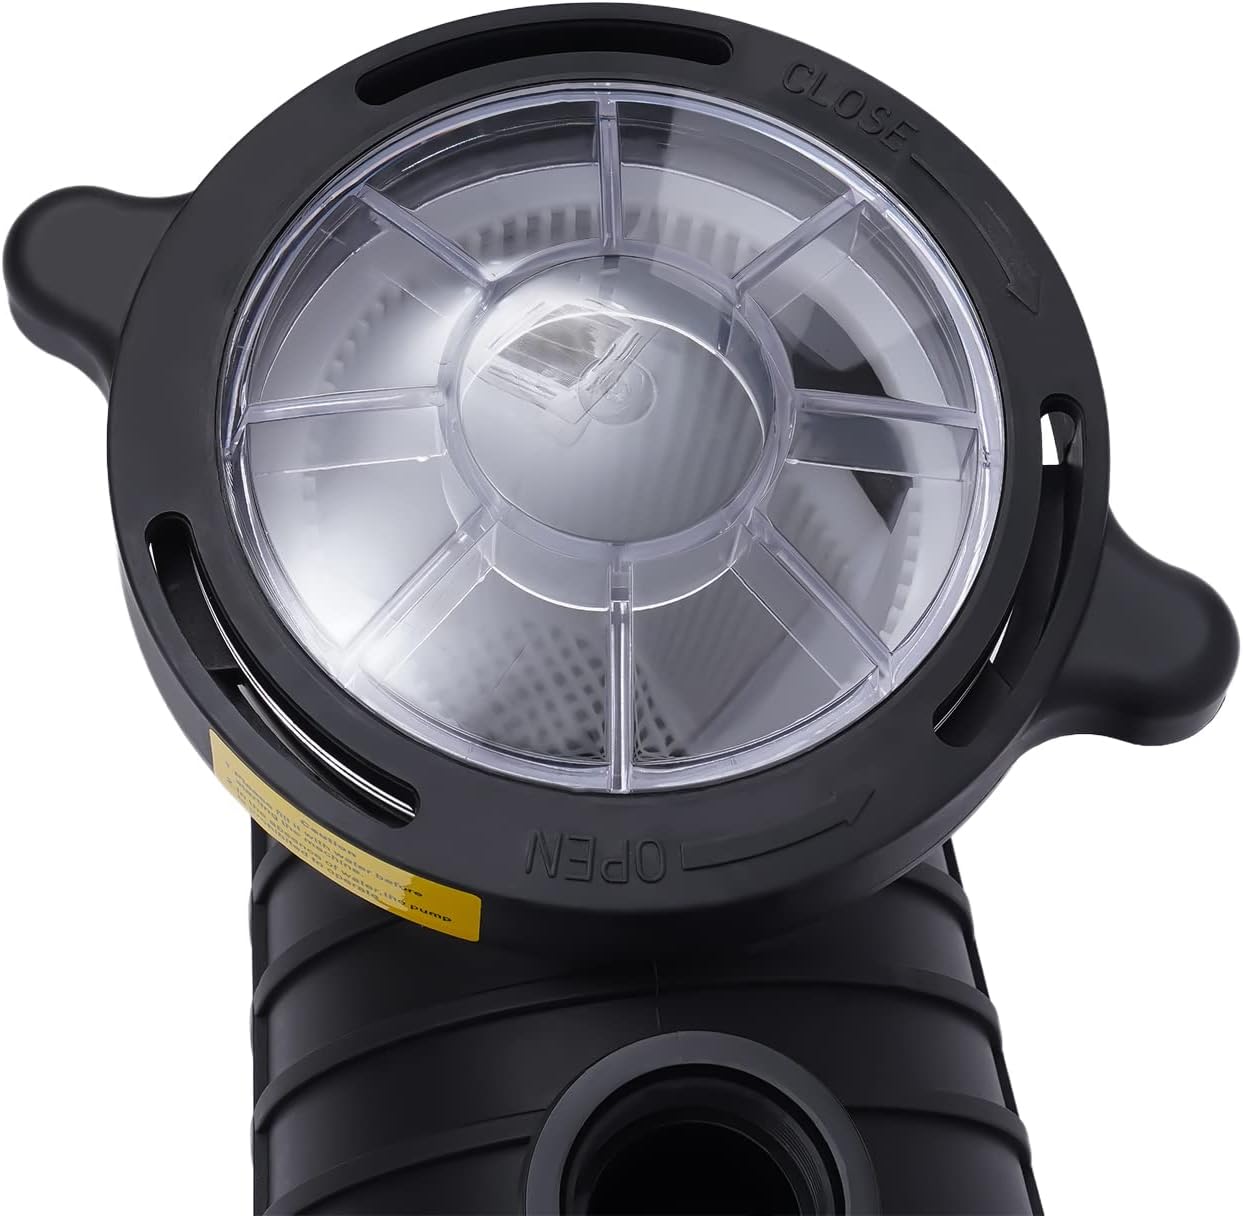
Figure 5.1: The transparent cover of the strainer basket, allowing visual inspection of debris levels. It can be sealed by rotation using the three clips.

Figure 5.2: Visual representation of the pump's operation, demonstrating water intake, filtration, and return to the pool.
6. Maintenance
Regular maintenance ensures efficient operation and extends the life of your pump.
- Cleaning the Strainer Basket:
a. Disconnect power to the pump.
b. Rotate the transparent cover counter-clockwise to unclip and remove it.
c. Lift out the strainer basket.
d. Empty any debris and rinse the basket thoroughly with water.
e. Inspect the basket for damage. Replace if necessary.
f. Reinsert the clean basket, ensuring it seats properly.
g. Replace the transparent cover and rotate clockwise to secure the clips. Ensure a tight seal to prevent leaks.
h. Re-prime the pump if necessary (refer to Section 4. Setup and Installation). - Winterization (Water Drainage): For areas experiencing freezing temperatures, it is essential to drain the pump to prevent damage. Locate the drain plug at the bottom of the pump and open it to completely drain all water. This prevents water accumulation that could freeze and crack the pump housing.
- General Cleaning: Keep the exterior of the pump clean and free of dirt and debris. Do not use harsh chemicals or abrasive cleaners.

Figure 6.1: The removable strainer basket, designed to collect debris and ensure trouble-free operation. Regular cleaning is recommended.
7. Troubleshooting
This section addresses common issues you might encounter with your pool pump. For problems not listed here, please contact customer support.
| Problem | Possible Cause | Solution |
|---|---|---|
| Pump does not start | No power; incorrect voltage setting; motor overheating protection activated. | Check power connection and circuit breaker. Verify voltage switch setting (115V/230V). Allow motor to cool down if overheated. |
| Low water flow or no prime | Strainer basket clogged; air leak in suction line; pump not primed; low water level in pool. | Clean strainer basket. Check all plumbing connections for leaks. Ensure pump is fully primed with water. Verify adequate pool water level. |
| Unusual noise from pump | Air in system; debris in impeller; worn bearings. | Check for air leaks in suction line. Clean strainer basket and inspect impeller for debris (power off first). If noise persists, contact support. |
| Water leakage | Loose connections; damaged O-rings or seals; cracked housing. | Tighten all plumbing connections. Inspect and replace any damaged O-rings or seals. If housing is cracked, pump may need replacement. |
8. Warranty and Support
For warranty information, please refer to the documentation provided at the time of purchase. Typically, warranty details are included with your sales receipt or product registration.
If you require technical assistance, have questions about installation, operation, or maintenance, or need to report a defect, please contact AOOCHU customer support through your retailer or the official AOOCHU website. When contacting support, please have your model number (HBP1500II or GH1832) and purchase information readily available.