1. Introduction
This manual provides detailed instructions for the operation and maintenance of your Clariviews VHS to DVD Recorder. This device is designed to convert and record video and audio from various sources, including VHS, VCR, DVD, camcorders, USB devices, SD cards, and smartphones, directly to DVD, USB, or SD card formats. Please read this manual thoroughly before using the product to ensure proper function and to maximize its lifespan.
2. Safety Information
- Do not expose the device to rain, moisture, or extreme temperatures.
- Avoid placing the device near heat sources or in direct sunlight.
- Use only the provided power adapter.
- Do not attempt to open or repair the device yourself. Refer all servicing to qualified personnel.
- Ensure proper ventilation around the device during operation.
- Keep out of reach of children.
3. Package Contents
Please check that all items listed below are included in your package:
- Clariviews DVD Recorder Unit
- AC Power Adapter
- AV Cable (RCA)
- 10 Blank DVD-Rs
- Quick Start Guide
- User Manual (this document)
4. Product Overview
Familiarize yourself with the components and ports of your Clariviews VHS to DVD Recorder.
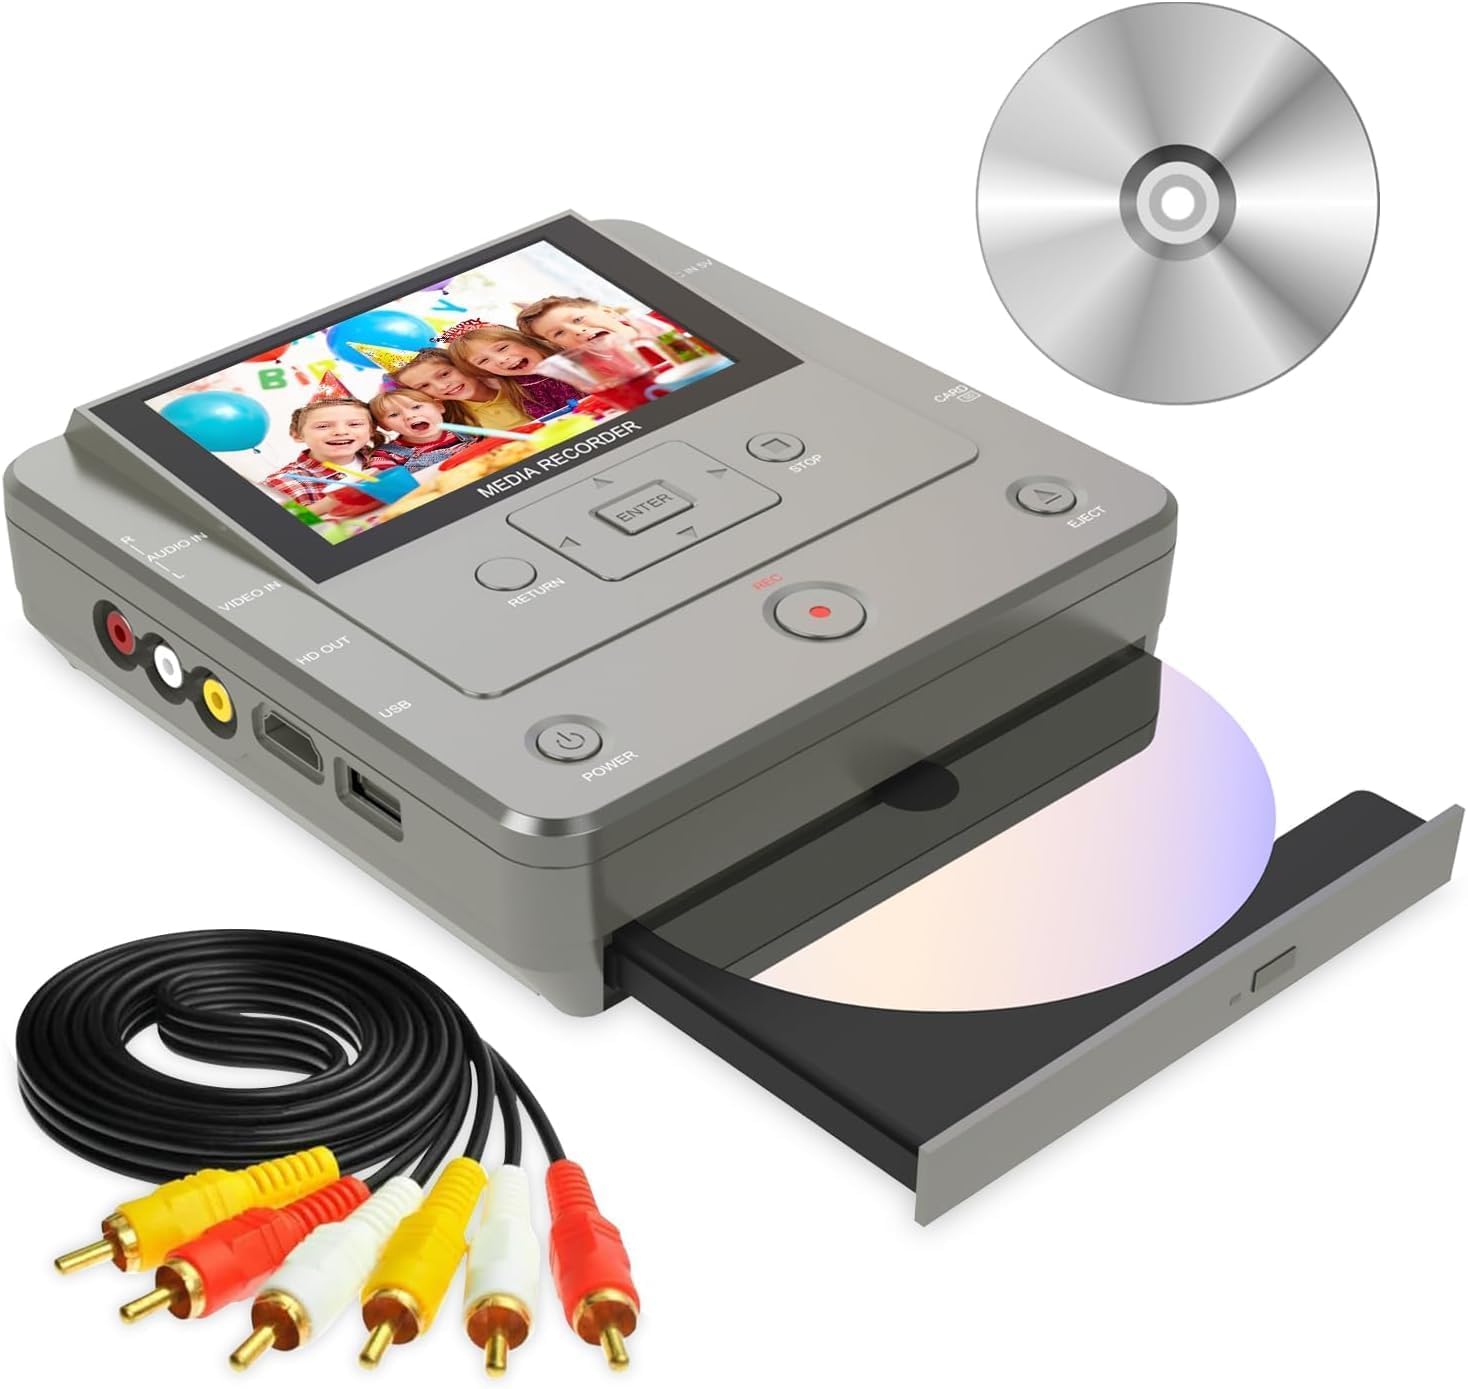
Figure 4.1: Clariviews VHS to DVD Recorder with its accessories. The image shows the device from an angled perspective, highlighting the 4.3-inch LCD screen displaying a family photo, control buttons (ENTER, RETURN, STOP, REC, EJECT, POWER), input/output ports (AUDIO IN, VIDEO IN, HD OUT, USB), and the DVD tray with a disc partially inserted. An RCA cable bundle and a separate blank DVD are also visible.
4.1 Front Panel and Controls
- LCD Screen: 4.3-inch display for previewing video and navigating menus.
- ENTER Button: Confirms selections.
- RETURN Button: Navigates back in menus.
- STOP Button: Stops recording or playback.
- REC Button: Initiates recording.
- EJECT Button: Opens/closes the DVD tray.
- POWER Button: Turns the device on/off.
4.2 Side/Rear Panel Ports
- AUDIO IN (R/L): Red and white RCA jacks for audio input.
- VIDEO IN: Yellow RCA jack for video input.
- HD OUT: HDMI port for connecting to an external display (TV, monitor).
- USB Port: For connecting USB storage devices.
- SD Card Slot: For inserting SD memory cards.
- DC IN: Power input port.
5. Setup
5.1 Initial Power-Up
- Connect the AC Power Adapter to the DC IN port on the device and plug the other end into a power outlet.
- Press the POWER button to turn on the device. The LCD screen will illuminate.
- Follow any on-screen prompts for initial language or date/time settings.
5.2 Connecting to a Video Source (e.g., VCR, Camcorder)
- Ensure both the Clariviews Recorder and your video source (e.g., VCR, camcorder) are powered off.
- Connect the yellow RCA plug of the AV cable to the VIDEO OUT port of your video source and to the VIDEO IN port on the Clariviews Recorder.
- Connect the red and white RCA plugs of the AV cable to the AUDIO OUT (R/L) ports of your video source and to the AUDIO IN (R/L) ports on the Clariviews Recorder.
- Power on both devices.
5.3 Connecting to an External Display (Optional)
To view the content on a larger screen, connect an HDMI cable from the HD OUT port on the Clariviews Recorder to an HDMI input on your TV or monitor.
6. Operating Instructions
6.1 Recording from External Sources (VHS, Camcorder, TV) to DVD/USB/SD
- Ensure your external source is connected as described in Section 5.2.
- Insert a blank DVD-R/RW into the DVD tray or a USB drive/SD card into the respective slot.
- On the Clariviews Recorder, navigate to the "Record" menu using the directional buttons and ENTER.
- Select the input source (e.g., "AV In").
- Start playback on your external source (e.g., VCR). The video will appear on the Clariviews LCD screen.
- Press the REC button on the Clariviews Recorder to begin recording.
- Press the STOP button to end the recording. The recorded content will be saved to the selected media.
- Note: The recording duration will match the playback duration of the source video. Ensure sufficient space on your recording media.
6.2 Copying Files Between USB, SD Card, and DVD
- Insert the source media (e.g., USB drive) and the destination media (e.g., blank DVD or SD card).
- Navigate to the "Copy" menu.
- Select the source device and the files you wish to copy.
- Select the destination device.
- Confirm the copy operation.
6.3 Using the WiFi APP for Smartphone Transfer
- Download the "Friendly Memories" app from your smartphone's app store (iOS or Android).
- On the Clariviews Recorder, navigate to the "WiFi" or "App Connect" menu to enable WiFi.
- Connect your smartphone to the Clariviews Recorder's WiFi network (SSID and password will be displayed on the recorder's screen).
- Open the "Friendly Memories" app on your smartphone.
- Select the photos or videos you wish to transfer.
- Choose the destination on the Clariviews Recorder (DVD, USB, or SD card) and initiate the transfer.
7. Maintenance
- Cleaning: Use a soft, dry cloth to clean the exterior of the device. Do not use liquid cleaners or abrasive materials.
- Disc Care: Handle DVDs by the edges. Store them in their cases to prevent scratches and dust accumulation.
- Storage: When not in use for extended periods, store the device in a cool, dry place away from direct sunlight.
8. Troubleshooting
| Problem | Possible Cause | Solution |
|---|---|---|
| Device does not power on. | Power adapter not connected or faulty. | Ensure power adapter is securely connected and plugged into a working outlet. Try a different outlet. |
| No video/audio during recording. | Incorrect AV cable connection or source not playing. | Verify AV cables are correctly connected to VIDEO IN and AUDIO IN. Ensure the external source is playing content. |
| Recording stops unexpectedly. | Insufficient space on recording media (DVD, USB, SD). | Use a blank DVD or media with sufficient storage capacity. |
| WiFi connection issues. | Incorrect WiFi password or app not connected. | Double-check the WiFi password. Ensure the "Friendly Memories" app is open and connected to the device's WiFi network. |
| DVD disc not recognized. | Disc is dirty, scratched, or incompatible format. | Clean the disc. Try a different disc. Ensure it is a supported format (DVD+RW/R -RW/R, DVD+R DL, CD+RW/R -RW/R). |
9. Specifications
| Brand | Clariviews |
| Model | B0FNWPZFVG |
| Media Type | VHS to DVD Recorder |
| Supported Recording Media | DVD+RW/R -RW/R, DVD+R DL, CD+RW/R -RW/R, USB, SD Card |
| Input Sources | VHS, VCR, DVD, CD, Camcorder, SD Card, USB, TV, Smartphone (via WiFi App) |
| Connectivity Technology | Wi-Fi, USB, RCA |
| Connector Type | RCA, USB, SD Card, HDMI |
| Resolution (HD Output) | Up to 1920 x 1080 pixels (1080p) |
| Audio Output Mode | Stereo |
| Supported Audio Format | Dolby Digital, DTS, PCM |
| Item Weight | 1.3 Kilograms (2.86 pounds) |
| Package Dimensions | 10.2 x 7.2 x 2.87 inches |
10. Warranty and Support
10.1 Warranty Information
Clariviews products are covered by a limited warranty from the date of purchase. Please refer to the warranty card included in your package for specific terms and conditions. This warranty typically covers manufacturing defects but does not cover damage caused by misuse, accidents, unauthorized modifications, or normal wear and tear.
10.2 Customer Support
If you encounter any issues or have questions regarding your Clariviews VHS to DVD Recorder that are not addressed in this manual, please contact our customer support team. For the most up-to-date contact information, please visit the official Clariviews website or refer to your product packaging.
When contacting support, please have your product model number (B0FNWPZFVG) and purchase date ready.