Introduction
Thank you for choosing the SIMPLUS 3-in-1 Corded Stick Vacuum Cleaner. This manual provides essential information for the safe and efficient operation, maintenance, and troubleshooting of your new appliance. Please read it thoroughly before first use and keep it for future reference.
Product Components
Your SIMPLUS 3-in-1 Corded Stick Vacuum Cleaner comes with several components designed for versatile cleaning.

Figure 1: Product Components and Dimensions. This image illustrates the main body, two PVC connecting hoses, a floor brush, a flat brush, and a filter element. Key dimensions are also provided.
- Main Body: Contains the motor, dust cup, and controls.
- PVC Connecting Hoses (x2): Used to extend the reach of the vacuum.
- Floor Brush: Primary attachment for floor cleaning.
- Flat Brush (Crevice Tool): For narrow spaces and corners.
- Filter Element: Part of the 3-layer filtration system.
Setup and Assembly
Follow these steps to assemble your vacuum cleaner for first use.
- Attach Extension Tube: Connect the PVC connecting hoses to the main body and the floor brush. Ensure they click securely into place.
- Attach Floor Brush: Insert the floor brush into the end of the assembled extension tube.
- Insert Filter: Ensure the 3-layer filter system (HEPA F8 filter, cyclone filter, microporous sponge filter) is correctly installed inside the dust cup.
- Power Connection: Plug the power cord into a suitable electrical outlet.
Video: RoneAir W800 Getting Started Guide. This video demonstrates the assembly process, including connecting the extension tubes and attachments, and shows how to install and remove the filter for cleaning.
Operating Instructions
Your SIMPLUS vacuum offers versatile cleaning modes for different needs.
Using as a Stick Vacuum
For general floor cleaning, use the vacuum in its stick configuration with the floor brush attached.
- Power On: Press the power button located on the main body.
- Maneuvering: The brush head rotates 30° left/right and 150° forward/backward, allowing easy access under furniture and around obstacles.
- Recommended Surfaces: Ideal for hardwood floors, tiles, and low-pile carpets.

Figure 2: Flexible Brush Head. The brush head's swivel steering allows for easy cleaning under sofas, beds, and other low-clearance areas.
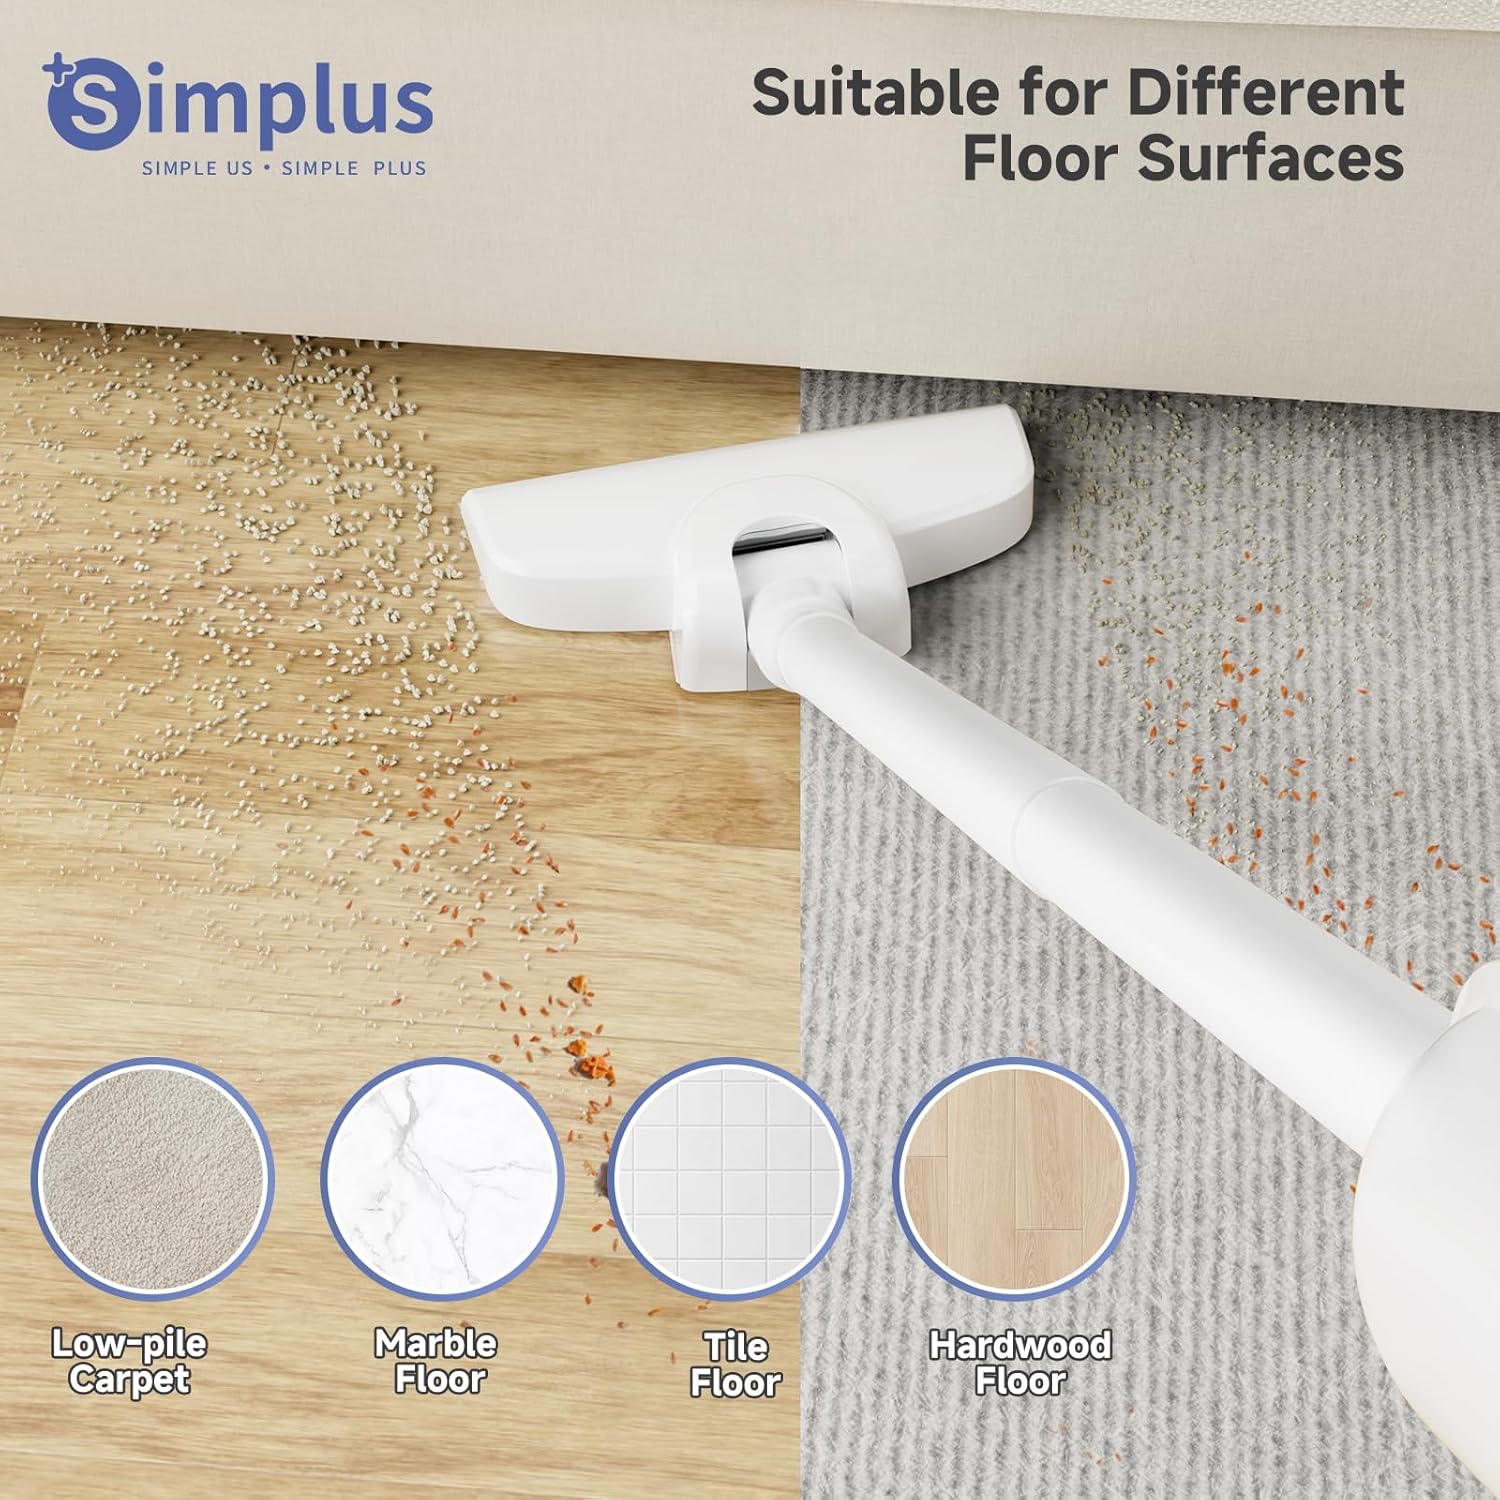
Figure 3: Suitable for Different Floor Surfaces. The vacuum is effective on various hard floor types and low-pile carpets.
Using as a Handheld Vacuum
Detach the extension tubes and floor brush to use the main body as a handheld vacuum for targeted cleaning.
- Attach Flat Brush: Connect the flat brush (crevice tool) directly to the main body for cleaning sofa gaps, car interiors, and tight corners.
- Power On: Press the power button.
Video: Vacuum Cleaners for Home (Preview). This short video demonstrates the handheld vacuum in action, quickly cleaning a sofa surface.
Maintenance
Regular maintenance ensures optimal performance and extends the life of your vacuum cleaner.
Emptying the Dust Cup
Empty the 0.35L dust cup regularly, especially after each use, to maintain strong suction.
- Detach Dust Cup: Press the release button on the main body to detach the dust cup.
- Empty Contents: Hold the dust cup over a waste bin and empty the collected debris.

Figure 4: Effortless Dust Cup Emptying. The dust cup is designed for easy removal and emptying.
Cleaning the Filter
The HEPA F8 filter is washable and reusable. Clean it periodically to prevent clogging and maintain suction power.
- Remove Filter: Twist and pull out the filter element from the dust cup.
- Wash Filter: Rinse the filter under running water until clean. Do not use detergent.
- Dry Filter: Allow the filter to air dry completely for at least 24 hours before reinserting. Ensure it is completely dry to prevent damage to the motor.
- Reassemble: Place the dry filter back into the dust cup and reattach the dust cup to the main body.

Figure 5: 3-Layer High-Efficiency Filtration. The multi-layer filter system captures fine particles for cleaner exhaust air.
Video: RoneAir W800 Getting Started Guide. This video demonstrates how to remove, clean, and reinsert the vacuum's filter.
Troubleshooting
If you encounter issues with your vacuum cleaner, refer to the following common problems and solutions.
| Problem | Possible Cause | Solution |
|---|---|---|
| Loss of Suction | Full dust cup; Clogged filter; Blockage in nozzle/tube. | Empty dust cup; Clean/wash filter; Check for and remove blockages. |
| Vacuum Not Turning On | Not plugged in; Power outlet issue; Damaged cord. | Ensure plug is secure; Test outlet with another device; Contact customer support if cord is damaged. |
| Unusual Noise | Blockage in the air path; Loose parts. | Check for and remove blockages; Ensure all parts are securely assembled. |
Specifications
| Feature | Detail |
|---|---|
| Brand | SIMPLUS |
| Model Name | Vacuum Cleaner |
| Item Model Number | XCQH002WH00-US |
| Power Source | Corded Electric (400W) |
| Suction Power | 15KPA |
| Filter Type | HEPA F8 Filter (Washable & Reusable) |
| Dust Cup Capacity | 0.35 Liters (12 OZ) |
| Item Weight | 1.87 lbs (0.85 kg) |
| Product Dimensions | 5.71"L x 5.31"W x 15.16"H |
| Special Feature | 3-in-1 Multifunctional (Stick/Handheld), Flexible Brush Head |
| Surface Recommendation | Hard Floor, Low-Pile Carpet |
Warranty and Support
For warranty information or technical support, please refer to the contact details provided with your product packaging or visit the official SIMPLUS website. Keep your purchase receipt as proof of purchase.