1. Overview
The Clariviews Multi-Function Media Recorder (Model KR043B) is an all-in-one solution designed to convert and manage your analog and digital media. This device allows you to effortlessly convert analog videos from VHS tapes, VCRs, and camcorders into digital formats, saving them directly to DVD discs, USB drives, or SD cards without requiring a computer. It also supports wireless transfer of photos and videos from your smartphone via a dedicated app, enabling easy backup and sharing. With a built-in 4.3-inch color preview screen and HDMI output, you can monitor your conversions in real-time and enjoy your digitized memories on a modern HDTV.
2. Safety Information
Please read and understand all safety instructions before using this device. Failure to follow these instructions may result in electric shock, fire, or serious injury.
- Electrical Safety: Use only the provided AC power adapter. Do not expose the device to rain or moisture. Do not open the device casing; refer all servicing to qualified personnel.
- Placement: Place the device on a stable, flat surface. Avoid placing it near heat sources, direct sunlight, or in areas with excessive dust or humidity. Ensure adequate ventilation around the device.
- Cleaning: Disconnect the power before cleaning. Use a soft, dry cloth to clean the exterior. Do not use liquid cleaners or aerosol sprays.
- Handling: Handle the device with care. Avoid dropping or subjecting it to strong impacts. Keep out of reach of children.
3. What's in the Box
Verify that all the following items are included in your package:
- Clariviews Multi-Function Media Recorder (Model KR043B)
- AC Power Adapter
- AV Cable (RCA)
- 10 Pcs Blank DVD-R
- Quick Start Guide
- User Manual

4. Product Features & Components
The Clariviews Media Recorder is designed for intuitive operation with clearly labeled ports and controls.
4.1 Input/Output Ports

- Audio In (L/R): Red and white RCA jacks for left and right audio input.
- Video In: Yellow RCA jack for composite video input.
- HDMI Out: For connecting to an HDTV or monitor for playback.
- USB Port: For connecting USB drives for recording and playback.
- SD Card Slot: For inserting SD cards for recording and playback.
- DC In 5V: Power input port.
- DVD Drive: For inserting DVD-R/RW discs for recording and playback.
4.2 File Transfer & Management

The device offers powerful cross-device flexibility, allowing you to copy and manage your videos, photos, and music by transferring files freely in any direction between USB storage devices, SD cards, and DVDs.
4.3 Analog Device Compatibility

The recorder is compatible with most camcorders, digital cameras, and VCRs. It is designed to convert analog videos from VHS tapes, VCRs, and camcorders into digital formats. Important Note: This device is designed to convert VHS tapes to DVD and cannot play VHS tapes directly. The conversion process requires a separate, functioning VHS player to be connected.
5. Setup
Follow these steps to set up your Clariviews Media Recorder for use:
- Connect Power: Plug the AC power adapter into the 'DC In 5V' port on the recorder and then into a wall outlet.
- Connect Analog Source: Use the provided AV cables to connect your analog video source (e.g., VHS player, camcorder) to the 'Audio In (L/R)' and 'Video In' ports on the recorder. Ensure the colors of the plugs match the colors of the ports (Yellow for Video, White for Left Audio, Red for Right Audio).
- Insert Storage Medium: Insert a blank DVD-R/RW disc into the DVD drive, or connect a USB drive to the USB port, or insert an SD card into the SD card slot.
- Power On: Press the 'POWER' button on the device to turn it on.
- Optional HDMI Connection: For viewing on a larger screen, connect an HDMI cable from the 'HDMI Out' port on the recorder to an HDMI input on your TV or monitor.

5.1 Setup Video Guide
6. Operating Instructions
6.1 Recording from Analog Sources
To convert your analog videos to digital format:
- Ensure your analog source (e.g., VCR) is connected to the recorder via AV cables and powered on.
- Insert your desired storage medium (DVD, USB, or SD card) into the recorder.
- On the recorder's screen, navigate to the 'Video' recording option and select your target storage.
- Start playback on your analog source device.
- Press the 'REC' button on the media recorder to begin recording. Monitor the recording progress on the built-in 4.3-inch screen.
- Press the 'STOP' button on the recorder when you wish to end the recording.
6.2 Copying Files Between Storage Media
The device allows flexible file management between different storage types.

- Insert both the source and target storage media (e.g., a USB drive with files and a blank DVD).
- Navigate to the 'Copy' function in the menu.
- Select the source media (e.g., USB) and the target media (e.g., DVD).
- Follow the on-screen prompts to select files and initiate the copying process.
6.3 Wireless Transfer from Smartphone
Transfer photos and videos from your smartphone to the recorder wirelessly.
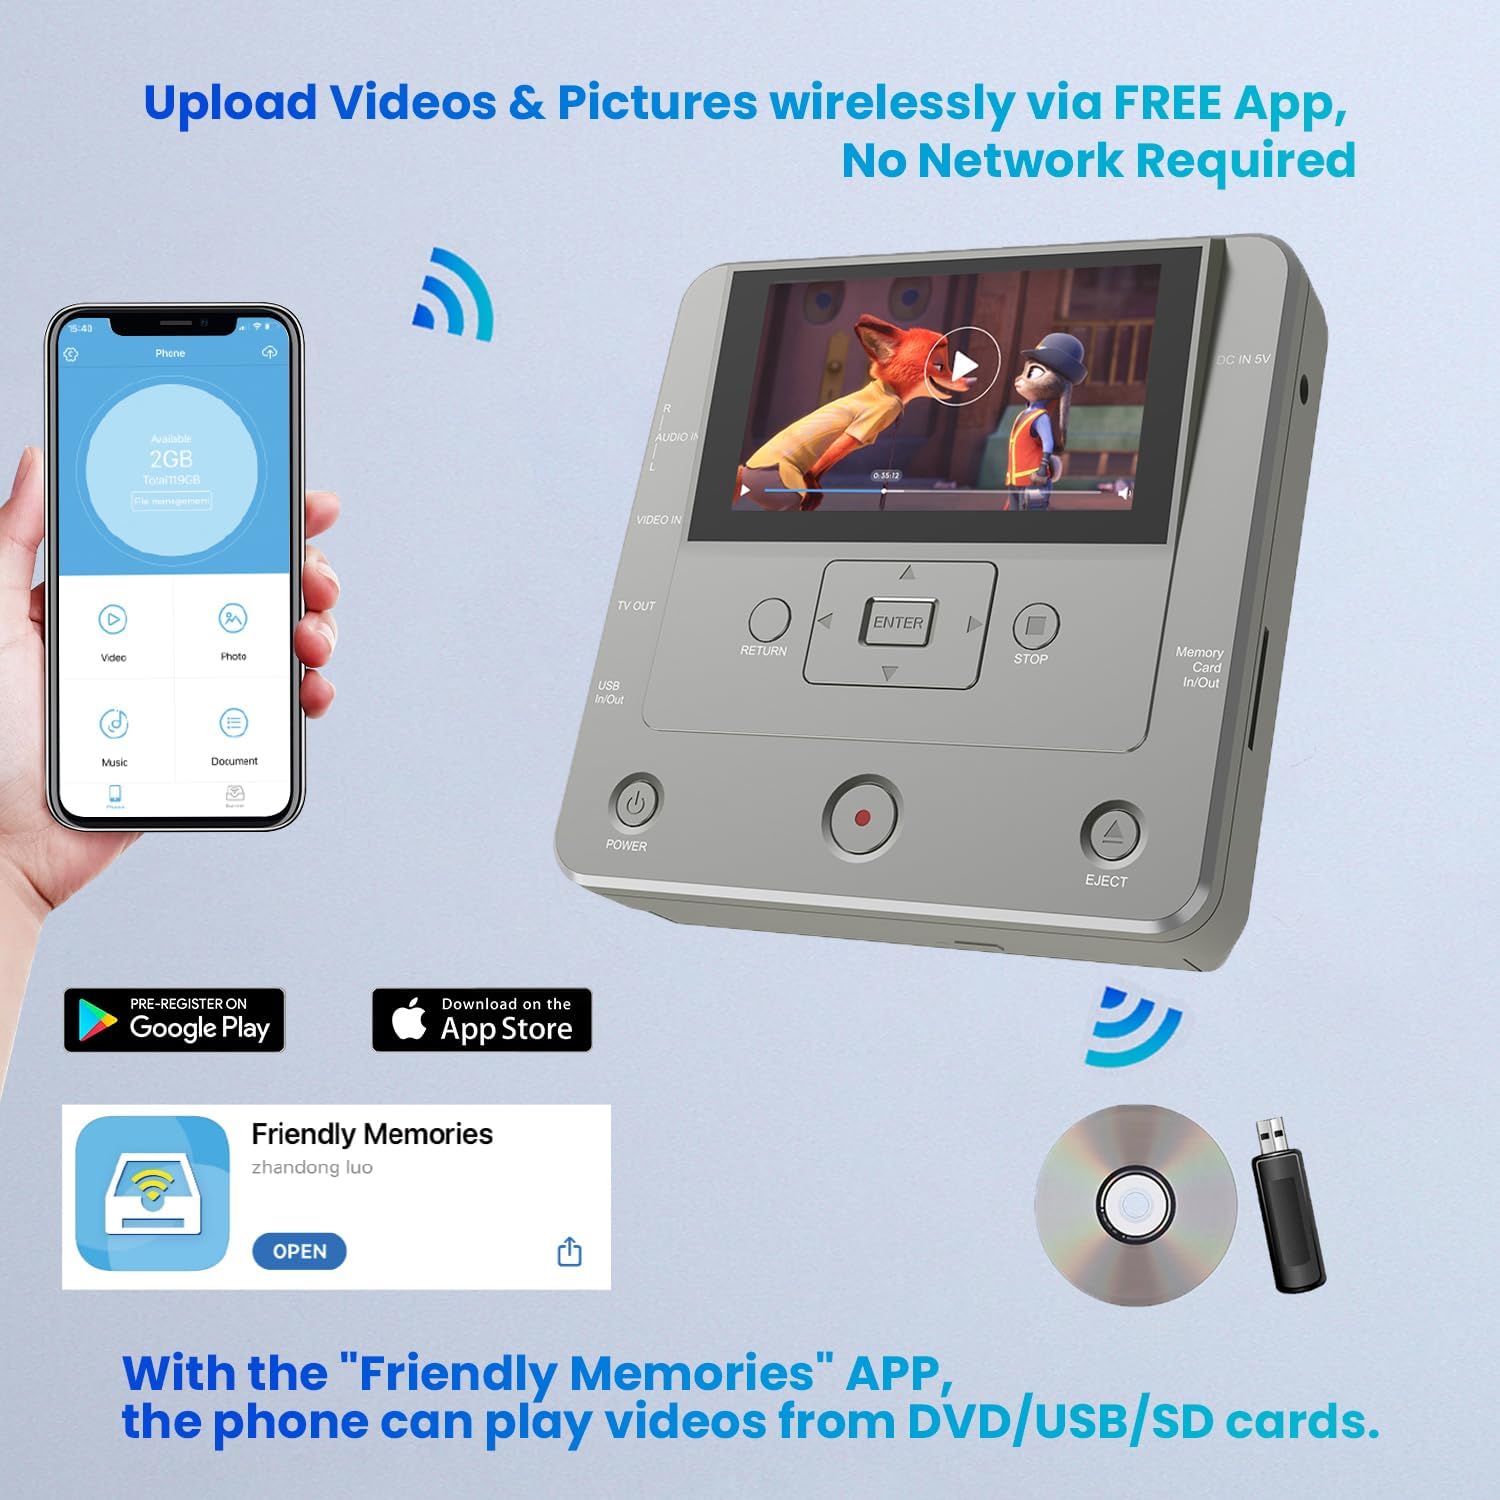
- Download the free "Friendly Memories" app from the App Store (iOS) or Google Play (Android).
- Connect your smartphone to the recorder's Wi-Fi network (details in app/manual).
- Use the app to select photos and videos from your phone.
- Upload them directly to the recorder, choosing to save them to a DVD, USB drive, or SD card.
6.4 Playback
You can play back recorded media directly on the device or on an external display.

- On Device: Navigate to 'Media Player' in the menu, select the storage medium (USB, Card, or DVD), and choose the file you wish to play.
- On TV/Monitor: Connect the recorder to your TV via HDMI. Select the appropriate HDMI input on your TV. Play media as described above, and it will be displayed on your TV.
6.5 Operating Video Guides
7. Maintenance
Proper maintenance ensures the longevity and optimal performance of your media recorder.
- Cleaning: Regularly wipe the exterior of the device with a soft, dry, lint-free cloth. Avoid using abrasive cleaners or solvents.
- Dust Prevention: Keep the device in a clean, dust-free environment. Dust can accumulate in ports and vents, affecting performance.
- Storage: When not in use for extended periods, store the device in its original packaging or a protective case in a cool, dry place.
- Disc Handling: Always handle DVD discs by their edges to avoid fingerprints or scratches. Store discs in protective sleeves or cases.
8. Troubleshooting
If you encounter issues with your Clariviews Media Recorder, refer to the following common troubleshooting steps:
| Problem | Possible Cause | Solution |
|---|---|---|
| Device does not power on | Power adapter not connected or faulty; power button not pressed correctly. | Ensure power adapter is securely connected. Press and hold the power button for a few seconds. Try a different power outlet. |
| No video/audio signal during recording | AV cables incorrectly connected; source device not playing; incorrect input selected. | Check AV cable connections (color-coded). Ensure the source device is playing. Verify the correct input source is selected on the recorder. |
| Recording fails or stops unexpectedly | Insufficient storage space; incompatible media format; faulty storage device. | Check available space on USB/SD/DVD. Ensure USB drive is formatted to FAT32. Try a different storage device. |
| Cannot play back recorded files | File corruption; incompatible file format; incorrect playback source selected. | Ensure files are not corrupted. Verify the file format is supported. Select the correct playback source (USB, Card, DVD) in the Media Player. |
| Smartphone app connection issues | Incorrect Wi-Fi password; device not in Wi-Fi mode; app not updated. | Ensure correct Wi-Fi password. Check device settings for Wi-Fi mode. Update the "Friendly Memories" app to the latest version. |
9. Specifications
Key technical specifications for the Clariviews Multi-Function Media Recorder (Model KR043B):
| Feature | Detail |
|---|---|
| Brand Name | Clariviews |
| Model | KR043B |
| Item Weight | 2.38 pounds |
| Product Dimensions | 6.1 x 6.1 x 1.9 inches |
| Color | Gray |
| Media Type | DVD-R/RW, VCD, VHS, VHS to DVD Recorder |
| Resolution | 1920x1080 (HD Output) |
| Connector Type | HDMI Out, RCA In, SD Card, USB |
| Connectivity Technology | HDMI Out, RCA In, SD Card, USB Device, Wi-Fi (via smartphone app) |
| Audio Output Mode | Stereo, Surround Sound |
| Special Features | 4.3-inch LCD Monitoring Screen, AV IN, DVD-R/RW Disc Recording, No Computer Needed, Smartphone App for Wireless Photo/Video Burning |
10. Warranty & Support
Clariviews products are designed for reliability and performance. For warranty information and technical support, please refer to the documentation included in your product package or visit the official Clariviews website. Keep your purchase receipt as proof of purchase for any warranty claims.
For additional assistance, please contact Clariviews Customer Support:
- Website: Clariviews Store on Amazon
- Email: support@clariviews.com (example)
- Phone: 1-800-XXX-XXXX (example)