1. Product Overview
This LayBurst 60-inch Farmhouse L-Shaped Executive Desk with Hutch is designed to enhance your workspace with its vintage-inspired aesthetic and practical features. Crafted from engineered wood with a distressed farmhouse finish, it offers durability and style. The desk includes a variety of storage options and a built-in charging station for convenience.
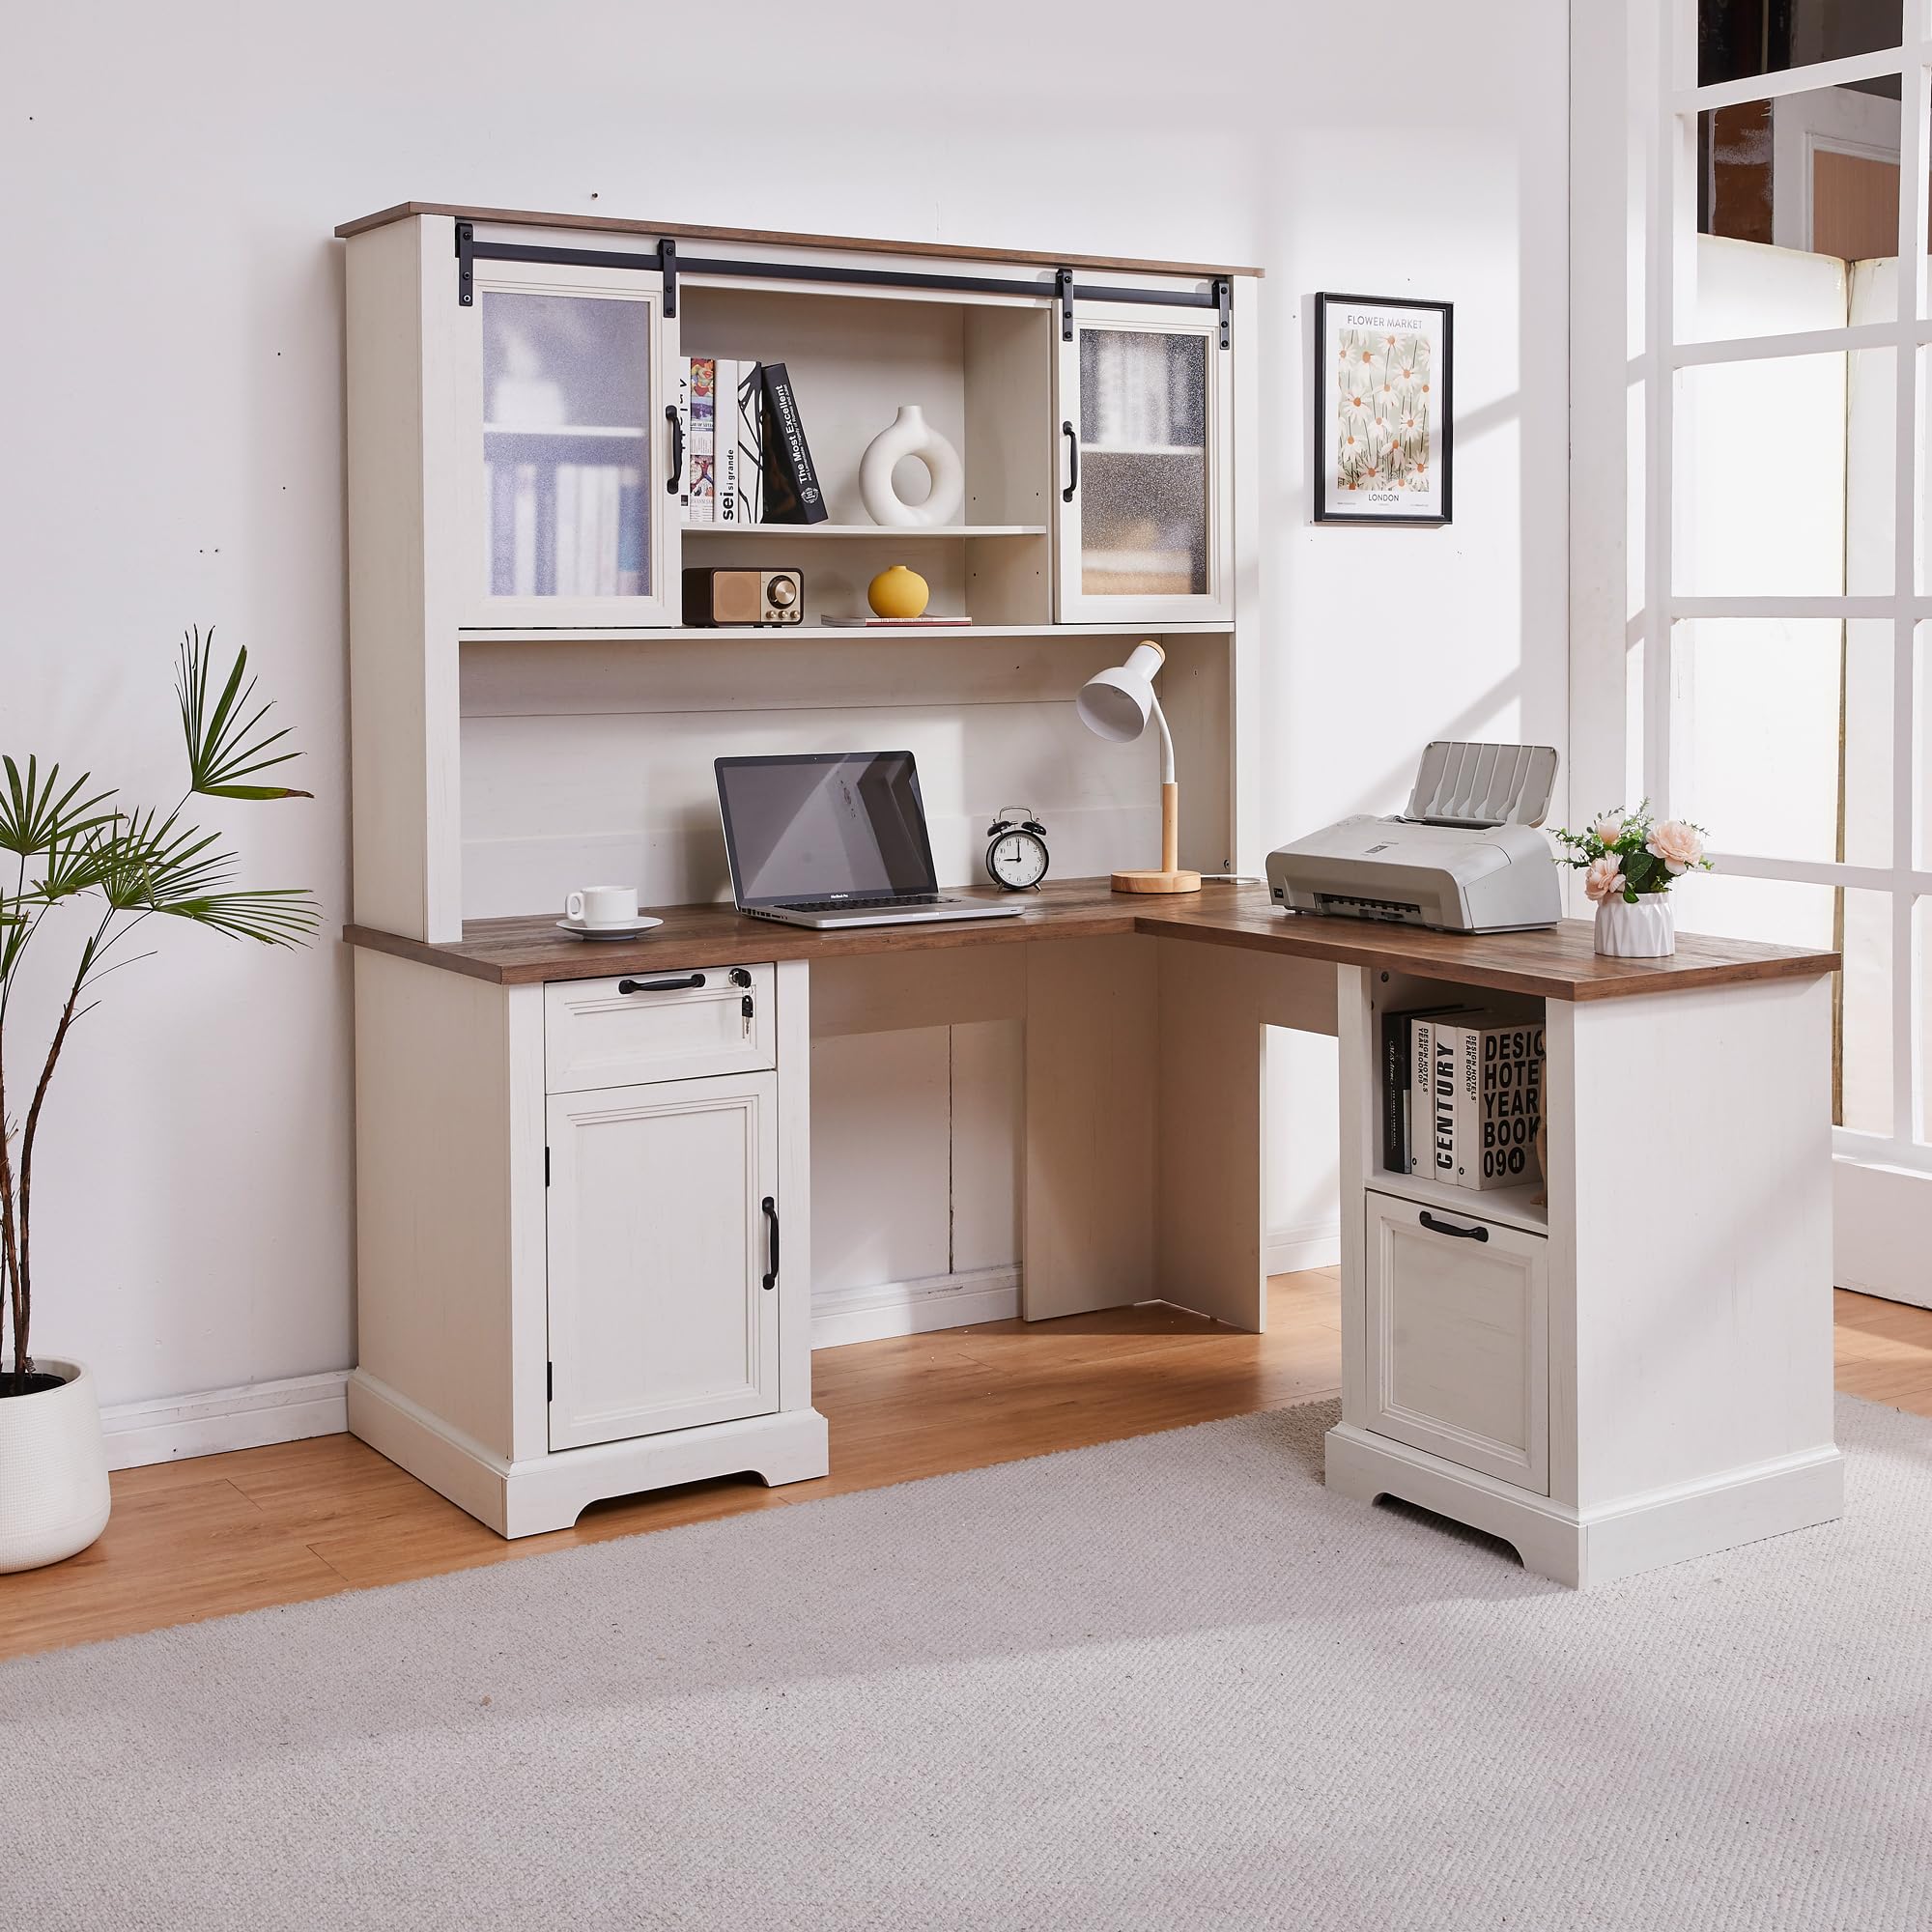
Image 1.1: Overall view of the LayBurst 60-inch Farmhouse L-Shaped Executive Desk with Hutch, showcasing its design and features.
Key Features:
- Rustic Farmhouse Design: Features a distressed farmhouse finish and a sliding barn door with semi-transparent acrylic for a blend of elegance and rustic style.
- Flexible Storage Solutions: Includes a lockable drawer, an adjustable file cabinet (fits A4, letter, and legal documents), an adjustable-shelf cabinet, and open shelving. The hutch provides additional adjustable shelves and enclosed storage.
- Convenient Built-in Charging Station: Equipped with 2 AC outlets, 1 USB port, and 1 Type-C port to keep your devices powered and your desktop organized.
- Durable Construction: Made from carefully polished engineered wood for lasting use.
- Versatile Use: Suitable as a professional executive desk, computer desk, or multifunctional home office station.
Video 1.1: A brief overview demonstrating the features and functionality of the LayBurst 60" Farmhouse L-Shaped Desk with Hutch.
2. Setup Instructions
The LayBurst 60" Farmhouse L-Shaped Executive Desk with Hutch is delivered in two separate packages, which may arrive at different times. This packaging method is designed to protect all components during transit. Please ensure you have received both packages before beginning assembly.
Before Assembly:
- Unpack Carefully: Open both packages and lay out all components on a clean, soft surface to prevent scratches.
- Verify Parts: All pieces are clearly numbered. Refer to the included detailed step-by-step instructions and verify that all parts are present. Sorting parts by their numbered order can significantly streamline the assembly process.
- Ventilation: It is recommended to air out the components in a well-ventilated space for a period before assembly to dissipate any manufacturing odors.
- Tools: Ensure you have the necessary tools as indicated in the instruction manual. While some basic tools may be included, additional personal tools might be required.
Assembly Process:
- Follow the provided step-by-step instructions precisely. Each step is designed to guide you through the assembly of the desk and hutch.
- Pay close attention to the orientation of each piece as indicated in the diagrams.
- The hutch is primarily designed to be assembled on the left side of the desk. While modifications to place it on the right side may be possible, they are not officially supported and may require additional effort or adjustments.
- Secure all fasteners firmly, but avoid over-tightening to prevent damage to the engineered wood.
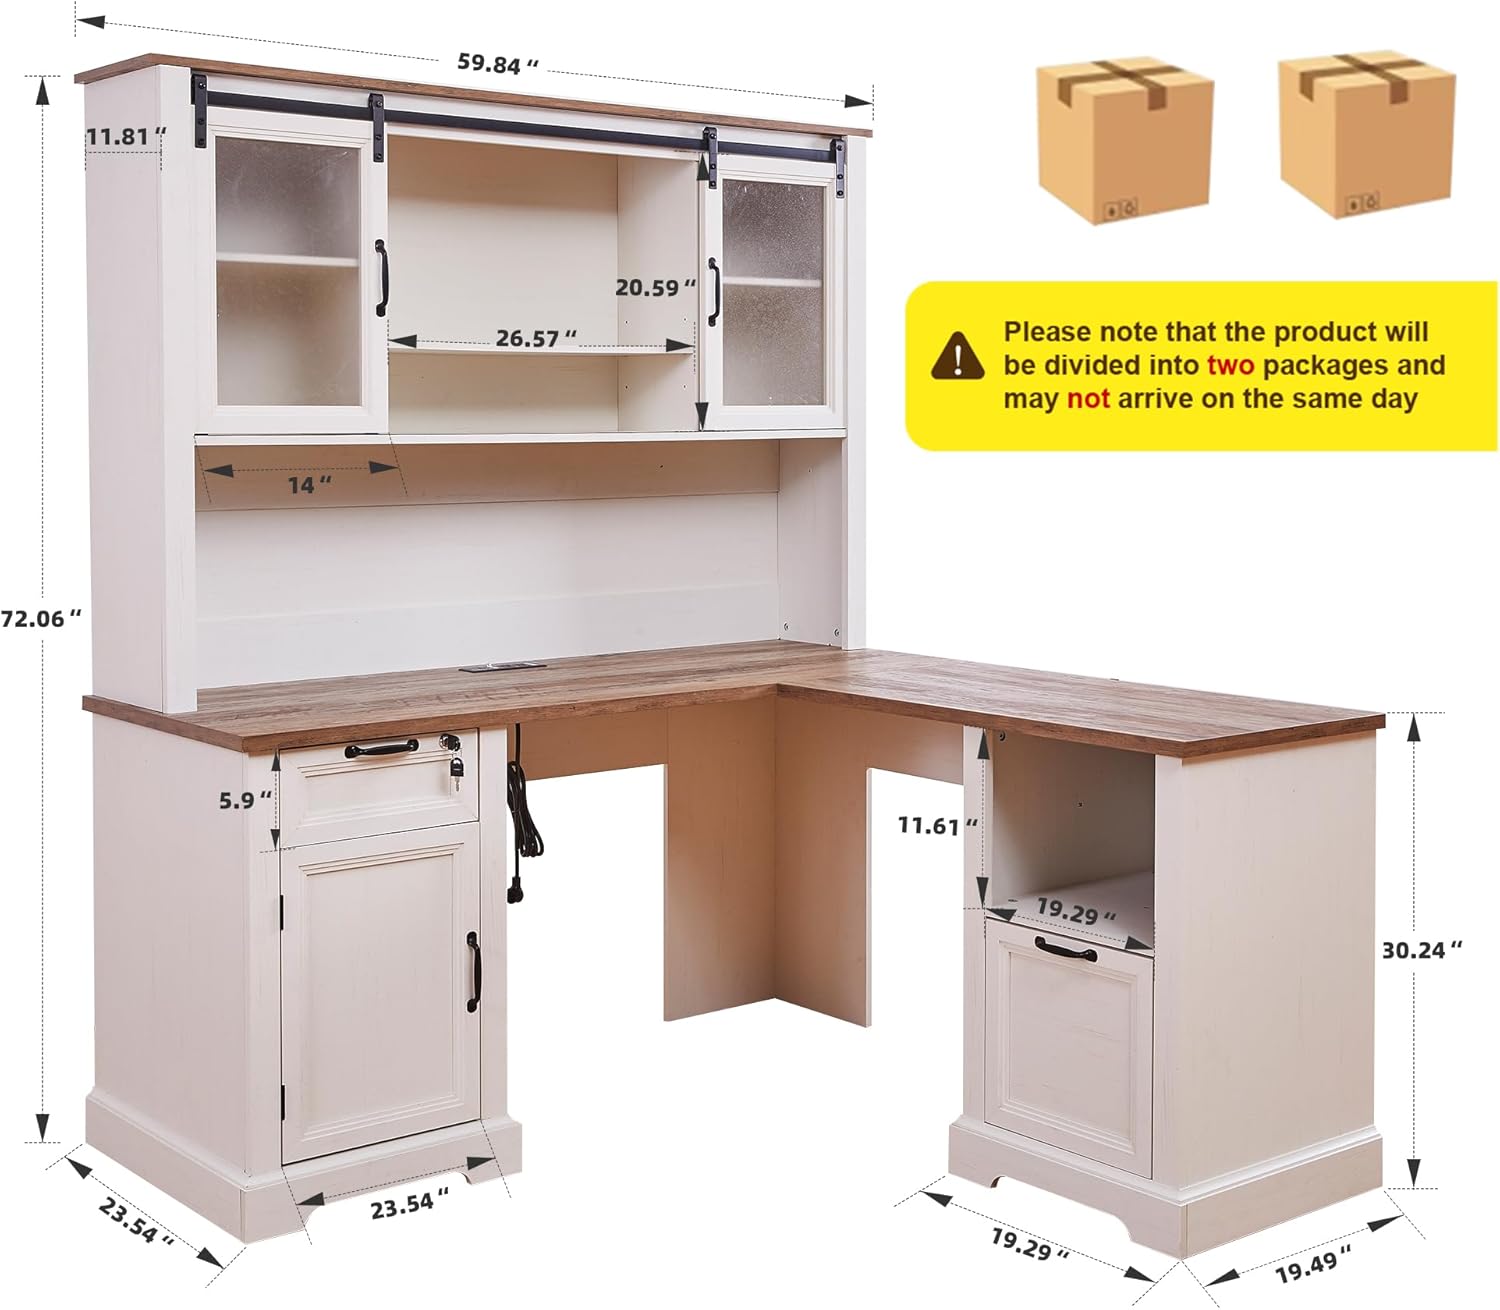
Image 2.1: Diagram showing the overall dimensions of the desk and a reminder about the two-package delivery.
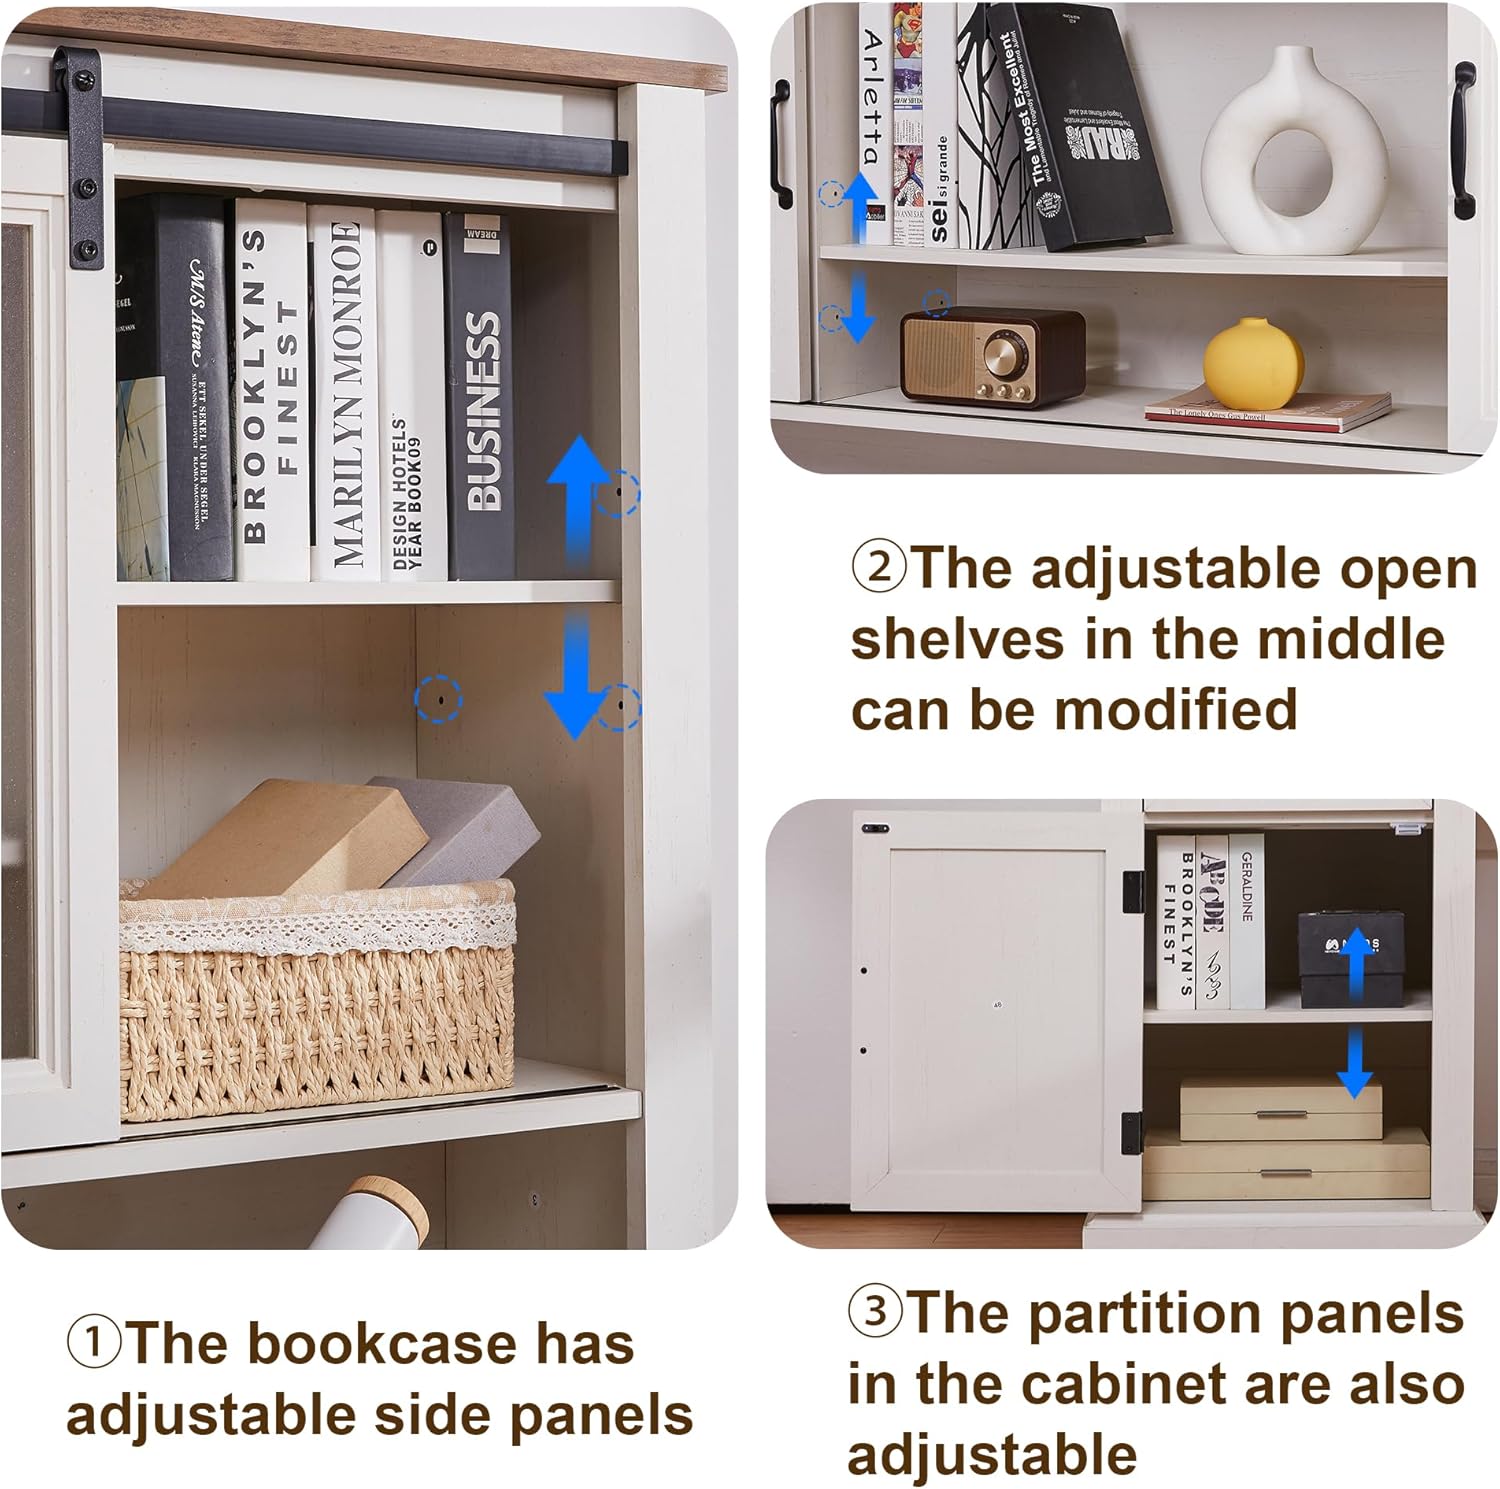
Image 2.2: Illustration of the adjustable shelves within the hutch and lower cabinet, demonstrating flexibility during assembly and use.
3. Operating Instructions
Using the Built-in Charging Station:
The desk is equipped with a convenient charging station to power your electronic devices. It includes:
- 2 AC Outlets (125V/12A, AC 1500W MAX)
- 1 USB Port (5V/2A)
- 1 Type-C Port (5V/3A, 9V/2A, 12V/1.5A, DC 18W MAX)
Simply plug your devices into the appropriate ports. Ensure the desk is connected to a power source for the charging station to function.

Image 3.1: Close-up of the built-in charging station, showing the AC outlets, USB, and Type-C ports in use.
Utilizing Storage Features:
- Lockable Drawer: Use the provided key to secure important documents and personal belongings in the lockable drawer.
- Adjustable File Cabinet: The file cabinet is designed to accommodate A4, letter, and legal-sized documents. Adjust the horizontal bars as needed to fit your specific file sizes.
- Sliding Barn Door Hutch: The semi-transparent acrylic sliding barn doors on the hutch allow you to conceal or reveal sections of the shelving as desired, providing flexible display and storage options.
- Adjustable Shelves: Both the hutch and the lower cabinet feature adjustable shelves. Reposition them to customize storage space for items of various heights.

Image 3.2: Detailed view of the lockable drawer with key and the adjustable file cabinet, highlighting their functionality.

Image 3.3: Demonstrates the semi-transparent acrylic sliding doors on the hutch and the various storage compartments of the L-shaped desk.
4. Maintenance
Proper care and maintenance will ensure the longevity and appearance of your LayBurst desk.
Cleaning:
- Wipe surfaces regularly with a soft, damp cloth.
- For stubborn marks, use a mild, non-abrasive cleaner specifically designed for engineered wood or furniture.
- Avoid using harsh chemicals, abrasive cleaners, or solvents, as these can damage the finish.
- Immediately wipe up spills to prevent moisture damage.
General Care:
- Avoid placing hot items directly on the desk surface. Use coasters or protective pads.
- Protect the desk from direct sunlight and extreme temperature changes, which can cause fading or warping.
- Periodically check and tighten all fasteners to ensure stability.
- Keep keys for the lockable drawer in a safe place.
5. Troubleshooting
This section addresses common concerns and provides solutions for your LayBurst desk.
Common Issues and Solutions:
- Strong Odor After Unpacking: If you notice a strong odor upon unpacking, it is likely residual from manufacturing. Place the components in a well-ventilated area for 24-48 hours before assembly to allow the fumes to dissipate.
- Mislabeled Parts in Instructions: While efforts are made for accuracy, occasionally parts may be mislabeled in the instruction manual. If you encounter this, refer to the diagrams and the physical appearance of the parts to identify them correctly. Sorting all parts by their numbers before starting assembly can help prevent confusion.
- Hutch Placement: The hutch is designed to be installed on the left side of the desk. If you wish to place it on the right, it may require custom modifications and is not covered by standard assembly instructions.
- Stability Issues: Ensure all screws and fasteners are securely tightened. If the desk still feels unstable, double-check that all components are correctly aligned according to the assembly instructions.
- Drawers or Doors Not Operating Smoothly: Check for any obstructions in the tracks or hinges. Ensure that all hardware is installed correctly and tightened appropriately.
6. Specifications
| Feature | Detail |
|---|---|
| Brand | LayBurst |
| Model Number | ywq25060601-L |
| Product Dimensions (D x W x H) | 23.5"D x 60"W x 72"H |
| Item Weight | 210 Pounds |
| Material Type | Engineered Wood |
| Finish Type | Powder Coated |
| Color | White |
| Style | Rustic |
| Desk Design | Executive Desk |
| Special Features | Adjustable File Cabinet, Built-in Charging Station, Lockable Drawer, Sliding Barn Door Hutch |
| Number of Drawers | 4 |
| Number of Shelves | 2 (open) + 2 (enclosed) |
| Number of Cabinets | 3 |
| Required Assembly | Yes |
| Includes All Assembly Tools | No |
7. Warranty and Support
For specific warranty information, please refer to the documentation included with your purchase or contact LayBurst customer service directly. Keep your proof of purchase for any warranty claims.
Customer Support:
If you encounter any issues not covered in this manual, require replacement parts, or have questions regarding assembly or product functionality, please contact LayBurst customer support through the retailer where the product was purchased or visit the official LayBurst website for contact information.