1. Introduction
This manual provides essential instructions for the proper installation, operation, and maintenance of your Shrandi REAMTONY AD0612VB-A7BGP 6025 12V 4-Wire Cooling Fan. Please read this manual thoroughly before use to ensure optimal performance and longevity of the product.
2. Product Overview
The REAMTONY AD0612VB-A7BGP is a high-performance 6025 cooling fan designed for efficient heat dissipation in motherboards and other electronic devices. It features a compact design and a 4-wire configuration for precise speed control.
Key Features:
- High-performance 6025 cooling fan for efficient heat dissipation.
- Operates at 12V with a current of 0.54A for reliable power and cooling.
- Compact size of 60mm x 60mm x 25mm, suitable for various applications.
- Rigorous testing ensures reliability and performance.
- Easy installation with a 4-wire configuration for speed control and quiet operation.
Product Components:
The cooling fan consists of a fan frame, fan blades, and a 4-wire connector for power and signal. The label on the fan provides model and electrical specifications.

Figure 1: Front view of the REAMTONY 6025 cooling fan, displaying the ADDA brand label, model AD0612VB-A7BGP, 12V 0.54A specifications, and CE marking. The fan has a black frame and visible fan blades.
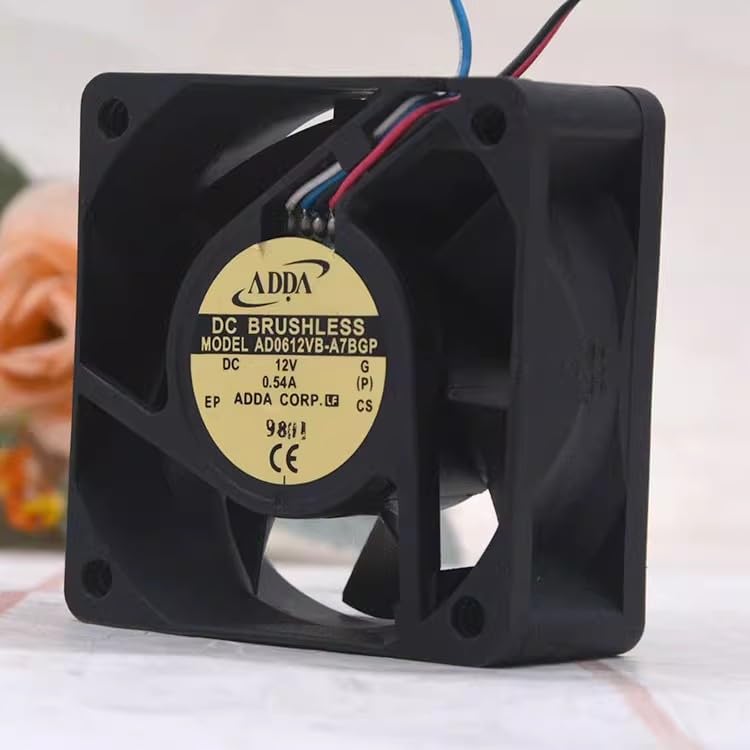
Figure 2: Angled view of the REAMTONY 6025 cooling fan, highlighting its side profile and the ADDA label. The 4-wire cable, consisting of red, black, blue, and white wires, extends from the fan housing.
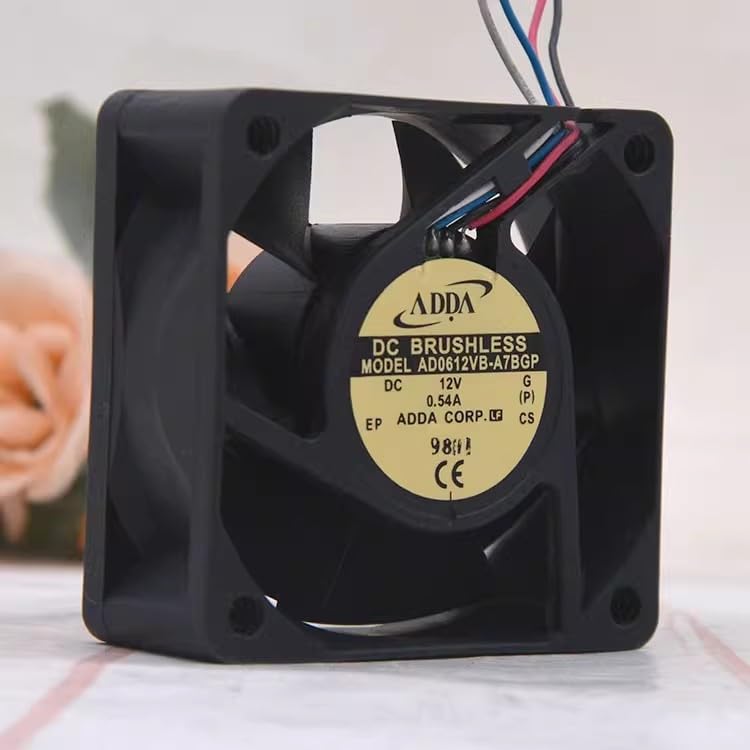
Figure 3: A different angled view of the REAMTONY 6025 cooling fan, providing a clearer look at the fan blades and the ADDA label. The fan's compact design is evident.
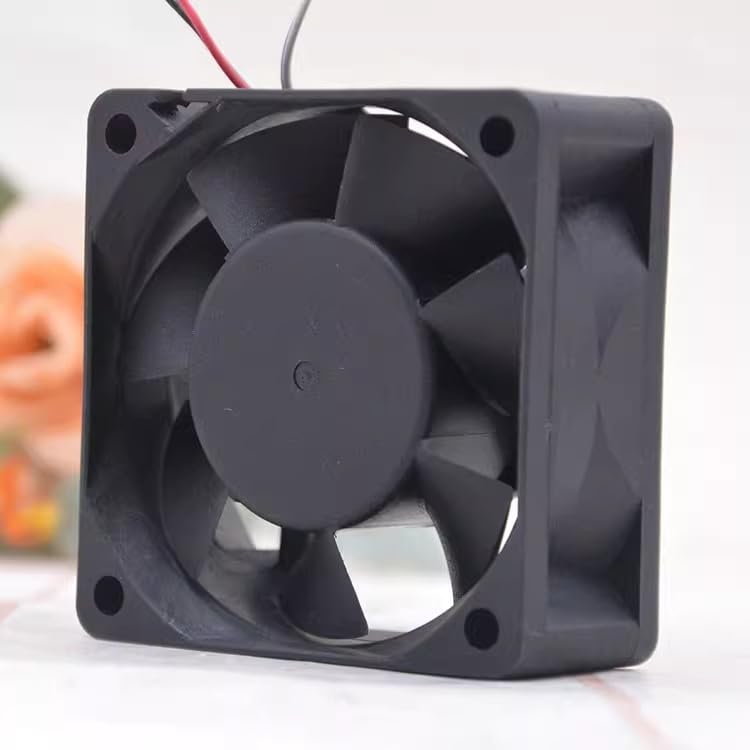
Figure 4: Rear view of the REAMTONY 6025 cooling fan, showcasing the fan blades and the four corner mounting holes. This view emphasizes the airflow direction.

Figure 5: Angled rear view of the REAMTONY 6025 cooling fan, providing another perspective of the fan blades and mounting holes. This view helps in understanding the fan's physical dimensions and installation points.
3. Setup and Installation
This cooling fan is designed for easy integration into various electronic systems, particularly motherboards. Ensure the system is powered off and disconnected from the power source before installation.
Installation Steps:
- Identify Mounting Location: Locate the appropriate mounting area within your device (e.g., motherboard heatsink, chassis fan mount). The fan's dimensions are 60mm x 60mm x 25mm.
- Secure the Fan: Use appropriate screws (not included) to secure the fan to the mounting points. Ensure the fan is oriented correctly for desired airflow (typically blowing air towards the component to be cooled or out of the chassis).
- Connect the 4-Wire Cable: Connect the fan's 4-wire cable to the corresponding 4-pin fan header on your motherboard or power supply.
- Red Wire: +12V Power
- Black Wire: Ground
- Yellow/White Wire: Tachometer (RPM signal)
- Blue Wire: PWM (Pulse Width Modulation for speed control)
- Verify Connection: Ensure the connector is firmly seated.
- Power On: Reconnect power to your system and power it on. The fan should begin operating.
Caution: Incorrect wiring or connection to an incompatible header may damage the fan or the connected device. If unsure, consult a qualified technician.
4. Operation
Once properly installed and connected, the REAMTONY AD0612VB-A7BGP cooling fan will operate automatically when power is supplied to the fan header. The 4-wire configuration allows for advanced control over fan speed.
Fan Speed Control (PWM):
The blue wire provides Pulse Width Modulation (PWM) input, allowing your motherboard or fan controller to dynamically adjust the fan's speed based on system temperature or user-defined profiles. This helps optimize cooling performance while minimizing noise.
- Access your system's BIOS/UEFI settings or use compatible software provided by your motherboard manufacturer to configure fan speed curves.
- Ensure the fan header is set to PWM mode if available, rather than voltage control (DC mode), to utilize the 4-wire functionality fully.
The fan is designed for continuous operation within its specified voltage and current limits (12V, 0.54A).
5. Maintenance
Regular maintenance helps ensure the longevity and efficient operation of your cooling fan.
- Dust Removal: Periodically inspect the fan blades and housing for dust accumulation. Use compressed air or a soft brush to gently remove dust. Ensure the system is powered off and unplugged before cleaning.
- Avoid Obstructions: Ensure no cables or other components obstruct the fan blades, which can lead to reduced airflow or damage.
- Check for Noise: Unusual noises (grinding, rattling) may indicate a failing bearing. If persistent, consider replacing the fan.
Warning: Do not attempt to disassemble the fan. This may void any potential warranty and could damage the unit.
6. Troubleshooting
| Problem | Possible Cause | Solution |
|---|---|---|
| Fan not spinning |
|
|
| Fan spinning too fast/slow (no speed control) |
|
|
| Excessive noise or vibration |
|
|
7. Specifications
| Model | AD0612VB-A7BGP |
| Size | 60mm x 60mm x 25mm |
| Voltage | 12V DC |
| Current | 0.54A |
| Power | 6.48W |
| Connector Type | 4-Wire (PWM controlled) |
| Manufacturer | Shrandi |
8. Warranty and Support
For warranty information or technical support, please refer to the documentation provided with your purchase or contact the manufacturer directly. Keep your proof of purchase for warranty claims.